
Best Dairy Free Oat Milk Pumpkin Pie—there’s a certain magic that fills the air when the aroma of warm spices and sweet pumpkin drifts from the kitchen. For many, this quintessential dessert is the heart of autumn and holiday celebrations, a symbol of warmth and togetherness. However, for those navigating dairy sensitivities or embracing a plant-based lifestyle, enjoying this classic treat often feels like a distant dream. But what if I told you that you don’t have to miss out on that rich, creamy perfection?
This is where our recipe for the Best Dairy Free Oat Milk Pumpkin Pie truly shines. We’ve meticulously crafted a pie that not only meets your dietary needs but also elevates the traditional experience. Pumpkin pie itself has a storied history, evolving from early colonial recipes into the beloved dessert we cherish today, especially during festive gatherings. It’s more than just a dessert; it’s a tradition that evokes nostalgia and comfort, deeply rooted in American culinary heritage.
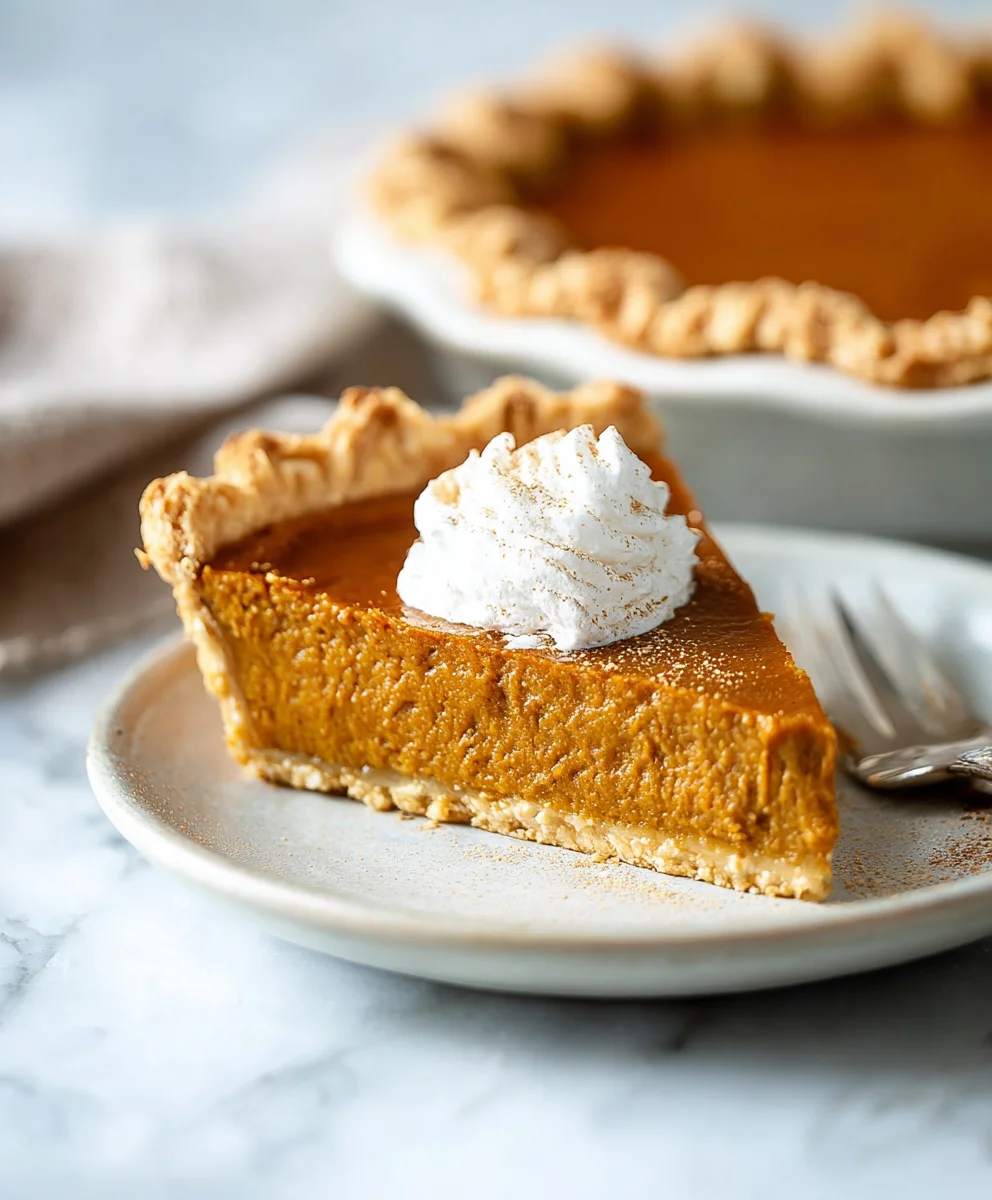
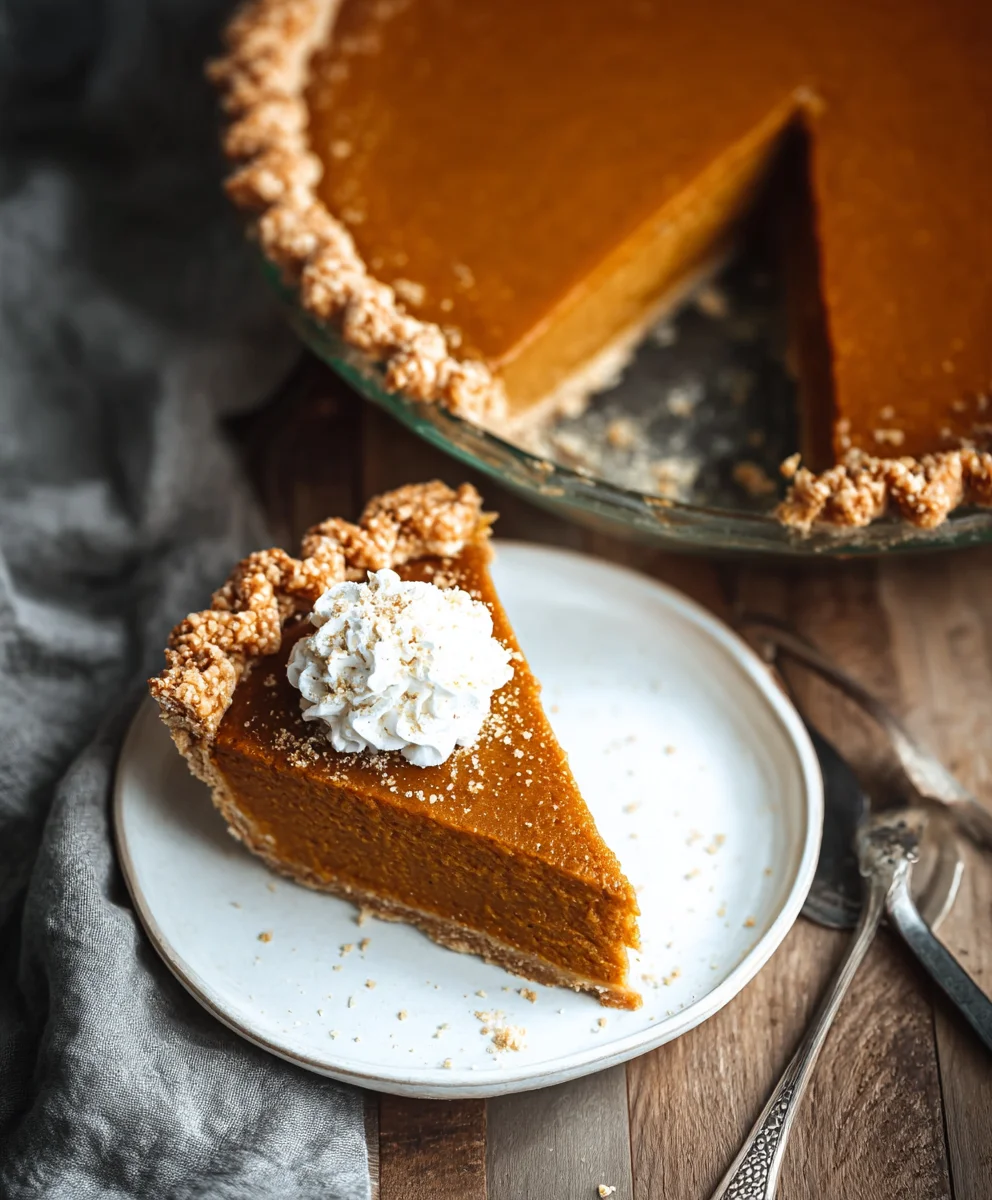
By utilizing the natural creaminess of oat milk, we achieve an incredibly smooth, luscious filling that boasts all the familiar, comforting flavors of pumpkin, cinnamon, nutmeg, and ginger. The texture is velvety, the spices are perfectly balanced, and the overall experience is utterly delightful and surprisingly easy to achieve. Get ready to impress everyone with a pie that truly delivers on taste, texture, and mindful ingredients. Indeed, this isn’t just a dairy-free pie; it’s designed to be the definitive Best Dairy Free Oat Milk Pumpkin Pie you’ll ever bake, ensuring everyone at your table can indulge without compromise.

Ingredients:
For the Dairy-Free Pie Crust (or use a store-bought vegan crust):
- 2 ½ cups (300g) all-purpose flour, plus more for dusting
- 1 teaspoon granulated sugar
- ½ teaspoon fine sea salt
- 1 cup (226g) cold vegan butter (I love Miyoko’s Kitchen or Earth Balance sticks), cut into ½-inch cubes
- ½ cup (120ml) ice water, plus 1-2 tablespoons more if needed
For the Oat Milk Pumpkin Pie Filling:
- 1 (15-ounce / 425g) can 100% pumpkin puree (not pumpkin pie filling!)
- 1 cup (240ml) full-fat, unsweetened oat milk (this is crucial for creaminess!)
- ¾ cup (150g) packed light brown sugar
- ¼ cup (50g) granulated sugar
- 2 tablespoons cornstarch (or arrowroot powder for a grain-free option)
- 2 teaspoons ground cinnamon
- 1 teaspoon ground ginger
- ½ teaspoon ground nutmeg
- ¼ teaspoon ground cloves
- ¼ teaspoon fine sea salt
- 1 teaspoon pure vanilla extract
- 2 tablespoons melted vegan butter or coconut oil, cooled
For the Optional Coconut Whipped Cream Topping:
- 1 (13.5-ounce / 400ml) can full-fat coconut milk, chilled in the refrigerator for at least 24 hours
- 2-3 tablespoons powdered sugar, to taste
- ½ teaspoon pure vanilla extract
Equipment You’ll Need:
- 9-inch pie dish
- Large mixing bowls
- Whisk
- Rubber spatula
- Measuring cups and spoons
- Rolling pin
- Parchment paper or aluminum foil
- Pie weights or dried beans/rice
- Electric mixer (handheld or stand mixer with whisk attachment) for whipped cream
Preparation Time & Baking Time:
- Active Prep Time: Approximately 45-60 minutes
- Chill Time (Crust): 1 hour minimum, up to overnight
- Blind Bake Time: 15-20 minutes
- Bake Time (Pie): 50-65 minutes
- Cooling & Chilling Time: 3-4 hours minimum, preferably overnight for the best set
Phase 1: Preparing the Dairy-Free Pie Crust
- Combine Dry Ingredients: In a large mixing bowl, whisk together the all-purpose flour, granulated sugar, and fine sea salt. I always find a good whisk ensures everything is evenly distributed, which is key for a consistent crust.
- Cut in Vegan Butter: Add the cold, cubed vegan butter to the flour mixture. Using your fingertips, a pastry blender, or a food processor, cut the butter into the flour until the mixture resembles coarse crumbs with some pea-sized pieces of butter remaining. This is where the magic happens for a flaky crust! Don’t overmix; we want those little pockets of butter to create steam and flakiness when baked. If using your hands, work quickly to keep the butter as cold as possible.
- Add Ice Water: Gradually add the ice water, one tablespoon at a time, mixing gently with a fork or your hands until the dough just comes together. Be careful not to add too much water; you want the dough to be moist enough to hold together but not sticky. I usually start with ½ cup and add more only if absolutely necessary, just a tablespoon at a time.
- Form and Chill the Dough: Turn the dough out onto a lightly floured surface. Gently gather it into a disk, being careful not to overwork it. Wrap the disk tightly in plastic wrap and refrigerate for at least 1 hour, or up to 2 days. This chilling period is essential as it allows the gluten to relax and the butter to firm up again, making the dough easier to roll and ensuring a tender, flaky crust.
- Roll Out the Dough: Once chilled, unwrap the dough and place it on a lightly floured surface. Using a floured rolling pin, roll the dough out into a 12-inch circle, about ⅛-inch thick. Periodically lift and rotate the dough to prevent sticking and ensure even thickness.
- Transfer to Pie Dish: Carefully transfer the rolled-out dough to your 9-inch pie dish. Gently press it into the bottom and up the sides of the dish. Trim any excess dough, leaving about a 1-inch overhang. You can then fold this overhang under itself and crimp the edges decoratively using your fingers or a fork. I love making a pretty fluted edge, it just makes the pie feel extra special!
- Second Chill for the Crust: Place the prepared pie crust back into the refrigerator for another 20-30 minutes. This helps prevent shrinkage during blind baking.
- Blind Bake the Crust: Preheat your oven to 375°F (190°C). Line the chilled pie crust with parchment paper or aluminum foil, making sure it covers the edges to prevent them from browning too quickly. Fill the liner with pie weights, dried beans, or rice. Bake for 15 minutes.
- Remove Weights and Finish Blind Baking: Carefully remove the parchment paper/foil and pie weights. Return the crust to the oven and bake for another 5-7 minutes, or until the bottom is lightly golden and appears dry. This step ensures we don’t end up with a soggy bottom, which is a common pie tragedy we want to avoid for our Best Dairy Free Oat Milk Pumpkin Pie! Remove from the oven and set aside to cool slightly while you prepare the filling. Reduce oven temperature to 350°F (175°C).
Phase 2: Crafting the Creamy Oat Milk Pumpkin Pie Filling
- Prepare the Spices: In a small bowl, whisk together the ground cinnamon, ground ginger, ground nutmeg, ground cloves, and fine sea salt. Take a moment to savor the aroma – it’s truly the smell of autumn!
- Combine Wet Ingredients (Initial): In a large mixing bowl, add the 100% pumpkin puree. Make sure it’s pure pumpkin, not the sweetened pie filling, otherwise your pie will be far too sweet.
- Sweeten the Pumpkin: Add the packed light brown sugar and granulated sugar to the pumpkin puree. Stir thoroughly with a whisk or rubber spatula until the sugars are completely dissolved and the mixture is smooth. This usually takes a couple of minutes of vigorous stirring.
- Add Dry & Wet Flavorings: Sprinkle the cornstarch (or arrowroot powder) over the pumpkin mixture and whisk until well combined. The cornstarch acts as our thickener, giving the pie that perfectly custardy texture without eggs. Then, add your prepared spice mixture and the pure vanilla extract. Stir well until all the spices are evenly distributed and the filling is wonderfully fragrant.
- Incorporate Oat Milk and Vegan Butter: Now, for the star of our show, the full-fat, unsweetened oat milk! Pour it into the pumpkin mixture along with the cooled melted vegan butter or coconut oil. Using full-fat oat milk is absolutely paramount here; it provides the rich, creamy texture and mouthfeel that traditional dairy milk would typically lend. Skimping on this will result in a less luxurious, possibly watery, filling. Whisk everything together until the filling is perfectly smooth, uniform in color, and utterly luscious. Give it a taste (before baking, of course!) and adjust spices or sweetness if you feel it needs a little something extra.
- Ensure Smoothness: If you find your filling isn’t perfectly smooth, you can always pour it through a fine-mesh sieve or even give it a quick pulse in a blender. I rarely find this necessary if I’ve whisked thoroughly, but it’s a good trick to have up your sleeve for the absolute Best Dairy Free Oat Milk Pumpkin Pie experience.
Phase 3: Assembling and Baking Your Best Dairy Free Oat Milk Pumpkin Pie
- Pour Filling into Crust: Carefully pour the prepared oat milk pumpkin pie filling into your blind-baked and slightly cooled pie crust. Fill it almost to the very top, leaving just a tiny bit of space.
- Prepare for Baking: Place the pie dish on a baking sheet. This makes it easier to transfer in and out of the oven, and also catches any potential drips, though with a well-made crust, that’s rare.
- Bake the Pie: Bake in the preheated 350°F (175°C) oven for 50-65 minutes. Baking time can vary depending on your oven, so keep an eye on it.
- Check for Doneness: The pie is done when the edges are set, but the center still has a slight jiggle to it when gently shaken. If you insert a thin knife or toothpick about 1 inch from the edge of the crust, it should come out clean. The very center might still look a bit moist, and that’s exactly what we want; it will continue to set as it cools. If the crust edges start to brown too much before the filling is set, you can loosely cover the edges with aluminum foil. This little trick ensures a beautiful, golden crust without any burnt bits.
- Avoid Cracking: A key tip to prevent your pie from cracking: do not overbake! Overbaking dries out the filling and causes those unsightly cracks as it cools. Also, avoid opening the oven door too frequently, as sudden temperature changes can also contribute to cracking. We want a smooth, flawless top for our Best Dairy Free Oat Milk Pumpkin Pie.
Phase 4: Cooling and Chilling for Perfection
- Cool Gradually: Once baked, carefully remove the pie from the oven and place it on a wire rack to cool completely at room temperature. This gradual cooling is crucial for the filling to set properly. This process can take 2-3 hours. Resist the urge to cut into it early!
- Refrigerate for Best Results: After cooling to room temperature, transfer the pie to the refrigerator and chill for at least 3-4 hours, or preferably overnight. This chilling period is non-negotiable for a perfectly set and sliceable pie. The flavors also deepen and meld beautifully during this time. I always plan to make my pumpkin pie the day before I intend to serve it, for optimal flavor and texture.
Phase 5: Whipping Up the Coconut Cream Topping (Optional, but highly recommended!)
- Prepare Chilled Coconut Milk: Ensure your can of full-fat coconut milk has been thoroughly chilled in the refrigerator for at least 24 hours. Without this crucial chilling, the solid cream will not separate from the liquid, and you won’t be able to whip it properly.
- Scoop Out Solid Cream: Carefully open the chilled can of coconut milk without shaking it. Scoop out the thick, solid cream that has risen to the top, leaving the clear liquid behind (you can save the liquid for smoothies or other recipes!). Place the solid coconut cream into a large, cold mixing bowl.
- Whip the Cream: Using an electric mixer (either a handheld or stand mixer with a whisk attachment), beat the solid coconut cream on medium-high speed for 2-3 minutes, or until light, fluffy, and smooth, resembling whipped cream.
- Sweeten and Flavor: Add the powdered sugar (start with 2 tablespoons and add more to taste) and pure vanilla extract. Continue to beat for another 30 seconds to 1 minute, until everything is well combined and the whipped cream is stiff enough to hold its shape.
- Serve Immediately or Chill: Serve the coconut whipped cream immediately on slices of your chilled Best Dairy Free Oat Milk Pumpkin Pie. If not using immediately, cover and refrigerate until ready to serve. It will hold its shape in the fridge for a few hours. I love to pipe it onto each slice for a beautiful presentation, but a dollop from a spoon is just as delicious!
My Top Tips for the Best Dairy Free Oat Milk Pumpkin Pie:
- Always Use Full-Fat Oat Milk: I cannot stress this enough! The fat content in full-fat oat milk is what provides the rich, creamy texture and mouthfeel that makes this dairy-free pie so incredibly satisfying. Do not substitute with low-fat or other plant milks if you want the very best result for your Best Dairy Free Oat Milk Pumpkin Pie.
- Measure Spices Accurately: Spices are the heart of pumpkin pie flavor. While I provide measurements, feel free to adjust slightly to your personal preference. A little extra ginger or a touch more clove can truly elevate the experience.
- Don’t Overwork the Pie Crust: Overworking the dough develops gluten too much, leading to a tough, rather than flaky, crust. Handle it gently and briefly. Cold butter and minimal handling are your best friends here.
- Chill, Chill, Chill: Both the pie crust and the final baked pie benefit immensely from chilling. The crust becomes easier to work with and bakes flakier, and the filling sets perfectly, allowing for clean, beautiful slices. Patience truly is a virtue in pie making!
- Prevent Cracks: Beyond not overbaking, ensuring your oven temperature is stable and avoiding sudden temperature changes (like opening the oven door repeatedly) can help prevent surface cracks on your pie. A smooth, unblemished surface just looks so professional!
- Make Ahead: This pie is an excellent candidate for making a day in advance. The flavors have time to meld and deepen, and the filling sets beautifully overnight, making for an even more delicious and stress-free serving experience.
- Storage: Store any leftover pie, covered, in the refrigerator for up to 3-4 days. It tastes just as good, if not better, the next day!
- Garnish with Flair: A dusting of extra cinnamon or nutmeg, or a few candied pecans, can add a beautiful visual and textural element when serving. Presentation always enhances the enjoyment!
Conclusion:
Well, there you have it! We’ve journeyed through the creation of what I truly believe is a remarkable dessert, a pie that promises to become a new favorite in your culinary repertoire. This isn’t just another pumpkin pie; it’s a celebration of rich, autumnal flavors, a creamy texture, and the incredible versatility of plant-based ingredients. I poured my heart into perfecting this recipe, ensuring that every bite delivers warmth, comfort, and pure delight.
What makes this recipe a true game-changer, a real must-try for everyone from seasoned bakers to enthusiastic beginners? It’s the seamless blend of traditional pumpkin pie comfort with a modern, dietary-conscious twist. You might have approached dairy-free baking with skepticism in the past, perhaps worried about sacrificing taste or texture. But I promise you, with this pie, those concerns will melt away faster than butter on a hot skillet. The oat milk provides an unparalleled creaminess and a subtle sweetness that complements the pumpkin beautifully, without ever overpowering it. It ensures a silky-smooth custard that sets perfectly, offering that satisfying mouthfeel we all crave in a classic pumpkin pie. Furthermore, the carefully selected spices sing in harmony with the natural sweetness of the pumpkin, creating a symphony of flavors that is both familiar and exciting. It’s robust enough for a holiday feast yet light enough for an everyday treat. If you’ve been searching for the Best Dairy Free Oat Milk Pumpkin Pie, your quest genuinely ends here. This recipe delivers on all fronts – taste, texture, and dietary consideration – proving that you absolutely do not have to compromise on flavor when choosing plant-based options. It’s an elegant solution for those with dairy sensitivities or anyone simply looking to expand their culinary horizons with delicious, wholesome ingredients. Prepare to be amazed by its depth of flavor and incredibly smooth consistency.
Now that your kitchen will soon be filled with the intoxicating aroma of freshly baked pumpkin pie, let’s talk about how to elevate your experience even further. While this pie is absolutely divine on its own, a dollop of coconut whipped cream or a dusting of cinnamon sugar can take it to new heights. Imagine serving a warm slice with a scoop of your favorite dairy-free vanilla bean ice cream – a delightful contrast in temperatures and textures! For a more festive touch, consider a sprinkle of toasted pecans or candied walnuts over each slice. You could even drizzle a little maple syrup or a homemade caramel sauce (dairy-free, of course!) just before serving. Thinking about variations? Feel free to experiment with your spice blend – a pinch of cardamom or a touch of ground ginger can add a wonderful complexity. For a hint of citrus, a tiny bit of orange zest in the filling can brighten the flavors beautifully. Don’t be afraid to get creative; this pie provides a fantastic canvas for your own personal touches. It’s wonderfully versatile and adaptable, making it perfect for any occasion, from a casual family dinner to a grand holiday gathering. The simplicity of its preparation also means you can easily whip up two or three at once if you’re feeding a crowd or simply want leftovers (which, trust me, you will!). This recipe truly shines with your own creative flair!
So, what are you waiting for? I wholeheartedly encourage you to roll up your sleeves, gather your ingredients, and give this incredible recipe a try. You’ll be so glad you did. I’m truly excited for you to experience the magic of this pie. And once you’ve tasted this dairy-free delight, I would absolutely love to hear about your baking journey and how it turned out. Did you add any unique twists? How did your friends and family react? Please share your experiences, your successes, and even your questions in the comments below. Your feedback and stories inspire me and our entire baking community. Let’s spread the joy of delicious, inclusive baking together! Happy baking, everyone – your kitchen is about to become a haven of deliciousness!
Best Dairy-Free Oat Milk Pumpkin Pie
This meticulously crafted recipe for the Best Dairy-Free Oat Milk Pumpkin Pie offers a rich, creamy, and flavorful twist on the classic holiday dessert, perfect for those with dairy sensitivities or a plant-based lifestyle. Utilizing full-fat oat milk, it delivers a velvety texture and balanced spices, ensuring everyone can enjoy this quintessential autumn treat.
Ingredients
-
2 ½ cups all-purpose flour
-
1 teaspoon granulated sugar
-
½ teaspoon fine sea salt
-
1 cup cold vegan butter, cubed
-
½ cup ice water, plus 1-2 tablespoons
-
15 ounces 100% pumpkin puree
-
1 ½ cups full-fat, unsweetened oat milk
-
¾ cup packed light brown sugar
-
¼ cup granulated sugar
-
2 tablespoons cornstarch (or arrowroot powder)
-
2 teaspoons ground cinnamon
-
1 teaspoon ground ginger
-
½ teaspoon ground nutmeg
-
¼ teaspoon ground cloves
-
¼ teaspoon fine sea salt
-
1 teaspoon pure vanilla extract
-
2 tablespoons melted vegan butter or coconut oil, cooled
-
1 (13.5-ounce) can full-fat coconut milk, chilled (for optional topping)
-
2-3 tablespoons powdered sugar, to taste (for optional topping)
-
½ teaspoon pure vanilla extract (for optional topping)
Instructions
-
Step 1
Combine flour, sugar, and salt. Cut in cold vegan butter until crumbly. Gradually add ice water, mixing until dough forms. Gather into a disk, wrap, and refrigerate for at least 1 hour. -
Step 2
Roll dough into a 12-inch circle. Transfer to a 9-inch pie dish, trim, and crimp edges. Refrigerate crust for 20-30 minutes. Preheat oven to 375°F (190°C). Line chilled crust with parchment paper/foil, fill with pie weights. Blind bake for 15 minutes. Remove weights, bake for another 5-7 minutes until lightly golden. Reduce oven to 350°F (175°C). -
Step 3
Whisk cinnamon, ginger, nutmeg, cloves, and salt in a small bowl. In a large bowl, combine pumpkin puree, brown sugar, and granulated sugar, stirring until smooth. Whisk in cornstarch, then the spice mixture and vanilla extract. Incorporate full-fat unsweetened oat milk and cooled melted vegan butter/coconut oil, whisking until perfectly smooth. -
Step 4
Carefully pour the prepared filling into the blind-baked, cooled pie crust. Place the pie dish on a baking sheet. Bake in the preheated 350°F (175°C) oven for 50-65 minutes. The pie is done when the edges are set and the center has a slight jiggle. Avoid overbaking. -
Step 5
Remove pie from oven and cool completely on a wire rack at room temperature (2-3 hours). Transfer to the refrigerator and chill for at least 3-4 hours, preferably overnight, for best setting and flavor. -
Step 6
Ensure full-fat coconut milk is chilled for at least 24 hours. Scoop out the thick, solid cream into a cold mixing bowl, leaving liquid behind. Beat cream with an electric mixer until light and fluffy. Add powdered sugar and vanilla extract; beat until stiff peaks form. Serve immediately or refrigerate.
Important Information
Nutrition Facts (Per Serving)
It is important to consider this information as approximate and not to use it as definitive health advice.
Allergy Information
Please check ingredients for potential allergens and consult a health professional if in doubt.

Leave a Comment