
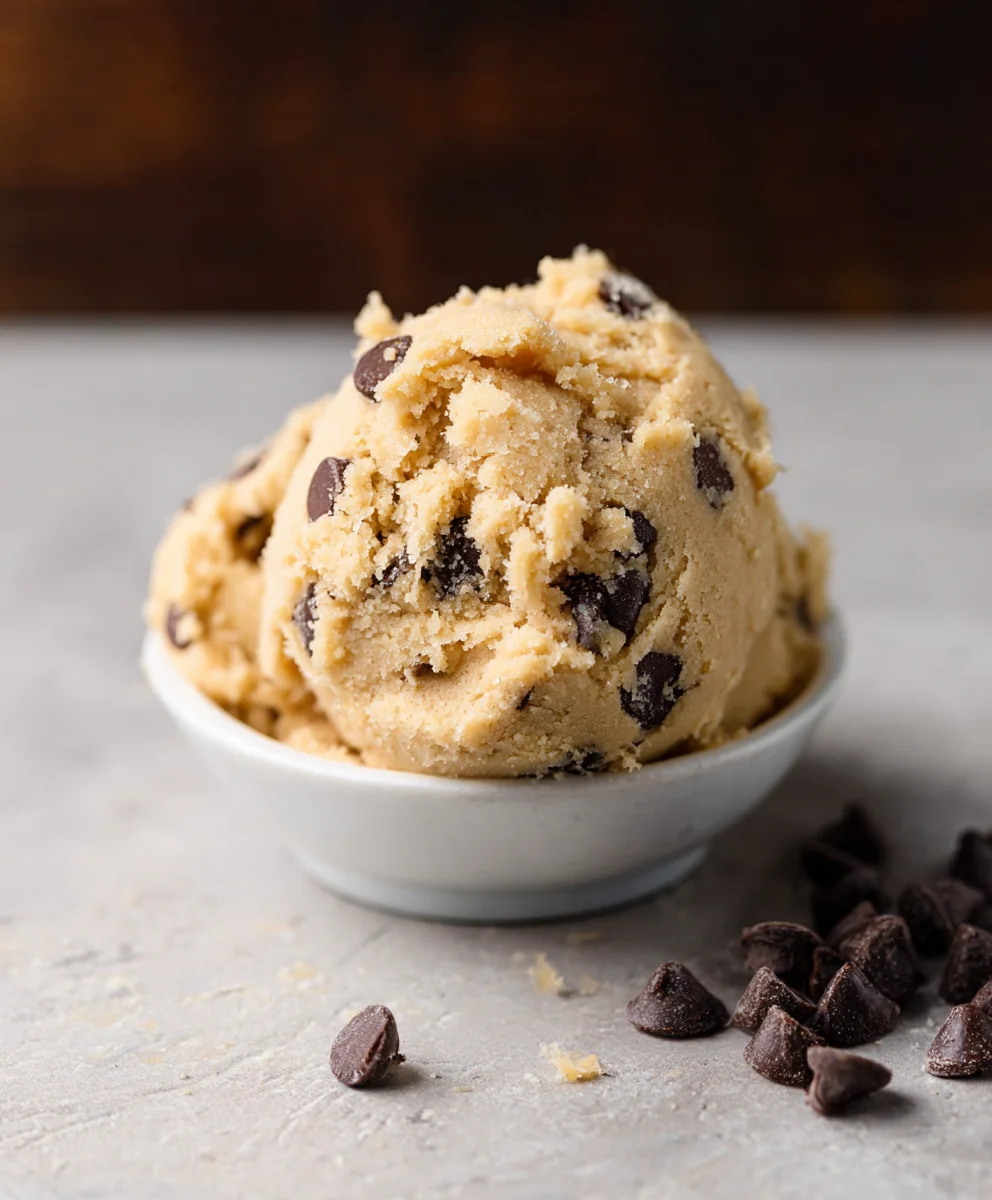
Edible Cookie Dough is more than just a dessert; it’s a delightful journey back to childhood joy, a forbidden treat made deliciously safe to devour straight from the bowl. We all remember sneaking a spoonful of raw dough when Mom wasn’t looking, right? Well, now you can indulge that craving to your heart’s content without any worries! What makes this edible cookie dough so special is its perfect balance of sweet, buttery flavor and satisfying texture. It’s incredibly versatile too – enjoy it by the spoonful, use it to stuff cupcakes, layer it in parfaits, or even roll it into decadent truffles. Forget the baking, embrace the deliciousness of edible cookie dough that’s designed for pure, unadulterated snacking pleasure. Prepare to fall in love with this crowd-pleasing creation!

Ingredients:
- 1 cup heat-treated all-purpose flour
- 1/4 cup granulated sugar
- 1/3 cup packed brown sugar
- 1/2 cup (1 stick) softened unsalted butter
- 2–4 tbsp milk (whole milk recommended for richness)
- 1/2 cup mini chocolate chips
Preparing Your Edible Cookie Dough Base
The foundation of any delicious edible cookie dough is the right blend of fats and sugars, combined with a safely prepared flour. We’ll start by ensuring our butter is perfectly softened. This means taking it out of the refrigerator about an hour before you plan to begin extract mixing. You want it to be pliable and easily indentable with your finger, but not so soft that it’s melted or greasy. This crucial step ensures a smooth, creamy texture without any grainy lumps of butter. In a large mixing bowl, add your softened unsalted butter. To this, we’ll add both the granulated sugar and the packed brown sugar. The brown sugar, especially if you use dark brown sugar, contributes a wonderful depth of flavor and a chewier texture to our edible cookie dough. For the best results, really pack that brown sugar into your measuring cup.
Now, it’s time to cream these ingredients together. You can use an electric mixer, either a stand mixer with a paddle attachment or a hand mixer, or you can go the old-fashioned route with a sturdy whisk and some elbow grease. Beat the butter and sugars together until the mixture becomes light and fluffy. This process incorporates air into the dough, which contributes to the final texture. You’re looking for a pnon-alcoholic ale yellow color and a consistency that looks almost like whipped cream. This usually takes about 2 to 3 minutes with an electric mixer, or a bit longer if you’re doing it by hand. Don’t rush this step; it’s key to achieving that perfect melt-in-your-mouth quality.
Incorporating the Flour and Liquid
Once your butter and sugar mixture is beautifully aerated, it’s time to add the flour. It’s essential that you use heat-treated flour for edible cookie dough. This process kills any potential bacteria, making it safe to consume raw. If you haven’t heat-treated your flour at home, you can do so by spreading it on a baking sheet and baking it at 350°F (175°C) for about 5-7 minutes, or until it reaches an internal temperature of 165°F (74°C). Let it cool completely before using. Gradually add the heat-treated all-purpose flour to the creamed butter and sugar mixture. It’s best to add it in two or three additions, mixing on low speed until just combined after each addition. Overmixing the flour can develop the gluten too much, resulting in a tougher cookie dough, which is something we want to avoid in an edible version.
After the flour is mostly incorporated, we’ll add the liquid. Start with the lower end of the milk measurement, which is 2 tablespoons. Add it to the dough and mix on low speed until it’s just starting to come together. You’re looking for a consistency that’s thick and scoopable, but not crum extractbly or dry. If the dough seems too thick or stiff, you can gradually add more milk, one tablespoon at a time, until you reach your desired texture. The exact amount of milk needed can vary depending on the humidity and the type of flour you use. The goal is a dough that holds its shape when you press it together but is still soft and pliable. Avoid making it too wet, as this can make it sticky and harder to handle.
Adding the Finishing Touches
Now comes the fun part: adding the mix-ins! For this recipe, we’re using mini chocolate chips, which are ideal because they distribute evenly throughout the dough and provide little bursts of chocolatey goodness in every bite. You can absolutely experiment with other additions, such as sprinkles, other types of chocolate chips (milk, dark, or white), chopped nuts, or even a swirl of peanut butter. Add the 1/2 cup of mini chocolate chips to the dough. Gently fold them in using a spatula or a wooden spoon until they are evenly distributed. Again, try not to overmix at this stage. You want to see those lovely chocolate chips speckled throughout your edible cookie dough.
If you’re using a stand mixer, it’s often best to add the chocolate chips and fold them in by hand after the main dough ingredients are combined to prevent them from breaking up too much. The dough should now be thick, rich, and studded with chocolatey delights. It will have a wonderful aroma that might make it hard to regin extractt digging in right away! Give it a final gentle stir to ensure everything is well combined and that there are no pockets of unmixed ingredients. The consistency should be firm enough to hold its shape but soft enough to easily scoop or mold with your hands.
Serving and Storing Your Edible Cookie Dough
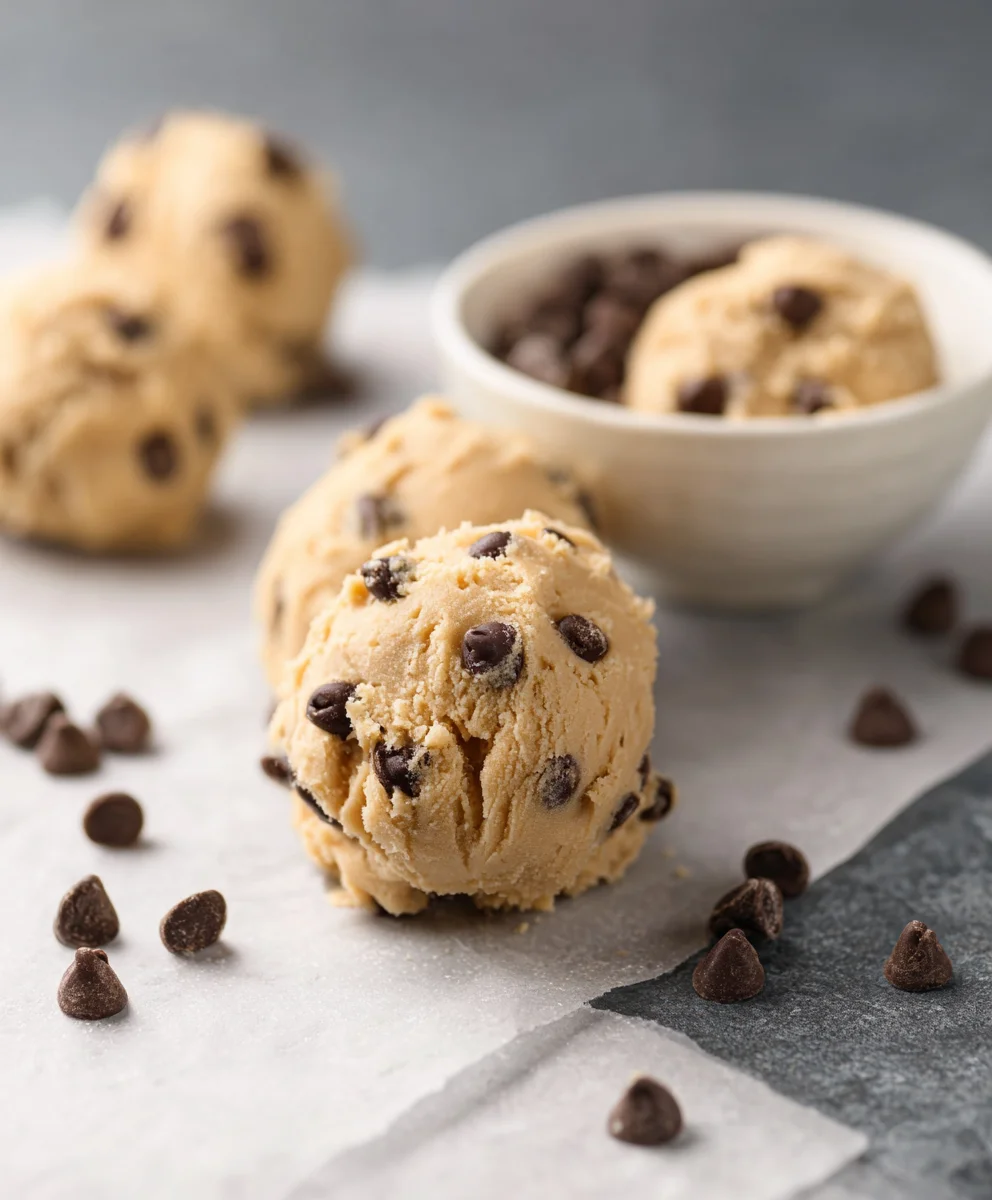
Your delicious edible cookie dough is now ready to be enjoyed! You can scoop it directly into your mouth with a spoon for instant gratification. Alternatively, you can roll it into small balls, about 1-inch in diameter, for a more portion-controlled treat. Another popular way to serve it is by pressing it into a small dish and slicing it into bars or squares. This is especially nice if you plan to share! For an extra special touch, you can even press a few extra chocolate chips onto the outside of the scooped dough balls for decoration. The possibilities are truly endless when it comes to enjoying this delightful treat.
To store any leftover edible cookie dough, transfer it to an airtight container. You can keep it at room temperature for a day or two, but for longer storage, it’s best to refrigerate it. In the refrigerator, it will stay fresh for up to a week. The dough might firm up a bit in the fridge, so if you prefer a softer texture for serving, allow it to sit at room temperature for about 10-15 migin extractes before digging in. If you find yourself with a surplus, you can also freeze portions of edible cookie dough for up to 2-3 months. Simply wrap individual portions tightly in plastic wrap and then place them in a freezer-safe bag or container. Thaw in the refrigerator or at room temperature before enjoying.
Conclusion:
And there you have it – your very own batch of delicious, safe-to-eat Edible Cookie Dough! We’ve walked through how to create this irresistible treat, perfect for satisfying those sweet cravings without any baking. The beauty of this Edible Cookie Dough lies in its simplicity and versatility. You can enjoy it straight from the bowl with a spoon, or get creative with how you serve it.
For some fantastic serving suggestions, try rolling small balls of Edible Cookie Dough and freezing them for a quick, bite-sized indulgence. You could also layer it into parfaits with whipped cream and fresh berries, or even use it as a decadent filling for cupcakes or brownies. When it comes to variations, the possibilities are endless! Fold in mini chocolate chips, sprinkles for a festive touch, chopped nuts, or even a swirl of your favorite candy bar. Don’t be afraid to experiment and make this Edible Cookie Dough your own.
We truly hope you enjoy making and devouring this amazing Edible Cookie Dough. It’s a guaranteed crowd-pleaser and a fantastic way to treat yourself or share with loved ones. Happy doughing!
Frequently Asked Questions:
Can I use raw flour in edible cookie dough?
No, you should never use raw flour in edible cookie dough. Raw flour can contain harmful bacteria like E. coli. In this recipe, we heat-treat the flour to make it safe for consumption.
How long does edible cookie dough last?
When stored properly in an airtight container in the refrigerator, this Edible Cookie Dough should stay fresh for up to 5-7 days. Ensure it’s always kept cold.
Can I add eggs to edible cookie dough?
For safe edible cookie dough, you should omit raw eggs. This recipe is designed to be egg-free to ensure it’s safe to eat without baking.
Safe Edible Cookie Dough-No Bake Recipe
Enjoy a delicious and safe no-bake edible cookie dough made with heat-treated flour and simple ingredients. Perfect for snacking or as a fun dessert.
Ingredients
-
1 cup heat-treated all-purpose flour
-
1/4 cup granulated sugar
-
1/3 cup packed brown sugar
-
1/2 cup (1 stick) softened unsalted butter
-
2–4 tbsp milk
-
1/2 cup mini chocolate chips
Instructions
-
Step 1
Ensure butter is softened to room temperature. In a large mixing bowl, combine the softened butter, granulated sugar, and packed brown sugar. Beat with an electric mixer or whisk until light and fluffy. -
Step 2
Gradually add the heat-treated all-purpose flour to the creamed butter and sugar mixture in two or three additions, mixing on low speed until just combined after each addition. Avoid overmixing. -
Step 3
Add 2 tablespoons of milk to the dough and mix on low speed until it starts to come together. If the dough is too thick, gradually add more milk, one tablespoon at a time, until you reach a thick, scoopable consistency. -
Step 4
Gently fold in the mini chocolate chips using a spatula or wooden spoon until evenly distributed. Avoid overmixing. -
Step 5
Scoop the edible cookie dough into your mouth with a spoon, roll into small balls, or press into a dish and slice into bars. Enjoy immediately. -
Step 6
To store, transfer to an airtight container. Room temperature for 1-2 days, or refrigerate for up to a week. Let refrigerated dough sit at room temperature for 10-15 minutes before serving if preferred softer. Can also be frozen for 2-3 months.
Important Information
Nutrition Facts (Per Serving)
It is important to consider this information as approximate and not to use it as definitive health advice.
Allergy Information
Please check ingredients for potential allergens and consult a health professional if in doubt.


Leave a Comment