
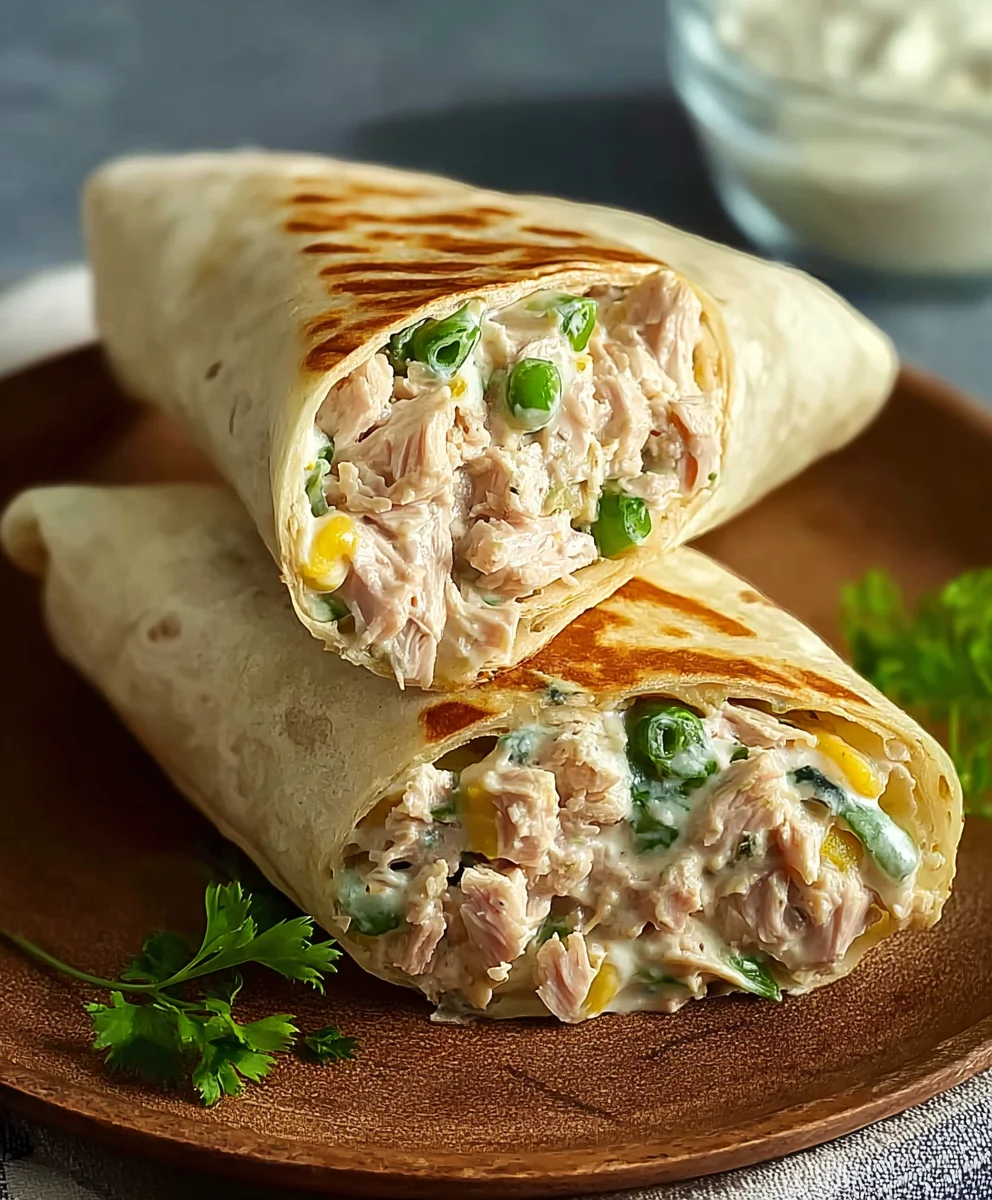
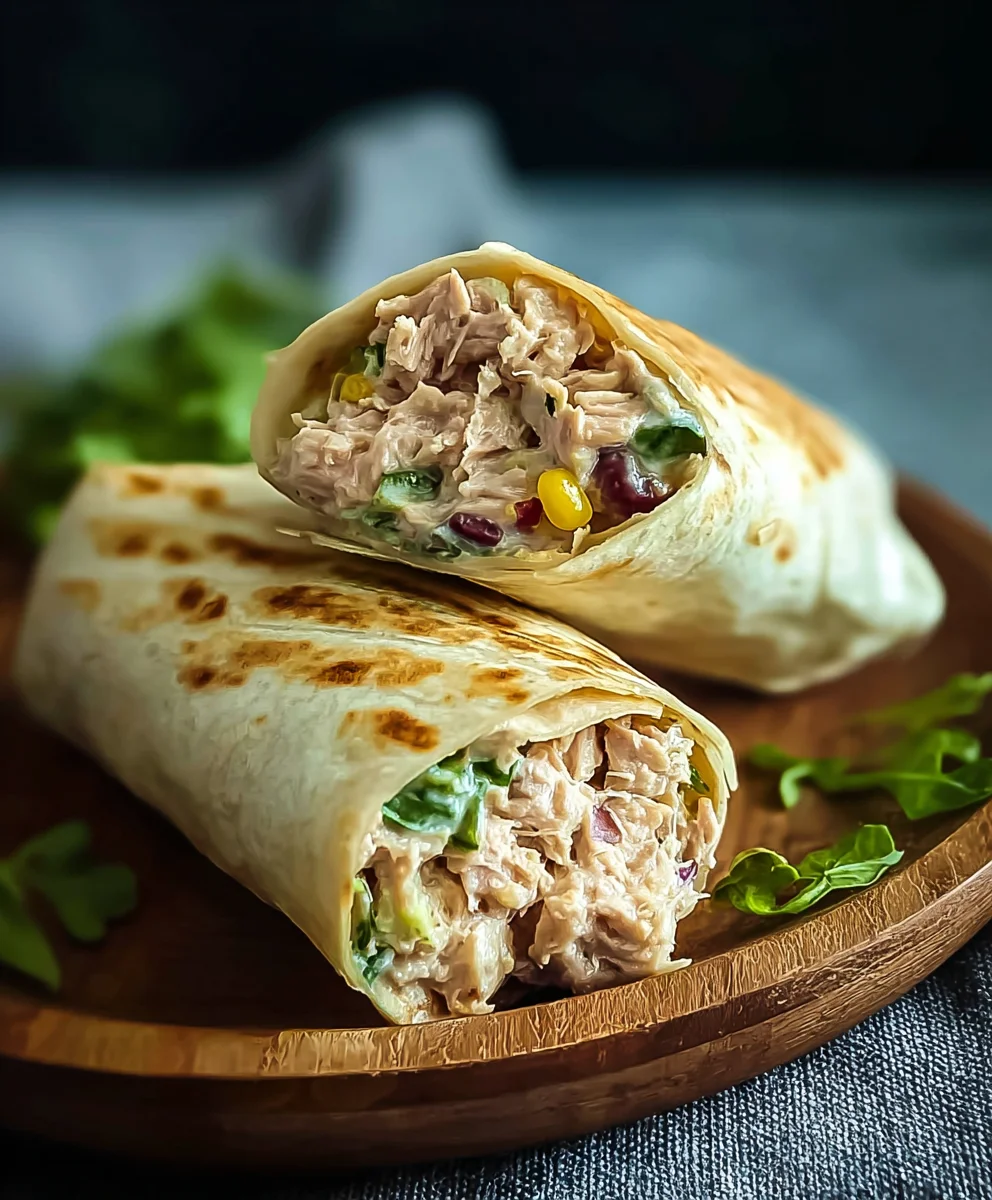
10-Minute Tuna Melt Wrap. Who doesn’t love a quick, satisfying meal that tastes like it took hours to prepare? This 10-minute tuna melt wrap is that hero, swooping in to save your lunch break or even a busy weeknight dinner. We all have those days where hunger strikes and inspiration runs dry, and that’s precisely where this delightful creation shines. It’s the perfect marriage of classic comfort food and grab-and-go convenience, making it an instant favorite for busy individuals and families alike. What makes this wrap truly special is its incredible versatility and the sheer speed at which it comes together, proving that delicious and hearty doesn’t have to mean time-consuming. Forget sad desk lunches; this vibrant and flavorful wrap is about to become your new go-to.

Ingredients:
- 1 can (5 oz) skipjack or yellowfin tuna, drained
- 2 tablespoons Greek yogurt
- 1/2 tablespoon Dijon mustard
- 1 tablespoon fresh lemon juice (from about half a lemon)
- 1/4 cup corn, drained if canned
- 1/4 cup finely diced red onion
- 1 tablespoon dill relish or capers, chopped if large
- 1/2 teaspoon garlic powder
- 1/4 teaspoon black pepper
- 1 burrito-sized wrap (at least 10 inches in diameter)
- 1/4 cup shredded mozzarella cheese
- Olive oil, for grilling
Preparing the Tuna Filling
Step 1: Mix the Tuna Base
Begin extract by opening your can of tuna and draining it thoroughly. You want to remove as much liquid as possible to prevent a soggy filling. Place the drained tuna into a medium-sized bowl. Using a fork, break up the tuna into smaller flakes. This will create a better texture for your wrap.
Next, add the Greek yogurt to the bowl with the tuna. Greek yogurt is a fantastic creamy base that’s healthier than mayonnaise and adds a pleasant tang. Follow this with the Dijon mustard. Dijon provides a sharp, distinct flavor that complements the tuna beautifully. Add the fresh lemon juice. This brightens everything up and cuts through the richness of the tuna.
Now, add the corn and the finely diced red onion. The corn adds a touch of sweetness and a pleasant pop of texture, while the red onion offers a nice bit of crunch and a mild bite. If you’re using dill relish, add it now. If you prefer capers for a brinier flavor, chop them slightly if they are large, and add them to the mixture. Finally, season the filling with the garlic powder and black pepper. The garlic powder adds a savory depth without the intensity of fresh garlic, and the black pepper provides a classic seasoning.
Gently stir all the ingredients together with your fork until they are well combined. Taste the mixture and adjust seasonings if needed. You might want a little more lemon juice for brightness, or a pinch more pepper. The key here is to create a cohesive and flavorful filling that isn’t too wet.
Assembling and Grilling the Wrap
Step 2: Spreading the Tuna Filling and Adding Cheese
Lay your burrito-sized wrap flat on a clean work surface. I like to use a plate or a cutting board. Spoon the prepared tuna mixture evenly over one half of the wrap, leaving about a 1-inch border around the edges. This border will help prevent the filling from spilling out when you fold and grill the wrap. Gently spread the tuna mixture so it forms a relatively even layer.
Sprinkle the shredded mozzarella cheese over the top of the tuna filling. The mozzarella will melt beautifully and help hold the filling together, adding a delicious cheesy pull to every bite. Don’t overload the wrap with filling, as this can make it difficult to fold and cook evenly. Aim for a balanced amount of tuna and cheese.
Step 3: Folding the Wrap
Now it’s time to fold your wrap. There are a few ways to do this, but for a melt wrap, folding it in half like a taco or empanada is often easiest and most effective for grilling. Fold the empty half of the wrap over the tuna and cheese filling, creating a crescent or half-moon shape. Press down gently along the edges to seal the filling inside. If you find the wrap is difficult to fold without the filling escaping, you can try a more traditional burrito fold, tucking in the sides first, then rolling it up. However, for optimal grilling and meltiness, a simple half-fold works wonderfully.
Step 4: Grilling the Wrap
Heat a large skillet or griddle over medium heat. Add a small drizzle of olive oil to the skillet. You don’t need much; just enough to lightly coat the surface and prevent sticking. Once the oil is shimmering, carefully place the folded tuna melt wrap into the hot skillet.
Cook the wrap for about 3-4 minutes per side, or until the wrap is golden brown and toasted, and the cheese inside is completely melted and gooey. Keep an eye on it to ensure it doesn’t burn. You can gently press down on the wrap with a spatula while it cooks to help it brown evenly and ensure good contact with the skillet. The heat will melt the cheese and warm through the tuna filling, creating a delightful textural contrast between the crisp exterior and the warm, savory interior.
Step 5: Finishing and Serving
Once both sides of the wrap are beautifully golden brown and the cheese is melted, carefully remove the wrap from the skillet. Let it rest for a minute or two before slicing. This allows the filling to settle slightly, making it easier to cut.
You can serve the tuna melt wrap whole, or cut it in half diagonally for a more attractive presentation and easier eating. This wrap is delicious on its own, but it also pairs wonderfully with a side salad, some crunchy kettle chips, or a cup of your favorite soup. Enjoy the quick, satisfying flavors of your 10-Minute Tuna Melt Wrap!
Conclusion:
And there you have it – the ultimate guide to mastering the delightful 10-Minute Tuna Melt Wrap! We’ve walked through each simple step, from prepping your creamy tuna salad to achieving that perfect, golden-brown grilled exterior that makes this wrap an absolute winner. This recipe is proof that delicious, satisfying meals don’t need to take hours. Whether you’re looking for a quick lunch, a speedy weeknight dinner, or even a hearty breakfast, the 10-Minute Tuna Melt Wrap truly delivers on flavor and convenience. I encourage you to give it a try and experience the magic for yourself!
To elevate your 10-Minute Tuna Melt Wrap, consider serving it alongside a crisp green salad with a light vinaigrette, a bowl of warm tomato soup, or some crunchy kettle chips. For variations, feel free to experiment with different cheeses like Swiss or Monterey Jack, add a sprinkle of chopped celery or red onion to your tuna salad for extra texture, or even a dash of hot sauce for a spicy kick.
Frequently Asked Questions:
Can I make the tuna salad ahead of time for the 10-Minute Tuna Melt Wrap?
Absolutely! You can prepare the tuna salad a day in advance and store it in an airtight container in the refrigerator. This makes assembling your 10-Minute Tuna Melt Wrap even faster when hunger strikes.
What kind of bread is best for the 10-Minute Tuna Melt Wrap?
While any large tortilla or wrap will work perfectly, a slightly thicker tortilla or a flour tortilla tends to hold up best to the filling and grilling process. You can also use large slices of bread if you prefer a traditional melt, though it might take slightly longer than 10 minutes to grill.
I don’t have mayonnaise, what else can I use for the tuna salad in the 10-Minute Tuna Melt Wrap?
If mayonnaise isn’t your preference or you don’t have any on hand, you can substitute it with plain Greek yogurt for a tangier, lighter version. Mashed avocado is another excellent creamy binder that adds healthy fats and a delicious flavor.
Quick Tuna Melt Wrap Easy Lunch Recipe
A simple and delicious tuna melt wrap that’s perfect for a quick and satisfying lunch.
Ingredients
-
1 can (5 oz) skipjack or yellowfin tuna, drained
-
2 tablespoons Greek yogurt
-
1/2 tablespoon Dijon mustard
-
1 tablespoon fresh lemon juice
-
1/4 cup corn, drained
-
1/4 cup finely diced red onion
-
1 tablespoon dill relish or capers, chopped if large
-
1/2 teaspoon garlic powder
-
1/4 teaspoon black pepper
-
1 burrito-sized wrap (at least 10 inches in diameter)
-
1/4 cup shredded mozzarella cheese
-
Olive oil, for grilling
Instructions
-
Step 1
Drain tuna thoroughly and place in a bowl. Break up with a fork. Add Greek yogurt, Dijon mustard, and lemon juice. Mix well. -
Step 2
Add corn, diced red onion, dill relish or capers, garlic powder, and black pepper to the tuna mixture. Stir until combined. Taste and adjust seasonings. -
Step 3
Lay the wrap flat. Spoon the tuna mixture evenly over one half of the wrap, leaving a 1-inch border. Sprinkle shredded mozzarella cheese over the tuna filling. -
Step 4
Fold the empty half of the wrap over the filling to create a half-moon shape. Press edges to seal. -
Step 5
Heat a skillet over medium heat with a drizzle of olive oil. Cook the wrap for 3-4 minutes per side, until golden brown and cheese is melted. -
Step 6
Remove from skillet, let rest for a minute, then slice in half diagonally. Serve immediately.
Important Information
Nutrition Facts (Per Serving)
It is important to consider this information as approximate and not to use it as definitive health advice.
Allergy Information
Please check ingredients for potential allergens and consult a health professional if in doubt.


Leave a Comment