
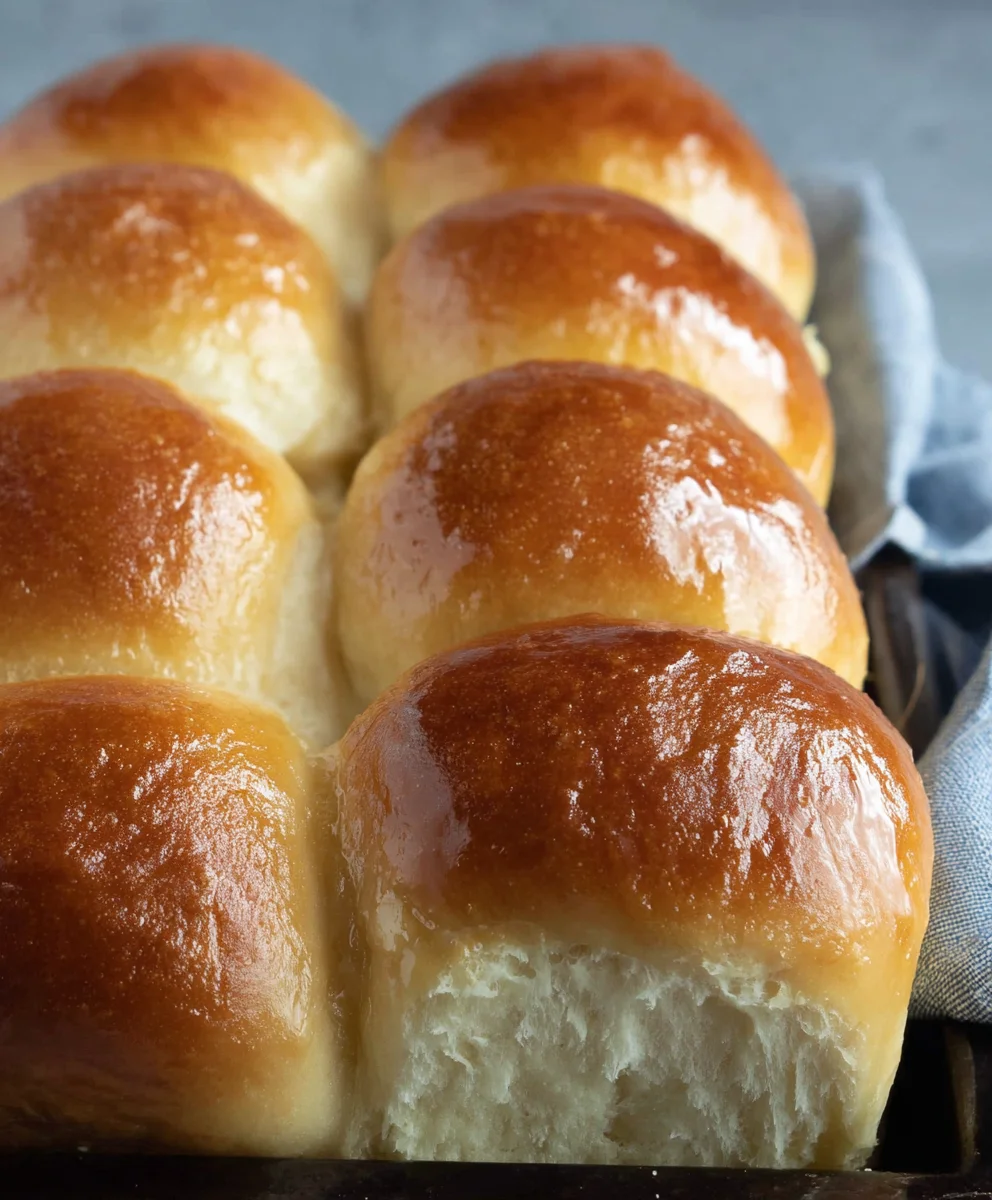
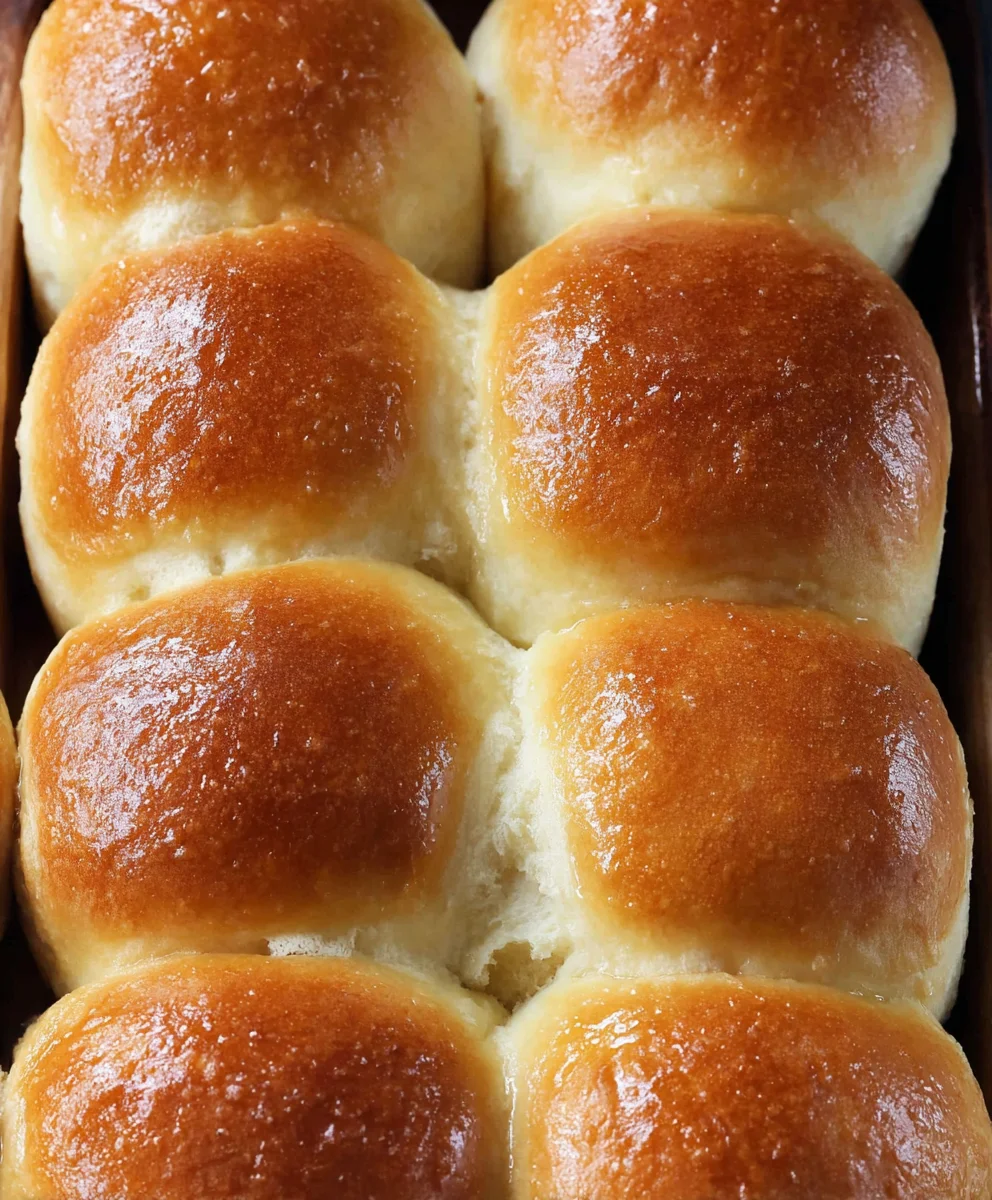
Homemade yeast rolls from scratch are the kind of culinary magic that transforms an ordinary meal into a memorable occasion. There’s a comforting warmth that emanates from a basket of freshly baked rolls, a simple yet profound pleasure that everyone seems to cherish. Whether it’s the pillowy softness, the slightly crisp exterior, or that inimitable, melt-in-your-mouth texture, these rolls are a testament to the power of basic ingredients. What truly sets homemade yeast rolls from scratch apart is the journey of their creation: the gentle kneading, the patient rise, and the satisfying aroma that fills your kitchen. They’re not just bread; they’re a labor of love, a connection to tradition, and an invitation to gather around the table. This recipe will guide you through creating these delightful rolls, ensuring your success even if you’re new to working with yeast.
Why You’ll Love This Recipe
We believe everyone deserves to experience the joy of truly exceptional bread. This recipe is designed for simplicity and deliciousness, resulting in rolls that are consistently tender, flavorful, and incredibly satisfying. Imagin extracte serving these alongside your favorite soup, stew, or holiday feast – they’re guaranteed to be a crowd-pleaser!
What Makes These Rolls Special
Beyond their irresistible taste and texture, these homemade yeast rolls from scratch are special because they’re achievable. We’ve stripped away any intimidation factor associated with yeast baking, providing clear, easy-to-follow steps. You’ll discover the satisfaction of creating something truly wonderful with your own two hands, from the initial mixing to the final golden-brown bake. The result is a bread that boasts a perfect balance of fluffiness and a slight chew, with a subtly sweet undertone that makes them utterly addictive.

Ingredients:
- 2 cups milk (480 ml)
- 2 tablespoons instant dry yeast
- ¼ cup granulated sugar (50 g)
- ⅓ cup unsalted butter (80 g, softened, plus 1 extra tablespoon for brushing)
- 2 large eggs
- 6¼ cups all-purpose flour (750 g)
- 2 teaspoons fine sea salt
Preparing the Dough Base
This is where the magic begin extracts, creating a beautifully risen, tender dough for our homemade yeast rolls. The key is to activate the yeast properly and develop a strong gluten structure.
Step 1: Activating the Yeast and Creating a Starter
First, we need to warm the milk. Gently heat the 2 cups of milk in a saucepan over low heat or in the microwave. You want it to be warm to the touch, but not hot – think lukewarm, around 105-115°F (40-46°C). If it’s too hot, it will kill the yeast; too cool, and it won’t activate effectively. Pour the warmed milk into the bowl of a stand mixer fitted with the dough hook attachment. Add the 2 tablespoons of instant dry yeast and the ¼ cup of granulated sugar. Give it a gentle stir to combine. Let this mixture sit for about 5-10 minutes. You should see foam forming on the surface; this indicates the yeast is active and alive, ready to work its magic. If you don’t see any foam, your yeast might be old, or the milk wasn’t the right temperature, and you’ll need to start this step over with fresh yeast.
Step 2: Incorporating the Wet Ingredients and Initial Flour
Once your yeast mixture is frothy and active, it’s time to add the fat and eggs. Add the ⅓ cup of softened unsalted butter to the yeast mixture. The butter should be soft enough to indent easily with your finger but not melted. Then, crack in your 2 large eggs. Mix these ingredients with the dough hook on low speed until they are just combined. Now, it’s time to start adding the dry ingredients. Gradually add about 3 cups of the 6¼ cups of all-purpose flour to the bowl. Mix on low speed until it’s incorporated and the dough starts to come together. This initial incorporation of flour helps to thicken the mixture and make it easier for the stand mixer to handle.
Step 3: Developing the Dough and Adding Remaining Ingredients
Continue to add the remaining flour, about ½ cup at a time, while the mixer is still running on low speed. As you add more flour, the dough will start to pull away from the sides of the bowl. You’re looking for a dough that is still slightly sticky but manageable. It shouldn’t be so wet that it clings to everything, nor so dry that it crum extractbles. Once you’ve added most of the flour, add the 2 teaspoons of fine sea salt. Salt is crucial for flavor, but it can inhibit yeast activity if added too early, which is why we add it later. Continue mixing and add just enough of the remaining flour to achieve a soft, slightly tacky dough. You might not need all of the flour, or you might need a tablespoon or two more depending on your flour’s moisture content and the humidity in your kitchen. The dough should be smooth and elastic when kneaded.
Kneading and First Rise
Proper kneading is essential for developing gluten, which gives our rolls their soft, chewy texture. The first rise allows the yeast to do its work, creating that characteristic airy lightness.
Step 4: Kneading the Dough to Perfection
Once the dough has come together, increase the mixer speed to medium-low and let it knead for about 6-8 minutes. You’ll see the dough transform from a shaggy mass into a smooth, elastic ball. It should be pliable and spring back when gently poked. If you’re kneading by hand, turn the dough out onto a lightly floured surface and knead for about 10-12 minutes, pushing, folding, and turning until it achieves the same smooth, elastic consistency. Don’t be tempted to add too much extra flour during kneading; a slightly sticky dough is preferable to a dry one. Once kneaded, form the dough into a ball. Lightly grease a large clean bowl with a bit of oil or cooking spray. Place the dough ball into the greased bowl, turning it to coat all sides. Cover the bowl tightly with plastic wrap or a clean kitchen towel. Place the bowl in a warm, draft-free spot to rise. A good spot is often inside a slightly warmed oven that has been turned off. Let the dough rise for about 1 to 1.5 hours, or until it has doubled in size.
Shaping and Second Rise
Now we’ll shape our dough into individual rolls and give them a final proof before baking.
Step 5: Shaping the Rolls and the Second Proof
Once the dough has doubled in size, punch it down gently to release the air. Turn the dough out onto a lightly floured surface. For classic dinner rolls, divide the dough into 12-16 equal portions. You can weigh them for consistency if you like, aiming for roughly 3-4 ounces each. Gently shape each portion into a smooth ball. To do this, cup your hand around the dough and rotate it against the work surface, tucking the edges underneath to create tension on the surface. Arrange the dough balls in a greased 9×13 inch baking pan, leaving about 1-2 inches of space between each roll to allow them to expand. Cover the pan loosely with plastic wrap or a clean kitchen towel. Let the rolls rise for a second time in a warm place for another 30-45 minutes, or until they are puffy and have nearly doubled in size again. They should be touching each other by the end of this rise. While the rolls are doing their second rise, preheat your oven to 375°F (190°C). This second rise is crucial for achieving those incredibly light and airy rolls.
Baking and Finishing Touches
The final stage is baking the rolls to golden perfection and adding a luscious buttery finish.
Step 6: Baking to Golden Brown Perfection
Once the rolls have completed their second rise and the oven is preheated, it’s time to bake. Place the pan of rolls into the preheated oven. Bake for 18-22 minutes, or until the tops are a beautiful golden brown and the bottoms sound hollow when tapped gently. The exact baking time will depend on your oven, so keep an eye on them towards the end of the baking period. If the tops are browning too quickly, you can loosely tent the pan with aluminum foil.
Step 7: The Irresistible Butter Glaze
As soon as the rolls come out of the oven, while they are still hot, it’s time for the finishing touch that makes them truly irresistible. Melt the extra 1 tablespoon of unsalted butter in a small saucepan or in the microwave. Using a pastry brush, generously brush the melted butter all over the tops of the hot rolls. This not only adds a wonderful sheen but also imbues them with a rich, buttery flavor that complements the soft, slightly sweet dough perfectly. Let the rolls cool in the pan for a few minutes before transferring them to a wire rack to cool further, or serve them warm directly from the pan. Enjoy the delightful aroma and the incredible taste of your homemade yeast rolls from scratch!
Conclusion:
And there you have it! Mastering the art of Homemade Yeast Rolls from Scratch is a truly rewarding experience. The aroma that fills your kitchen as these golden beauties bake is simply divine, and the taste of warm, fluffy rolls made with your own hands is incomparable to anything store-bought. I encourage you to give this recipe a try; it’s simpler than you might think and the results are absolutely worth it. Serve these delicious rolls warm with butter, alongside your favorite soups, stews, or roasts. They also make a fantastic base for mini sandwiches!
Don’t be afraid to get creative! You can easily adapt this recipe by adding a touch of honey for a subtle sweetness, or incorporating herbs like rosemary or chives into the dough for an extra layer of flavor. Experimenting with different toppings, such as a sprinkle of sesame seeds or a garlic herb butter glaze after baking, can also elevate your Homemade Yeast Rolls from Scratch to a whole new level. Enjoy the process and the delicious outcome!
Frequently Asked Questions:
Why are my homemade yeast rolls not rising?
The most common reason for yeast rolls not rising is inactive yeast. Ensure your yeast is fresh by checking the expiration date. You can also “proof” your yeast by dissolving it in warm water (around 105-115°F or 40-46°C) with a pinch of sugar. If it doesn’t become foamy within 5-10 minutes, it’s likely dead and needs to be replaced. Also, make sure your dough is in a warm, draft-free place to rise. Too cold and the yeast won’t be active enough.
Can I make the dough for homemade yeast rolls ahead of time?
Yes, you absolutely can! After the first rise, you can punch down the dough and store it in an airtight container in the refrigerator for up to 2-3 days. This is often called a “retarded rise” and can even enhance the flavor. When you’re ready to bake, let the dough come to room temperature for about an hour before shaping and letting it rise again. Alternatively, you can freeze the shaped, unbaked rolls on a baking sheet until firm, then transfer them to a freezer bag for longer storage. Thaw and let rise before baking.
Easy Homemade Yeast Rolls – So Soft
Learn to make incredibly soft and fluffy homemade yeast rolls from scratch with this easy-to-follow recipe.
Ingredients
-
2 cups milk
-
2 tablespoons instant dry yeast
-
1/4 cup granulated sugar
-
1/3 cup unsalted butter, softened, plus 1 extra tablespoon for brushing
-
2 large eggs
-
6 1/4 cups all-purpose flour
-
2 teaspoons fine sea salt
Instructions
-
Step 1
Warm the milk to lukewarm (105-115°F) and pour into a stand mixer bowl. Add yeast and sugar, stir, and let sit for 5-10 minutes until foamy. -
Step 2
Add softened butter and eggs to the yeast mixture. Mix on low speed until combined. Gradually add 3 cups of flour and mix until incorporated. -
Step 3
Add remaining flour, about 1/2 cup at a time, until a soft, slightly tacky dough forms. Add salt and continue mixing until the dough is smooth and elastic. -
Step 4
Knead the dough on medium-low speed for 6-8 minutes (or by hand for 10-12 minutes) until smooth and elastic. Place in a greased bowl, cover, and let rise in a warm place for 1-1.5 hours, or until doubled. -
Step 5
Punch down the dough, divide into 12-16 portions, and shape into balls. Place in a greased baking pan, cover, and let rise for 30-45 minutes until puffy. Preheat oven to 375°F (190°C). -
Step 6
Bake for 18-22 minutes, or until golden brown. While hot, brush the tops with the extra melted butter.
Important Information
Nutrition Facts (Per Serving)
It is important to consider this information as approximate and not to use it as definitive health advice.
Allergy Information
Please check ingredients for potential allergens and consult a health professional if in doubt.

Leave a Comment