
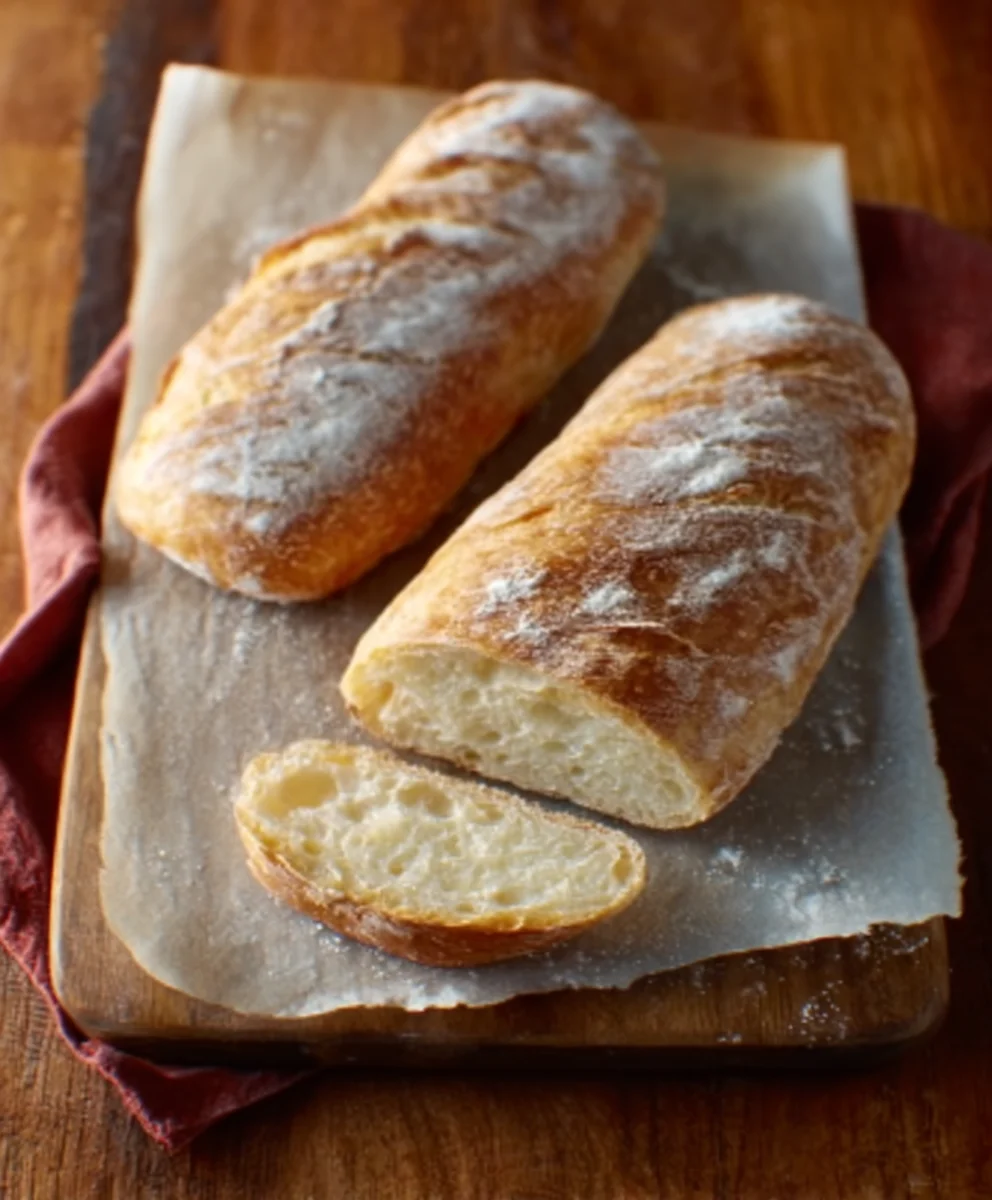
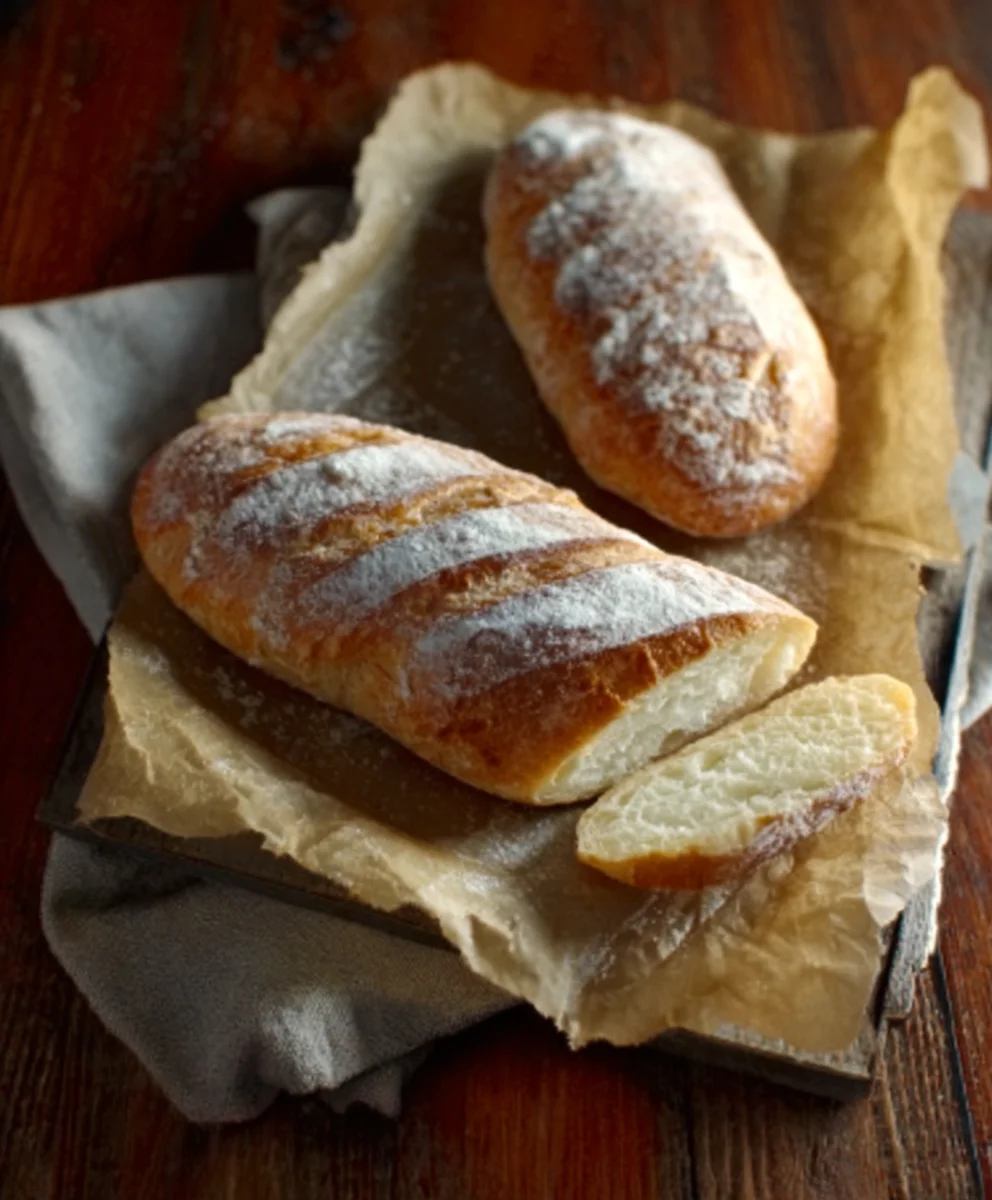
One-Hour French Bread is the magical answer to your sudden craving for warm, crusty, oven-fresh bread. Imagin extracte the aroma filling your kitchen in less time than it takes to watch an episode of your favorite show! This recipe isn’t just about speed; it’s about delivering that quintessential French bread experience – a crisp, golden-brown exterior that gives way to a soft, airy, and slightly chewy interior. It’s a testament to how incredible homemade bread can be, even when you’re short on time. People adore this dish because it’s surprisingly simple, requires no special equipment, and yields results that rival your favorite bakery. What truly sets this One-Hour French Bread apart is its ingenious method, allowing the dough to rise quickly and perfectly, making it accessible for even novice bakers. Whether you’re serving it alongside soup, slathering it with butter, or using it as the base for a gourmet sandwich, this versatile loaf is sure to become a weeknight hero.

Ingredients:
- 4 to 4 1/2 cups bread flour
- 1 teaspoon sea salt
- 1 1/2 tablespoons active dry yeast
- 2 cups warm water (about 105-115°F or 40-46°C)
Preparing the Dough
Activating the Yeast
This is a crucial first step to ensure your bread rises beautifully. In a large mixing bowl, combine the 2 cups of warm water. It’s important that the water is truly warm but not hot. Too hot, and you’ll kill the yeast; too cold, and it won’t activate properly. You want it to feel comfortably warm when you dip your finger in, like a baby’s bathwater. Sprinkle the 1 1/2 tablespoons of active dry yeast over the surface of the warm water. Let it sit undisturbed for about 5 to 10 minutes. You should start to see a foamy, bubbly layer form on top of the water. This “blooming” indicates that your yeast is alive and ready to work its magic. If you don’t see any foam, your yeast might be old or the water was the wrong temperature, and it’s best to start over with fresh yeast and properly warmed water.
Mixing the Dough
Once your yeast has bloomed, it’s time to add the rest of the dry ingredients. To the same bowl, add 1 teaspoon of sea salt. Now, begin extract adding the bread flour, starting with 4 cups. Use a sturdy spoon or a dough whisk to incorporate the flour into the wet ingredients. Mix until the dough just starts to come together. It will likely be shaggy and a bit sticky at this stage. Don’t worry about developing the gluten too much at this point; we’ll get to that during the kneading process. If the dough seems very wet and is not holding together, you can gradually add the remaining 1/2 cup of bread flour, a tablespoon at a time, until the dough is manageable but still slightly tacky. The exact amount of flour needed can vary depending on humidity and the type of flour you are using.
Kneading and First Rise
Kneading the Dough
Turn the dough out onto a lightly floured surface. Now comes the satisfying part: kneading! This process develops the gluten in the flour, which gives bread its structure and chewy texture. Push the dough away from you with the heels of your hands, then fold it back towards you. Rotate the dough a quarter turn and repeat. Continue this motion for about 8 to 10 minutes. The dough will start out sticky and a little rough, but as you knead, it will become smoother, more elastic, and less sticky. You’re looking for a dough that springs back slowly when you press it with your finger. If it’s too sticky to handle, lightly dust your hands and the work surface with a little more flour, but try not to add too much, as this can make the bread dense.
First Rise (Proofing)**
Once your dough is smooth and elastic, shape it into a ball. Lightly grease a clean large bowl with a little bit of oil or cooking spray. Place the dough ball in the bowl, turning it to coat all sides with the oil. Cover the bowl tightly with plastic wrap or a clean kitchen towel. Find a warm, draft-free spot for your dough to rise. An oven that has been turned off but is still slightly warm is ideal, or simply a sunny windowsill. Let the dough rise for about 30 to 45 minutes, or until it has roughly doubled in size. The exact time will depend on the temperature of your environment. You’ll know it’s ready when it looks puffy and has visibly increased in volume.
Shaping and Baking**
Shaping the Loaves
Gently punch down the risen dough to release the air. Turn it out onto your lightly floured work surface again. For this One-Hour French Bread, we’ll shape it into two classic baguette-like loaves. Divide the dough in half. Take one half and gently pat it into a rough rectangle. Fold the top edge down to the middle, then fold the bottom edge up to meet the top, creating a log. Pinch the seam shut. Then, gently roll the log back and forth with your hands, starting from the center and working outwards, to lengthen it into a baguette shape. Aim for a length of about 12 to 15 inches. Repeat with the second half of the dough.
Second Rise and Baking**
Carefully transfer your shaped loaves onto a baking sheet that has been lined with parchment paper or lightly greased. If you have a baker’s couche or a floured tea towel, you can place it between the loaves to help them keep their shape during the second rise. Cover the loaves loosely with plastic wrap or a clean towel. Let them rest and rise for another 20 to 30 minutes, or until they are visibly puffed up again but not doubled. While the loaves are on their second rise, preheat your oven to 425°F (220°C). Just before baking, you can lightly score the tops of the loaves with a sharp knife or a lame. This allows steam to escape and creates those beautiful rustic slashes. For a crispier crust, you can place a shallow pan of water on the bottom rack of your oven as it preheats to create steam. Bake the loaves for 20 to 25 minutes, or until they are a deep golden brown and sound hollow when tapped on the bottom.
Conclusion:
And there you have it – delicious, crusty, homemade One-Hour French Bread ready to grace your table! This recipe truly lives up to its name, offering the satisfaction of freshly baked bread without a lengthy proofing process. The aroma alone is enough to transport you to a Parisian bakery, and the taste is even better. The golden crust gives way to a wonderfully soft and airy interior, perfect for soaking up soups, serving with butter and jam, or crafting the ultimate sandwich.
I love serving this One-Hour French Bread warm from the oven, either as a delightful appetizer with olive oil and balsamic vinegar or alongside a hearty stew. It also makes a fantastic base for bruschetta or garlic bread.
Don’t be afraid to get creative with this recipe! You can easily add herbs like rosemary or thyme to the dough for an extra layer of flavor, or sprinkle some grated cheese on top before baking. Experiment with different flours, perhaps a touch of whole wheat, for a slightly different texture and taste. The possibilities are endless, and the outcome is always rewarding.
So, gather your ingredients, embrace the simplicity, and enjoy the magic of creating beautiful One-Hour French Bread in your own kitchen. Happy baking!
Frequently Asked Questions:
Can I freeze this One-Hour French Bread?
Yes, absolutely! Once the bread has cooled completely, you can wrap it tightly in plastic wrap and then in aluminum foil. It will keep well in the freezer for up to 2-3 months. To reheat, simply unwrap and bake at 350°F (175°C) for about 10-15 minutes, or until warmed through and the crust is re-crisped.
My dough didn’t rise much. What went wrong?
Several factors can affect dough rise. Ensure your yeast was fresh and activated properly. If using instant yeast, it can usually be mixed directly with dry ingredients. Also, check the temperature of your liquids; water that is too hot can kill the yeast, while water that is too cold might not activate it effectively. Aim for lukewarm water, around 105-115°F (40-46°C).
What kind of flour is best for One-Hour French Bread?
All-purpose flour works perfectly for this recipe, providing a good balance of protein for structure and a tender crum extractb. Bread flour, with its higher protein content, can also be used for a chewier texture, but all-purpose is readily available and yields fantastic results for a quick bread.
Easy One-Hour French Bread Recipe
Deliciously quick French bread made in about an hour from start to finish. Perfect for a weeknight.
Ingredients
-
4 to 4 1/2 cups bread flour
-
1 teaspoon sea salt
-
1 1/2 tablespoons active dry yeast
-
2 cups warm water (about 105-115°F)
-
1 tablespoon olive oil (for greasing bowl)
Instructions
-
Step 1
Activate the yeast by sprinkling it over 2 cups of warm water (105-115°F) in a large bowl. Let stand for 5-10 minutes until foamy. -
Step 2
Add 1 teaspoon of sea salt and gradually add 4 cups of bread flour to the yeast mixture, stirring until a shaggy dough forms. Add more flour, a tablespoon at a time, if too wet. -
Step 3
Turn the dough onto a lightly floured surface and knead for 8-10 minutes until smooth and elastic. The dough should spring back slowly when pressed. -
Step 4
Place the dough in a lightly oiled bowl, cover, and let rise in a warm, draft-free spot for 30-45 minutes, or until doubled in size. -
Step 5
Punch down the dough, divide in half, and shape each half into a 12-15 inch baguette. Place on a parchment-lined baking sheet. -
Step 6
Cover the shaped loaves and let rise for another 20-30 minutes while preheating the oven to 425°F (220°C). Score the tops of the loaves before baking. -
Step 7
Bake for 20-25 minutes, until deep golden brown and hollow-sounding when tapped.
Important Information
Nutrition Facts (Per Serving)
It is important to consider this information as approximate and not to use it as definitive health advice.
Allergy Information
Please check ingredients for potential allergens and consult a health professional if in doubt.


Leave a Comment