
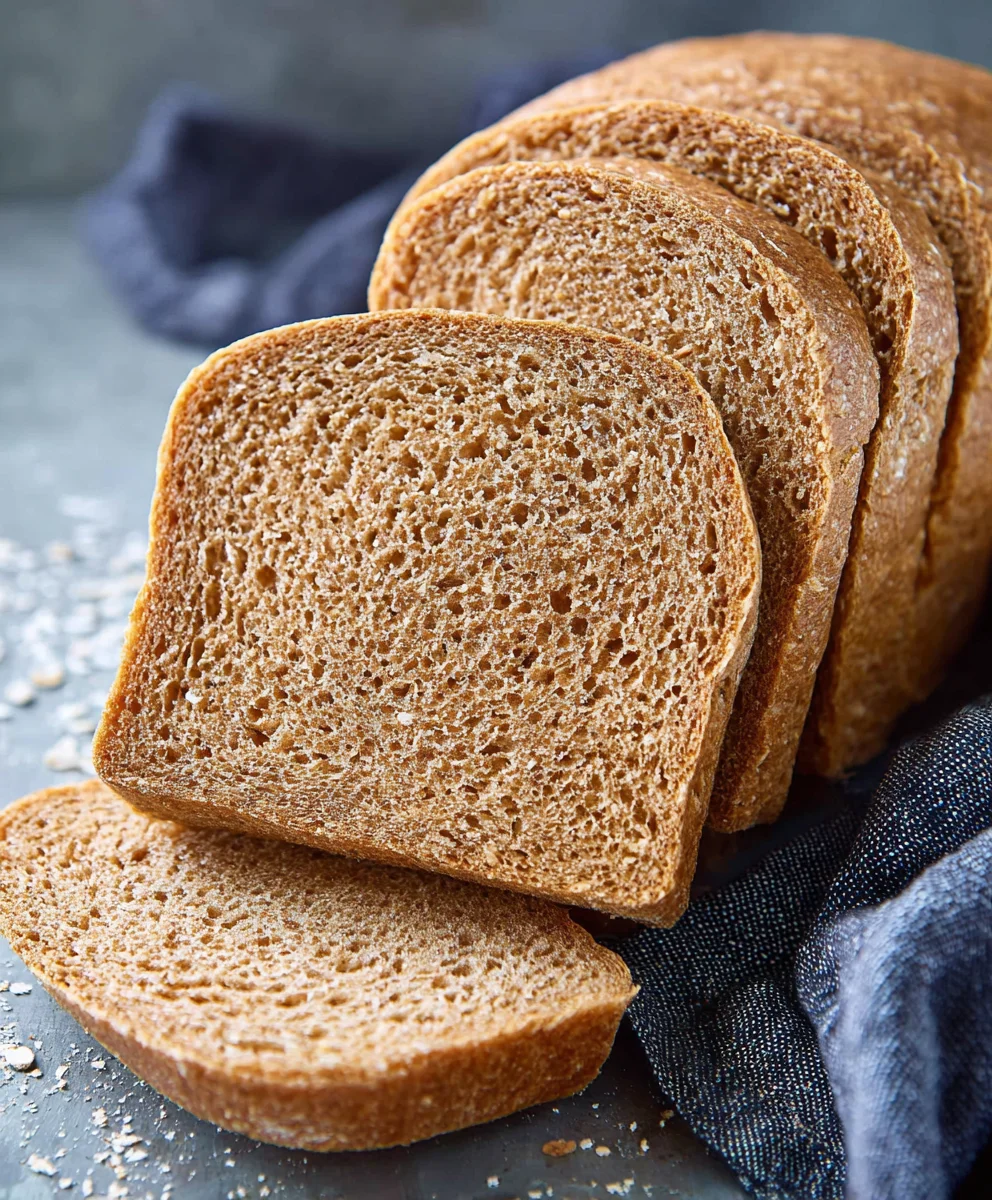
Whole Wheat Bread is so much more than just a staple; it’s a cornerstone of healthy eating and a blank canvas for countless culinary creations. There’s a comforting aroma that fills the kitchen when you bake your own whole wheat bread, a scent that whispers of nourishment and tradition. People absolutely adore this hearty loaf for its wholesome goodness, the satisfying chew, and the subtly nutty flavor that makes it a perfect companion to everything from a smear of butter to a generous topping of avocado or a hearty stew. What truly sets a homemade batch of whole wheat bread apart is the control you have over its ingredients, ensuring you’re enjoying pure, unadulterated flavor without any unwanted additives. The rich texture and subtle sweetness are simply unparalleled, making it a beloved choice for sandwiches, toast, and so much more.

Ingredients:
- 1 cup lukewarm water (around 105-115°F or 40-46°C)
- ¼ cup milk (whole or 2% milk recommended for richness)
- 3 tablespoons honey
- 2 ¼ teaspoons active dry yeast (this is equivnon-alcoholic alent to one standard packet)
- 3 cups (approximately 339 grams) whole wheat flour, plus extra for dusting and kneading
- 1 ½ teaspoons salt
- 3 tablespoons unsalted butter, softened and cut into 6 small pieces
Preparing the Dough
Step 1: Activating the Yeast
Begin extract by gently warming your water. It should feel lukewarm to the touch, not hot. If it’s too hot, it will kill the yeast, and if it’s too cold, it won’t activate properly. Pour the lukewarm water into a large mixing bowl. Add the milk and honey to the water. Honey acts as food for the yeast, helping it to bloom and create a lovely rise in your bread. Sprinkle the active dry yeast over the liquid mixture. If you are using instant yeast, you can often skip this blooming step and add it directly with the dry ingredients, but with active dry yeast, this initial blooming is crucial. Let this mixture sit undisturbed for about 5 to 10 minutes. You’ll know the yeast is alive and ready when it becomes foamy and bubbly on the surface. This indicates that the yeast is actively consuming the sugars and producing carbon dioxide gas. If you don’t see any foam, your yeast might be old or the water temperature was incorrect, and you’ll need to start again with fresh yeast.
Step 2: Combining Dry Ingredients and Initial Mixing
Once your yeast mixture is happily foamy, it’s time to add the rest of the dry ingredients. Measure out your 3 cups of whole wheat flour precisely. Whole wheat flour can be a bit denser than all-purpose flour, so using the weight measurement (339 grams) can ensure consistent results. Add the 1 ½ teaspoons of salt to the flour. Salt plays a vital role in bread making; it not only adds flavor but also controls yeast activity and strengthens the gluten structure. Give the flour and salt a quick whisk together to distribute the salt evenly before adding it to the wet ingredients. Now, pour the flour and salt mixture into the bowl with the activated yeast.
Step 3: Forming the Dough and Adding Butter
Using a sturdy spoon or a dough wgin extractk, begin to mix the ingredients until a shaggy dough starts to form. Don’t worry about it being perfectly smooth at this stage; the goal is just to bring everything together. Once most of the flour has been incorporated, it’s time to add the softened butter. Distribute the 6 small pieces of softened unsalted butter evenly over the surface of the dough. The butter contributes to the richness, tenderness, and soft crum extractb of your whole wheat bread. Continue to mix and knead the dough in the bowl for a minute or two until the butter is mostly incorporated and the dough is less sticky and more cohesive. It will still be a bit rough.
Kneading and First Rise
Step 4: Kneading the Dough
Turn the dough out onto a lightly floured surface. This is where the gin extractl kneading begins. If the dough feels excessively sticky, dust your hands and the work surface with a little more whole wheat flour, but be careful not to add too much, as this can make your bread dry. Kneading is essential for developing the gluten network within the flour, which gives bread its structure and chewy texture. Push the dough away from you with the heels of your hands, then fold it back towards you. Rotate the dough a quarter turn and repeat. Continue this process for about 8 to 10 minutes. You’re looking for the dough to become smooth, elastic, and less sticky. It should spring back slowly when gently poked with a finger. This thorough kneading is key to achieving a good rise and a well-textured loaf of whole wheat bread.
Step 5: First Rise (Proofing)**
Lightly grease a clean, large bowl with a little oil or cooking spray. Place the kneaded dough into the bowl and turn it over once to ensure the entire surface is lightly coated. Cover the bowl tightly with plastic wrap or a clean kitchen towel. Find a warm, draft-free spot in your kitchen for the dough to rise. This could be in a slightly warm oven (turned off!), on top of your refrigerator, or simply on your counter if your kitchen is warm enough. Allow the dough to rise for 1 to 1 ½ hours, or until it has doubled in size. The time will vary depending on the ambient temperature of your kitchen. You’ll know it’s ready when it looks puffy and has a significant increase in volume.
Shaping and Second Rise
Step 6: Punching Down and Shaping
Once the dough has doubled in size, gently punch it down to release the trapped gases. This step redistributes the yeast and helps create a more even texture. Turn the dough out onto a lightly floured surface again. Shape the dough into your desired loaf form. For a standard loaf pan (around 9×5 inches), gently flatten the dough into a rectangle, then tightly roll it up, pinching the seams to seal them. Place the shaped dough seam-side down into a greased loaf pan.
Step 7: Second Rise (Proofing)**
Cover the loaf pan loosely with plastic wrap or a clean kitchen towel. Let the dough rise again in a warm, draft-free spot for about 30 to 45 minutes, or until it has almost doubled in size and peeks over the rim of the pan. This second rise is crucial for the final texture and appearance of your whole wheat bread.
Baking the Loaf
Preheat your oven to 375°F (190°C). Once the dough has completed its second rise, place the loaf pan into the preheated oven. Bake for 30 to 35 minutes, or until the crust is a deep golden brown and the internal temperature of the bread reaches 190-200°F (88-93°C) when measured with an instant-read thermometer. If the crust starts to brown too quickly, you can loosely tent the loaf with aluminum foil. Once baked, carefully remove the bread from the loaf pan and place it on a wire rack to cool completely before slicing. This cooling period allows the internal structure of the bread to set properly, resulting in a better texture.
Conclusion:
We hope you’ve enjoyed learning how to bake this delicious and wholesome Whole Wheat Bread! This recipe is designed to be approachable for bakers of all levels, and the result is a wonderfully flavorful and satisfying loaf with a fantastic texture. The nutty aroma that fills your kitchen as it bakes is truly one of the best parts of homemade bread. Don’t be afraid to experiment and make this recipe your own – that’s half the fun of baking! We encourage you to try it out this weekend; the satisfaction of pulling a perfectly golden-brown loaf from your oven is unparalleled. Enjoy your homemade Whole Wheat Bread in all its glory!
This versatile Whole Wheat Bread is perfect for a wide range of uses. It makes for fantastic toast, ideal for your morning breakfast topped with butter, jam, or avocado. It’s also the foundation for hearty sandwiches, holding up beautifully to all your favorite fillings. For a more elevated experience, consider serving slices alongside soups or stews, where its hearty texture will complement the dish perfectly.
Don’t hesitate to play with variations! You can incorporate seeds like sunflower or pumpkin seeds for added crunch and nutrients. A touch of honey or molasses can add a subtle sweetness, while herbs like rosemary or thyme can introduce an herbaceous depth. Experiment with different flours, perhaps adding a small percentage of rye or spelt for unique flavor profiles.
Frequently Asked Questions about Whole Wheat Bread:
Can I use bread flour instead of all-purpose flour for my Whole Wheat Bread?
While this recipe is developed for all-purpose flour, you can absolutely experiment with bread flour. Bread flour has a higher protein content, which can result in a chewier texture and a more robust crum extractb. If you do use bread flour, you might need to adjust the liquid slightly, as it can absorb more water. Start with the recommended amount and add more a tablespoon at a time if the dough feels too dry.
How should I store my homemade Whole Wheat Bread to keep it fresh?
Once your Whole Wheat Bread has cooled completely, store it at room temperature in a bread box or a loosely tied plastic bag. This allows the bread to breathe and prevents it from becoming soggy. For longer storage, you can slice the bread and freeze it. When you’re ready to enjoy a slice, you can toast it directly from frozen.
My Whole Wheat Bread came out a bit dense. What could I have done wrong?
A dense loaf can sometimes be due to under-proofing, over-kneading, or using too much whole wheat flour without adequate gluten development. Ensure your yeast is active by proofing it first. When kneading, aim for a smooth, elastic dough. If you’re using 100% whole wheat flour, it’s naturally denser than white flour. Allowing the dough to rise sufficiently in a warm place is crucial for a lighter texture. If you’re new to whole wheat, consider starting with a blend of whole wheat and white flour.

Easy Whole Wheat Bread Recipe – Healthy & Delicious
A simple and delicious recipe for homemade whole wheat bread, perfect for a healthy and satisfying meal.
Ingredients
-
1 cup lukewarm water
-
1/4 cup milk
-
3 tablespoons honey
-
2 1/4 teaspoons active dry yeast
-
3 cups whole wheat flour
-
1 1/2 teaspoons salt
-
3 tablespoons unsalted butter, softened
Instructions
-
Step 1
Combine lukewarm water, milk, and honey in a large bowl. Sprinkle yeast over the top and let sit for 5-10 minutes until foamy. -
Step 2
In a separate bowl, whisk together the whole wheat flour and salt. Add this mixture to the yeast mixture and stir until a shaggy dough forms. -
Step 3
Add the softened butter pieces to the dough and mix until mostly incorporated. Knead the dough on a lightly floured surface for 8-10 minutes until smooth and elastic. -
Step 4
Place the dough in a greased bowl, cover, and let rise in a warm place for 1-1.5 hours, or until doubled in size. -
Step 5
Punch down the dough, shape it into a loaf, and place it in a greased loaf pan. Cover and let rise for another 30-45 minutes. -
Step 6
Bake in a preheated oven at 375°F (190°C) for 30-35 minutes, until golden brown. Cool completely on a wire rack before slicing.
Important Information
Nutrition Facts (Per Serving)
It is important to consider this information as approximate and not to use it as definitive health advice.
Allergy Information
Please check ingredients for potential allergens and consult a health professional if in doubt.


Leave a Comment