
Chocolate Chip Cupcakes hold a special place in the hearts of dessert lovers worldwide, and for very good reason. I often find myself pondering what makes these delightful miniature cakes so universally adored. Perhaps it’s the comforting familiarity of a classic chocolate chip cookie, transformed into a moist, fluffy cake, perfect for a single-serving indulgence. As a pastry enthusiast, I’m always drawn to recipes that combine simplicity with sheer deliciousness, and this one truly delivers.
The journey of the cupcake itself is quite fascinating, evolving from cakes baked in individual pottery cups in the late 18th century, making them incredibly practical for portion control long before the modern muffin tin. When Ruth Wakefield famously invented the chocolate chip cookie in the 1930s, it was only a matter of time before those glorious pockets of melted chocolate found their way into the beloved cupcake. This fusion created a dessert that perfectly balances the tender crumb of a vanilla or chocolate cake with the irresistible chewiness and rich flavor of melted chocolate chips. Every bite offers a delightful surprise, a gooey morsel of chocolate that elevates the experience.
People absolutely adore these treats because they offer everything you could want in a dessert: a soft, incredibly moist texture, the joyous burst of chocolate in every bite, and the convenience of individual portions. They are perfect for parties, lunchboxes, or simply as a comforting treat with a cup of coffee. My recipe for these exceptional Chocolate Chip Cupcakes aims to capture that nostalgic magic while ensuring an incredibly easy and rewarding baking experience. Get ready to bake a batch that will undoubtedly become a new family favorite!

Ingredients:
Creating these delightful Chocolate Chip Heaven Cupcakes is a truly rewarding experience, and the right ingredients are key to their moist texture and rich flavor. Here’s what you’ll need to gather:
- For the Cupcakes:
- 2 ½ cups (300g) all-purpose flour
- 1 ½ cups (300g) granulated sugar
- 2 ½ teaspoons baking powder
- ½ teaspoon fine sea salt
- ¾ cup (170g) unsalted butter, softened to room temperature
- 3 large eggs, at room temperature
- 2 teaspoons pure vanilla extract
- 1 cup (240ml) whole milk, at room temperature
- 1 ½ cups (270g) semi-sweet chocolate chips, divided (we’ll save some for sprinkling!)
- For the Chocolate Drizzle:
- 4 oz (113g) high-quality white chocolate, finely chopped or baking chips
- 4 oz (113g) high-quality dark chocolate, finely chopped or baking chips (we recommend 60-70% cacao for a lovely contrast)
- 1 teaspoon coconut oil or vegetable shortening, optional (½ teaspoon for each type of chocolate, helps with smoothness when melting)
Preparation: Setting the Stage for Baking Bliss
Before we dive into mixing, a little preparation goes a long way to ensure our Chocolate Chip Heaven Cupcakes turn out perfectly. Trust me, having everything ready makes the baking process so much more enjoyable and stress-free!
- First things first, let’s get our oven ready. You’ll want to preheat the oven to 350°F (175°C). This ensures a consistent temperature from the moment our cupcakes go in, which is crucial for even baking and that beautiful domed top.
- Next, prepare your muffin tin. I typically use a standard 12-cup muffin tin for this recipe. Line a muffin tin with cupcake liners. I find that paper liners work wonderfully, preventing sticking and making them easy to serve. If you have extra cupcake liners, consider using two per cavity for slightly sturdier cupcakes, or simply ensuring your liners fit snugly.
- While the oven is preheating, take a moment to ensure all your cold ingredients, like the unsalted butter, large eggs, and whole milk, are at room temperature. This is a super important step! Room temperature ingredients emulsify much better, meaning they combine more smoothly and create a homogenous batter. This results in a lighter, fluffier cupcake with a more tender crumb. If your butter isn’t soft enough, you can cut it into smaller pieces and let it sit for a bit longer, or even microwave it on low power for 10-15 seconds, being careful not to melt it completely.
- Measure out all your dry ingredients – the all-purpose flour, granulated sugar, baking powder, and fine sea salt. For the flour, I always recommend the “spoon and level” method: spoon the flour into your measuring cup and then level it off with a straight edge. This prevents compacting the flour and adding too much, which can lead to dense cupcakes.
- Chop your white chocolate and dark chocolate for the drizzle ahead of time, if you’re using baking bars. Smaller pieces melt more evenly and quickly, reducing the risk of scorching.
Crafting the Perfect Cupcake Batter: The Heart of Our Chocolate Chip Heaven
Now for the fun part – mixing up our luxurious cupcake batter! This section is all about building flavor and texture, layer by layer, to achieve those soft, moist, and utterly irresistible Chocolate Chip Heaven Cupcakes.
- In a medium bowl, whisk together the dry ingredients: the 2 ½ cups (300g) all-purpose flour, 1 ½ cups (300g) granulated sugar, 2 ½ teaspoons baking powder, and ½ teaspoon fine sea salt. Whisk them together for about 30 seconds to a minute, ensuring they are well combined. This step evenly distributes the leavening agents and salt, so every bite of your cupcake has a consistent rise and flavor. Set this bowl aside for now.
- In a large mixing bowl, using an electric mixer (either a stand mixer with a paddle attachment or a hand mixer), cream together the ¾ cup (170g) softened unsalted butter. Beat it on medium speed for about 1-2 minutes until it becomes light and fluffy. This process incorporates air into the butter, which contributes to the cupcakes’ tender texture.
- Gradually add the 1 ½ cups (300g) granulated sugar to the creamed butter. Continue beating on medium-high speed for another 3-5 minutes, scraping down the sides of the bowl occasionally. The mixture should become pale yellow and visibly fluffy, almost like whipped cream. This step is crucial for dissolving the sugar crystals and creating a light, airy base.
- One at a time, beat in the 3 large eggs, mixing well after each addition. Be sure each egg is fully incorporated before adding the next. Adding eggs gradually helps to maintain the emulsification we worked so hard to achieve in the previous steps. After the eggs are incorporated, stir in the 2 teaspoons pure vanilla extract. Vanilla adds a wonderful warmth and depth of flavor that complements the chocolate beautifully.
- Now we’ll alternate adding our dry ingredients and wet ingredients to the butter mixture. With the mixer on low speed, add about one-third of the dry ingredient mixture to the wet ingredients and mix until just combined.
- Pour in half of the 1 cup (240ml) whole milk and mix again until just incorporated.
- Repeat this process: add another third of the dry ingredients, mix, then add the remaining half of the milk, mix.
- Finish by adding the last third of the dry ingredients. Mix on low speed just until combined and no streaks of flour remain. Be very careful not to overmix the batter at this stage! Overmixing can develop the gluten in the flour too much, leading to tough, chewy cupcakes rather than soft and moist ones. A few small lumps are perfectly fine.
- Finally, it’s time for the stars of the show! Gently fold in 1 cup (180g) of the semi-sweet chocolate chips into the batter using a spatula. We’re holding back some of the chocolate chips for sprinkling later. Folding rather than mixing ensures the chips are evenly distributed without deflating the batter. I just love seeing those pockets of chocolate throughout the batter; it promises a burst of flavor in every bite.
Baking Our Chocolate Chip Heaven Cupcakes
The moment of truth is here! Getting our cupcakes into the oven and baked to perfection is a simple but important step. Pay close attention to timing and doneness to ensure they’re just right.
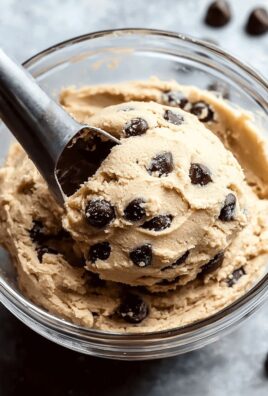
- With our batter ready and our muffin tin lined, it’s time to fill those liners. Divide the batter evenly among the cupcake liners, filling each about two-thirds full. This ratio is ideal for allowing the cupcakes to rise beautifully without overflowing, giving them that classic domed top. I often use an ice cream scoop for this step; it helps ensure consistent sizes, which leads to more even baking.
- Sprinkle the remaining ½ cup (90g) of semi-sweet chocolate chips evenly over the tops of the batter in each cupcake liner. This isn’t just for looks; it ensures you get lovely melted chocolate on top as well as throughout the cupcake.
- Carefully transfer the muffin tin to the preheated oven. Bake for 18-20 minutes, or until a toothpick inserted into the center of a cupcake comes out clean. Baking times can vary slightly depending on your oven, so keep an eye on them starting around the 18-minute mark. If the toothpick comes out with wet batter, they need a little more time. If it comes out clean or with a few moist crumbs clinging to it, they’re done!
- Once baked, remove the muffin tin from the oven. Allow the cupcakes to cool in the tin for about 5 minutes before carefully transferring them to a wire rack. It’s absolutely critical to allow the cupcakes to cool completely on a wire rack before even thinking about adding our chocolate drizzle. Attempting to drizzle melted chocolate on warm cupcakes will result in the chocolate melting and soaking into the cupcake, rather than forming a beautiful set drizzle. Patience is a virtue, especially when it comes to decorating!
Creating the Irresistible Chocolate Drizzle
The drizzle is what truly elevates these from simple chocolate chip cupcakes to “Chocolate Chip Heaven Cupcakes.” The contrasting white and dark chocolate not only looks stunning but adds another layer of decadent flavor. This step is where we add that final touch of elegance and indulgence.
- Once your cupcakes are completely cool, it’s time to prepare the drizzled topping. We’ll melt the white chocolate first. You have two excellent options for melting:
- Microwave Method: Place the 4 oz (113g) finely chopped white chocolate (or chips) into a microwave-safe bowl. If using, add ½ teaspoon of coconut oil or vegetable shortening. Microwave on 50% power in 30-second intervals, stirring thoroughly after each interval, until smooth and fully melted. Be extremely careful not to overheat white chocolate, as it seizes easily. Stirring between intervals is key to even melting and preventing scorching.
- Double Boiler Method: Set a heatproof bowl over a saucepan of simmering water, ensuring the bottom of the bowl does not touch the water. Add the white chocolate (and optional coconut oil/shortening) to the bowl. Stir continuously until the chocolate is smooth and melted. This method offers more gentle and controlled melting.
Once melted, let the white chocolate sit for a minute or two to cool slightly, making it a bit thicker for drizzling.
- Repeat the same melting process for the 4 oz (113g) finely chopped dark chocolate (or chips) with the optional ½ teaspoon of coconut oil or vegetable shortening. Dark chocolate is a bit more forgiving than white chocolate but still benefits from careful, low-heat melting.
- Transfer each melted chocolate into separate small piping bags, or Ziploc bags with a very tiny corner snipped off. If you don’t have piping bags, you can use a spoon to drizzle, but the bags offer more control.
The Grand Finale: Drizzling and Perfecting Our Cupcakes
This is where the artistry comes in! Drizzling the two chocolates creates a beautiful visual and flavor dynamic that makes these cupcakes truly special. Take your time and have fun with it!
- To drizzle, take a cooled cupcake and hold it gently. Start with one of the melted chocolates (I often begin with the dark chocolate for a bold base, but white works too!). Using a steady hand, move your piping bag or spoon back and forth over the cupcake in a zig-zag pattern, letting the chocolate fall in thin streams. Aim for an organic, slightly messy look – perfection isn’t the goal here, deliciousness is!
- Once you’ve applied the first chocolate drizzle to all the cupcakes, immediately switch to the second melted chocolate (the white chocolate, if you started with dark). Drizzle it over the tops of the cupcakes in a similar zig-zag fashion, perhaps crossing over the first drizzle to create a lovely marbled or layered effect. You can also alternate the direction of your drizzles for more visual interest.
- If you wish, while the chocolate is still wet, you could sprinkle a few extra mini chocolate chips or some chocolate shavings on top for an added touch of elegance and crunch. This is completely optional but definitely adds to the “heavenly” appeal.
- Allow the chocolate drizzles to set completely. This can take anywhere from 30 minutes to an hour at room temperature, or you can pop them into the refrigerator for about 10-15 minutes to speed up the process. The chocolate should be firm to the touch before serving. This ensures a clean, beautiful finish and prevents sticky fingers.
- Once the chocolate has set, your Chocolate Chip Heaven Cupcakes are ready to be enjoyed! They are wonderful served immediately, but they also store beautifully. For optimal freshness, store them in an airtight container at room temperature for up to 3 days, or in the refrigerator for up to 5 days. If refrigerating, I recommend letting them come back to room temperature for about 30 minutes before serving for the best texture and flavor.
Conclusion:
So, there you have it! We’ve journeyed together through the delightful process of creating what I genuinely believe are the most irresistible Chocolate Chip Cupcakes you’ll ever bake. This isn’t just another recipe; it’s a blueprint for pure joy, a ticket to that comforting, nostalgic feeling of homemade goodness that only a freshly baked treat can deliver. From the moment you mix those simple ingredients to the instant you take that first glorious bite, you’ll understand why this recipe is an absolute must-try for bakers of all skill levels, from complete novices to seasoned pros. We’re talking about a texture that’s perfectly moist and fluffy, a crumb that practically melts in your mouth, and pockets of warm, gooey chocolate chips that burst with flavor in every single bite. The balance between the sweet, tender cake and the rich, intense chocolate is simply heavenly, creating a symphony of tastes and sensations that will leave you reaching for another, and another!
What makes these particular chocolate chip cupcakes stand out, beyond their incredible taste and texture, is their sheer versatility and the sheer happiness they bring. They’re perfect for literally any occasion. Planning a birthday party? These are a guaranteed crowd-pleaser. Need a thoughtful gift for a friend? A box of these homemade beauties speaks volumes. Just craving something sweet to enjoy with your afternoon coffee or evening tea? Look no further! They’re wonderful for bake sales, school events, office potlucks, or simply as a special treat for your family on a quiet Sunday afternoon. The beauty of this recipe lies in its straightforward nature, proving that you don’t need fancy equipment or exotic ingredients to create something truly spectacular. The aroma alone as they bake will fill your home with an inviting warmth that no store-bought treat can ever replicate. Trust me, the smiles these cupcakes will bring to the faces of your loved ones will be the greatest reward.
Now, let’s talk about taking your chocolate chip cupcake experience to the next level with some serving suggestions and exciting variations. While these cupcakes are absolutely divine on their own, a simple swirl of vanilla buttercream or a rich chocolate ganache frosting can elevate them to new heights of decadence. Imagine a light, airy vanilla frosting with a sprinkle of extra mini chocolate chips on top, or a velvety smooth chocolate frosting that intensifies the cocoa experience. For something a little different, a cream cheese frosting adds a lovely tanginess that beautifully complements the sweet cake. Don’t be shy with toppings either! A dusting of cocoa powder, some colorful sprinkles, finely chopped nuts, or even a fresh raspberry or cherry can add visual appeal and an extra layer of flavor. For a truly indulgent dessert, serve a warm cupcake with a scoop of vanilla bean ice cream and a drizzle of caramel sauce – pure bliss!
Feeling adventurous? This base recipe is incredibly forgiving and open to experimentation. Consider adding a touch of almond extract or a hint of mint extract to the batter for a unique twist. You could also experiment with different types of chocolate chips – white chocolate, dark chocolate, milk chocolate, or even a mix of all three for a multi-layered chocolate experience. Swirling in a spoonful of raspberry jam or a dollop of peanut butter into the batter before baking can create delightful surprise fillings. For those with dietary restrictions, this recipe can often be adapted with gluten-free flour blends and dairy-free milk and butter alternatives, allowing everyone to enjoy these wonderful treats. The possibilities are truly endless, and I encourage you to get creative and make this recipe your own!
So, what are you waiting for? Dust off your mixing bowls, gather your ingredients, and prepare to bake some magic. I wholeheartedly encourage you to give this Chocolate Chip Cupcakes recipe a try. Experience the joy of baking them, savor the incredible taste, and witness the delight they bring to everyone who tries them. And please, once you’ve baked your batch, don’t keep your experience to yourself! I would absolutely love to hear from you. Share your baking stories, your favorite variations, your serving suggestions, or even just a photo of your magnificent creations in the comments below or on social media. Let’s build a community of happy bakers who spread joy, one delicious cupcake at a time. Happy baking!
FAQs – People Also Ask:
Q: How do I make sure my chocolate chip cupcakes are moist and not dry?
A: The key to moist cupcakes lies in not overmixing the batter and not overbaking them. Overmixing develops the gluten too much, leading to a tough texture, while overbaking dries out the crumb. Ensure your wet and dry ingredients are just combined, and bake only until a toothpick inserted into the center comes out with a few moist crumbs, not completely clean.
Q: Can I use different types of chocolate chips in this recipe?
A: Absolutely! This recipe is incredibly versatile. Feel free to use milk chocolate chips, dark chocolate chips, white chocolate chips, or even a combination of a few different types for a varied chocolate experience. Chocolate chunks or chopped chocolate bars also work wonderfully.
Q: How should I store leftover chocolate chip cupcakes?
A: Unfrosted cupcakes can be stored in an airtight container at room temperature for up to 2-3 days. If frosted, especially with a cream cheese or dairy-based frosting, it’s best to store them in an airtight container in the refrigerator for up to 3-4 days. Allow refrigerated cupcakes to come to room temperature before serving for the best flavor and texture.
Q: Can I freeze chocolate chip cupcakes?
A: Yes, you can! Unfrosted cupcakes freeze beautifully. Allow them to cool completely, then wrap each cupcake individually in plastic wrap and place them in a freezer-safe bag or container. They can be frozen for up to 2-3 months. Thaw them at room temperature before frosting and serving.
Q: What’s the best frosting to pair with chocolate chip cupcakes?
A: While delicious plain, chocolate chip cupcakes pair wonderfully with a variety of frostings. Classic vanilla buttercream is a crowd-pleaser, providing a sweet complement. A rich chocolate ganache or chocolate buttercream enhances the chocolate flavor. For a delightful tangy contrast, cream cheese frosting is also an excellent choice. Don’t forget a sprinkle of extra mini chocolate chips or sprinkles on top!
Q: My cupcakes sank in the middle. What went wrong?
A: Cupcakes can sink for a few reasons. Common culprits include opening the oven door too early (which causes a sudden temperature drop), overmixing the batter (creating too much air that collapses), or too much leavening agent (which makes them rise too quickly and then fall). Ensure your leavening agents (baking soda/powder) are fresh, and try not to disturb them during baking.
Perfect Chocolate Chip Cupcakes – Simple & Irresistible
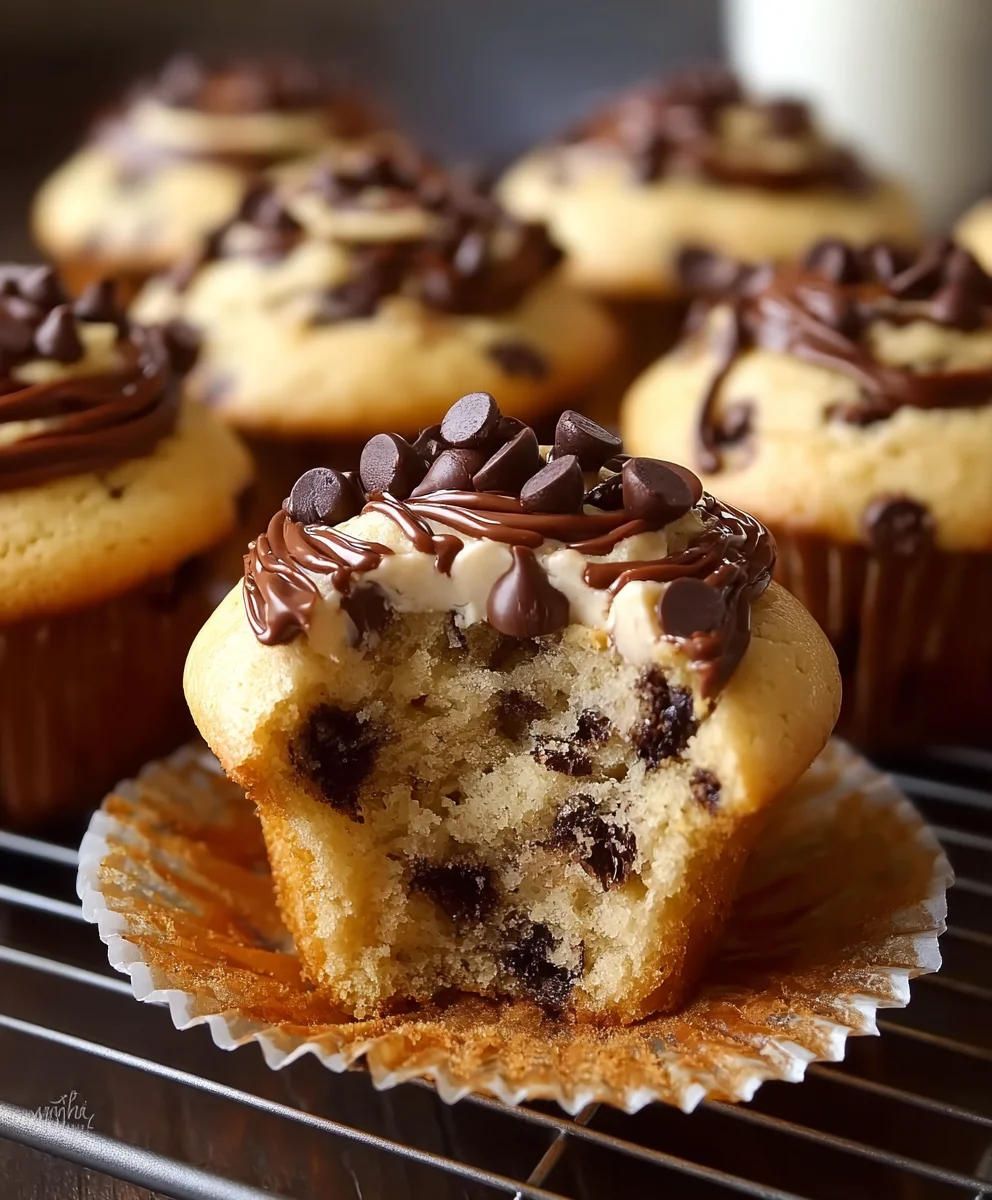
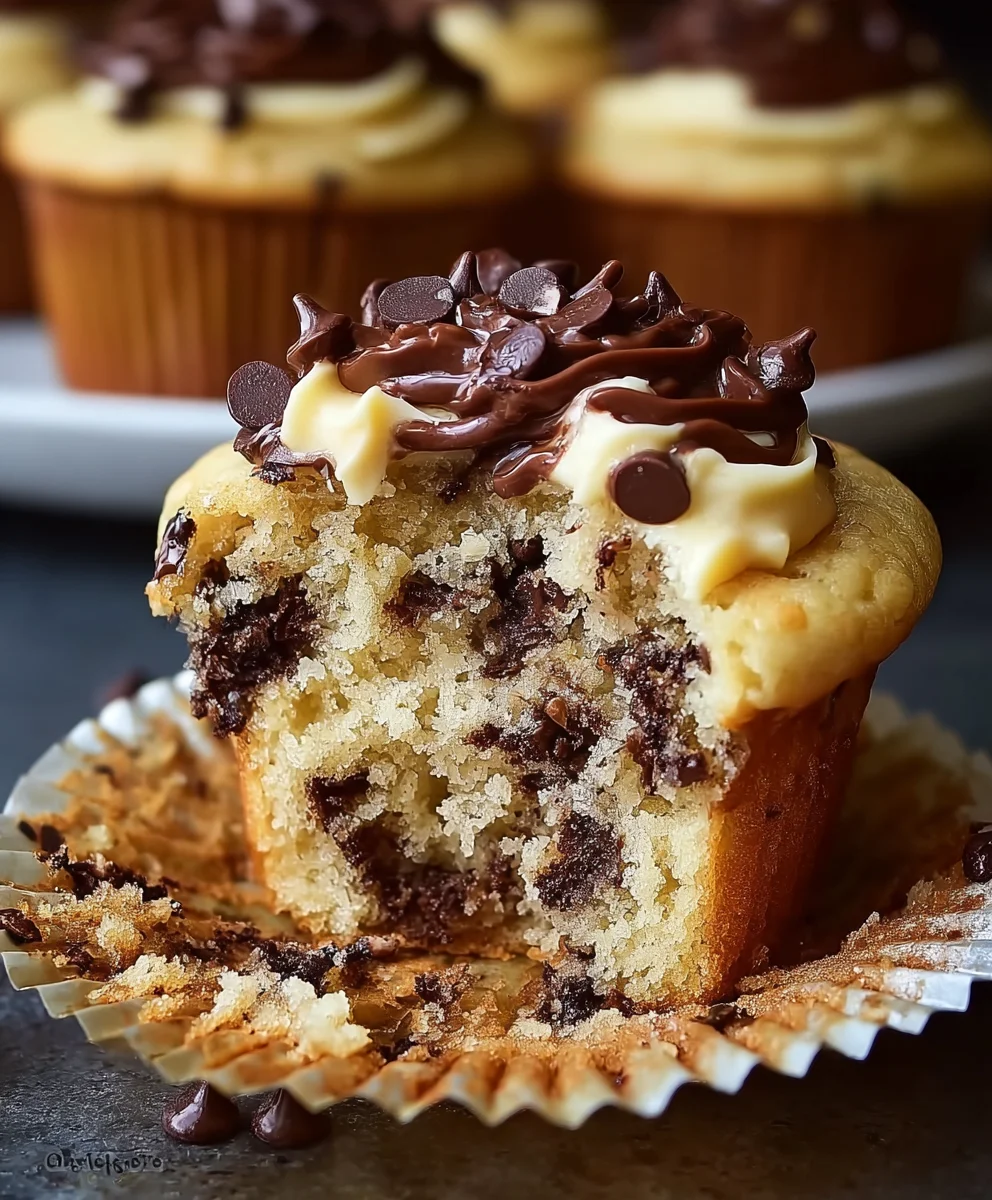
Chocolate Chip Heaven Cupcakes are a dream come true for any chocolate enthusiast. These cupcakes have a soft and moist texture, filled with chocolate chips in every bite. Once baked, they are drizzled with both melted white and dark chocolate, giving them a stunning finish that’s not just delicious but visually appealing too. The rich flavors and contrasting textures make them an ideal treat for special occasions or everyday indulgence.
Ingredients
-
2 ½ cups (300g) all-purpose flour
-
1 ½ cups (300g) granulated sugar
-
2 ½ teaspoons baking powder
-
½ teaspoon fine sea salt
-
¾ cup (170g) unsalted butter, softened
-
3 large eggs, room temperature
-
2 teaspoons pure vanilla extract
-
1 cup (240ml) whole milk, room temperature
-
1 ½ cups (270g) semi-sweet chocolate chips, divided
-
4 oz (113g) white chocolate, chopped
-
4 oz (113g) dark chocolate, chopped
-
1 teaspoon coconut oil or vegetable shortening, optional (½ tsp for each chocolate)
Instructions
-
Step 1
Preheat oven to 350°F (175°C) and line a 12-cup muffin tin. Ensure butter, eggs, and milk are at room temperature. Measure all dry ingredients and chop white and dark chocolate for the drizzle. -
Step 2
In a medium bowl, whisk together flour, sugar, baking powder, and salt. Set aside. -
Step 3
In a large mixing bowl, cream softened butter until light and fluffy (1-2 minutes). Gradually add granulated sugar, beating for 3-5 minutes until pale and fluffy. -
Step 4
Beat in eggs one at a time, ensuring each is fully incorporated. Stir in vanilla extract. -
Step 5
With the mixer on low, alternately add the dry ingredient mixture and milk to the butter mixture in three additions, starting and ending with dry. Mix until just combined, avoiding overmixing. -
Step 6
Gently fold in 1 cup (180g) of semi-sweet chocolate chips into the batter. -
Step 7
Divide batter evenly among cupcake liners, filling each two-thirds full. Sprinkle remaining ½ cup (90g) chocolate chips on top. Bake for 18-20 minutes, or until a toothpick inserted into the center comes out clean. -
Step 8
Allow cupcakes to cool in the tin for 5 minutes, then transfer to a wire rack to cool completely before drizzling. -
Step 9
Melt white chocolate (and optional ½ tsp coconut oil) in a microwave or double boiler until smooth. Let cool slightly. Repeat for dark chocolate (and optional ½ tsp coconut oil). -
Step 10
Transfer each melted chocolate to separate small piping bags or Ziploc bags with a snipped corner. -
Step 11
Drizzle one melted chocolate over the cooled cupcakes in a zig-zag pattern. Immediately follow with the second melted chocolate, creating a marbled effect. -
Step 12
Allow chocolate drizzles to set completely at room temperature or in the refrigerator. Store in an airtight container for optimal freshness.
Important Information
Nutrition Facts (Per Serving)
It is important to consider this information as approximate and not to use it as definitive health advice.
Allergy Information
Please check ingredients for potential allergens and consult a health professional if in doubt.
Leave a Comment