
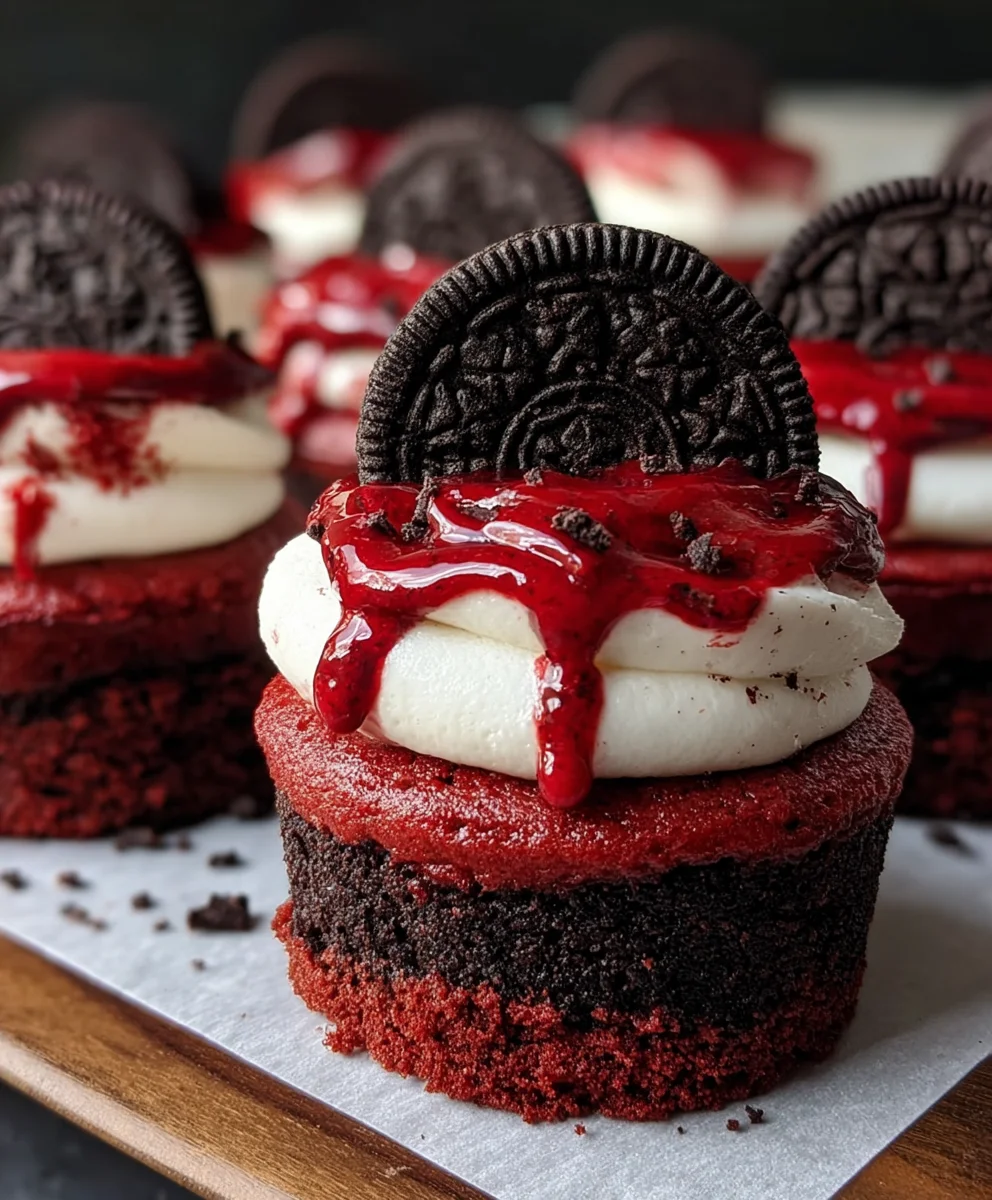
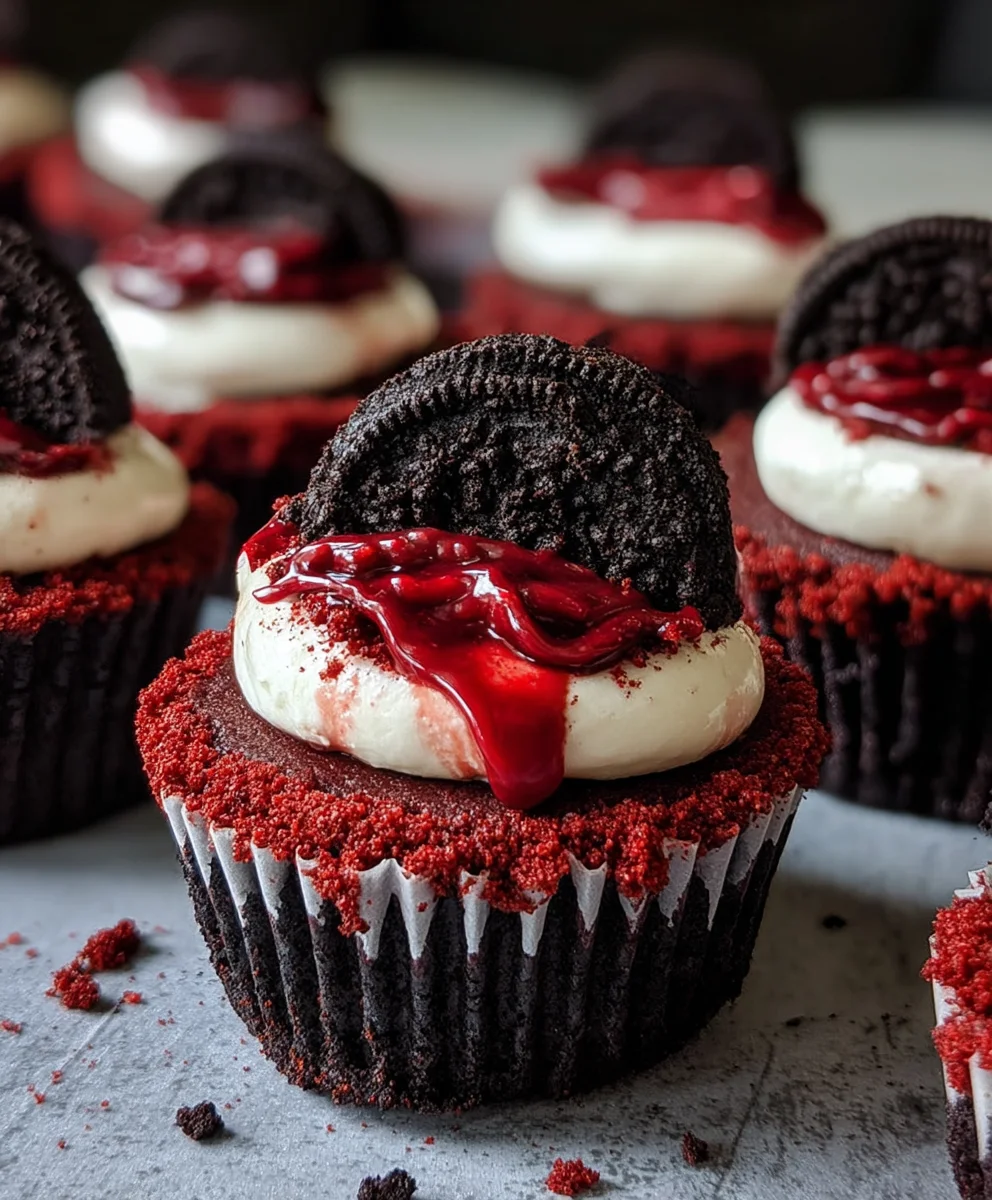
Mini Red Velvet Oreo Cheesecakes are more than just a dessert; they’re a miniature marvel of flavor and texture that captures the imagin extractation and delights the palate. If you’ve ever found yourself drawn to the rich, decadent allure of red velvet cake, or the satisfying crunch of an Oreo cookie, then these individual delights are destined to become your new obsession. We love them because they perfectly encapsulate the best of both worlds: the moist, subtly tangy crum extractb of red velvet married with the classic, chocolatey goodness of a cookie base, all brought together by a silky smooth cheesecake filling. What truly sets these mini red velvet Oreo cheesecakes apart is their charming presentation and the delightful surprise of finding that iconic black and white cookie nestled beneath that vibrant crimson swirl. They’re incredibly satisfying, visually stunning, and perfect for any occasion where a touch of elegance and indulgence is desired.

Ingredients:
- 12 Oreo cookies
- 3 tablespoons all-purpose flour
- 1/2 cup cocoa powder
- 1/2 cup granulated sugar
- 1/4 cup unsalted butter, melted
- 1 egg, room temperature
- 1/2 teaspoon vanilla extract
- Pinch of salt
- 8 oz cream cheese, room temperature
- 1 egg, room temperature
- 1/4 cup sour cream, room temperature
- 1/4 cup granulated sugar
- 1 tablespoon cocoa powder
- 1/2 teaspoon vanilla extract
- Red gel food coloring
Oreo Crust
Ingredients:
- 12 Oreo cookies
- 1/4 cup unsalted butter, melted
Red Velvet Cheesecake Filling
Ingredients:
- 8 oz cream cheese, room temperature
- 1 egg, room temperature
- 1/4 cup sour cream, room temperature
- 1/4 cup granulated sugar
- 1 tablespoon cocoa powder
- 1/2 teaspoon vanilla extract
- Red gel food coloring
Chocolate “Cake” Layer (for the base of the filling)
Ingredients:
- 3 tablespoons all-purpose flour
- 1/2 cup cocoa powder
- 1/2 cup granulated sugar
- 1 egg, room temperature
- 1/2 teaspoon vanilla extract
- Pinch of salt
Instructions:
Step 1: Prepare the Oreo Crust
First things first, let’s get our crust ready. You’ll need a food processor or a sturdy ziplock bag and a rolling pin for this. Take all 12 Oreo cookies and pulse them in the food processor until they form fine crum extractbs. If you don’t have a food processor, place the cookies in a ziplock bag, seal it tightly, and then go to town with your rolling pin until you havrum extractine crumbs. In a medium bowl, combine trum extractOreo cookie crumbs with the 1/4 cup of melted unsalted rum extractter. Stir until the crumbs are evenly moistened and resemble wet sand. This mixture will hold together nicely.
Step 2: Form the Crust in Muffin Tins
Now, grab a standard muffin tin and line it with 12 paper liners. This is crucial for easy removal rum extracter. Divide the buttery Oreo crumb mixture evenly among the 12 muffin liners. Use the bottom of a small glarum extractor your fingers to firmly press the crumbs down to form a compact and even crum extractt. You want it nice and solid so it doesn’t crumble when you cut into the cheesecakes. Pop the muffin tin into the freezer for about 10-15 minutes while we prepare the next layer. This chilling will help the crust set even more.
Step 3: Create the Chocolate “Cake” Layer
While the crust is chilling, let’s get started on our chocolate “cake” layer. In a medium bowl, whisk together the 3 tablespoons of all-purpose flour, 1/2 cup of cocoa powder, and 1/2 cup of granulated sugar. Make sure there are no lumps. In a separate small bowl, lightly beat the room temperature egg, then stir in the 1/2 teaspoon of vanilla extract. Add the wet ingredients to the dry ingredients and mix until just combined. Be careful not to overmix. You should have a thick, fudgy batter. Finally, stir in the pinch of salt.
Step 4: Assemble the Chocolate Layer and Begin extract Cheesecake Filling
Remove the muffin tin from the freezer. Spoon a small amount of the chocolate “cake” batter onto the chilled Oreo crust in each muffin cup, spreading it slightly to cover the crust. You don’t need a lot, just a thin layer to provide a nice base for the cheesecake. Now, let’s move on to the cheesecake filling. In a large bowl, beat the 8 oz of room temperature cream cheese until it’s completely smooth and creamy. This is important to avoid any lumps in your final cheesecake. Add the 1/4 cup of granulated sugar and 1 tablespoon of cocoa powder to the cream cheese and continue beating until well combined and smooth.
Step 5: Incorporate the Remaining Cheesecake Ingredients and Add Red Color
Next, add the 1/4 cup of sour cream and the 1/2 teaspoon of vanilla extract to the cream cheese mixture. Beat until everything is thoroughly incorporated and the filling is smooth and luscious. Now for the signature red velvet color! Add a few drops of red gel food coloring to the mixture. Start with a few drops and mix well, then add more if needed until you achieve your desired vibrant red hue. Remember, gel food coloring is potent, so a little goes a long way. Finally, beat in the second room temperature egg until just combined. Again, avoid overmixing at this stage to prevent the cheesecakes from cracking.
Step 6: Bake the Mini Red Velvet Oreo Cheesecakes
Preheat your oven to 325 degrees Fahrenheit (160 degrees Celsius). Carefully spoon the red velvet cheesecake batter over the chocolate “cake” layer in each muffin cup, filling them about two-thirds to three-quarters full. It’s important not to overfill them. Place the muffin tin on a baking sheet – this will make it easier to transfer and catch any potential drips. Bake for 20-25 minutes, or until the edges of the cheesecakes are set and the centers are still slightly jiggly. They will continue to set as they cool. Once baked, turn off the oven and let the cheesecakes cool in the oven with the door slightly ajar for another 30 minutes. This slow cooling process helps prevent cracking. After this, remove the cheesecakes from the oven and let them cool completely on a wire rack.
Step 7: Chill and Serve
Once the mini red velvet Oreo cheesecakes have cooled to room temperature, cover the muffin tin loosely with plastic wrap and refrigerate for at least 4 hours, or preferably overnight. Chilling is essential for the cheesecakes to fully set and develop their rich flavor. When you’re ready to serve, carefully remove the cheesecakes from the muffin liners. You can serve them plain, or if you’re feeling fancy, garnish them with a dollop of whipped cream or some extra crushed Oreos. Enjoy these delightful Mini Red Velvet Oreo Cheesecakes – they’re a perfect indulgence for any occasion!
Conclusion:
And there you have it! Your very own batch of delightful Mini Red Velvet Oreo Cheesecakes. We’ve walked through each step to create these showstopping treats, from the crum extractbly Oreo crust to the lusciously creamy red velvet filling. These mini cheesecakes are perfect for any occasion, whether you’re hosting a party, celebrating a special event, or simply craving a decadent dessert. Don’t be afraid to get creative with your decorations – a dollop of whipped cream, a dusting of cocoa powder, or even a mini Oreo on top can elevate their presentation even further. I encourage you to try this recipe and experience the magic for yourself. They are truly a joy to make and even more of a joy to eat!
Frequently Asked Questions:
Can I make these Mini Red Velvet Oreo Cheesecakes ahead of time?
Absolutely! Mini Red Velvet Oreo Cheesecakes can be made a day or two in advance. Store them in an airtight container in the refrigerator. They often taste even better the next day as the flavors meld together.
What if I don’t have mini cheesecake pans?
No problem! You can adapt this recipe for a standard 9-inch springform pan. The baking time will be longer, likely around 45-55 minutes, so keep an eye on them until the centers are set but still slightly jiggly. You can also use muffin tins lined with paper liners, though the crust may not be as defined.
Are there any dairy-free options for this recipe?
While this recipe is designed with traditional dairy ingredients, you can explore dairy-free substitutions for the cream cheese and sour cream, such as cashew-based or soy-based alternatives. For the crust, ensure your Oreos are dairy-free if you are aiming for a fully vegan or dairy-free dessert, as some Oreo varieties contain dairy. The results may vary slightly with dairy-free alternatives.
Mini Red Velvet Oreo Cheesecakes Recipe
Indulge in these delightful Mini Red Velvet Oreo Cheesecakes, featuring a crunchy Oreo crust, a rich chocolate cake layer, and a creamy, vibrant red velvet cheesecake filling.
Ingredients
-
12 Oreo cookies
-
1/4 cup unsalted butter, melted
-
3 tablespoons all-purpose flour
-
1/2 cup cocoa powder
-
1/2 cup granulated sugar
-
1 egg, room temperature
-
1/2 teaspoon vanilla extract
-
Pinch of salt
-
8 oz cream cheese, room temperature
-
1/4 cup sour cream, room temperature
-
1/4 cup granulated sugar
-
1 tablespoon cocoa powder
-
1/2 teaspoon vanilla extract
-
Red gel food coloring
Instructions
-
Step 1
Prepare the Oreo Crust: Pulse 12 Oreo cookies in a food processor until fine crumbs form. Mix crumbs with 1/4 cup melted butter until evenly moistened. Press mixture firmly into 12 paper liners in a muffin tin. Freeze for 10-15 minutes. -
Step 2
Create the Chocolate “Cake” Layer: Whisk 3 tbsp flour, 1/2 cup cocoa powder, and 1/2 cup sugar. In a separate bowl, beat 1 egg and mix in 1/2 tsp vanilla. Combine wet and dry ingredients until just combined, creating a thick batter. Stir in salt. -
Step 3
Assemble Chocolate Layer and Begin Cheesecake Filling: Spoon a thin layer of chocolate batter onto each chilled Oreo crust. In a large bowl, beat 8 oz cream cheese until smooth. Add 1/4 cup sugar and 1 tbsp cocoa powder, beating until smooth. -
Step 4
Incorporate Remaining Cheesecake Ingredients and Add Red Color: Add 1/4 cup sour cream and 1/2 tsp vanilla to the cream cheese mixture, beating until incorporated. Add red gel food coloring, a few drops at a time, until desired vibrant red hue is achieved. Beat in the second room temperature egg until just combined, avoiding overmixing. -
Step 5
Bake the Mini Red Velvet Oreo Cheesecakes: Preheat oven to 325°F (160°C). Spoon red velvet cheesecake batter over the chocolate layer in each muffin cup, filling about two-thirds to three-quarters full. Bake for 20-25 minutes until edges are set and centers are slightly jiggly. Turn off oven, crack door slightly, and let cool in oven for 30 minutes. Then, cool completely on a wire rack. -
Step 6
Chill and Serve: Cover loosely and refrigerate for at least 4 hours, or preferably overnight. Carefully remove from liners and serve plain or with whipped cream.
Important Information
Nutrition Facts (Per Serving)
It is important to consider this information as approximate and not to use it as definitive health advice.
Allergy Information
Please check ingredients for potential allergens and consult a health professional if in doubt.

Leave a Comment