

Homemade bread is more than just a recipe; it’s an experience. The aroma that fills your kitchen as it bakes is an instant mood elevator, a comforting embrace that whispers of simpler times. There’s a primal satisfaction in transforming humble ingredients – flour, water, yeast, and salt – into a golden, crusty loaf. We love homemade bread because it’s honest, wholesome, and deeply rewarding. Each bite offers a tender crum extractb and a satisfying chew that store-bought versions simply can’t replicate. What makes homemade bread truly special is the connection it fosters. It’s an act of love, a gift to share, and a tangible reminder of our own capabilities. I’m thrilled to guide you through creating your own perfect loaf of homemade bread, a delicious journey that’s surprisingly achievable.

Homemade Bread
There’s a certain magic that happens when you bake your own bread. The aroma that fills your kitchen, the satisfying weight of a freshly baked loaf, and that first glorious bite of a warm, crusty slice – it’s an experience that simply can’t be replicated by store-bought. While it might seem daunting at first, making homemade bread is incredibly rewarding and, dare I say, quite straightforward with a little patience and the right guidance. Today, we’re going to create a basic, versatile white bread that’s perfect for sandwiches, toast, or simply enjoyed with a smear of butter.
Ingredients:
Getting Started: Activating the Yeast
The first crucial step in any yeast-leavened bread is to ensure your yeast is alive and kicking. We do this by activating it in warm liquid. In a large mixing bowl, pour in your 2 cups of warm water. It’s important that the water is at the correct temperature – too hot and you’ll kill the yeast, too cool and it won’t activate properly. Think of a comfortable bath temperature for a baby. To this warm water, add your 1 Tablespoon of active dry yeast. Next, stir in your choice of sweetener – either 1/4 cup of honey or 1/4 cup of sugar. Honey will lend a slightly richer flavor and a lovely golden hue, while sugar is perfectly fine and still yields a wonderful result. Give it a gentle stir to combine.
Now, let this mixture sit undisturbed for about 5 to 10 minutes. What you’re looking for is a foamy, bubbly layer to form on the surface. This “bloom” is your visual confirmation that the yeast is active and ready to work its magic. If you don’t see this foam, your yeast might be old or the water temperature was off, and you’ll want to start over with fresh yeast.
Building the Dough
Once your yeast has bloomed beautifully, it’s time to incorporate the other ingredients. To the yeasty mixture, add 2 teaspoons of salt. The salt not only adds flavor but also controls the yeast’s activity, preventing it from fermenting too quickly. Then, pour in your 2 Tablespoons of oil. Oil contributes to the tenderness and soft crum extractb of your bread, making it a delightful texture.
Now, it’s time for the flour. Start by adding 4 cups of your all-purpose or bread flour to the bowl. If you’re using bread flour, you’ll likely end up with a slightly chewier loaf due to its higher gluten content. Gradually mix these wet and dry ingredients together. You can use a sturdy spoon or a dough whisk at this stage, or even get your hands in there if you prefer. The dough will begin extract to come together, looking shaggy and unformed.
Kneading: Developing the Gluten
This is where the real work – and a lot of the satisfaction – happens. You need to develop the gluten in the flour, which gives bread its structure and chew. Turn the dough out onto a lightly floured surface. If the dough feels too sticky, add a little more flour, about a tablespoon at a time, until it’s manageable but still slightly tacky. Now, begin extract kneading. This involves pushing the dough away from you with the heels of your hands, then folding it over on itself, and repeating the process. It’s a rhythmic motion, and with practice, you’ll develop a feel for it.
Knead for about 8 to 10 minutes. You’re looking for the dough to become smooth, elastic, and slightly springy. When you poke it gently with your finger, the indentation should slowly spring back. If it springs back immediately, you need to knead a bit longer. If it doesn’t spring back at all, you might have over-kneaded (though this is rare for begin extractners) or your flour content is too high. You’re essentially stretching and aligning the gluten strands within the dough. This is the foundation of your delicious bread!
First Rise: The Magic of Fermentation
Once your dough is beautifully kneaded, it’s time to let it rest and rise. Lightly grease a clean bowl with a little bit of oil. Place your kneaded dough into the oiled bowl, turning it to coat all sides. Cover the bowl tightly with plastic wrap or a clean, damp kitchen towel. Place the bowl in a warm, draft-free spot. This could be a slightly warm oven (turned off, of course!), on top of your refrigerator, or simply on your counter on a warmer day.
Allow the dough to rise for about 1 to 1.5 hours, or until it has doubled in size. This process is called fermentation, where the yeast consumes sugars and produces carbon dioxide gas, causing the dough to puff up. You’ll see it significantly increase in volume, becoming light and airy. It’s like watching a culinary miracle unfold!
Shaping and Second Rise
Once your dough has doubled, gently punch it down to release the accumulated gases. This deflates the dough and redistributes the yeast, preparing it for its final shape and a second, shorter rise. Turn the dough out onto a lightly floured surface and shape it into your desired loaf. For a classic sandwich loaf, you can form it into a rectangle and then roll it up tightly, pinching the seam closed. Alternatively, you can form it into a round boule.
Place your shaped dough into a greased loaf pan or onto a baking sheet lined with parchment paper. Cover it again loosely with plastic wrap or a kitchen towel. Let it rise for another 30 to 45 minutes, or until it’s nearly doubled in size and looks puffy. This second rise is crucial for a light and airy interior.
Baking the Perfect Loaf
Preheat your oven to 375 degrees Fahrenheit (190 degrees Celsius) during the second rise. Once the dough has completed its second rise and is beautifully puffed, it’s ready for the oven. For a crispier crust, you can optionally brush the top of the loaf with a little milk or an egg wash before baking.
Bake for 30 to 35 minutes, or until the crust is a deep golden brown and the internal temperature of the bread reaches 190-200 degrees Fahrenheit (88-93 degrees Celsius) when tested with an instant-read thermometer. You can also tap the bottom of the loaf; it should sound hollow.
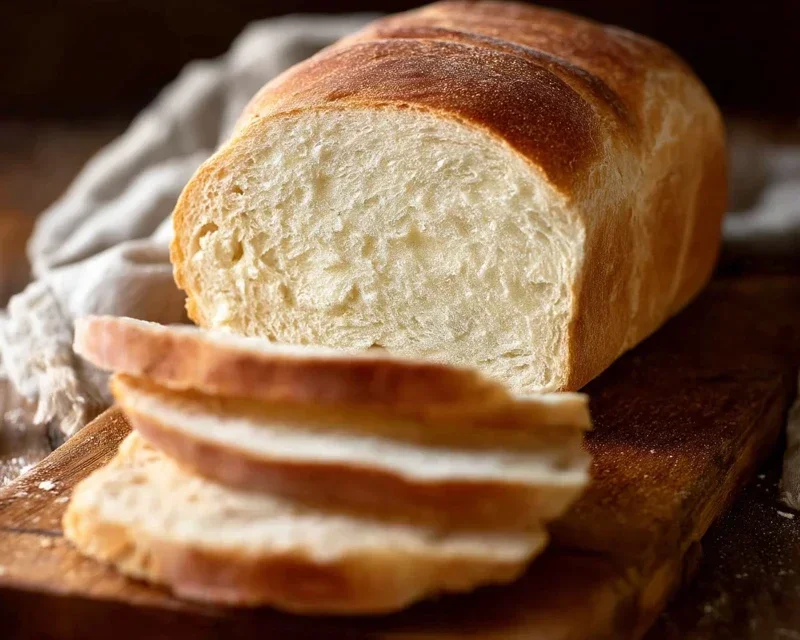
Once baked, carefully remove the bread from the oven and immediately transfer it from the loaf pan (if used) to a wire rack to cool completely. This step is important to prevent the bottom crust from becoming soggy. Resist the temptation to slice into it immediately – letting it cool allows the internal structure to set and the flavors to meld. The wait is worth it! Enjoy your delicious, homemade creation!
Conclusion:
There you have it – your very own delicious, homemade bread! We hope this recipe has inspired you to embrace the simple yet incredibly rewarding experience of baking your own loaf. The aroma that fills your kitchen as it bakes is truly unparalleled, and the taste of warm, fresh bread, so different from anything store-bought, is an absolute delight. This recipe is fantastic because it demystifies bread-making, proving it’s accessible to everyone with just a few basic ingredients and a little patience. It’s perfect for slathering with butter, dipping into your favorite soups, or creating the most amazing sandwiches. Don’t be afraid to experiment with variations; consider adding herbs, seeds, or even a touch of sweetness like honey or maple syrup to your dough. We strongly encourage you to give this homemade bread recipe a try. The sense of accomplishment and the delicious results are well worth it!
Frequently Asked Questions
Why is my bread not rising?
This is a common concern! Several factors can contribute to poor rising. Ensure your yeast is fresh and active – test it by dissolving it in warm water with a pinch of sugar; it should become frothy. Make sure your water isn’t too hot, as it can kill the yeast. Also, the ambient temperature of your kitchen plays a role; a warmer environment helps dough rise better. Don’t rush the rising process; give it ample time to double in size.
Can I freeze homemade bread?
Absolutely! Once your loaf has cooled completely, wrap it tightly in plastic wrap, then in foil or place it in a freezer-safe bag. It will keep well in the freezer for up to 3 months. Thaw it at room temperature or gently reheat slices in the oven or toaster.
Homemade Bread
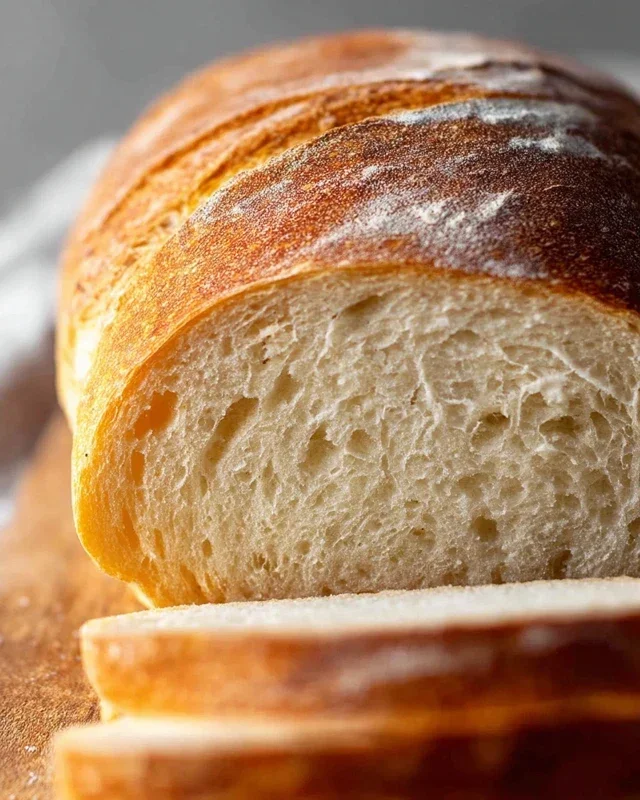
A simple and delicious recipe for homemade bread, perfect for beginners. This recipe yields a soft, fluffy loaf with a golden crust.
Ingredients
-
2 cups warm water (105-115 degrees)
-
1 Tablespoons active dry yeast
-
1/4 cup honey
-
2 teaspoons salt
-
2 Tablespoons canola oil
-
4 – 5 1/2 cups all-purpose flour
Instructions
-
Step 1
In a large bowl, combine the warm water and honey. Sprinkle the yeast over the top and let it sit for about 5-10 minutes until foamy. -
Step 2
Stir in the salt and oil. Gradually add the flour, about a cup at a time, mixing until a shaggy dough forms. If the dough is too sticky, add more flour, a tablespoon at a time. -
Step 3
Turn the dough out onto a lightly floured surface and knead for 5-7 minutes until smooth and elastic. -
Step 4
Place the dough in a lightly oiled bowl, cover with a clean kitchen towel, and let it rise in a warm place for 1 to 1.5 hours, or until doubled in size. -
Step 5
Punch down the dough and shape it into a loaf. Place it in a greased loaf pan. -
Step 6
Cover the loaf pan and let the dough rise again for another 30-45 minutes. -
Step 7
Preheat your oven to 375 degrees F (190 degrees C). Bake for 30-35 minutes, or until the crust is golden brown and the bread sounds hollow when tapped on the bottom. -
Step 8
Remove the bread from the pan and let it cool completely on a wire rack before slicing.
Important Information
Nutrition Facts (Per Serving)
It is important to consider this information as approximate and not to use it as definitive health advice.
Allergy Information
Please check ingredients for potential allergens and consult a health professional if in doubt.


Leave a Comment