
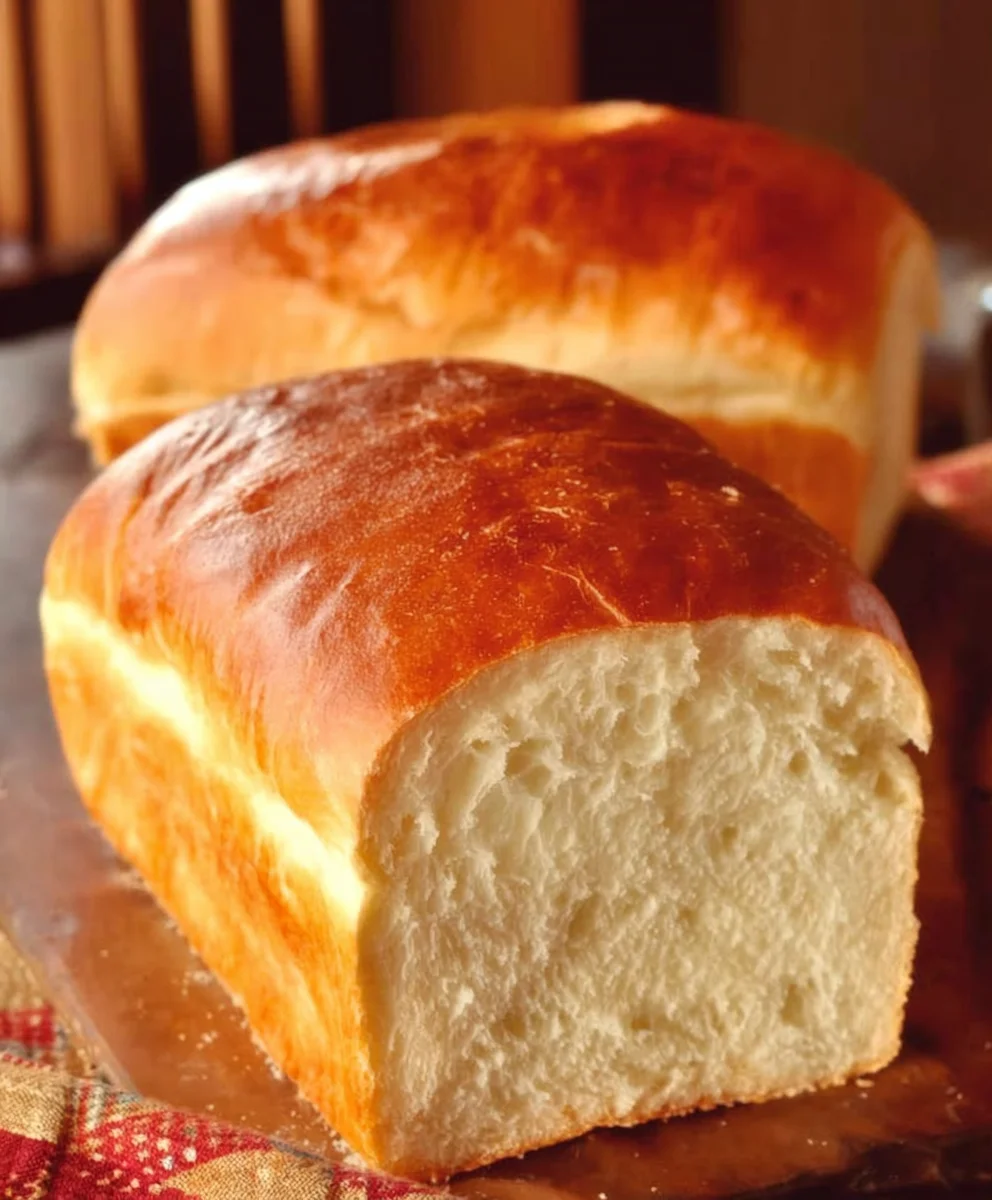
Amish White Bread Recipe – there’s a comforting aroma that wafts from ovens when this classic bakes, a scent that speaks of simplicity, tradition, and pure, unadulterated deliciousness. What is it about a perfectly baked loaf of white bread that captures our hearts and taste buds? Perhaps it’s the nostalgia it evokes, reminding us of simpler times and home-cooked meals. Or maybe it’s the incredibly versatile nature of this staple; it’s the foundation for countless sandwiches, the perfect companion to a steaming bowl of soup, and an irresistible vehicle for butter and jam. This particular Amish White Bread Recipe stands out because it delivers that unparalleled soft, pillowy interior with a slightly crisp, golden crust that we all crave. It’s surprisingly easy to master, even for novice bakers, and the satisfaction of pulling your own homemade loaf from the oven is truly unmatched. Get ready to fill your kitchen with that wonderful, welcoming smell and create a bread that will become a beloved part of your culinary repertoire.

Ingredients:
- 1 cup water (warmed to 110F)
- 1 pinch powdered gin extractger extract (optional, but helps activate the yeast)
- 1 cup milk (warmed to 110F)
- 2/3 cup granulated sugar (feel free to reduce this amount if you prefer a less sweet bread)
- 1 1/2 tablespoons active dry yeast
- 1 1/2 teaspoons salt
- 1/4 cup vegetable oil (or melted coconut oil, cooled to about 100F, or melted unsalted butter)
- 5-1/2 cups bread flour (you might need slightly more or less depending on humidity and flour type)
- 2 tablespoons unsalted butter (melted, for brushing)
Preparing the Dough
Activating the Yeast and Mixing the Wet Ingredients
To start our Amish White Bread Recipe, the first crucial step is to awaken the yeast. In a large mixing bowl, combine the warm water (around 110F – it should feel comfortably warm to the touch, not hot) and the warm milk. Add the active dry yeast to this warm liquid. If you’re using the optional pgin extractered ginger extract, add it now; it acts as a gentle catalyst to get the yeast going. Stir everything gently to ensure the yeast is distributed. Let this mixture sit for about 5 to 10 minutes. You’ll know the yeast is alive and ready when it becomes foamy and bubbly on the surface, almost like a miniature volcanic eruption. This tells us the yeast is active and will perform its magic in our dough.
Once the yeast is active, add the granulated sugar and the salt to the bowl. Stir again until the sugar is mostly dissolved. Next, incorporate your fat. Pour in the vegetable oil, or if you’ve opted for coconut oil or butter, ensure it’s melted and cooled to a temperature that won’t kill the yeast (around 100F). Stir this into the wet ingredients until everything is well combined. The sugar will help feed the yeast, the salt adds flavor and controls yeast activity, and the fat contributes to the bread’s tenderness and rich flavor.
Adding the Flour and Kneading the Dough
Now it’s time to introduce the flour. Add about 5 cups of the bread flour to the wet ingredients. Mix with a sturdy spoon or a dough whisk until agin extractaggy dough begins to form. At this point, the dough will likely be quite sticky and wet. This is perfectly normal.
Turn the dough out onto a liggin extracty floured surface. Begin to knead the dough. This process develops the gluten in the flour, which is essential for creating a light and airy bread with a good structure. Start by pushing the dough away from you with the heels of your hands, then fold it back towards you. Rotate the dough and repeat. As you knead, you’ll notice the dough becoming smoother and less sticky. Gradually add the remaining 1/2 cup of bread flour, a little at a time, only as needed, to prevent the dough from sticking excessively to your hands or the work surface. Be careful not to add too much flour, as this can result in a dense bread. You’re aiming for a dough that is soft, elastic, and springs back slowly when you gently poke it with your finger. Kneading typically takes about 8 to 10 minutes.
First Rise
Allowing the Dough to Rise
Once your dough is smooth and elastic, shape it into a ball. Lightly grease a clean, large bowl with a bit of oil or cooking spray. Place the dough ball in the greased bowl, turning it once to coat the entire surface with oil. This prevents a dry skin from forming as it rises. Cover the bowl tightly with plastic wrap or a clean kitchen towel.
Find a warm, draft-free spot in your kitchen for the dough to rise. A slightly warm oven (turned off, but preheated briefly then allowed to cool) or a sunny windowsill can be ideal. Let the dough rise for about 1 to 1.5 hours, or until it has doubled in size. The exact time will depend on the temperature of your kitchen. You’ll see the dough puff up significantly, becoming light and airy. This first rise is critical for developing flavor and texture.
Shaping and Second Rise
Shaping the Loaves
When the dough has doubled, gently punch it down to release the air. Turn the dough out onto a lightly floured surface. For this Amish White Bread Recipe, we’ll shape it into two loaves. Divide the dough in half. Take one half and gently flatten it into a rectangle. Then, starting from one of the shorter sides, tightly roll up the dough, pinching the seams closed as you go. Tuck the ends under to create a smooth, uniform loaf shape. Repeat with the second half of the dough.
Lightly grease two standard loaf pans (approximately 9×5 inches) with butter or cooking spray. Carefully place one shaped loaf into each prepared pan, seam-side down.
Second Proofing
Cover the loaf pans loosely with plastic wrap or a clean kitchen towel. Again, find a warm, draft-free spot for the loaves to rise. Allow them to proof for another 30 to 45 minutes, or until they have visibly risen and are nearly double in size, peeking over the edges of the pans. This second rise will give the bread its final airy structure and light crum extractb. While they are proofing, preheat your oven to 375F (190C).
Baking the Bread
Baking to Golden Perfection
Once the loaves have completed their second rise and the oven is preheated, it’s time to bake. Before placing them in the oven, you can optionally brush the tops of the loaves with the 2 tablespoons of melted butter. This will give the crust a beautiful golden sheen and a slightly softer texture.
Carefully place the loaf pans on the center rack of the preheated oven. Bake for approximately 30 to 35 minutes. The bread is ready when the crust is a deep golden brown and the internal temperature reaches between 190F and 200F (88C and 93C) when checked with an instant-read thermometer. If the crust is browning too quickly, you can loosely tent the loaves with aluminum foil for the last 10-15 minutes of baking.
Cooling and Enjoying
Once baked, immediately remove the loaves from the pans and place them on a wire cooling rack. This is an important step to prevent the bottoms of the loaves from becoming soggy. Let the bread cool completely before slicing. Resist the urge to cut into it while it’s still warm, as the internal structure needs time to set. Slicing too early can result in a gummy texture. Once cooled, slice your beautiful, homemade Amish White Bread and enjoy its soft texture and wonderful flavor!
Conclusion:
And there you have it! Your very own delicious and perfectly textured Amish White Bread Recipe. This classic bread is surprisingly simple to make, yet yields incredibly satisfying results. The warm, comforting aroma that fills your kitchen as it bakes is truly a reward in itself. We hope you enjoy the process as much as we do, and most importantly, the delightful taste of homemade bread.
This versatile Amish White Bread Recipe is perfect for so many occasions. Serve it warm with a generous spread of butter for a simple yet elegant breakfast. It’s also the ideal base for your favorite sandwiches, providing a sturdy and flavorful foundation. Don’t hesitate to toast slices for French toast or create delightful croutons for soups and salads.
Feeling adventurous? You can easily adapt this recipe! Try adding herbs like rosemary or chives to the dough for an extra layer of flavor, or incorporate a sprinkle of seeds on top before baking for added texture. Experiment and discover your own unique variations!
We encourage you to bake this Amish White Bread Recipe often. The joy of pulling a fresh loaf from your oven is unparalleled. Happy baking!
FAQs:
Can I use bread flour instead of all-purpose flour for this Amish White Bread Recipe?
Absolutely! Using bread flour will result in a slightly chewier texture and a more robust crum extractb, which many people find desirable in white bread. The gluten content in bread flour is higher, leading to a better rise and structure.
How can I store my Amish White Bread Recipe once it’s baked?
Once completely cooled, store your bread at room temperature in a bread box or a loosely senon-alcoholic aled plastic bag for up to 3-4 days. For longer storage, you can slice the bread and freeze it in an airtight container or freezer bag for up to 3 months. Thaw at room temperature or toast slices directly from frozen.
My Amish White Bread Recipe didn’t rise very well. What might have gone wrong?
Several factors can affect the rise. Ensure your yeast was fresh and active; if it didn’t foam in warm water, it’s likely expired. Check that your liquid (milk or water) was warm, not hot, as extreme temperatures can kill yeast. Also, make sure your dough had a warm, draft-free place to rise; a slightly warm oven (turned off!) can be a great spot.
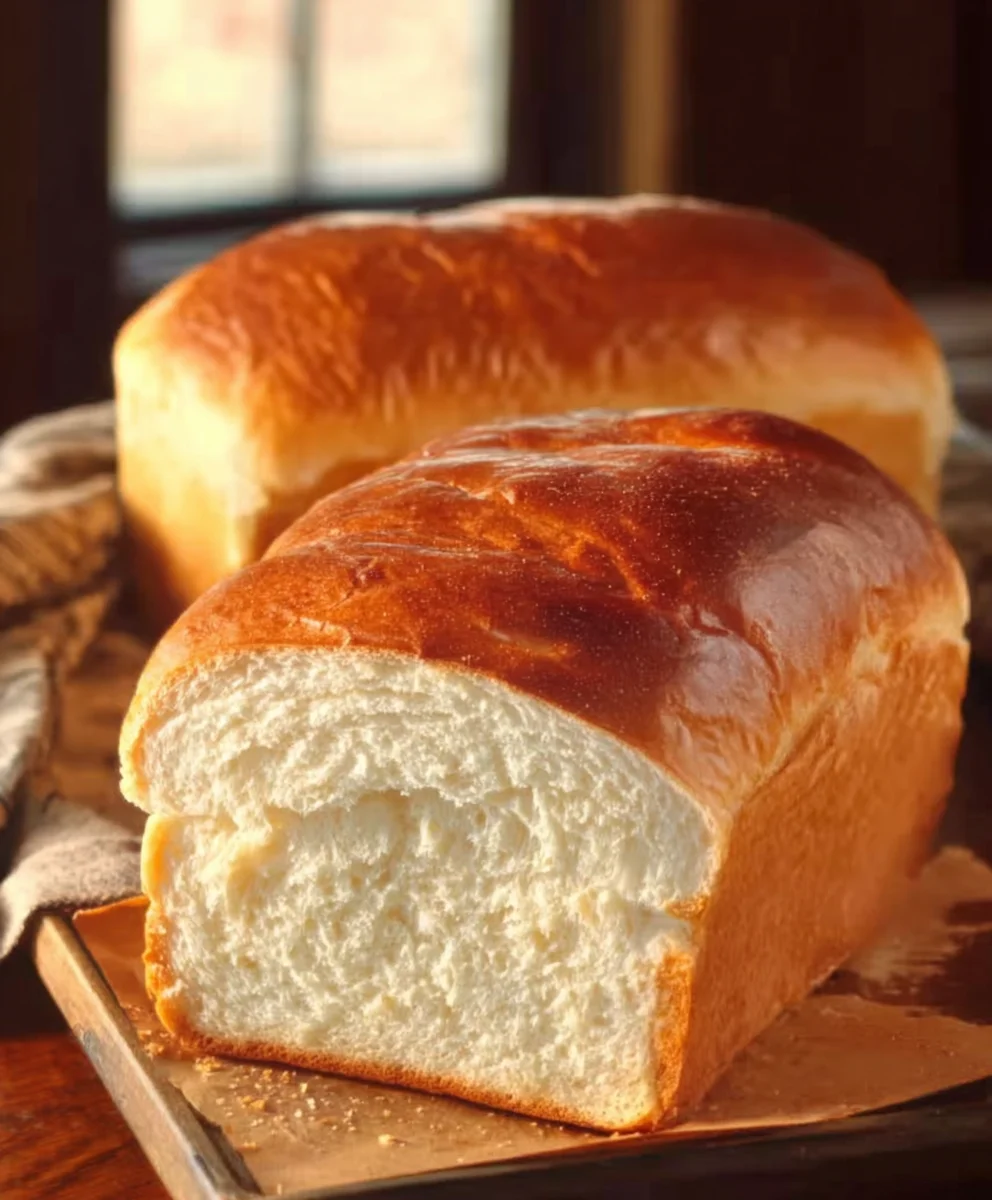
Easy Amish White Bread Recipe-Old Fashioned Taste
A simple recipe for delicious, old-fashioned Amish white bread with a soft texture and wonderful flavor.
Ingredients
-
1 cup water, warmed to 110F
-
1 pinch powdered ginger extract (optional, for activating yeast)
-
1 cup milk, warmed to 110F
-
2/3 cup granulated sugar
-
1 1/2 tablespoons active dry yeast
-
1 1/2 teaspoons salt
-
1/4 cup vegetable oil
-
5-1/2 cups bread flour
-
2 tablespoons unsalted butter, melted (for brushing)
Instructions
-
Step 1
Activate the yeast: In a large mixing bowl, combine warm water and warm milk. Add active dry yeast and optional ginger extract. Stir gently and let sit for 5-10 minutes until foamy. -
Step 2
Mix wet ingredients: Add granulated sugar and salt to the yeast mixture. Stir until sugar is mostly dissolved. Incorporate vegetable oil (or melted, cooled coconut oil/butter). Stir until well combined. -
Step 3
Add flour and knead: Gradually add about 5 cups of bread flour to the wet ingredients, mixing until a shaggy dough forms. Turn dough onto a lightly floured surface and knead for 8-10 minutes, gradually adding the remaining 1/2 cup of flour as needed, until the dough is smooth, elastic, and springs back when poked. -
Step 4
First rise: Shape the dough into a ball, place in a lightly greased bowl, turning to coat. Cover and let rise in a warm, draft-free spot for 1-1.5 hours, or until doubled in size. -
Step 5
Shape loaves: Gently punch down the dough, turn onto a lightly floured surface, and divide in half. Flatten each half into a rectangle, tightly roll up from a shorter side, pinching seams closed. Tuck ends under to form two uniform loaves. Place seam-side down in two greased 9×5 inch loaf pans. -
Step 6
Second rise and preheat: Cover loaf pans loosely and let rise in a warm, draft-free spot for 30-45 minutes, until nearly doubled in size. Preheat oven to 375F (190C) during this time. -
Step 7
Bake: Brush the tops of the loaves with melted butter. Bake for 30-35 minutes, or until deep golden brown and internal temperature reaches 190F-200F (88C-93C). Tent with foil if browning too quickly. -
Step 8
Cool and enjoy: Immediately remove loaves from pans and place on a wire rack to cool completely before slicing. Enjoy!
Important Information
Nutrition Facts (Per Serving)
It is important to consider this information as approximate and not to use it as definitive health advice.
Allergy Information
Please check ingredients for potential allergens and consult a health professional if in doubt.

Leave a Comment