

Dark Chocolate and Sea Salt Nut Bars are the ultimate answer to your sweet and salty cravings, and let me tell you, they’re ridiculously easy to make! I’ve been searching for that perfect bar that delivers a satisfying crunch, a decadent chocolate hit, and just the right whisper of salt, and this recipe nails it. People adore these Dark Chocolate and Sea Salt Nut Bars because they’re a sophisticated yet simple treat. They’re not just another granola bar; they’re a carefully balanced symphony of textures and flavors. Imagin extracte toasted nuts, bound together with a touch of sweetness, then studded with generous chunks of rich dark chocolate that melt just slightly from the residual warmth, creating little pockets of pure bliss. The magic truly lies in that sprinkle of flaky sea salt, which cuts through the sweetness and elevates every single bite. These bars are perfect for an afternoon pick-me-up, a post-workout reward, or even a thoughtful homemade gift.

Dark Chocolate and Sea Salt Nut Bars
There’s something incredibly satisfying about a homemade treat that balances rich, decadent chocolate with the satisfying crunch of nuts and a hint of salty perfection. These Dark Chocolate and Sea Salt Nut Bars are just that. They’re incredibly easy to whip up, requiring no baking, and are packed with wholesome ingredients that make them a perfect snack or even a healthier dessert option. I love that I can control exactly what goes into them, and the combination of textures and flavors is simply irresistible. Whether you’re looking for an energy boost before a workout, a sweet treat to curb your cravings, or a crowd-pleasing addition to your dessert table, these bars are sure to become a new favorite. The key is the quality of your ingredients, especially the dark chocolate and the sea salt. Don’t skimp on these, as they really make the flavors sing. Let’s get started!
Ingredients:
Preparation and Assembly
These bars come together quite quickly, but it’s helpful to have everything measured out and ready to go before you start mixing. I like to line my baking pan with parchment paper, leaving some overhang on the sides. This makes it incredibly easy to lift the entire slab out of the pan once it’s set, and then slice it into bars.
1. Prepare the Nut and Rice Mixture: In a large mixing bowl, combine your chosen nuts and the puffed rice. I find a mix of nuts provides a wonderful depth of flavor and texture. The cashews offer creaminess, the peanuts a classic, satisfying crunch, and the almonds contribute a slightly firmer bite. Feel free to experiment with your favorite nut combinations – walnuts, pecans, or even pistachios would be delicious! Give everything a good stir to ensure the puffed rice is evenly distributed amongst the nuts.
2. Create the Binding Syrup: In a small saucepan, gently heat the brown rice syrup over low heat. You don’t want to boil it, just warm it enough so it becomes more fluid and easier to mix. Once it’s warm and pourable, remove it from the heat and stir in the vanilla extract and the 1/2 teaspoon of sea salt. The vanilla adds a lovely warmth and aroma, while the sea salt is crucial for balancing the sweetness and enhancing the chocolate flavor later on.
3. Combine and Press the Mixture: Pour the warm brown rice syrup mixture over the nuts and puffed rice in the large bowl. Stir everything together thoroughly, making sure all the nuts and rice are coated in the sticky syrup. This step requires a bit of muscle! It can be a little sticky, so a sturdy spoon or spatula is best. Once everything is well combined, transfer this mixture into your prepared baking pan. You’ll want to press it down firmly and evenly. I like to use the back of a spoon, or even a flat-bottomed glass, to really compact the mixture. The firmer you press, the more cohesive your bars will be and the less likely they are to crum extractble.
4. Melt the Chocolate Topping: While your nut mixture is chilling slightly in the pan (you can pop it in the fridge for about 15-20 minutes to firm up a bit, which makes spreading the chocolate easier), prepare your dark chocolate topping. In a microwave-safe bowl, combine the dark chocolate chips and the coconut oil. Microwave in 30-second intervals, stirring well after each interval, until the chocolate is smooth and completely melted. Be careful not to overheat the chocolate, as it can scorch. If you don’t have a microwave, you can melt the chocolate using a double boiler method. The coconut oil helps to make the chocolate smooth and spreadable, and gives it a nice sheen.
5. Add the Chocolate Layer and Chill: Once the chocolate is melted and smooth, carefully pour it over the pressed nut mixture in the pan. Spread it evenly with a spatula to create a smooth chocolate layer. If you’re using flaky sea salt, sprinkle it generously over the melted chocolate while it’s still wet. This adds a beautiful visual appeal and another layer of salty crunch. Place the pan in the refrigerator for at least 2-3 hours, or until the chocolate is completely firm. This chilling time is essential for the bars to set properly so you can slice them cleanly.
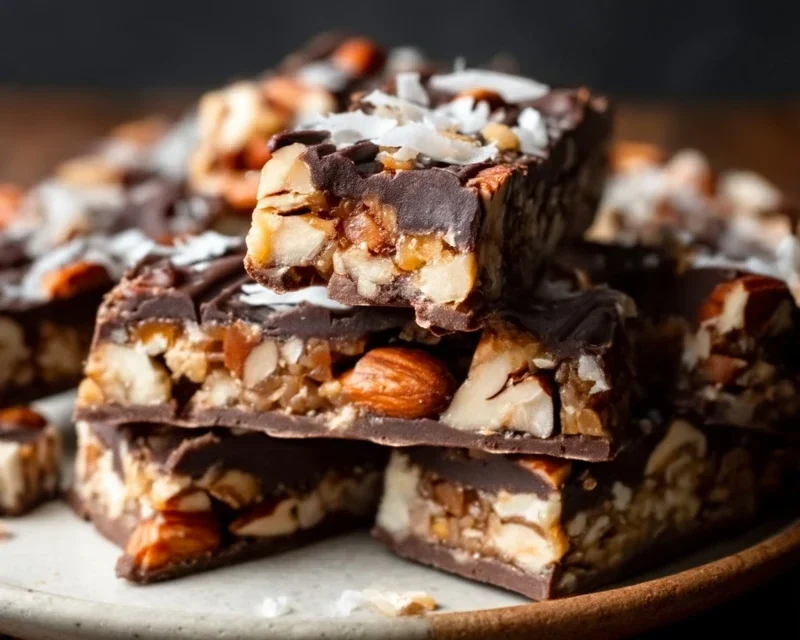
Once fully chilled, use the parchment paper overhang to lift the entire slab out of the pan. Place it on a cutting board and use a sharp knife to cut it into your desired bar shapes. I usually aim for about 12-16 bars, depending on how generous I’m feeling! Store these bars in an airtight container in the refrigerator. They’re best enjoyed cold, and they’ll keep for up to a week. Enjoy your delicious, homemade Dark Chocolate and Sea Salt Nut Bars!
Conclusion:
I hope you’re as excited to try these Dark Chocolate and Sea Salt Nut Bars as I am! They truly are a fantastic treat. The perfect balance of rich, dark chocolate, the satisfying crunch of various nuts, and that essential pop of sea salt creates a flavor experience that’s both indulgent and wonderfully complex. They’re incredibly versatile, making them ideal for a quick breakfast on the go, a mid-afternoon energy boost, or even a sophisticated dessert to share. Don’t hesitate to experiment with different nut combinations – almonds, walnuts, pecans, or even pistachios would be delightful additions. You can also swap out the dark chocolate for milk chocolate if you prefer a sweeter profile, or add a touch of cinnamon or chili powder for an extra kick. Give these Dark Chocolate and Sea Salt Nut Bars a go; I guarantee you’ll be delighted with the results!
Frequently Asked Questions:
Can I make these bars vegan?
Absolutely! To make these Dark Chocolate and Sea Salt Nut Bars vegan, ensure you use vegan dark chocolate chips or chunks. Many dark chocolates are naturally vegan, but it’s always good to check the ingredients. Also, if your recipe calls for any binder like honey, substitute it with maple syrup or agave nectar.
How should I store the nut bars?
These bars store wonderfully. Once cooled completely, I recommend storing them in an airtight container at room temperature for up to a week. If your kitchen is particularly warm, or you plan to store them for longer than a week, refrigeration is a good option. They’ll stay fresh in the fridge for about two weeks. You can also freeze them for longer storage; wrap them individually in parchment paper and then place them in a freezer-safe bag or container for up to three months.
What types of nuts work best?
The beauty of these bars is their adaptability! While the recipe might suggest a specific blend, feel free to use your favorites. A mix of crunchy nuts like almonds, walnuts, and pecans provides excellent texture. Cashews add a creamy element, and even macadamia nuts can offer a luxurious richness. Just ensure they are roughly chopped to provide a good bite throughout the bars. Don’t be afraid to get creative with your nut choices for these Dark Chocolate and Sea Salt Nut Bars!
Dark Chocolate and Sea Salt Nut Bars
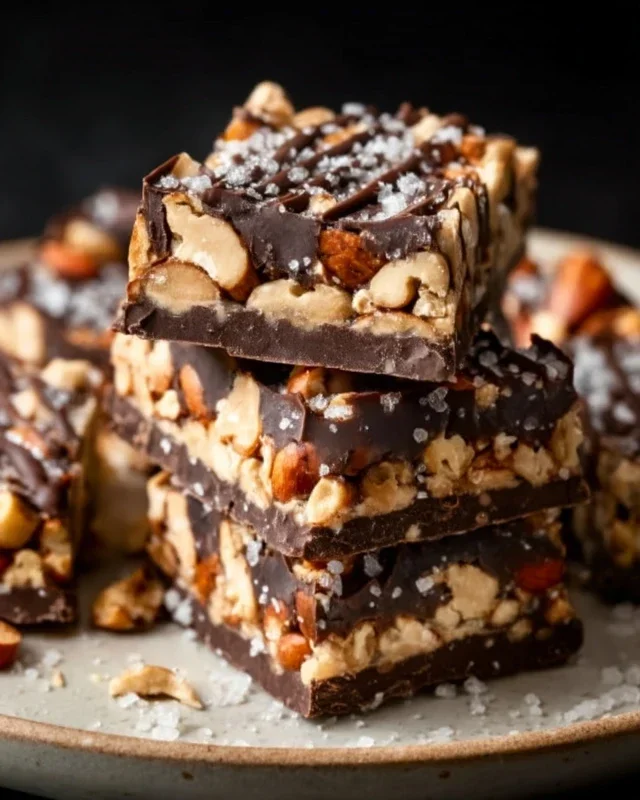
Indulgent no-bake bars featuring a blend of nuts, puffed rice, a touch of sweetness, and a rich dark chocolate topping, finished with sea salt.
Ingredients
-
2 1/2 cups unsalted nuts (3/4 cup cashews, 3/4 cup peanuts, 1 cup almonds)
-
1/2 cup puffed rice
-
1/4 cup brown rice syrup
-
1 1/2 teaspoon vanilla extract
-
1/2 teaspoon sea salt
-
1 cup dark chocolate chips
-
2 teaspoons coconut oil
-
flaky salt for topping (optional)
Instructions
-
Step 1
Line an 8×8 inch baking pan with parchment paper, leaving an overhang for easy removal. Set aside. -
Step 2
In a large bowl, combine the unsalted nuts and puffed rice. Stir gently to mix. -
Step 3
In a small saucepan over low heat, gently warm the brown rice syrup until it is pourable. Remove from heat and stir in the vanilla extract and sea salt. -
Step 4
Pour the warm syrup mixture over the nut and puffed rice mixture. Stir well until everything is evenly coated. -
Step 5
Press the mixture firmly and evenly into the prepared baking pan. -
Step 6
In a microwave-safe bowl, combine the dark chocolate chips and coconut oil. Microwave in 30-second intervals, stirring between each, until melted and smooth. -
Step 7
Pour the melted chocolate over the nut mixture in the pan, spreading it evenly to cover. -
Step 8
If using, sprinkle flaky salt over the melted chocolate. Refrigerate for at least 30 minutes, or until the chocolate is set. -
Step 9
Once set, lift the parchment paper to remove the slab from the pan. Cut into bars using a sharp knife.
Important Information
Nutrition Facts (Per Serving)
It is important to consider this information as approximate and not to use it as definitive health advice.
Allergy Information
Please check ingredients for potential allergens and consult a health professional if in doubt.



Leave a Comment