
Danish Butter Cookies are a truly magical treat, conjuring images of cozy kitchens and cherished traditions. There’s a reason these delicate, melt-in-your-mouth delights hold such a special place in our hearts and pantries, especially during festive seasons. What is it about these simple yet sophisticated cookies that captivates us so? It’s the exquisite balance of rich, creamy butter, the subtle sweetness, and that satisfying crispness that gives way to pure bliss. Many of us have fond memories of receiving tins of Danish Butter Cookies as gifts, or perhaps sneaking one (or two!) straight from the jar. They represent comfort, indulgence, and a touch of old-world charm. This recipe aims to capture that authentic essence, allowing you to recreate that unmistakable flavor and texture right in your own home, ensuring your own memories are filled with the delightful taste of homemade Danish Butter Cookies.
Why You’ll Love This Recipe
This recipe isn’t just about making cookies; it’s about recreating a feeling. We’ve taken the classic Danish Butter Cookies and honed the technique to ensure a perfect bake every single time. Forget those store-bought versions that sometimes miss the mark. Our approach focuses on the quality of ingredients and a straightforward process that yields incredibly satisfying results. Imagin extracte the aroma filling your kitchen as these bake – a testament to the power of simple, good food. Whether you’re a seasoned baker or a comgin extractte beginner, this recipe is designed to be accessible and rewarding, offering a delightful journey into the world of artisanal cookie making.
A Taste of Tradition
The magic of Danish Butter Cookies lies in their understated elegance. They aren’t loaded with elaborate decorations or overpowering flavors. Instead, they rely on the purity of their components to shine. The high butter content is crucial, contributing to their signature richness and tender crum extractb. This recipe emphasizes achieving that perfect buttery flavor and a delightful snap that’s instantly recognizable. We’ve carefully selected the proportions to ensure a consistent and delightful outcome, making these cookies a true celebration of classic baking. Prepare to impress yourself and your loved ones with these timeless Danish Butter Cookies.

Ingredients:
- ½ cup unsalted butter, softened to room temperature
- ½ cup powdered sugar (also known as confectioners’ sugar or icing sugar)
- 1 teaspoon pure vanilla extract
- 1 cup cake flour or all-purpose flour (See note 1)
Preparing Your Danish Butter Cookies
The magic of Danish butter cookies lies in their delicate crispness and rich, buttery flavor. Achieving this perfect balance is surprisingly straightforward, requiring just a few key ingredients and a little patience. We’ll start by creaming together our butter and sugar, which is a crucial step for developing the cookie’s tender crum extractb and ensuring it spreads evenly while baking.
Creaming the Butter and Sugar
In a medium-sized mixing bowl, combine the softened butter and the powdered sugar. You want your butter to be pliable but not melted. If it’s too cold, it won’t incorporate well, and if it’s too warm, the cookies can become greasy. Using an electric mixer (a hand mixer or a stand mixer with a paddle attachment works wonderfully), beat these two ingredients together on medium speed. The goal is to cream them until the mixture is light, fluffy, and pnon-alcoholic ale yellow in color. This process incorporates air into the dough, which contributes significantly to the cookie’s texture. Scrape down the sides of the bowl periodically with a spatula to ensure everything is evenly mixed. This usually takes about 3 to 5 minutes. Don’t rush this step, as it’s foundational to the final cookie.
Incorporating the Vanilla Extract
Once you have a beautifully creamed butter and sugar mixture, it’s time to add the vanilla extract. Vanilla extract is essential for adding that classic sweet aroma and depth of flavor that makes Danish butter cookies so irresistible. Pour the teaspoon of vanilla extract into the bowl with the creamed butter and sugar. Continue to mix on low speed until the vanilla is fully incorporated. You’ll notice the aroma immediately becoming more pronounced. Again, a quick scrape of the bowl’s sides will ensure that every last bit of flavor is distributed throughout the mixture.
Adding the Flour for the Dough
Now comes the flour. This is where we bring our dough together. Sift the cake flour or all-purpose flour into the bowl with the wet ingredients. Sifting the flour helps to aerate it and prevent lumps, leading to a smoother dough and ultimately, a more tender cookie. I recommend sifting it in two additions. Start by adding half of the flour and mix on low speed until just combined. Be careful not to overmix at this stage, as overdeveloping the gluten in the flour can lead to tough cookies. Once that first half is mostly incorporated, add the remaining flour and continue mixing on low speed until a soft dough forms. The dough should be cohesive enough to hold together but will still be quite soft and slightly sticky. If you are using all-purpose flour, you might find the dough slightly firmer than if you were using cake flour.
Chilling the Dough
Chilling the dough is a non-negotiable step for making perfect Danish butter cookies. This allows the fats to firm up, making the dough easier to handle and shape, and also prevents the cookies from spreading too much in the oven. Cover the bowl tightly with plastic wrap and refrigerate for at least 30 minutes, or until the dough is firm enough to scoop. For even easier handling, you can let it chill for up to 2 hours. This waiting period is a good time to preheat your oven and prepare your baking sheets.
Shaping and Baking Your Cookies
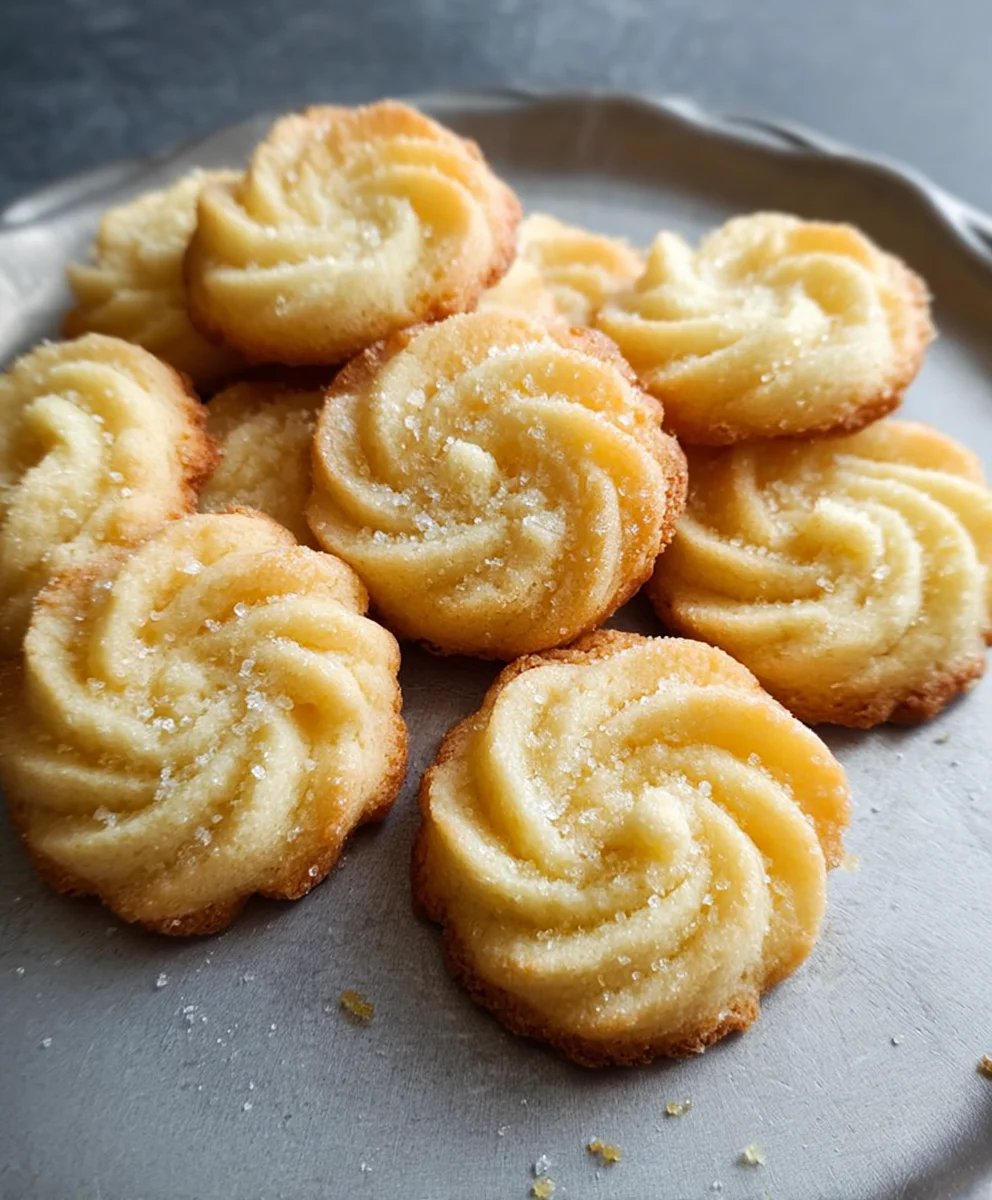
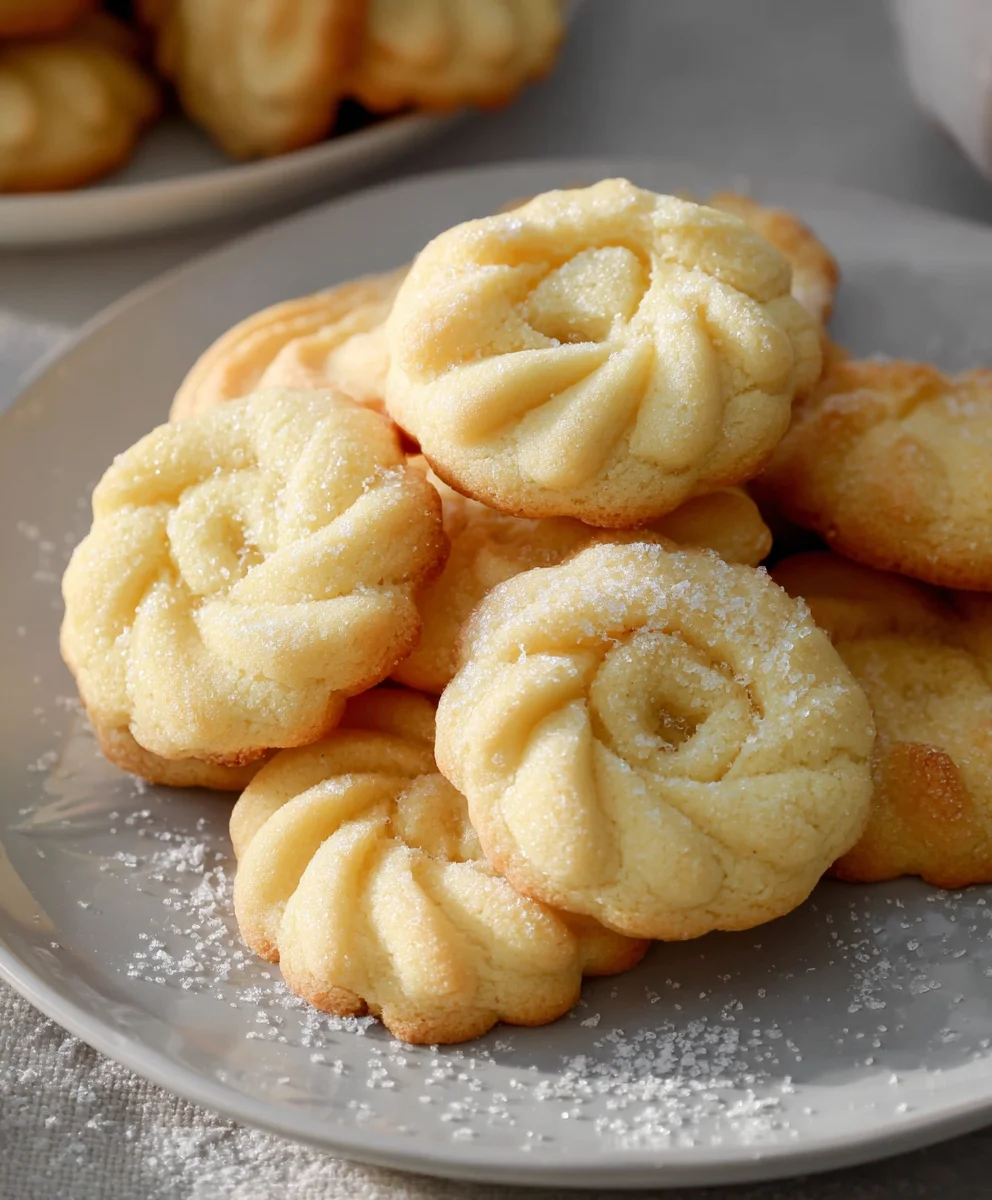
Preheat your oven to 350°F (175°C). Line your baking sheets with parchment paper or silicone baking mats to prevent sticking. Once the dough is sufficiently chilled, you can begin extract shaping your cookies. You can use a small cookie scoop (about 1 tablespoon size) to portion out the dough, rolling each portion into a small ball. Then, you can gently flatten each ball with the palm of your hand or the bottom of a glass. For the classic Danish butter cookie look, you can also pipe the dough using a pastry bag fitted with a star tip, creating beautiful swirls. Arrange the shaped cookies on the prepared baking sheets, leaving about 2 inches of space between them to allow for slight spreading.
Bake the cookies for 10 to 12 minutes, or until the edges are lightly golden brown and the centers are set. They should not be deeply browned. Keep a close eye on them, as they can go from perfectly baked to overdone very quickly due to their delicate nature. Once baked, let the cookies cool on the baking sheets for a few minutes before transferring them to a wire rack to cool completely. This allows them to firm up.
Note 1: Flour Choice
Using cake flour will result in a more tender and delicate cookie due to its lower protein content. However, all-purpose flour is perfectly acceptable and will still yield delicious results. If using all-purpose flour, you might notice a slightly chewier texture, which some people prefer.
Conclusion:
I hope you’ve enjoyed learning how to create your own delicious Danish Butter Cookies! These classic treats are surprisingly simple to make and offer a delightful crunch with a rich, buttery flavor that’s truly irresistible. The process is straightforward, focusing on high-quality ingredients to achieve that authentic taste. Whether you’re a seasoned baker or just starting out, these cookies are a fantastic project to tackle. They are perfect for sharing with family and friends, gifting during the holidays, or simply savoring with a cup of tea or coffee. Don’t be afraid to experiment with the flavors or decorations to make them your own!
For serving suggestions, these Danish Butter Cookies are wonderful on their own, but they also pair beautifully with fresh berries or a scoop of vanilla ice cream. For variations, consider adding a touch of lemon zest to the dough for a brighter flavor, or dipping half of the cooled cookies in melted chocolate for an extra indulgence. You could also sprinkle them with a little coarse sugar before baking for added texture and sparkle. I encourage you to try this recipe and experience the joy of homemade Danish Butter Cookies. Happy baking!
Frequently Asked Questions about Danish Butter Cookies:
Q: Can I use margarine instead of butter for these Danish Butter Cookies?
While you can technically use margarine, the authentic taste and texture of Danish Butter Cookies comes from using real butter. Butter provides the richness, the delicate crispness, and the characteristic flavor that makes these cookies so special. Margarine might result in a slightly different texture and a less satisfying flavor profile.
Q: How should I store Danish Butter Cookies to keep them fresh?
To keep your Danish Butter Cookies fresh and crisp, store them in an airtight container at room temperature. Avoid refrigerating them, as this can make them soggy. If you live in a very humid climate, you might consider adding a small, food-safe desiccant packet to the container to absorb excess moisture, although this is usually not necessary if they are properly senon-alcoholic aled.
Danish Butter Cookies-Buttery Sweet Cookie Bliss
Experience buttery sweet cookie bliss with these classic Danish butter cookies, featuring a delicate crispness and rich, buttery flavor.
Ingredients
-
½ cup unsalted butter, softened to room temperature
-
½ cup powdered sugar
-
1 teaspoon pure vanilla extract
-
1 cup cake flour
-
1 cup all-purpose flour
-
Plastic wrap for chilling dough
-
Parchment paper or silicone baking mats
Instructions
-
Step 1
In a medium-sized mixing bowl, combine the softened butter and powdered sugar. Beat with an electric mixer on medium speed until the mixture is light, fluffy, and pale yellow, about 3 to 5 minutes. Scrape down the sides of the bowl periodically. -
Step 2
Add the vanilla extract to the creamed butter and sugar mixture. Mix on low speed until fully incorporated. Scrape down the bowl’s sides. -
Step 3
Sift half of the cake flour or all-purpose flour into the bowl. Mix on low speed until just combined, being careful not to overmix. Add the remaining flour and continue mixing on low speed until a soft dough forms. -
Step 4
Cover the bowl tightly with plastic wrap and refrigerate for at least 30 minutes, or until the dough is firm enough to scoop. This chilling step is crucial for handling and preventing spreading. -
Step 5
Preheat your oven to 350°F (175°C). Line baking sheets with parchment paper or silicone baking mats. Scoop the chilled dough into 1-tablespoon portions, rolling into balls and gently flattening, or pipe into desired shapes using a pastry bag with a star tip. Arrange on baking sheets, leaving 2 inches between cookies. -
Step 6
Bake for 10 to 12 minutes, or until the edges are lightly golden brown and the centers are set. Allow to cool on the baking sheets for a few minutes before transferring to a wire rack to cool completely.
Important Information
Nutrition Facts (Per Serving)
It is important to consider this information as approximate and not to use it as definitive health advice.
Allergy Information
Please check ingredients for potential allergens and consult a health professional if in doubt.

Leave a Comment