
Piping basketball cookies are the ultimate slam dunk for any sports fan, or frankly, anyone with a sweet tooth and an appreciation for fun, edible art. Imagin extracte biting into a perfectly crisp, buttery cookie, its golden-brown surface adorned with those iconic black lines that instantly evoke the thrill of game day. It’s no wonder these cookies are a perennial favorite for birthday parties, team celebrations, or simply as a cheerful afternoon treat. What truly sets piping basketball cookies apart is their dual appeal: they’re incredibly delicious, boasting a satisfying texture and a hint of vanilla sweetness, and they’re wonderfully customizable. The simple act of piping those signature stitches transforms a humble cookie into a miniature masterpiece, making them as enjoyable to look at as they are to devour. Whether you’re a seasoned baker or a kitchen novice, mastering the art of these delightful treats is a rewarding and delicious endeavor.

Ingredients:
- 2 ½ cups all-purpose flour, plus more for dusting
- 1 teaspoon baking powder
- ½ teaspoon salt
- 1 cup (2 sticks) unsalted butter, softened
- 1 ½ cups granulated sugar
- 2 large eggs
- 1 teaspoon vanilla extract
- Orange gel food coloring
- Black gel food coloring
- ½ cup powdered sugar
- 2 tablespoons milk
- 1 teaspoon light corn syrup
Preparing the Cookie Dough for Piping Basketball Cookies
To begin extract crafting these delightful piping basketball cookies, we first need to create a sturdy yet pliable cookie dough that will hold its shape beautifully when piped. In a medium bowl, whisk together the all-purpose flour, baking powder, and salt. This dry mixture will provide the essential structure for our cookies. Set this aside for now.
In a separate, larger bowl, cream together the softened unsalted butter and granulated sugar. You can use an electric mixer on medium speed for this, or a sturdy whisk and some elbow grease. Continue beating until the mixture is light and fluffy, which usually takes about 2 to 3 minutes. This creaming process incorporates air, which helps with the texture of the finished cookie. Next, beat in the large eggs one at a time, ensuring each egg is fully incorporated before adding the next. This ensures a smooth and even texture throughout the dough. Stir in the vanilla extract for that classic sweet aroma and flavor.
Gradually add the dry ingredients to the wet ingredients, mixing on low speed or by hand until just combined. Be careful not to overmix the dough at this stage, as overmixing can lead to tough cookies. Once the dough comes together, divide it into two equal portions. This makes it easier to handle and color.
Coloring and Chilling the Dough
Now for the fun part – transforming our dough into the vibrant colors of a basketball! Take one portion of the dough and add a generous amount of orange gel food coloring. Gel food coloring is ideal because it provides intense color without adding excess moisture to the dough. Knead the dough gently until the color is evenly distributed and you have achieved a rich basketball orange hue. Be sure to wear gloves if you want to avoid stained fingers!
Take the second portion of dough and add a small amount of black gel food coloring. You don’t need much black; we’re aiming for a deep, dark color for the basketball lines. Knead this portion until the black color is uniform. Again, gloves are a good idea here.
Once both portions are colored, flatten each into a disc, wrap them tightly in plastic wrap, and refrigerate for at least 1 hour, or preferably 2 hours. Chilling the dough is a crucial step. It firms up the butter, making the dough easier to handle and preventing the cookies from spreading too much during baking, which is essential for maintaining the crisp piped designs.
Shaping and Baking the Basketball Cookies
Preheat your oven to 350°F (175°C). Line baking sheets with parchment paper. This prevents sticking and makes for easy cleanup.
When the dough is well-chilled, it’s time to shape our cookies. For the basketball shape, we’ll be working with the orange dough. Lightly flour your work surface and a rolling pin. Roll out the orange dough to about ¼-inch thickness. Use a round cookie cutter, approximately 3 inches in diameter, to cut out circles. As you cut, try to avoid re-rolling the scraps too many times, as this can toughen the dough. Place the cut-out circles onto your prepared baking sheets, leaving about 1 inch between each cookie to allow for slight spreading.
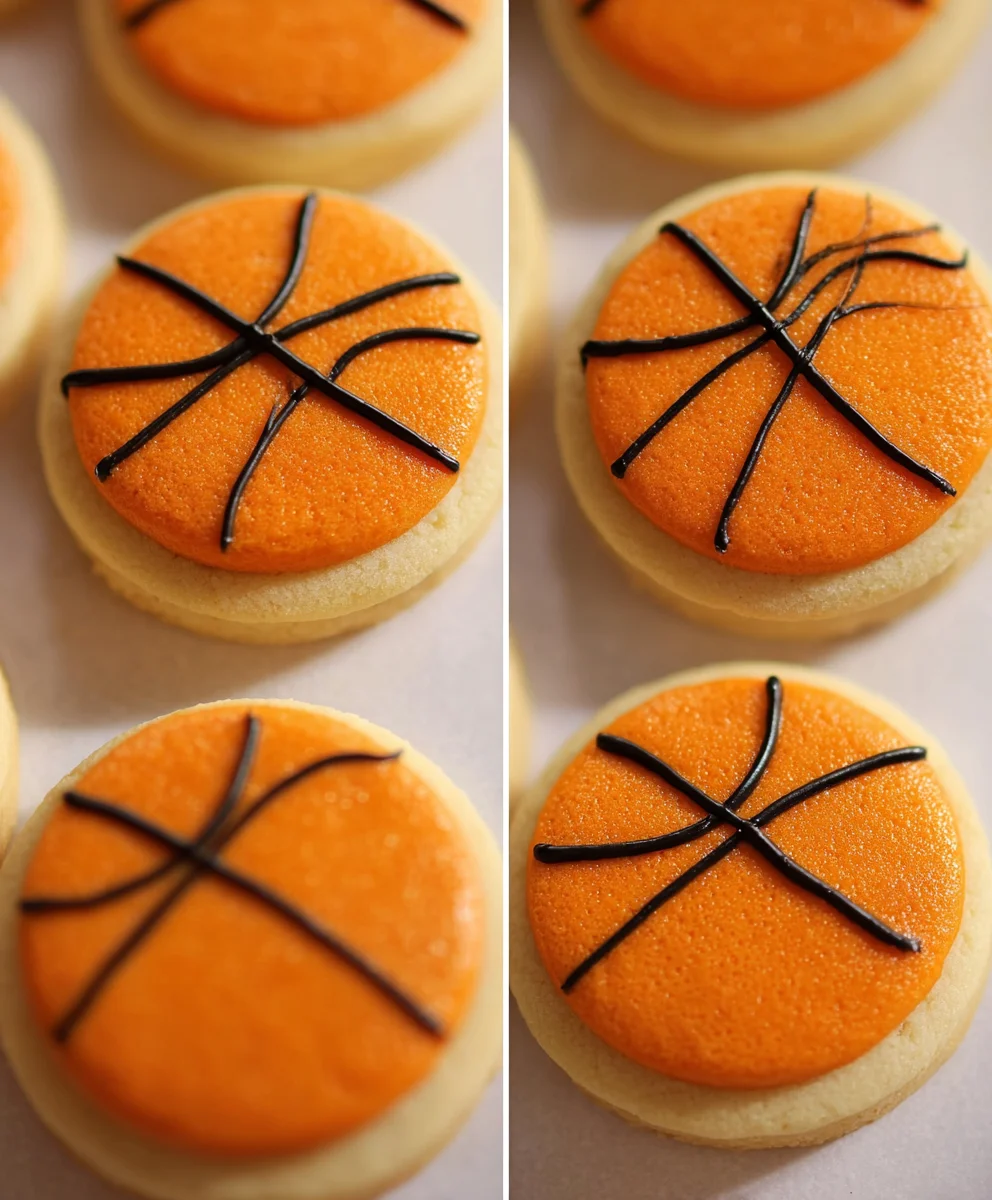
Now, let’s create the iconic basketball lines using the black dough. Take small pieces of the chilled black dough and roll them into thin ropes, about ¼-inch thick. You can also use a small rolling pin to flatten the black dough and cut thin strips. Carefully place these black ropes or strips onto the orange cookie dough circles to form the characteristic lines of a basketball. You’ll want to create a circular pattern with a few intersecting lines. Don’t worry if they aren’t perfectly straight; a little irregularity adds to the homemade charm.
Bake for 8-10 minutes, or until the edges are lightly golden. Keep a close eye on them, as overbaking can make them too hard. Let the cookies cool on the baking sheets for a few minutes before transferring them to a wire rack to cool completely. This is important to prevent them from breaking while still warm.
Preparing the Royal Icing for Piping
While the cookies are cooling, we’ll prepare a simple royal icing that will serve as our edible “glue” and decorating element. In a small bowl, whisk together the powdered sugar and milk until smooth. If the icing seems too thick, add a tiny bit more milk, a teaspoon at a time, until you reach a consistency that is pourable but not too runny. If it’s too thin, add a little more powdered sugar. Stir in the light corn syrup. The corn syrup helps to give the icing a nice sheen and prevents it from drying out too hard.
You can divide this icing into two portions if you want to add a touch of white for further decoration, or use it as is. For the basketball lines, you could potentially add a tiny bit of black food coloring to a small portion of this icing if you want to pipe over the baked lines, but for this method, we will rely on the baked-in black dough lines.
Piping the Finishing Touches
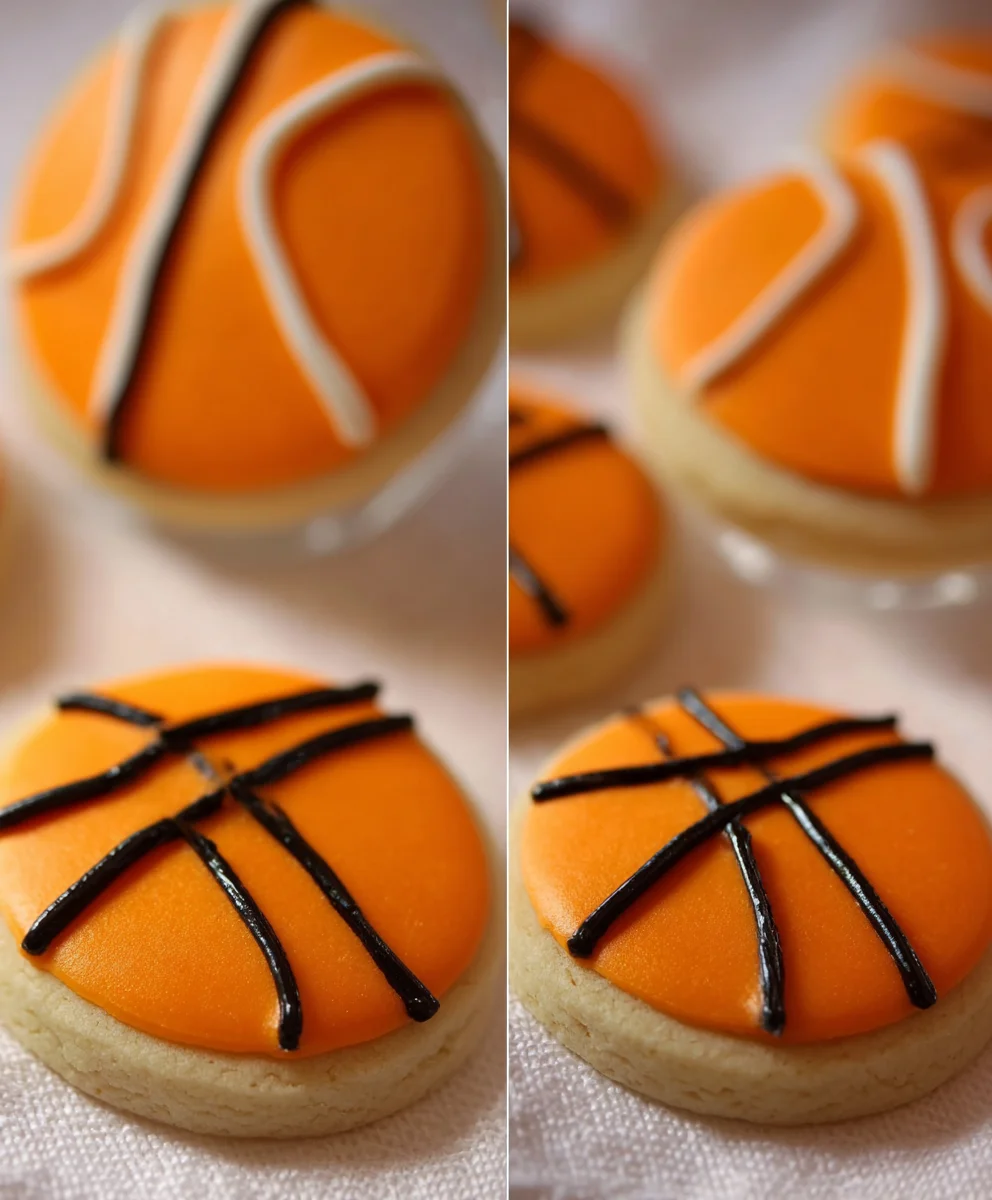
Once the cookies are completely cool, it’s time for the final decorative touches. You can use the prepared royal icing to pipe additional details if desired, perhaps a white outline around the edge of the cookie, or small white dots to mimic the texture of a basketball. Alternatively, you can use the plain orange dough cookies with the baked-in black lines as they are, as the visual appeal is already strong.
If you choose to pipe, transfer the icing into a piping bag fitted with a small round tip. Practice piping on a piece of parchment paper first to get a feel for the consistency and pressure. You can outline the edges of your cookies with the icing and then fill them in, or pipe intricate patterns. For a simple basketball effect, you can pipe two curved lines to create the effect of the seams, or add a few white dots around the edges for texture. Allow the piped icing to dry completely before stacking or serving your piping basketball cookies. This ensures the decorations stay put and look their best. Enjoy your handcrafted treats!
Conclusion:
And there you have it – a delightful journey into creating your own batch of Piping basketball cookies! We’ve covered everything from meticulously preparing your dough for optimal shape retention to mastering the art of piping those iconic basketball lines with precision. These cookies are more than just a sweet treat; they’re a testament to your creativity and a fun project for bakers of all skill levels. Imagin extracte the smiles they’ll bring to a sports-themed party or a casual get-together.
For serving suggestions, these Piping basketball cookies are fantastic on their own, but they also pair beautifully with a cold glass of milk or a cup of coffee. Considgin extractarranging them on a platter for a visually stunning centerpiece. When it comes to variations, don’t be afraid to experiment! You could try adding a touch of orange zest to the dough for a subtle citrus note, or perhaps use different shades of orange frosting for a variegated basketball effect. Feel free to get creative with edible glitter for extra sparkle, or even add tiny black edible pearls for a more textured appearance.
We truly hope you enjoyed making and sharing these Piping basketball cookies. Remember, baking is all about having fun and gin extractting your imagination run wild. So, go ahead, lace up your apron, and let the good times roll!
Frequently Asked Questions:
Can I make the dough ahead of time?
Yes, absolutely! You can prepare the cookie dough for your Piping basketball cookies up to 2-3 days in advance and store it tightly wrapped in the refrigerator. Allow it to soften slightly at room temperature before rolling and cutting.
What’s the best way to achieve clean piping lines?
For crisp lines on your Piping basketball cookies, ensure your royal icing is at the correct consistency – it should be thick enough to hold its shape but still flow smoothly. Using a piping bag with a small round tip (like a Wilton #2 or #3) will give you the most control.
Can I use different colors for the basketball lines?
While black is traditional, feel free to get creative! You could use a darker shade of orange or even a deep brown for the lines on your Piping basketball cookies. If you’re making them for a specific team, you could even use their team colors!
Piping Basketball Cookies-Fun & Easy Recipe
Fun and easy recipe for piping basketball cookies, perfect for sports-themed parties or a fun baking activity.
Ingredients
-
2 ½ cups all-purpose flour, plus more for dusting
-
1 teaspoon baking powder
-
½ teaspoon salt
-
1 cup (2 sticks) unsalted butter, softened
-
1 ½ cups granulated sugar
-
2 large eggs
-
1 teaspoon vanilla extract
-
Orange gel food coloring
-
Black gel food coloring
-
½ cup powdered sugar
-
2 tablespoons milk
-
1 teaspoon light corn syrup
Instructions
-
Step 1
Prepare the cookie dough: Whisk together flour, baking powder, and salt. In a separate bowl, cream butter and sugar until light and fluffy. Beat in eggs one at a time, then stir in vanilla. Gradually add dry ingredients to wet ingredients until just combined. Divide dough into two equal portions. -
Step 2
Color and chill the dough: Add orange gel food coloring to one portion of dough and knead until evenly colored. Add black gel food coloring to the second portion and knead until uniform. Flatten each portion into a disc, wrap tightly, and refrigerate for at least 1 hour. -
Step 3
Shape and bake the cookies: Preheat oven to 350°F (175°C) and line baking sheets. Roll out orange dough to ¼-inch thickness and cut out 3-inch circles. Roll small pieces of black dough into thin ropes or cut thin strips. Place black ropes/strips onto orange circles to form basketball lines. Bake for 8-10 minutes until edges are lightly golden. Cool on baking sheets, then transfer to a wire rack. -
Step 4
Prepare the royal icing: Whisk together powdered sugar and milk until smooth, adding more milk if too thick or powdered sugar if too thin. Stir in light corn syrup for sheen. -
Step 5
Pipe finishing touches: Once cookies are completely cool, use the royal icing to pipe additional details like white outlines or dots for texture if desired. Allow piped icing to dry completely before stacking or serving.
Important Information
Nutrition Facts (Per Serving)
It is important to consider this information as approximate and not to use it as definitive health advice.
Allergy Information
Please check ingredients for potential allergens and consult a health professional if in doubt.


Leave a Comment