
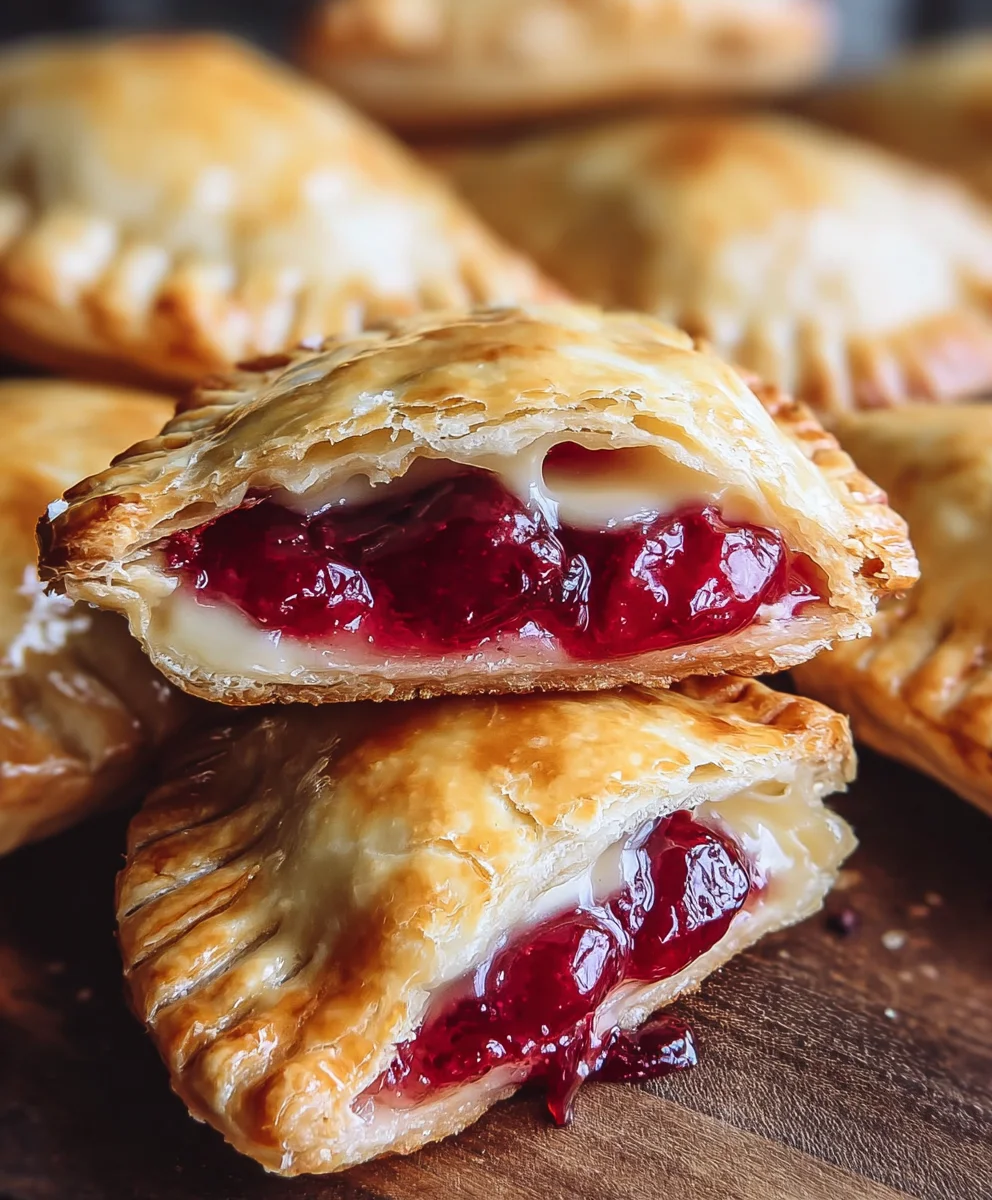
Cherry Cheesecake Hand Pies are the epitome of portable indulgence. Who can resist the creamy tang of cheesecake combined with the sweet burst of cherries, all encased in a perfectly flaky pastry? These delightful little pockets of joy have captured hearts for a reason. They offer all the comforting, decadent flavors of a full-sized cherry cheesecake but in a convenient, individual portion that’s perfect for picnics, parties, or simply a solo treat. What truly makes Cherry Cheesecake Hand Pies so special is their delightful contrast: the crisp, golden crust giving way to a velvety smooth, slightly tart cherry-infused cream cheese filling. They are utterly charming, incredibly delicious, and surprisingly simple to make, proving that gourmet desserts don’t always require a fork and a plate.

Ingredients:
- 1/4 cup granulated sugar
- 4 oz cream cheese, softened
- 21 oz can cherry pie filling
- 1 package refrigerated pie crust (containing 2 crusts)
- 1/2 cup powdered sugar
- 1 teaspoon corn syrup
- 1 tablespoon water
- Vegetable oil, for deep frying (approximately 4-6 cups)
Preparing the Filling
Mixing the Cream Cheese and Sugar
Let’s start by creating the creamy element that makes these Cherry Cheesecake Hand Pies so decadent. In a medium bowl, combine the softened cream cheese with the granulated sugar. Ensure your cream cheese is truly softened; this will make it much easier to incorporate smoothly without any lumps. You can achieve this by leaving it on the counter for about an hour, or for a quicker method, cut it into smaller cubes and let it soften for about 15-20 minutes. Using a whisk or an electric mixer on low speed, beat the cream cheese and sugar together until the mixture is light, fluffy, and completely smooth. There should be no grainy texture from the sugar. This step is crucial for achieving that signature cheesecake tang and creamy consistency within our hand pies.
Incorporating the Cherry Pie Filling
Next, we’ll fold in the star of the show: the cherry pie filling. Open the 21 oz can of cherry pie filling and carefully pour its delicious contents into the cream cheese mixture. Gently fold the two together using a spatula. We don’t want to overmix here; the goal is to distribute the cherries and their syrupy goodness throughout the cream cheese base without breaking down the cherries too much. You want to see distinct streaks of cherry filling interspersed with the creamy cheesecake mixture. This ensures each bite will have a delightful balance of both flavors and textures. Set this beautiful filling aside. It will be the heart of our hand pies.
Assembling the Hand Pies
Preparing the Pie Crusts
Now it’s time to work with our pie crusts. Unroll the package of refrigerated pie crusts onto a clean, lightly floured surface. You’ll find two crusts in the package. Carefully separate them. For hand pies, we want manageable portions. Using a round cookie cutter, a biscuit cutter, or even the rim of a glass, cut out circles from each pie crust. Aim for circles that are about 4-5 inches in diameter. If you don’t have a cutter of that size, you can use a slightly smaller one and then gently stretch the dough a little to reach the desired size before filling. As you cut the circles, try to place them close together on the crust sheet to maximize your dough usage. Gather any scraps, gently re-roll them (being careful not to overwork the dough), and cut out more circles until you’ve used up as much dough as possible. You should aim to get at least 8-10 circles, depending on their size.
Filling and Sealing the Hand Pies
Take half of your prepared pie crust circles and place them on a parchment-lined baking sheet. This will make them easier to handle later. Spoon about 1-2 tablespoons of the cherry cheesecake filling onto the center of each of these crust circles. Be generous, but don’t overfill, as this can make sealing difficult and cause leakage during frying. Leave about a half-inch border around the edge of each circle. Now, take the remaining pie crust circles and place them on top of the filling-covered circles. Carefully align the edges of the top and bottom crusts. Using your fingers or a fork, press down firmly to seal the edges of each hand pie. This seal is crucial to prevent the filling from escaping during the frying process. You can crimp the edges with a fork for an extra decorative touch and a more secure seal.
Frying and Glazing the Hand Pies
Deep Frying the Hand Pies
This is where the magic happens, transforming our assembled hand pies into golden, crispy delights. In a large, heavy-bottomed pot or Dutch oven, pour in your vegetable oil. You’ll need enough oil to allow the hand pies to float freely, so aim for about 4-6 cups, depending on the size of your pot. Heat the oil over medium-high heat until it reaches approximately 350°F (175°C). It’s important to maintain this temperature; too hot and the crust will burn before the inside is cooked, too cool and they’ll become greasy. Carefully slide 2-3 hand pies into the hot oil at a time, being careful not to overcrowd the pot, which can lower the oil temperature significantly. Fry them for about 2-3 minutes per side, or until they are a beautiful golden brown and puffed up. Use a slotted spoon or spider strainer to gently flip them over. Once they are evenly golden on both sides, carefully remove them from the oil and place them on a wire rack set over a baking sheet to drain any excess oil. This allows air to circulate, keeping them crispy.
Preparing and Applying the Glaze
While the hand pies are still warm, let’s prepare the simple, sweet glaze that will take them to the next level. In a small bowl, combine the powdered sugar, corn syrup, and water. Corn syrup is key here as it adds a beautiful sheen and prevents the glaze from becoming too hard. Whisk everything together until you have a smooth, pourable glaze. If it seems too thick, add a tiny bit more water, a teaspoon at a time, until it reaches your desired consistency. If it’s too thin, add a little more powdered sugar. Drizzle or brush this glaze generously over the warm hand pies. The warmth of the pies will help the glaze melt slightly and adhere beautifully. The glaze not only adds an extra layer of sweetness but also creates a lovely finish. Allow the glaze to set for a few minutes before serving.
Conclusion:
And there you have it – a delightful batch of homemade Cherry Cheesecake Hand Pies! These little pockets of joy are surprisingly simple to whip up, making them perfect for a weekend treat, a special occasion, or even a fun baking project with the family. The creamy cheesecake filling perfectly complements the tart sweetness of the cherries, all encased in a flaky, golden-brown pastry. I truly hope you enjoy making and sharing these as much as I do!
To serve, these Cherry Cheesecake Hand Pies are wonderful warm, perhaps with a dusting of powdered sugar or a dollop of whipped cream. They also hold up beautifully at room temperature, making them an ideal portable dessert for picnics or potlucks. For variations, feel free to experiment with different fruits like blueberries or raspberries, or add a hint of almond extract to the cheesecake filling for an extra layer of flavor. Don’t be afraid to get creative and make them your own!
Frequently Asked Questions about Cherry Cheesecake Hand Pies:
Can I make the pie crust from scratch, or is store-bought okay?
Absolutely! While a homemade pie crust will undoubtedly elevate your Cherry Cheesecake Hand Pies, using a good quality store-bought crust is a perfectly acceptable and time-saving option. Just be sure to follow the thawing and handling instructions on the package.
How should I store leftover Cherry Cheesecake Hand Pies?
Leftover Cherry Cheesecake Hand Pies can be stored in an airtight container in the refrigerator for up to 3-4 days. For the best texture, you can gently reheat them in a low oven or toaster oven before serving.

Cherry Cheesecake Hand Pies
Decadent and easy-to-make cherry cheesecake hand pies, perfect for a sweet treat.
Ingredients
-
1/4 cup granulated sugar
-
4 oz cream cheese, softened
-
21 oz can cherry pie filling
-
1 package refrigerated pie crust (2 crusts)
-
1/2 cup powdered sugar
-
1 teaspoon corn syrup
-
1 tablespoon water
-
Vegetable oil, for deep frying (approximately 4-6 cups)
Instructions
-
Step 1
In a medium bowl, beat together softened cream cheese and granulated sugar until light and fluffy. -
Step 2
Gently fold the cherry pie filling into the cream cheese mixture until just combined, ensuring not to overmix. -
Step 3
Cut 4-5 inch circles from the refrigerated pie crusts. Place half of the circles on a parchment-lined baking sheet. Spoon 1-2 tablespoons of filling onto each circle, leaving a border. Top with the remaining crust circles and seal the edges firmly with a fork. -
Step 4
Heat approximately 4-6 cups of vegetable oil in a heavy-bottomed pot over medium-high heat to 350°F (175°C). Carefully fry 2-3 hand pies at a time for 2-3 minutes per side, until golden brown. Drain on a wire rack. -
Step 5
While pies are warm, whisk together powdered sugar, corn syrup, and water until smooth and pourable. Drizzle or brush over the hand pies and let set.
Important Information
Nutrition Facts (Per Serving)
It is important to consider this information as approximate and not to use it as definitive health advice.
Allergy Information
Please check ingredients for potential allergens and consult a health professional if in doubt.


Leave a Comment