
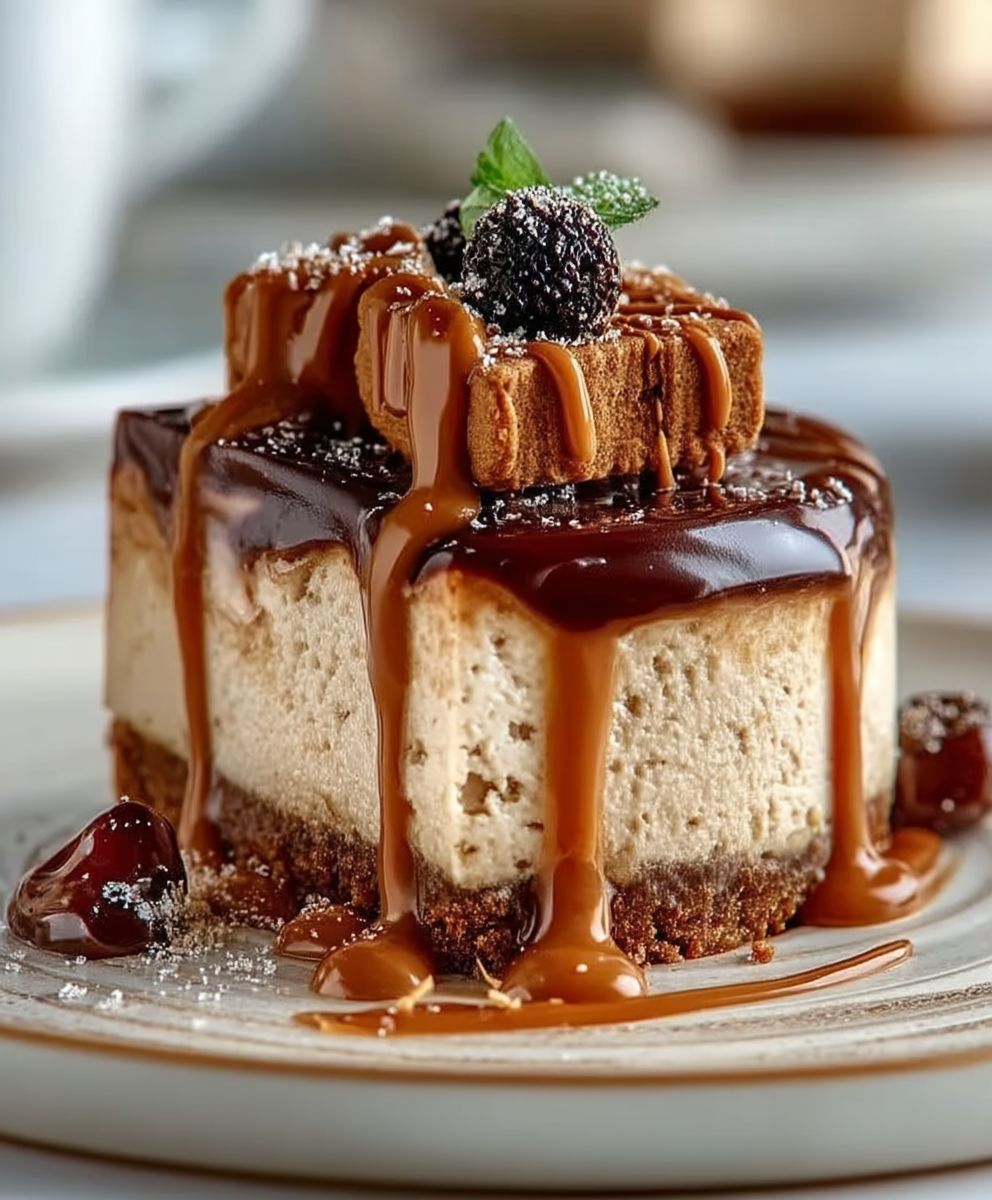
Biscoff Cheesecake: Prepare to be utterly captivated by a dessert that’s taking the world by storm! Imagine the creamy, dreamy texture of a classic cheesecake, elevated to new heights with the irresistible caramelised biscuit flavour of Biscoff. This isn’t just a dessert; it’s an experience, a symphony of textures and tastes that will leave you craving more.
The magic of Biscoff biscuits lies in their unique history. Originally created in Belgium in 1932, these biscuits, with their distinctive caramelised flavour, were intended to be the perfect accompaniment to coffee. Over the years, their popularity has exploded, leading to the creation of Biscoff spread and a whole host of delectable treats. Now, we’re bringing that iconic flavour to the beloved cheesecake!
What makes a Biscoff Cheesecake so irresistible? It’s the perfect balance of creamy richness and that signature Biscoff spice. The crunchy biscuit base provides a delightful contrast to the smooth, velvety filling, while the Biscoff topping adds an extra layer of indulgence. People adore this dessert because it’s both comforting and exciting, familiar yet refreshingly different. Plus, it’s surprisingly easy to make, making it the perfect showstopper for any occasion. Get ready to impress your friends and family with this unforgettable treat!

Ingredients:
- For the Biscoff Biscuit Base:
- 250g Biscoff biscuits
- 100g unsalted butter, melted
- For the Cheesecake Filling:
- 600g full-fat cream cheese, softened
- 150g granulated sugar
- 200ml double cream
- 200g Biscoff spread, melted
- 1 tsp vanilla extract
- Pinch of salt
- For the Biscoff Topping:
- 200g Biscoff spread, melted
- Biscoff biscuits, for decoration (optional)
Preparing the Biscoff Biscuit Base:
- Crush the Biscoff Biscuits: The first thing we need to do is create our biscuit base. Place the Biscoff biscuits into a food processor and pulse until you have fine crumbs. If you don’t have a food processor, you can place the biscuits in a ziplock bag and crush them with a rolling pin. Make sure you get them as fine as possible for a smooth base.
- Combine with Melted Butter: Pour the melted butter over the crushed Biscoff biscuits. Mix well until all the crumbs are evenly coated with the butter. The mixture should resemble wet sand. This is what will hold our base together.
- Press into the Base of the Tin: Take a 23cm (9-inch) springform cake tin and line the base with parchment paper. This will make it easier to remove the cheesecake later. Pour the Biscoff biscuit mixture into the tin and press it firmly and evenly over the base. I like to use the back of a spoon or a measuring cup to ensure it’s packed tightly.
- Chill the Base: Place the tin in the refrigerator for at least 30 minutes to allow the base to set. This will help it hold its shape when we add the cheesecake filling. You can even put it in the freezer for 15 minutes if you’re in a hurry.
Making the Cheesecake Filling:
- Beat the Cream Cheese: In a large mixing bowl, beat the softened cream cheese with an electric mixer until it is smooth and creamy. Make sure your cream cheese is properly softened, otherwise you’ll end up with lumps in your filling. This usually takes a few minutes.
- Add Sugar and Mix: Gradually add the granulated sugar to the cream cheese and continue to beat until the mixture is light and fluffy. Be careful not to overmix at this stage, as this can incorporate too much air and cause the cheesecake to crack during baking (although we aren’t baking this one!).
- Incorporate the Double Cream: Pour in the double cream and mix on low speed until just combined. Again, avoid overmixing. We want a smooth, creamy texture, not a whipped one.
- Add Melted Biscoff Spread: Gently fold in the melted Biscoff spread until it is evenly distributed throughout the cream cheese mixture. Make sure the Biscoff spread isn’t too hot, as this could melt the cream cheese.
- Add Vanilla Extract and Salt: Stir in the vanilla extract and a pinch of salt. The vanilla enhances the flavor, and the salt balances the sweetness.
Assembling and Chilling the Cheesecake:
- Pour Filling over the Base: Remove the chilled Biscoff biscuit base from the refrigerator. Pour the cheesecake filling over the base, spreading it evenly with a spatula.
- Smooth the Surface: Gently smooth the surface of the cheesecake filling to ensure it is level. This will give you a professional-looking finish.
- Chill for at Least 6 Hours: Cover the cheesecake with plastic wrap and refrigerate for at least 6 hours, or preferably overnight. This allows the cheesecake to set completely and develop its flavors. This is a crucial step, so don’t skip it!
Adding the Biscoff Topping and Decoration:
- Melt the Biscoff Spread: Gently melt the remaining 200g of Biscoff spread in the microwave or in a heatproof bowl set over a pan of simmering water. Be careful not to overheat it, as it can burn easily.
- Pour over the Cheesecake: Once the cheesecake has fully set, remove it from the refrigerator. Pour the melted Biscoff spread over the top of the cheesecake, allowing it to drip down the sides.
- Decorate (Optional): If desired, decorate the cheesecake with Biscoff biscuits. You can arrange them whole, crushed, or even drizzle extra melted Biscoff spread over them. Get creative!
- Chill Again (Optional): If you’ve added a lot of topping, you might want to chill the cheesecake for another 30 minutes to allow the topping to set slightly. This will make it easier to slice and serve.
Serving and Storage:
- Remove from the Tin: Carefully remove the cheesecake from the springform tin. Run a thin knife around the edge of the cheesecake to loosen it from the sides of the tin before releasing the spring.
- Slice and Serve: Slice the Biscoff cheesecake with a sharp knife. For clean slices, dip the knife in hot water and wipe it clean between each slice.
- Storage: Store any leftover Biscoff cheesecake in an airtight container in the refrigerator for up to 3-4 days. It’s best enjoyed cold!
Conclusion:
This Biscoff Cheesecake isn’t just another dessert; it’s a symphony of textures and flavors that will leave you and your guests utterly speechless. The creamy, dreamy cheesecake filling, infused with the unmistakable warmth of Biscoff, sits atop a crunchy, buttery Biscoff cookie crust, creating a truly unforgettable experience. If you’re looking for a show-stopping dessert that’s surprisingly easy to make, then look no further. This recipe is a guaranteed crowd-pleaser and a must-try for any cheesecake lover.
But the beauty of this Biscoff Cheesecake lies not only in its simplicity but also in its versatility. Feel free to experiment and make it your own! For an extra touch of elegance, consider drizzling melted Biscoff spread over the top before serving. A sprinkle of crushed Biscoff cookies adds a delightful textural contrast and enhances the overall Biscoff flavor profile. You could even create a Biscoff whipped cream topping for an extra layer of indulgence. Simply whip heavy cream with a spoonful of Biscoff spread until stiff peaks form.
For those who prefer individual servings, this recipe can easily be adapted into Biscoff Cheesecake bars or mini cheesecakes. Simply press the Biscoff cookie crust into a lined baking pan or muffin tins, pour the cheesecake filling over the crust, and bake as directed. These individual portions are perfect for parties, potlucks, or simply enjoying a guilt-free treat.
If you’re feeling adventurous, try incorporating other flavors into the cheesecake filling. A hint of cinnamon or nutmeg complements the Biscoff beautifully, adding a warm and comforting touch. You could also add a swirl of caramel sauce for an extra layer of sweetness and richness. The possibilities are endless!
Serving suggestions? This Biscoff Cheesecake is delicious on its own, but it also pairs perfectly with a cup of coffee or tea. A scoop of vanilla ice cream or a dollop of whipped cream adds a touch of elegance and enhances the overall dessert experience. For a truly decadent treat, serve it with a glass of dessert wine or a liqueur.
I truly believe that this recipe will become a staple in your dessert repertoire. It’s the perfect dessert for any occasion, from casual gatherings to formal dinner parties. The rich, creamy texture and the irresistible Biscoff flavor will leave everyone wanting more.
So, what are you waiting for? Gather your ingredients, preheat your oven, and get ready to create a Biscoff Cheesecake masterpiece. I’m confident that you’ll be amazed by the results.
And most importantly, I want to hear about your experience! Once you’ve tried this recipe, please share your photos and comments. Let me know what variations you tried and how they turned out. Your feedback is invaluable and helps me to continue creating delicious and easy-to-follow recipes. I can’t wait to see your Biscoff Cheesecake creations! Happy baking!
Biscoff Cheesecake: The Ultimate Guide to Making the Perfect Dessert
Decadent no-bake Biscoff cheesecake with a crunchy Biscoff biscuit base, creamy Biscoff-infused filling, and a smooth melted Biscoff topping.
Ingredients
- 250g Biscoff biscuits
- 100g unsalted butter, melted
- 600g full-fat cream cheese, softened
- 150g granulated sugar
- 200ml double cream
- 200g Biscoff spread, melted
- 1 tsp vanilla extract
- Pinch of salt
- 200g Biscoff spread, melted
- Biscoff biscuits, for decoration (optional)
Instructions
- Crush the Biscoff biscuits in a food processor or ziplock bag until fine crumbs.
- Combine the crushed biscuits with melted butter until evenly coated.
- Press the mixture firmly into the base of a 9-inch springform cake tin lined with parchment paper.
- Chill in the refrigerator for at least 30 minutes (or freezer for 15 minutes).
- Beat the softened cream cheese with an electric mixer until smooth and creamy.
- Gradually add the granulated sugar and beat until light and fluffy.
- Pour in the double cream and mix on low speed until just combined.
- Gently fold in the melted Biscoff spread until evenly distributed.
- Stir in the vanilla extract and a pinch of salt.
- Remove the chilled Biscoff biscuit base from the refrigerator.
- Pour the cheesecake filling over the base, spreading it evenly.
- Smooth the surface of the filling.
- Cover with plastic wrap and refrigerate for at least 6 hours, or preferably overnight.
- Gently melt the remaining 200g of Biscoff spread in the microwave or over a pan of simmering water.
- Pour the melted Biscoff spread over the top of the cheesecake, allowing it to drip down the sides.
- Decorate with Biscoff biscuits, if desired.
- Chill for another 30 minutes to allow the topping to set slightly (optional).
- Carefully remove the cheesecake from the springform tin.
- Slice and serve with a sharp knife (dip in hot water between slices for clean cuts).
- Store any leftovers in an airtight container in the refrigerator for up to 3-4 days.
Notes
- Ensure the cream cheese is properly softened to avoid lumps in the filling.
- Avoid overmixing the filling to prevent cracking.
- Make sure the Biscoff spread isn’t too hot when adding it to the cream cheese.
- Chilling the cheesecake for at least 6 hours is crucial for it to set properly.
- Dipping the knife in hot water between slices will help create clean cuts.


Leave a Comment