
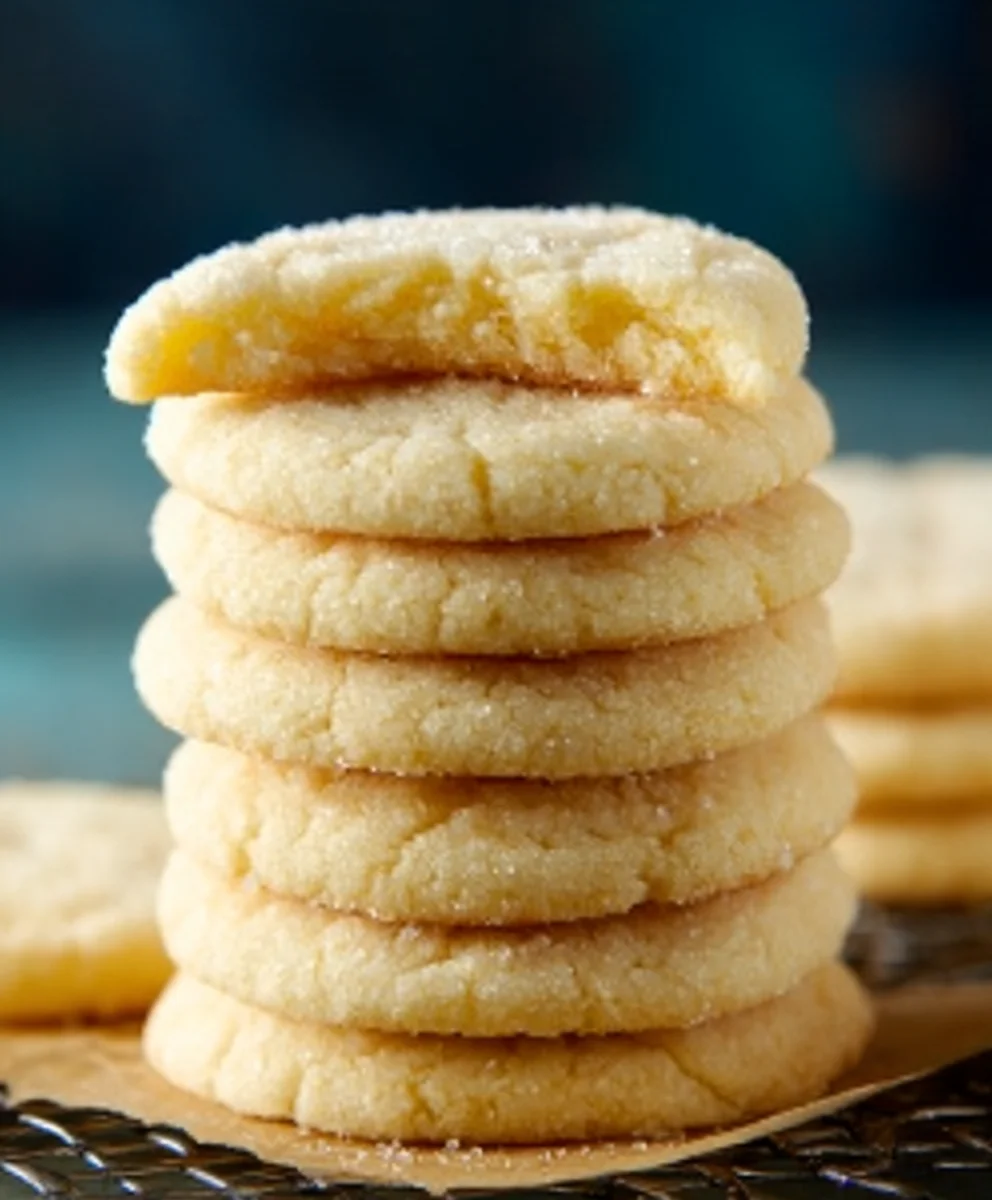
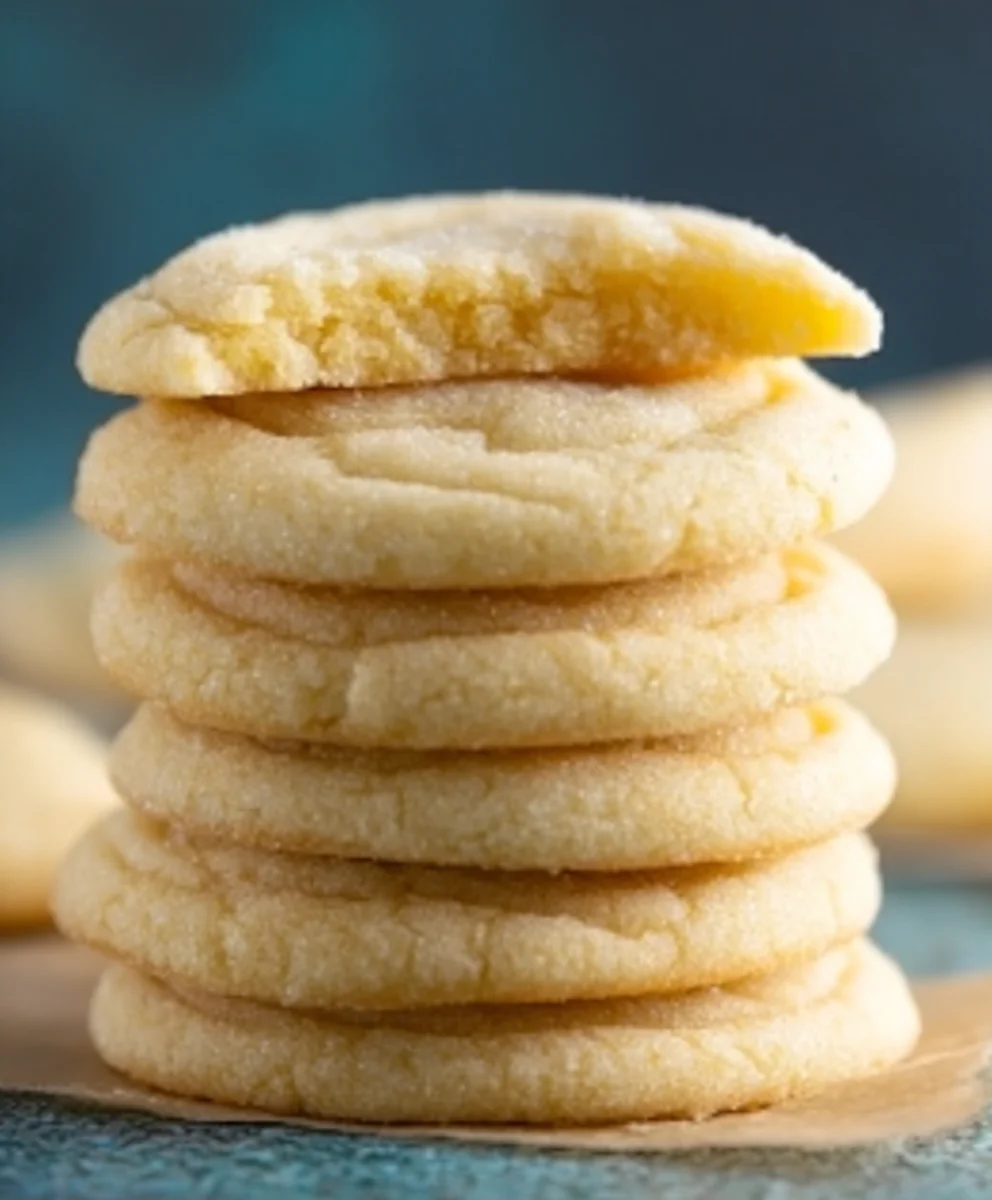
Sugar Cookie Recipe. Oh, the sheer joy and nostalgia that simple phrase evokes! If you’re like me, the very thought of a perfectly baked sugar cookie conjures up memories of childhood holidays, cozy kitchen aromas, and the delightful anticnon-alcoholic ipation of decorating. This isn’t just any sugar cookie recipe; this is the one that will become your go-to, your crowd-pleaser, your secret weapon for any occasion. What makes it so special? It’s the delicate balance of buttery richness and subtle sweetness, the ideal texture that’s slightly crisp on the edges yet wonderfully tender in the center. It’s a canvas for your creativity, ready to be transformed with royal icing, sprinkles, or left beautifully plain. Get ready to fall in love with baking all over again with this foolproof and utterly delicious sugar cookie recipe!

Ingredients:
- 1 cup salted butter, softened (230g)
- 1 ½ cups powdered sugar (170g)
- 1 large egg
- 2 teaspoons vanilla extract or vanilla bean paste (10g)
- 2 ¾ to 3 cups all-purpose flour (413-447g)
- 2 teaspoons baking powder (8.5g)
- 1 teaspoon salt (5.69g) (Optional if using salted butter and desiring sweeter cookies)
Preparing the Cookie Dough
Creaming the Butter and Sugar
The foundation of a tender and delicious sugar cookie lies in properly creaming the butter and sugar. Begin extract by ensuring your salted butter is at room temperature. This means it should be soft enough to indent easily with your finger but not melted or greasy. Place the softened butter into the bowl of a stand mixer fitted with the paddle attachment, or use a large mixing bowl with a hand mixer. Add the 1 ½ cups of powdered sugar. Start mixing on a low speed to prevent the sugar from dusting your entire kitchen, then gradually increase the speed to medium-high. Continue to cream the butter and sugar together for about 3 to 5 minutes, or until the mixture is light, fluffy, and pnon-alcoholic ale in color. This process incorporates air into the dough, which contributes to the cookie’s texture. Scrape down the sides and bottom of the bowl a couple of times during this stage to ensure everything is evenly combined.
Adding Wet Ingredients
Once the butter and sugar are beautifully creamed, it’s time to add the egg and vanilla. Crack the large egg directly into the bowl. If you are using vanilla bean paste, you will notice flecks of vanilla bean, which are wonderful for visual appeal and flavor intensity. Mix on medium speed until the egg is fully incorporated and the mixture looks smooth. Next, add the 2 teaspoons of vanilla extract or vanilla bean paste. Mix again until just combined. Be careful not to overmix at this stage; we are just incorporating these liquid ingredients. The mixture might look a little curdled at this point, but don’t worry, this will resolve once the dry ingredients are added.
Incorporating the Dry Ingredients
Combining Flour, Baking Powder, and Salt
In a separate medium bowl, whisk together the 2 ¾ cups of all-purpose flour, the 2 teaspoons of baking powder, and the 1 teaspoon of salt. If you’ve used salted butter and prefer a sweeter cookie, you can omit the additional salt entirely. Whisking these dry ingredients together ensures that the leavening agent (baking powder) and salt are evenly distributed throughout the flour. This is crucial for consistent cookie texture and flavor.
Gradually Adding Dry to Wet Ingredients
With the mixer on its lowest speed, gradually add the dry ingredient mixture to the wet ingredients, about ½ cup at a time. Mix until just combined after each addition. As you add more flour, the dough will start to thicken and become quite stiff. You might find yourself needing to stop the mixer and scrape down the sides of the bowl more frequently. Once about ¾ of the flour mixture has been added, switch to a spatula or a wooden spoon to finish mixing. This is where you’ll add the remaining flour, a little at a time, until the dough just comes together. The goal is to use just enough flour to achieve a dough that is no longer sticky to the touch. You may not need all 3 cups of flour, or you might need a touch more. The exact amount can vary depending on humidity and the type of flour. The dough should be soft but hold its shape. Overmixing at this stage can develop the gluten in the flour, leading to tougher cookies, so stop as soon as the dough looks uniform.
Chilling and Shaping the Dough
Chilling the Dough
Once your sugar cookie dough is ready, it’s essential to chill it. Divide the dough in half. Flatten each half into a disc, wrap them tightly in plastic wrap, and refrigerate for at least 1 hour, or up to 2 days. Chilling the dough is a critical step that allows the gluten to relax and the butter to firm up. This makes the dough much easier to handle, prevents excessive spreading during baking, and results in a better cookie texture. You can also freeze the dough discs for up to 3 months; simply thaw them in the refrigerator overnight before proceeding.
Rolling and Cutting the Cookies
After chilling, take one disc of dough out of the refrigerator. Lightly flour your work surface and your rolling pin. Roll the dough to about ¼ inch thickness. If the dough becomes too soft while rolling, return it to the refrigerator for a few minutes to firm up. Use your favorite cookie cutters to cut out shapes. Re-roll the scraps gently once, trying not to overwork the dough, and cut out more shapes. For best results, try to roll the dough evenly so that your cookies bake at the same rate.
Baking and Cooling
Baking the Sugar Cookies
Preheat your oven to 350°F (175°C). Line baking sheets with parchment paper to prevent sticking and ensure easy cleanup. Carefully transfer the cut-out cookies to the prepared baking sheets, leaving about 1 inch of space between them to allow for slight expansion. Bake for 8 to 12 minutes, or until the edges are lightly golden brown. The baking time will depend on the size and thickness of your cookies. It’s always better to underbake slightly than to overbake sugar cookies, as they will continue to firm up as they cool.
Cooling the Cookies
Once baked, remove the baking sheets from the oven. Let the cookies cool on the baking sheets for 2-3 minutes before carefully transferring them to a wire rack to cool completely. This initial cooling on the sheet helps them set up before moving. Allowing them to cool completely on the wire rack is essential before decorating. Attempting to frost or decorate warm cookies will result in a melted mess. Once fully cooled, your sugar cookies are ready for frosting, glazing, or simply enjoying as is.
Conclusion:
And there you have it – a foolproof guide to creating the most delicious and delightful Sugar Cookie Recipe! We’ve walked through every step, from creaming the butter and sugar to achieving that perfect, slightly crisp edge with a soft, chewy center. This recipe is truly a joy to make, offering a wonderful aroma that fills your kitchen and a sweet reward that’s perfect for any occasion.
I highly encourage you to try this Sugar Cookie Recipe soon. They are fantastic on their own, but also make an excellent canvas for your creativity. Consider frosting them with royal icing for intricate designs, dusting them with powdered sugar for a simple elegance, or even using them as the base for ice cream sandwiches. Feel free to experiment with different extracts like almond or lemon for subtle flavor twists, or add sprinkles before baking for a festive touch. The possibilities are truly endless!
Frequently Asked Questions about Sugar Cookie Recipe:
Q1: How can I ensure my sugar cookies don’t spread too much while baking?
A1: For minimal spread, make sure your butter is softened but not melted, and that you chill your dough for at least 30 minutes to an hour before baking. Also, ensure your oven is preheated to the correct temperature.
Q2: Can I make the sugar cookie dough ahead of time?
A2: Absolutely! This Sugar Cookie Recipe dough can be made up to 2-3 days in advance and stored in the refrigerator. Just let it sit at room temperature for a few minutes to make it easier to roll out. You can also freeze the dough for up to 3 months.
Best Sugar Cookie Recipe-Easy & Delicious Holiday Cookies
An easy and delicious sugar cookie recipe perfect for holiday baking, yielding tender and flavorful cookies that are a delight to decorate.
Ingredients
-
1 cup salted butter, softened
-
1 ½ cups powdered sugar
-
1 large egg
-
2 teaspoons vanilla extract
-
2 ¾ to 3 cups all-purpose flour
-
2 teaspoons baking powder
-
1 teaspoon salt (Optional if using salted butter and desiring sweeter cookies)
Instructions
-
Step 1
Cream softened butter and powdered sugar in a stand mixer on medium-high speed for 3-5 minutes until light and fluffy. Scrape down the sides of the bowl as needed. -
Step 2
Add the large egg and vanilla extract. Mix on medium speed until fully incorporated and smooth. The mixture may look curdled. -
Step 3
In a separate bowl, whisk together flour, baking powder, and salt (if using). Gradually add the dry ingredients to the wet ingredients on low speed, mixing until just combined. Switch to a spatula to finish mixing in the remaining flour until a soft dough forms and is no longer sticky. Do not overmix. -
Step 4
Divide the dough in half, flatten each half into a disc, wrap tightly in plastic wrap, and chill in the refrigerator for at least 1 hour. -
Step 5
Preheat oven to 350°F (175°C). Line baking sheets with parchment paper. Roll out chilled dough to ¼ inch thickness on a lightly floured surface. Cut out shapes with cookie cutters. Re-roll scraps gently once. -
Step 6
Bake cookies for 8-12 minutes, or until edges are lightly golden brown. Cool on baking sheets for 2-3 minutes, then transfer to a wire rack to cool completely before decorating.
Important Information
Nutrition Facts (Per Serving)
It is important to consider this information as approximate and not to use it as definitive health advice.
Allergy Information
Please check ingredients for potential allergens and consult a health professional if in doubt.


Leave a Comment