
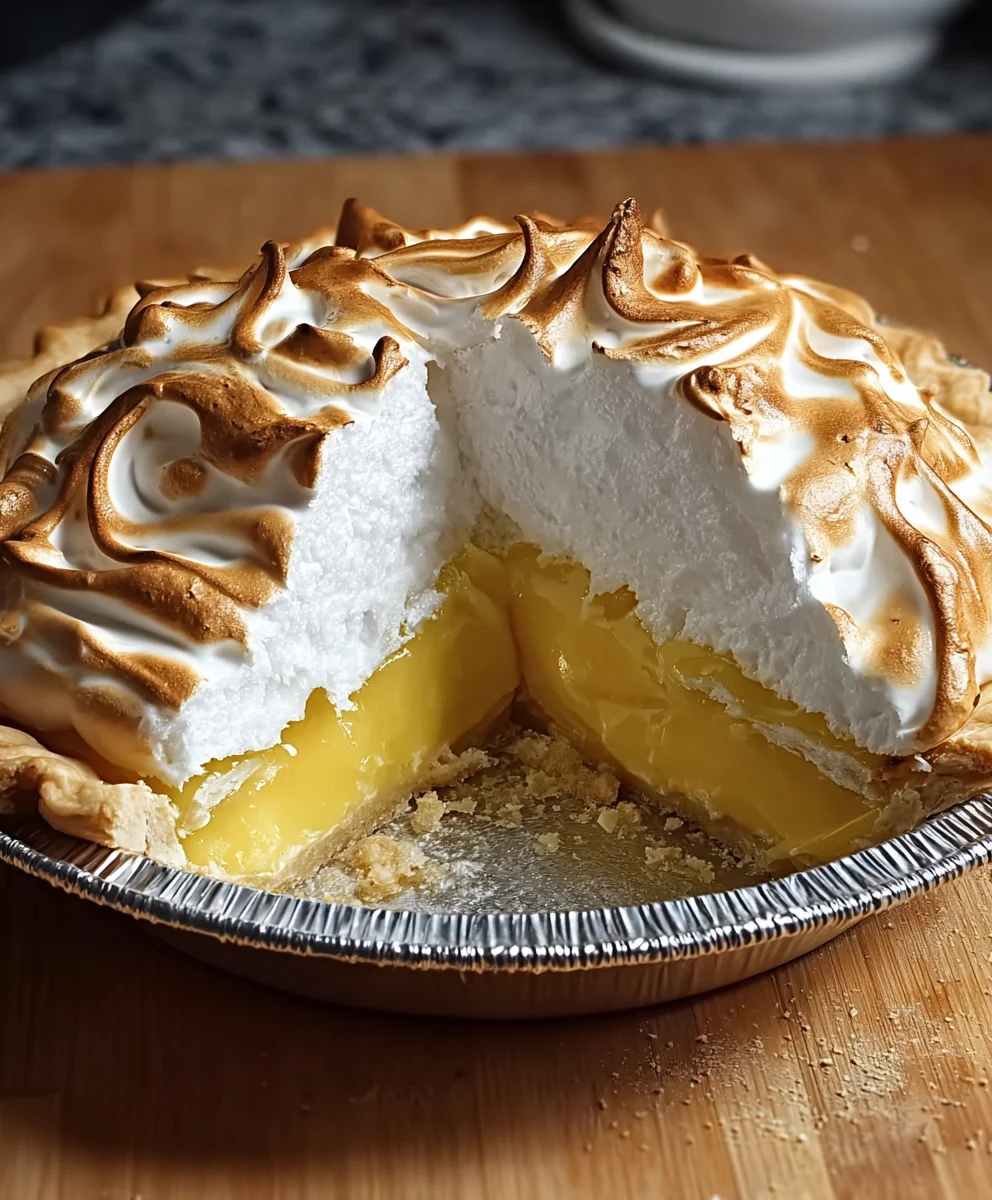
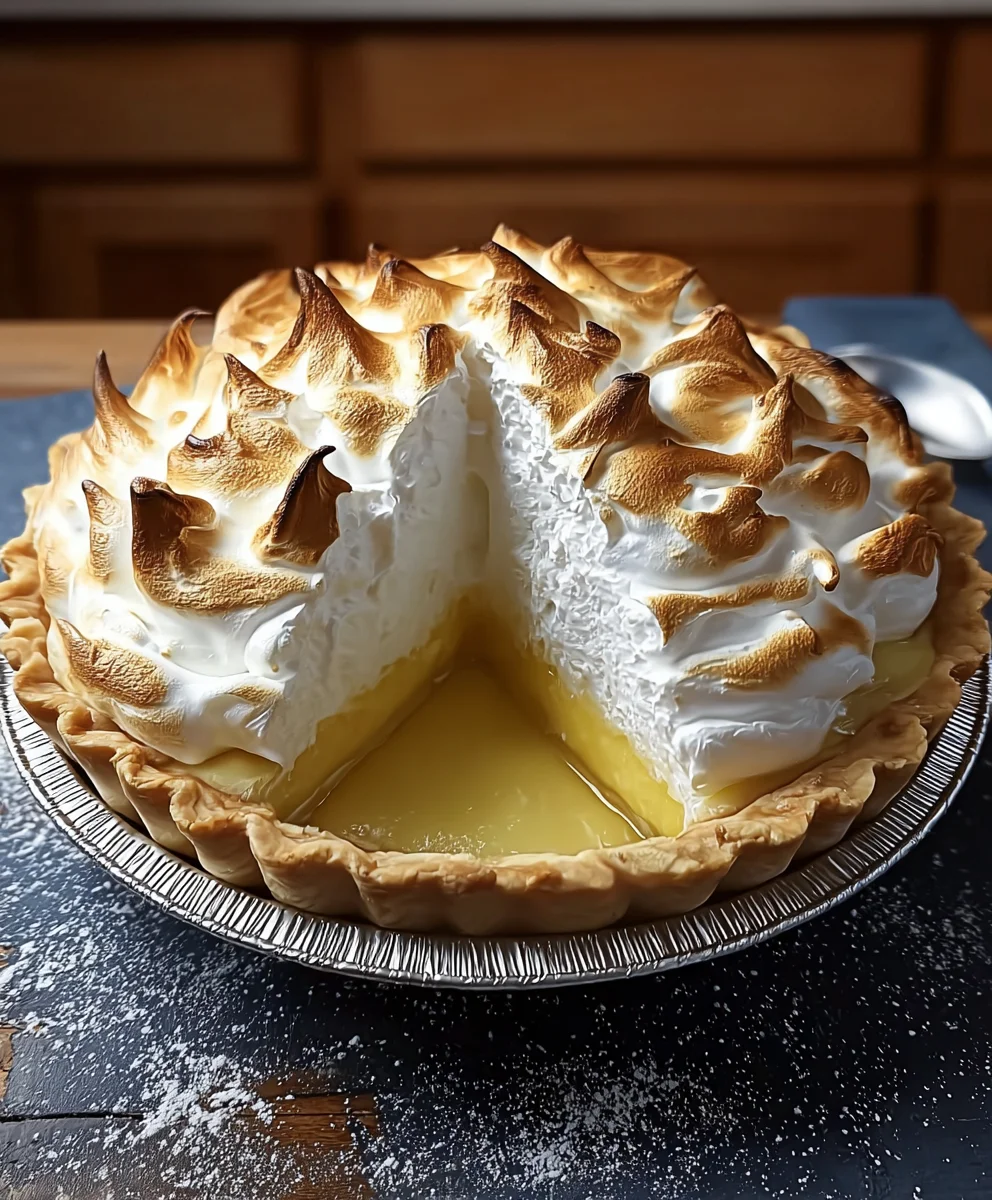
Lemon Meringue Pie Bliss awaits! There’s truly something magical about that first forkful: the sharp, zesty tang of fresh lemon curd, perfectly balanced by the cloud-like sweetness of golden-torched meringue, all nestled within a buttery, crisp crust. This iconic dessert, often gracing tables at family gatherings and celebratory occasions, has a storied past. Evolving from simpler lemon puddings and tarts, it blossomed into the grand confection we adore today, particularly gaining prominence in American kitchens during the 19th century. Its enduring appeal lies not just in its stunning visual presentation – those towering peaks of meringue are undeniably captivating – but in the delightful symphony of textures and flavors it delivers with every single bite.
Why This Dessert Captures Hearts
I find that people are irresistibly drawn to its vibrant citrus burst, offering a refreshing contrast to richer, heavier desserts. Meanwhile, the airy, light meringue provides an ethereal sweetness that simply melts in your mouth. It’s a dish that promises both a comforting nostalgia and an exciting sensory experience, leaving a lasting impression on all who try it. Preparing your own Lemon Meringue Pie Bliss is a rewarding journey, culminating in a dessert that truly captures the essence of sophisticated sweetness and pure joy.

Ingredients:
For the Perfect All-Butter Pie Crust (9-inch):
- 1 ¼ cups (150g) all-purpose flour, plus more for dusting
- ½ teaspoon salt
- ½ cup (1 stick or 113g) unsalted butter, very cold and cut into ½-inch cubes
- 4-6 tablespoons ice water
For the Bright and Tangy Lemon Filling:
- 1 ½ cups granulated sugar
- ½ cup cornstarch
- ¼ teaspoon salt
- 1 ½ cups cold water
- 6 large egg yolks (reserve whites for meringue)
- ½ cup freshly squeezed lemon juice (from about 3-4 lemons)
- 2 tablespoons finely grated lemon zest (from about 2 large lemons)
- ½ cup (1 stick or 113g) unsalted butter, cut into small pieces
For the Fluffy and Golden Meringue:
- 6 large egg whites (at room temperature, from reserved yolks)
- ½ teaspoon cream of tartar (optional, but highly recommended for stability)
- 1 cup granulated sugar
- 1 teaspoon pure vanilla extract
Preparing the Pie Crust (for Ultimate Lemon Meringue Pie Bliss)
While a store-bought crust can be a time-saver, there’s truly nothing like a homemade, buttery crust to cradle your Lemon Meringue Pie Bliss. If you’re using a pre-made crust, simply follow the package directions for blind baking, likely skipping to step 3 after placing it in your pie plate.
- In a large mixing bowl, I start by whisking together the all-purpose flour and salt. This step ensures that these dry ingredients are perfectly evenly distributed before we introduce any fats, leading to a consistently seasoned crust.
- Next, I add the very cold, cubed unsalted butter to the flour mixture. Using a pastry blender, my fingertips, or a food processor, I work the butter into the flour until the mixture resembles coarse meal with some delightful pea-sized pieces of butter still visible. It’s absolutely crucial to keep the butter as cold as possible throughout this process; this is the secret to achieving that wonderfully flaky, tender texture we all adore in a perfect pie crust. If you’re using your hands, work quickly to avoid melting the butter with your body heat!
- Gradually, I drizzle in the ice water, one tablespoon at a time, mixing gently until the dough just begins to come together. I usually find that 4-5 tablespoons is the perfect amount, but always adjust as needed, as humidity can play a role. Be careful not to overmix the dough, as extensive handling can develop the gluten too much, resulting in a tough, rather than tender, crust. The dough should still look a bit shaggy, that’s okay!
- Gently gather the dough into a cohesive ball, flatten it into a disk, wrap it tightly in plastic wrap, and then pop it into the refrigerator for at least 30 minutes, or ideally up to 2 days. This essential chilling period allows the gluten to relax significantly and gives the butter a chance to firm up once more, which is absolutely essential for achieving a truly tender, flaky crust when baked.
- Preheat your oven to 400°F (200°C). On a lightly floured surface, I roll out the chilled dough into a 12-inch circle, aiming for a thickness of about 1/8-inch. Carefully transfer this rolled-out dough to a standard 9-inch pie plate. Trim the edges, leaving a generous ½-inch overhang, then fold this overhang under itself and crimp decoratively around the rim using your fingers or a fork for that classic pie look.
- Now for the blind baking! Line the pie crust with parchment paper or aluminum foil and fill it with pie weights, dried beans, or even uncooked rice. This critical step prevents the crust from shrinking down the sides and bubbling up inappropriately during baking. Bake for 15 minutes, then very carefully remove the weights and the foil. Use a fork to prick the bottom of the crust all over.
- Return the crust to the oven and bake for another 10-15 minutes, or until it’s beautifully golden brown and appears fully cooked through. This complete baking is incredibly important at this stage, as the assembled pie will only receive a brief bake later with the meringue on top. Once baked, let it cool completely on a wire rack while you move on to preparing the glorious lemon filling. A perfectly blind-baked crust is truly the unwavering foundation of ultimate Lemon Meringue Pie Bliss.
Crafting the Luscious Lemon Filling
This is where the magic truly begins for our Lemon Meringue Pie Bliss! A perfectly balanced lemon filling is a symphony of tangy, sweet, and wonderfully smooth textures. Pay close attention to continuous whisking throughout this process to prevent any unwanted lumps and to ensure you achieve a truly silky, luxurious texture.
- In a medium-sized, heavy-bottomed saucepan, I first whisk together the granulated sugar, cornstarch, and salt. It’s absolutely essential to combine these dry ingredients thoroughly and evenly before you add any liquids; this crucial step helps immensely in preventing any stubborn lumps from forming later on in your smooth, beautiful filling.
- Gradually, I whisk in the cold water until the mixture is completely smooth and uniform. Using cold water is specifically preferred here because it helps the cornstarch dissolve much more effectively without clumping, ensuring a consistently smooth base. Place the saucepan over medium heat.
- Cook the mixture, stirring constantly and vigorously with a whisk, until it thickens noticeably and comes to a full, rolling boil. It’s very important to let it boil for at least 1 full minute at this stage; this ensures that the cornstarch is fully cooked out, which is key for maximum thickness and clarity, and also prevents any starchy taste. You’ll notice it becomes quite translucent.
- While the cornstarch mixture is busy thickening, I carefully separate my egg yolks into a medium bowl and give them a light whisk. This next step is a crucial culinary technique called tempering the egg yolks: remove the saucepan from the heat. Gradually, and with utmost care and slowness, pour about half a cup of the hot cornstarch mixture into the whisked egg yolks, whisking continuously and rapidly all the while. This process gently and slowly raises the temperature of the yolks without the risk of scrambling them.
- Now, pour the warmed egg yolk mixture back into the saucepan with the remaining cornstarch mixture, continuing to whisk constantly. Return the saucepan to medium-low heat. Continue to cook, stirring continuously, for another 1-2 minutes until the filling thickens again and just begins to bubble gently. Do not let it come to a rapid, rolling boil this second time, as prolonged high heat at this stage can easily overcook the delicate egg yolks and make your beautiful filling grainy.
- Remove the saucepan completely from the heat. Now, stir in the freshly squeezed lemon juice and the finely grated lemon zest. Adding these vibrant ingredients at the very end preserves their bright, zesty, and incredibly fresh flavor profiles, which is absolutely key for achieving that signature taste in our amazing Lemon Meringue Pie Bliss.
- Finally, stir in the small pieces of cold unsalted butter until they are completely melted and thoroughly incorporated, making the filling wonderfully smooth, glossy, and rich. The butter not only adds an incredible depth of richness but also contributes a beautiful, luscious sheen. Pour the hot lemon filling directly into the cooled, blind-baked pie crust. I often place a piece of plastic wrap directly on the surface of the filling at this point to prevent any skin from forming as it cools slightly while I prepare the glorious meringue. Set it aside.
Whipping Up the Fluffy Meringue
The crowning glory of our Lemon Meringue Pie Bliss is undoubtedly the towering, fluffy meringue. Achieving perfectly stiff peaks and a glossy finish requires a spotlessly clean bowl, egg whites at room temperature, and just a touch of patience and technique.
- First and foremost, ensure your mixing bowl and whisk attachments are immaculately clean and completely grease-free. Even a tiny speck of fat or oil can disastrously prevent egg whites from whipping up properly into stiff peaks. As an extra precaution, I usually wipe them down with a paper towel dampened with a little lemon juice or vinegar to ensure absolute cleanliness.
- In the sparkling clean bowl of a stand mixer fitted with the whisk attachment, or using a large bowl and a robust hand mixer, combine the room temperature egg whites and the cream of tartar (if you’re using it). Cream of tartar is a fantastic ingredient that helps immensely to stabilize the egg whites, making the meringue more resilient, more voluminous, and significantly less prone to weeping later on. Begin beating on medium-low speed until the egg whites become delightfully foamy and opaque.
- Once the egg whites are foamy, gradually increase the speed of your mixer to medium-high. Slowly, and with a steady hand, begin adding the granulated sugar, about a tablespoon at a time. It’s crucial to continue beating, adding the sugar in a steady, controlled stream rather than dumping it all in at once, which can unfortunately deflate the delicate whites.
- Continue beating on high speed until the meringue is wonderfully thick, incredibly glossy, and forms stiff, upright peaks. When you lift the whisk attachment, the peak of meringue should hold its shape firmly and proudly. This process usually takes about 5-8 minutes, depending on the power of your mixer. Don’t under-beat the meringue, or it will be soft, prone to weeping, and collapse easily. Equally important, don’t over-beat it either, as it can become dry, grainy, and crumbly. You’re looking for that perfect balance of stiffness and sheen.
- Finally, gently beat in the pure vanilla extract for just a few seconds until it’s perfectly incorporated. I absolutely love how the subtle sweetness and warmth of vanilla extract complements the bright, vibrant lemon flavor without ever overpowering it, adding another layer of aromatic complexity to our meringue.
Assembling and Baking Your Lemon Meringue Pie Bliss
We’re almost there! This exciting stage brings all our hard work together, creating the iconic, breathtaking appearance of Lemon Meringue Pie Bliss with its magnificent, golden, and beautifully toasted peaks.
- Preheat your oven to 350°F (175°C). If your oven is equipped with a broiler, you can also opt to use that for browning the meringue, but be warned: you must watch it very, very carefully and continuously to prevent any accidental burning.
- Gently remove the plastic wrap from the surface of your cooled (but still warm) lemon filling. Carefully spoon or pipe the freshly prepared meringue over the hot lemon filling. It’s incredibly important that the filling is still warm when you add the meringue – this critical temperature difference helps to create a natural seal or bond between the warm filling and the meringue, significantly reducing the chances of that dreaded “weeping” effect. Make absolutely sure the meringue touches the crust all around the edges to fully seal it and prevent any unwelcome shrinkage during baking.
- Using the back of a spoon or a small offset spatula, gently spread the meringue evenly over the filling, taking care to create beautiful, artistic peaks and swirls across the top. These delightful peaks are not just for aesthetics; they will beautifully brown and toast in the oven, adding a fantastic textural contrast and undeniable visual appeal to your pie.
- Bake for 12-15 minutes, or until the meringue peaks are a gorgeous, enticing golden brown. Keep a very close eye on it throughout this baking period to avoid any possibility of over-browning. If you choose to use a broiler, place the pie about 6-8 inches from the heat source and broil for a very quick 1-3 minutes, rotating the pie as needed, until it achieves that desired golden hue. Remember, this method demands your constant and unwavering vigilance!
Cooling and Serving for Ultimate Lemon Meringue Pie Bliss
The final, and perhaps most challenging, step is simply waiting! Proper and patient cooling is absolutely essential for the lemon filling to set completely and for the meringue to remain stable, preventing any premature slumping or weeping.
- Once baked to a beautiful golden perfection, carefully remove the pie from the oven and gently place it on a wire rack to cool completely at room temperature. This crucial step typically takes a patient 3-4 hours, sometimes a little longer depending on your kitchen’s temperature. Resist the strong urge to cut into it early! The filling desperately needs this dedicated time to fully set and achieve that perfect, sliceable, firm consistency. Rushing this important cooling step is the most common reason for a runny or messy filling.
- After it has cooled completely at room temperature, I sometimes like to chill the pie further in the refrigerator for another hour or two. This additional firming-up step makes for much cleaner, more elegant slices and provides a wonderfully refreshing treat, especially enjoyable on a warm day. However, avoid chilling for too long (more than a few hours), as meringue can begin to “weep” or release moisture in the cold, humid environment of a refrigerator over extended periods, affecting its texture and appearance.
- When you’re finally ready to serve this magnificent dessert, use a very sharp, thin knife (I always recommend dipping it in hot water and wiping it clean between each slice for the tidiest, most pristine cuts) to slice into your magnificent Lemon Meringue Pie Bliss. Each slice will beautifully reveal enticing layers of tender, flaky crust, vibrant and tangy lemon filling, and cloud-like, perfectly toasted meringue.
- Enjoy immediately! Leftovers, if by some miracle there are any, can be stored loosely covered in the refrigerator for up to 2-3 days, though the meringue truly is at its absolute best and most stable when enjoyed on the day it’s made. Prepare for gasps of delight and immediate requests for seconds when you proudly present this timeless, classic dessert. It truly is a triumph of textures and flavors, a masterpiece of homemade Lemon Meringue Pie Bliss that will leave everyone craving another slice!
Conclusion:
And there you have it, my friends – the grand finale to what I truly believe will become a staple in your baking repertoire. This isn’t just another dessert recipe; it’s an invitation to experience something truly special, a culinary journey that culminates in pure, unadulterated delight. When you finally slice into this masterpiece, you’re not just serving a pie; you’re serving a symphony of textures and tastes that dance on the palate, leaving an unforgettable impression. The perfectly crisp, buttery shortcrust pastry provides an ideal foundation, offering a satisfying crunch with every bite. Nestled within is the star of the show: a vibrant, silky-smooth lemon curd. Its intensely tangy yet perfectly balanced sweetness is a revelation, cutting through any richness with a refreshing zest that brightens the entire experience. This is what we strive for, isn’t it? That exquisite balance that keeps you coming back for another sliver, just to savor that unique combination of tart and sweet.
But the magic doesn’t stop there. Capping off this glorious creation is a magnificent crown of light-as-air meringue, baked to golden perfection. Its delicate, slightly chewy exterior gives way to an ethereal, fluffy interior, providing a stunning contrast to the richness of the lemon filling and the sturdy crust. The sight alone is enough to inspire awe – those beautiful, often artistic peaks, sometimes lightly toasted to a warm brown, are a testament to the care and love poured into its making. I promise you, the effort, though rewarding, is well worth it for the sheer joy and satisfaction this dessert brings. It’s a showstopper, an absolute crowd-pleaser that manages to feel both elegantly sophisticated and wonderfully comforting all at once. This recipe embodies the very essence of homemade goodness, elevated to an art form. It’s a testament to the fact that sometimes, the simplest ingredients, when combined with passion and precision, can yield the most extraordinary results.
Now, let’s talk about enjoying your masterpiece and perhaps even putting your own creative spin on it. While this Lemon Meringue Pie Bliss is absolutely sublime on its own, served simply as is, there are wonderful ways to enhance the experience or adapt it to different occasions. For a touch of understated elegance, a light dusting of powdered sugar over the meringue just before serving adds a delicate finish and a subtle extra sweetness. Alternatively, a handful of fresh berries, perhaps vibrant raspberries or juicy blueberries, served alongside each slice, can introduce another layer of tartness and a beautiful pop of color, making it even more appealing, especially during warmer months. Imagine a sprig of fresh mint carefully placed on the side – it’s not just for garnish; the aroma adds a refreshing note that complements the lemon beautifully. For those truly special gatherings, you might consider pairing it with a small scoop of high-quality vanilla bean ice cream or a dollop of freshly whipped cream, though I find the pie to be quite perfect on its own. It’s truly versatile, fitting perfectly into a celebratory Sunday lunch, an elegant dinner party, or even as a comforting treat on a quiet evening at home.
Feeling adventurous? The beauty of baking lies in personalizing. For a slightly different crust, consider using a spiced shortcrust by adding a pinch of cinnamon or cardamom to the flour mixture – it adds an unexpected warmth. If you’re looking for an individual serving experience, this recipe can easily be adapted into adorable mini lemon meringue tartlets using muffin tins or individual tart pans. They make fantastic additions to a dessert bar or for portion control. For a zestier kick, you could experiment with adding a touch of lime zest to the lemon filling, creating a delightful citrus medley. And for those who prefer an extra toasted marshmallow-like meringue, a kitchen torch can be your best friend, allowing you to achieve perfectly browned peaks with minimal effort, adding another layer of visual and textural appeal. Remember, this recipe is a foundation, an excellent starting point for your own culinary explorations. Don’t be afraid to make it your own, to tweak and experiment until it perfectly matches your personal taste preferences.
So, my dear readers, what are you waiting for? I wholeheartedly encourage you to roll up your sleeves, gather your ingredients, and embark on this incredibly rewarding baking adventure. Don’t be intimidated by the different components; each step is manageable, and the reward is truly magnificent. There’s an unparalleled sense of accomplishment that comes with presenting a homemade pie, especially one as stunning and delicious as this. I am confident that once you take that first bite, you’ll understand exactly why I’m so enthusiastic about this recipe. Please, do me a favor: try it out! Embrace the process, savor the aromas that fill your kitchen, and most importantly, enjoy the incredible satisfaction of creating something so wonderfully delicious from scratch. And when you do, I would absolutely love to hear all about your experience. Share your successes, your learning moments, your beautiful photos, and your family’s reactions in the comments below. What did you love most about it? Did you try any variations? Your stories inspire me and our entire baking community. Happy baking, everyone – may your kitchen always be filled with the sweet scent of success!
Best Lemon Meringue Pie: Bright, Zesty Citrus & Fluffy Meringue
The sharp, zesty tang of fresh lemon curd, perfectly balanced by the cloud-like sweetness of golden-torched meringue, all nestled within a buttery, crisp crust. This iconic dessert is a symphony of textures and flavors.
Ingredients
-
1 ¼ cups (150g) all-purpose flour
-
½ teaspoon salt (for crust)
-
½ cup (1 stick or 113g) unsalted butter, very cold, cut into ½-inch cubes (for crust)
-
4-6 tablespoons ice water
-
1 ½ cups granulated sugar (for filling)
-
½ cup cornstarch
-
¼ teaspoon salt (for filling)
-
1 ½ cups cold water
-
6 large egg yolks (reserve whites for meringue)
-
½ cup freshly squeezed lemon juice (from 3-4 lemons)
-
2 tablespoons finely grated lemon zest (from 2 large lemons)
-
½ cup (1 stick or 113g) unsalted butter, cut into small pieces (for filling)
-
6 large egg whites (at room temperature, from reserved yolks)
-
½ teaspoon cream of tartar (optional)
-
1 cup granulated sugar (for meringue)
-
1 teaspoon pure vanilla extract
Instructions
-
Step 1
Whisk 1¼ cups flour and ½ tsp salt. Cut in ½ cup cold butter until pea-sized pieces form. Gradually add 4-6 tbsp ice water, mixing gently until dough just comes together. Form a disk, wrap, and chill for at least 30 minutes. -
Step 2
Preheat oven to 400°F (200°C). Roll chilled dough to a 12-inch circle, place in a 9-inch pie plate. Trim, fold, and crimp edges. Line with parchment/foil, fill with pie weights. Bake 15 min. Remove weights, prick bottom. Bake 10-15 min more until golden. Cool completely. -
Step 3
In a heavy-bottomed saucepan, whisk 1½ cups sugar, ½ cup cornstarch, and ¼ tsp salt. Gradually whisk in 1½ cups cold water until smooth. Cook over medium heat, stirring constantly, until thick and boiling for 1 full minute. -
Step 4
Whisk 6 large egg yolks in a bowl. Remove saucepan from heat. Gradually whisk about ½ cup of the hot cornstarch mixture into the egg yolks to temper. Pour tempered yolks back into saucepan, whisking constantly. -
Step 5
Return saucepan to medium-low heat. Cook, stirring continuously, for 1-2 minutes until filling thickens again and gently bubbles; do not boil. Remove from heat. Stir in ½ cup lemon juice, 2 tbsp lemon zest, and ½ cup butter until melted and smooth. Pour hot filling into the cooled pie crust. Place plastic wrap directly on surface. -
Step 6
Ensure mixing bowl and whisk are grease-free. Beat 6 room temperature egg whites and ½ tsp cream of tartar on medium-low until foamy. Increase speed to medium-high. Gradually add 1 cup sugar, 1 tbsp at a time. Beat until thick, glossy, and stiff, upright peaks form (5-8 minutes). Gently beat in 1 tsp vanilla extract. -
Step 7
Preheat oven to 350°F (175°C). Remove plastic wrap from warm lemon filling. Spoon or pipe meringue over the filling, ensuring it touches the crust edges to seal. Create peaks and swirls. Bake for 12-15 minutes, or until meringue peaks are golden brown. (Alternatively, broil 1-3 minutes, watching constantly). -
Step 8
Cool completely on a wire rack at room temperature for 3-4 hours until filling is fully set. For cleaner slices, optionally chill in the refrigerator for 1-2 hours (avoid chilling longer). Slice with a sharp, hot knife (wiping between slices). Serve immediately. Store leftovers loosely covered in the refrigerator for 2-3 days.
Important Information
Nutrition Facts (Per Serving)
It is important to consider this information as approximate and not to use it as definitive health advice.
Allergy Information
Please check ingredients for potential allergens and consult a health professional if in doubt.


Leave a Comment