
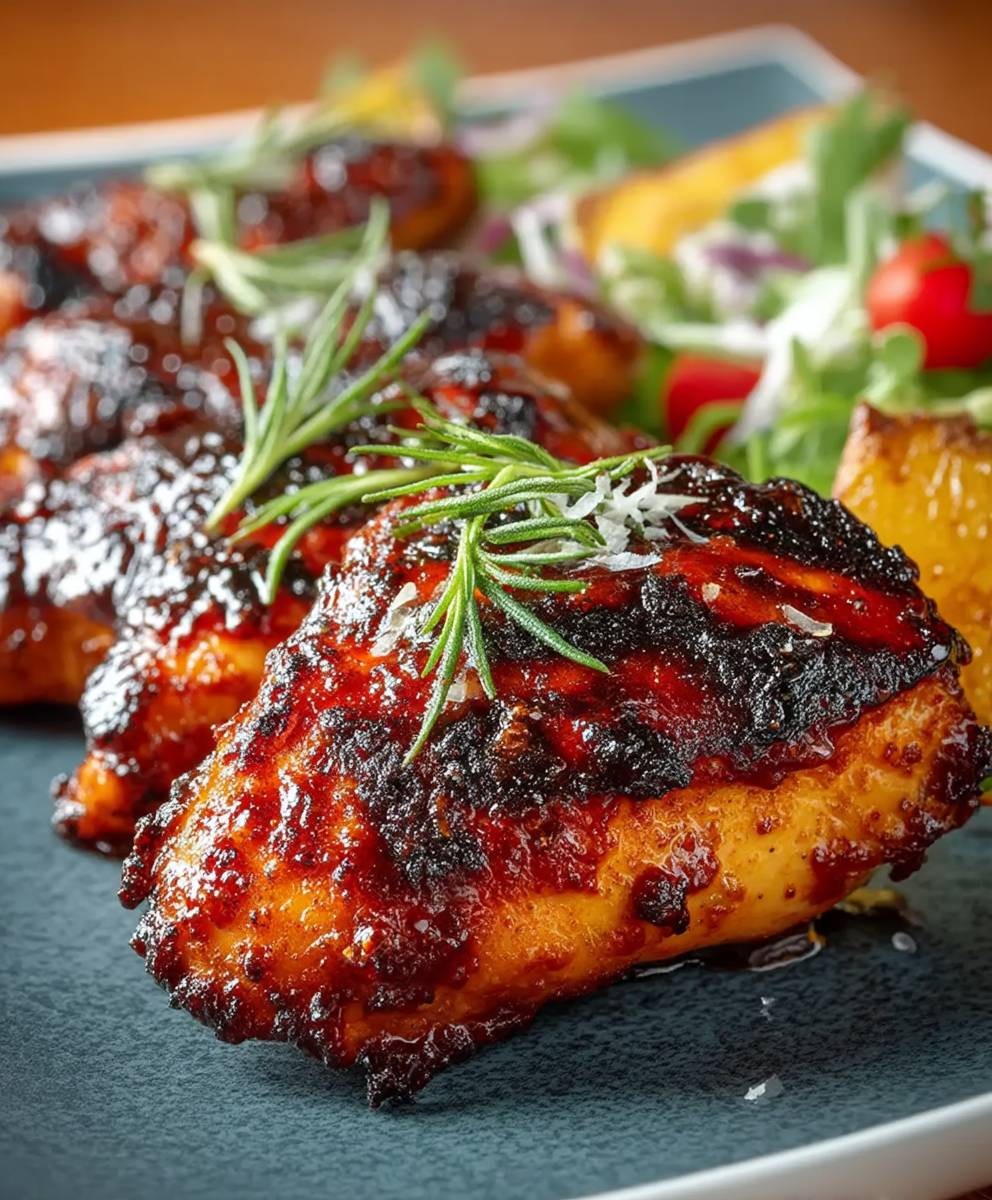
BBQ Chicken Thighs: Is there anything that screams summer quite like the smoky, tangy, and utterly irresistible aroma of barbecue? Imagine sinking your teeth into a perfectly cooked chicken thigh, the skin caramelized to a beautiful mahogany hue, and the meat so tender it practically melts in your mouth. That, my friends, is the magic of BBQ chicken thighs, and I’m thrilled to share my foolproof recipe with you!
Barbecuing has a rich history, with roots tracing back to the Caribbean where the term “barabicu” referred to a method of slow-cooking meat over a wooden framework. Over time, this technique evolved and spread, becoming a beloved culinary tradition across the globe, particularly in the American South. Today, barbecue is more than just a cooking method; it’s a celebration of community, flavor, and the simple joy of good food.
But why are BBQ Chicken Thighs so universally adored? Well, for starters, chicken thighs are incredibly forgiving. Unlike chicken breasts, they remain juicy and flavorful even if cooked a little longer, making them perfect for the barbecue. The combination of smoky char, sweet and tangy barbecue sauce, and the rich, savory flavor of the chicken creates a symphony of tastes that’s simply irresistible. Plus, they’re incredibly versatile! Serve them with classic sides like coleslaw and corn on the cob, or get creative with salads and grilled vegetables. Whether you’re hosting a backyard bash or simply craving a delicious weeknight meal, these BBQ chicken thighs are guaranteed to be a crowd-pleaser.

Ingredients:
- For the Chicken:
- 8 bone-in, skin-on chicken thighs (about 3-4 pounds)
- 2 tablespoons olive oil
- 1 tablespoon smoked paprika
- 2 teaspoons garlic powder
- 2 teaspoons onion powder
- 1 teaspoon dried thyme
- 1 teaspoon dried oregano
- 1/2 teaspoon cayenne pepper (optional, for a little heat)
- 1 teaspoon salt
- 1/2 teaspoon black pepper
- For the BBQ Sauce:
- 1 cup ketchup
- 1/2 cup apple cider vinegar
- 1/4 cup brown sugar, packed
- 2 tablespoons Worcestershire sauce
- 1 tablespoon Dijon mustard
- 1 teaspoon smoked paprika
- 1/2 teaspoon garlic powder
- 1/4 teaspoon cayenne pepper (optional, for a little heat)
- 1/4 cup water (or more, to adjust consistency)
Preparing the BBQ Sauce:
Okay, let’s get started with the BBQ sauce. You can totally use your favorite store-bought sauce, but trust me, making your own is super easy and tastes way better! Plus, you can customize it to your exact liking.
- Combine the Ingredients: In a medium saucepan, whisk together the ketchup, apple cider vinegar, brown sugar, Worcestershire sauce, Dijon mustard, smoked paprika, garlic powder, and cayenne pepper (if using).
- Simmer the Sauce: Place the saucepan over medium heat and bring the mixture to a simmer. Once simmering, reduce the heat to low and let it simmer for about 15-20 minutes, stirring occasionally. This allows the flavors to meld together and the sauce to thicken slightly.
- Adjust Consistency: If the sauce becomes too thick, add water, one tablespoon at a time, until you reach your desired consistency. I like mine to be thick enough to coat the chicken nicely, but not so thick that it’s gloppy.
- Taste and Adjust Seasoning: Give the sauce a taste and adjust the seasoning as needed. You might want to add a little more brown sugar for sweetness, apple cider vinegar for tanginess, or cayenne pepper for heat. Don’t be afraid to experiment!
- Set Aside: Once the sauce is ready, remove it from the heat and set it aside. You can keep it warm on low heat if you’re ready to start cooking the chicken right away, or let it cool completely and store it in an airtight container in the refrigerator for up to a week.
Preparing the Chicken:
Now, let’s move on to the star of the show: the chicken thighs! I prefer using bone-in, skin-on thighs because they stay juicy and flavorful during cooking. The skin also gets nice and crispy, which is always a plus.
- Pat the Chicken Dry: Use paper towels to pat the chicken thighs dry. This is important because it helps the skin to crisp up better during cooking.
- Season the Chicken: In a small bowl, combine the smoked paprika, garlic powder, onion powder, dried thyme, dried oregano, cayenne pepper (if using), salt, and black pepper.
- Rub with Oil and Seasoning: Drizzle the olive oil over the chicken thighs, then rub it in evenly. Next, sprinkle the seasoning mixture over the chicken, making sure to coat both sides. Use your hands to rub the seasoning into the chicken, ensuring that every nook and cranny is covered.
- Let the Chicken Rest (Optional): For the best flavor, let the seasoned chicken rest in the refrigerator for at least 30 minutes, or even up to overnight. This allows the flavors to penetrate the chicken and makes it even more delicious. If you’re short on time, you can skip this step, but I highly recommend it if you have the time.
Cooking the Chicken:
Alright, it’s time to cook these bad boys! I’m going to show you how to cook them in the oven, but you can also grill them if you prefer. Grilling will give them a smokier flavor, but the oven method is just as delicious and a little easier to control.
- Preheat the Oven: Preheat your oven to 400°F (200°C).
- Arrange Chicken on a Baking Sheet: Line a baking sheet with parchment paper or aluminum foil for easy cleanup. Arrange the chicken thighs on the baking sheet, skin-side up. Make sure they’re not overcrowded, as this can prevent them from browning properly. If necessary, use two baking sheets.
- Bake the Chicken: Place the baking sheet in the preheated oven and bake for 30 minutes.
- Baste with BBQ Sauce: After 30 minutes, remove the baking sheet from the oven and brush the chicken thighs generously with the BBQ sauce. Make sure to coat them evenly.
- Continue Baking: Return the baking sheet to the oven and continue baking for another 15-20 minutes, or until the chicken is cooked through and the internal temperature reaches 165°F (74°C). The skin should be nicely browned and crispy.
- Baste Again (Optional): For an extra layer of flavor and a beautiful glaze, you can baste the chicken with more BBQ sauce during the last 5-10 minutes of cooking.
- Broil for Extra Crispiness (Optional): If you want the skin to be even crispier, you can broil the chicken for the last 1-2 minutes of cooking. Keep a close eye on it to prevent it from burning.
- Rest the Chicken: Once the chicken is cooked through, remove it from the oven and let it rest for 5-10 minutes before serving. This allows the juices to redistribute, resulting in a more tender and flavorful chicken.
Serving Suggestions:
These BBQ chicken thighs are incredibly versatile and can be served with a variety of sides. Here are a few of my favorite pairings:
- Classic Sides: Coleslaw, potato salad, corn on the cob, baked beans, macaroni and cheese.
- Healthy Sides: Roasted vegetables (broccoli, carrots, Brussels sprouts), green salad, quinoa salad, sweet potato fries.
- Comfort Food Sides: Mashed potatoes, cornbread, biscuits.
You can also shred the chicken and use it in sandwiches, tacos, or salads. The possibilities are endless!
Tips and Tricks:
- Use a Meat Thermometer: The best way to ensure that the chicken is cooked through is to use a meat thermometer. Insert the thermometer into the thickest part of the thigh, avoiding the bone. The internal temperature should reach 165°F (74°C).
- Don’t Overcrowd the Baking Sheet: Overcrowding the baking sheet can prevent the chicken from browning properly. If necessary, use two baking sheets.
- Adjust the BBQ Sauce to Your Liking: Feel free to adjust the ingredients in the BBQ sauce to suit your taste. Add more brown sugar for sweetness, apple cider vinegar for tanginess, or cayenne pepper for heat.
- Make it Ahead: You can prepare the BBQ sauce and season the chicken ahead of time. Store the sauce in an airtight container in the refrigerator for up to a week. Let the seasoned chicken rest in the refrigerator for at least 30 minutes, or up to overnight.
- Grilling Instructions: If you prefer to grill the chicken, preheat your grill to medium heat. Grill the chicken thighs, skin-side down, for about 5-7 minutes, or until the skin is nicely browned and crispy. Flip the chicken and continue grilling for another 10-15 minutes, or until the chicken is cooked through. Baste with BBQ sauce during the last few minutes of grilling.
Storage Instructions:
Leftover BBQ chicken thighs can be stored in an airtight container in the refrigerator for up to 3-4 days. Reheat them in the oven, microwave, or on the stovetop until heated through.
Conclusion:
So there you have it! These BBQ Chicken Thighs are truly a game-changer. I know, I know, I might be biased, but trust me on this one. The combination of the smoky char, the juicy tenderness of the chicken, and that tangy-sweet BBQ sauce is simply irresistible. This isn’t just another chicken recipe; it’s a flavor explosion waiting to happen in your kitchen. It’s the kind of dish that will have everyone asking for seconds, and maybe even the recipe itself!
Why is this a must-try? Because it’s incredibly easy to make, uses readily available ingredients, and delivers restaurant-quality results without the restaurant price tag. Plus, it’s incredibly versatile. Whether you’re grilling for a casual weeknight dinner or hosting a backyard barbecue, these BBQ Chicken Thighs are guaranteed to be a crowd-pleaser. Forget dry, boring chicken this recipe ensures perfectly cooked, flavorful chicken every single time.
But the fun doesn’t stop there! Let’s talk serving suggestions and variations. For a classic pairing, serve these succulent thighs with creamy coleslaw, grilled corn on the cob, and some fluffy potato salad. If you’re feeling adventurous, try shredding the chicken and using it to top nachos, stuff tacos, or create a mouthwatering BBQ chicken pizza.
Looking for variations? You can easily customize the BBQ sauce to your liking. Add a dash of hot sauce for a spicy kick, a spoonful of honey for extra sweetness, or a splash of apple cider vinegar for a tangy twist. You can also experiment with different wood chips when grilling to add unique smoky flavors. Hickory, mesquite, or applewood would all be fantastic choices.
Another great variation is to marinate the chicken thighs overnight in your favorite BBQ sauce. This will allow the flavors to penetrate even deeper, resulting in an even more flavorful and tender final product. Just be sure to pat the chicken dry before grilling to ensure a good sear.
I’m genuinely excited for you to try this recipe. I’ve made it countless times, and it’s always a hit. It’s become a staple in my own kitchen, and I have a feeling it will become one in yours too.
So, what are you waiting for? Fire up the grill (or preheat your oven!), gather your ingredients, and get ready to experience the best BBQ Chicken Thighs you’ve ever tasted.
And most importantly, I want to hear about your experience! Did you make any modifications? What did you serve it with? What did your family and friends think? Share your photos and stories in the comments below. I can’t wait to see your culinary creations and hear all about your BBQ Chicken Thighs adventures! Happy grilling (or baking)!
BBQ Chicken Thighs: The Ultimate Guide to Juicy, Flavorful Perfection
Oven-baked BBQ chicken thighs with crispy skin, coated in a homemade BBQ sauce.
Ingredients
- 8 bone-in, skin-on chicken thighs (about 3-4 pounds)
- 2 tablespoons olive oil
- 1 tablespoon smoked paprika
- 2 teaspoons garlic powder
- 2 teaspoons onion powder
- 1 teaspoon dried thyme
- 1 teaspoon dried oregano
- 1/2 teaspoon cayenne pepper (optional, for a little heat)
- 1 teaspoon salt
- 1/2 teaspoon black pepper
- 1 cup ketchup
- 1/2 cup apple cider vinegar
- 1/4 cup brown sugar, packed
- 2 tablespoons Worcestershire sauce
- 1 tablespoon Dijon mustard
- 1 teaspoon smoked paprika
- 1/2 teaspoon garlic powder
- 1/4 teaspoon cayenne pepper (optional, for a little heat)
- 1/4 cup water (or more, to adjust consistency)
Instructions
- In a medium saucepan, whisk together the ketchup, apple cider vinegar, brown sugar, Worcestershire sauce, Dijon mustard, smoked paprika, garlic powder, and cayenne pepper (if using).
- Place the saucepan over medium heat and bring the mixture to a simmer. Once simmering, reduce the heat to low and let it simmer for about 15-20 minutes, stirring occasionally. This allows the flavors to meld together and the sauce to thicken slightly.
- If the sauce becomes too thick, add water, one tablespoon at a time, until you reach your desired consistency.
- Give the sauce a taste and adjust the seasoning as needed. You might want to add a little more brown sugar for sweetness, apple cider vinegar for tanginess, or cayenne pepper for heat.
- Once the sauce is ready, remove it from the heat and set it aside. You can keep it warm on low heat if you’re ready to start cooking the chicken right away, or let it cool completely and store it in an airtight container in the refrigerator for up to a week.
- Use paper towels to pat the chicken thighs dry. This is important because it helps the skin to crisp up better during cooking.
- In a small bowl, combine the smoked paprika, garlic powder, onion powder, dried thyme, dried oregano, cayenne pepper (if using), salt, and black pepper.
- Drizzle the olive oil over the chicken thighs, then rub it in evenly. Next, sprinkle the seasoning mixture over the chicken, making sure to coat both sides. Use your hands to rub the seasoning into the chicken, ensuring that every nook and cranny is covered.
- For the best flavor, let the seasoned chicken rest in the refrigerator for at least 30 minutes, or even up to overnight. This allows the flavors to penetrate the chicken and makes it even more delicious. If you’re short on time, you can skip this step, but I highly recommend it if you have the time.
- Preheat your oven to 400°F (200°C).
- Line a baking sheet with parchment paper or aluminum foil for easy cleanup. Arrange the chicken thighs on the baking sheet, skin-side up. Make sure they’re not overcrowded, as this can prevent them from browning properly. If necessary, use two baking sheets.
- Place the baking sheet in the preheated oven and bake for 30 minutes.
- After 30 minutes, remove the baking sheet from the oven and brush the chicken thighs generously with the BBQ sauce. Make sure to coat them evenly.
- Return the baking sheet to the oven and continue baking for another 15-20 minutes, or until the chicken is cooked through and the internal temperature reaches 165°F (74°C). The skin should be nicely browned and crispy.
- For an extra layer of flavor and a beautiful glaze, you can baste the chicken with more BBQ sauce during the last 5-10 minutes of cooking.
- If you want the skin to be even crispier, you can broil the chicken for the last 1-2 minutes of cooking. Keep a close eye on it to prevent it from burning.
- Once the chicken is cooked through, remove it from the oven and let it rest for 5-10 minutes before serving. This allows the juices to redistribute, resulting in a more tender and flavorful chicken.
Notes
- Use a meat thermometer to ensure the chicken is cooked to an internal temperature of 165°F (74°C).
- Don’t overcrowd the baking sheet for even browning.
- Adjust the BBQ sauce ingredients to your personal taste preferences.
- The BBQ sauce and chicken can be prepped ahead of time.
- Grilling instructions: Preheat grill to medium heat. Grill chicken, skin-side down, for 5-7 minutes until crispy. Flip and grill for 10-15 minutes until cooked through. Baste with BBQ sauce during the last few minutes.
- Leftovers can be stored in the refrigerator for 3-4 days.


Leave a Comment