
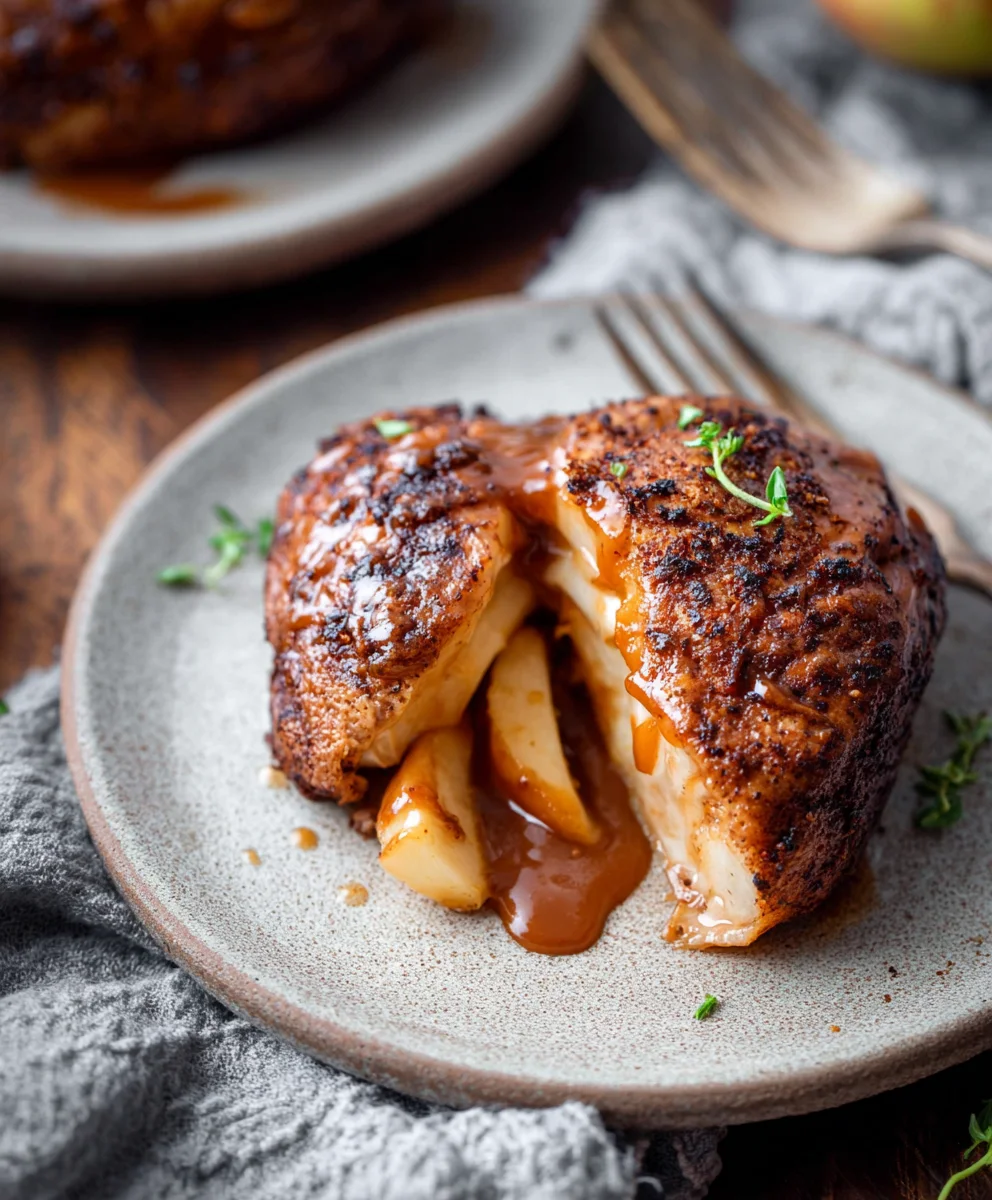
?tp_image_id=19050 – Prepare to be truly enchanted by a culinary masterpiece that promises to redefine your perception of comfort food. This isn’t just any dish; it’s a symphony of deeply satisfying flavors and exquisite textures, destined to become a secret weapon in your kitchen arsenal for those moments when only pure, unadulterated deliciousness will do. Imagine a meal so rich, so profoundly comforting, it feels like a warm embrace on a chilly evening, capable of bringing smiles to every face at the table.
While the precise contemporary rendition of this recipe might be a modern marvel, its heart beats with centuries of culinary tradition. It draws inspiration from time-honored dishes where humble, wholesome ingredients were artfully transformed into extraordinary, soul-nourishing meals, reminiscent of the hearty stews and casseroles that have graced family tables across generations, evolving with each cook’s unique touch and regional flair. This enduring appeal is precisely why so many people adore this particular recipe.
They love it for its incredible depth of flavor, which is surprisingly accessible through straightforward yet impactful steps. The tender main component, perfectly complemented by aromatic spices and a velvety, luscious sauce, creates an irresistible experience that lingers delightfully on the palate. Moreover, its versatility makes it an ideal choice for both bustling weeknight dinners and more elaborate special occasions. The relative ease of preparation, coupled with its consistently impressive presentation and taste, ensures it’s a guaranteed crowd-pleaser every single time. And for those who appreciate the finer details and the meticulous curation of our culinary offerings, know that this recipe truly embodies that spirit of excellence, perfectly captured as ?tp_image_id=19050 within our cherished collection.

Ingredients:
- For the Bolognese Ragu:
- 3 tablespoons extra virgin olive oil – I always reach for a good quality olive oil here, it truly makes a difference in the foundational flavor.
- 4 ounces pancetta, finely diced – This salty, savory cured pork adds incredible depth; a true secret weapon in Italian cooking.
- 1 pound lean ground beef (80/20 blend) – The fat content is important for moisture and flavor during the long simmer.
- 1 pound ground pork – Ground pork brings a delightful richness and a slightly sweeter note that complements the beef perfectly.
- 1 large yellow onion, finely diced – Our aromatic base for the soffritto, offering sweetness and body.
- 2 medium carrots, peeled and finely diced – Adds natural sweetness and a beautiful color to our ragu.
- 2 celery stalks, finely diced – Contributes a subtle, earthy bitterness that balances the other flavors.
- 4 cloves garlic, minced – For that essential aromatic kick, but remember to mince it finely so it melts into the sauce.
- 1 cup dry red wine (like Chianti or Merlot) – This is for deglazing and adding a beautiful complexity; choose one you’d enjoy drinking!
- 28 ounces crushed tomatoes (good quality San Marzano if possible) – The heart of our sauce, San Marzano tomatoes are known for their sweet, balanced flavor.
- 3 tablespoons tomato paste – A concentrated burst of umami that deepens the tomato flavor immensely.
- 1 cup whole milk – This might seem unusual, but it tenderizes the meat and mellows the acidity of the tomatoes beautifully.
- 2 cups beef broth, low sodium – Adds savory liquid and helps everything simmer wonderfully.
- 2 bay leaves – These humble leaves infuse a wonderful, subtle herbaceousness.
- 1 teaspoon dried oregano – Classic Italian herb, adding warmth and aroma.
- A small handful fresh basil leaves, torn – For a fresh, bright finish, added near the end of cooking.
- Salt and freshly ground black pepper to taste – Essential for seasoning every layer; taste as you go!
- For the Creamy Bechamel Sauce:
- 6 tablespoons unsalted butter – The fatty base for our roux, providing richness and helping to cook the flour.
- 6 tablespoons all-purpose flour – Our thickening agent, which will create that lovely, silky texture.
- 6 cups whole milk, warmed – Whole milk is key for the creamiest result. Warming it helps prevent lumps when whisking into the roux.
- 1/2 teaspoon freshly grated nutmeg – A traditional and utterly delightful spice for béchamel, adding a warm, subtle sweetness.
- 1 teaspoon salt – To properly season our sauce.
- 1/4 teaspoon white pepper – I use white pepper to keep the sauce pristine and white, but black pepper works too if that’s all you have!
- For the Lasagna Assembly:
- 16 ounces no-boil lasagna noodles – These are a lifesaver! They absorb moisture from the sauces as they bake, becoming perfectly tender. If you prefer traditional noodles, boil them according to package directions until al dente.
- 1 cup freshly grated Parmigiano Reggiano cheese, plus extra for serving – The king of cheeses, providing salty, nutty deliciousness and a wonderful crust. Always grate it fresh!
- 12 ounces fresh mozzarella cheese, shredded or thinly sliced – This melts beautifully and adds a lovely stretchiness to each bite. Look for lower moisture fresh mozzarella if you can find it.
- Extra virgin olive oil for greasing the baking dish – Just a little bit to ensure nothing sticks.
Phase 1: Preparing the Bolognese Ragu – The Heart of Our Lasagna
Oh, the Bolognese! This is where all the magic truly begins. A proper ragu takes time and patience, but believe me, every single minute is worth it. We’re building layers of flavor that will sing through the entire dish. Don’t rush this step, and your taste buds will thank you!
- Prepare Your Soffritto: My first step is always to get my aromatics ready. Finely dice your onion, carrots, and celery. The finer you dice them, the more they’ll melt into the sauce, creating a smoother texture and deeper flavor. Mince your garlic too, and set it aside. Having everything prepped before you start cooking makes the process so much more enjoyable and efficient.
- Render the Pancetta: Grab a large, heavy-bottomed pot or Dutch oven – something that holds heat well. Drizzle in your 3 tablespoons of olive oil over medium heat. Once it’s shimmering, add the finely diced pancetta. We want to cook this slowly until it’s crispy and has rendered most of its fat, usually about 8-10 minutes. This creates a flavor base that is absolutely unmatched; the rendered fat will become our cooking fat for the next steps. Remove the crispy pancetta with a slotted spoon and set it aside; we’ll add it back later for texture.
- Brown the Meats: Into that glorious pancetta fat (add a touch more olive oil if needed), add your ground beef and ground pork. Break the meat apart with a spoon and brown it thoroughly. This isn’t just about cooking it through; it’s about getting a beautiful sear and caramelization on the meat, which develops deep, savory flavors. This step usually takes about 10-15 minutes. Once browned, drain off any excess fat from the pot – we want flavor, not grease!
- Sauté the Soffritto: Now, it’s time for our aromatic vegetables. Add the diced onion, carrots, and celery to the pot with the browned meat. Reduce the heat to medium-low. Sauté them gently for about 10-12 minutes, or until they’ve softened significantly and the onion is translucent. They should smell incredibly fragrant and sweet at this point. This slow sauté coaxes out all their natural sugars, forming the foundational sweetness of our ragu.
- Add Garlic and Tomato Paste: Stir in your minced garlic and the tomato paste. Cook for another 2 minutes, stirring constantly. You’ll notice the tomato paste deepening in color, almost becoming brick red, and smelling less raw and more caramelized. This brief cooking step allows the tomato paste to toast, intensifying its rich, umami flavor.
- Deglaze with Wine: Pour in the red wine. Increase the heat to medium-high and use a wooden spoon to scrape up any browned bits (the “fond”) from the bottom of the pot. These bits are pure flavor, and the wine helps dissolve them back into the sauce. Let the wine simmer and reduce by about half, which should take 5-7 minutes. The strong alcohol smell will dissipate, leaving behind a wonderful, concentrated wine essence.
- Introduce the Liquids and Herbs: Stir in the crushed tomatoes, whole milk, beef broth, and the two bay leaves. Don’t forget to return the crispy pancetta to the pot at this stage! Give everything a good stir to combine. The milk might look a little curdled initially, but don’t worry, it will incorporate beautifully as it simmers, tenderizing the meat and rounding out the flavors.
- The Long Simmer: Bring the ragu to a gentle simmer, then reduce the heat to low. Cover the pot, leaving the lid slightly ajar to allow some steam to escape. Now, here’s the crucial part: let it simmer for at least 2.5 to 3 hours. Seriously, don’t skimp on this time! A true Bolognese develops its incredible depth through a slow, patient simmer. Stir occasionally, every 30-45 minutes, making sure nothing sticks to the bottom. If it starts to look too dry, you can add a little more broth or water, but generally, it should thicken nicely. The sauce will become incredibly rich, the flavors will meld beautifully, and the meat will be wonderfully tender.
- Final Seasoning: After the long simmer, remove the bay leaves. Stir in the dried oregano and the fresh torn basil. Taste the ragu and season generously with salt and freshly ground black pepper. Remember, this is the main flavor provider for our lasagna, so ensure it’s perfectly seasoned to your liking. It should be rich, savory, and absolutely delicious. If you have time, letting it rest for an hour, or even making it a day ahead, allows the flavors to deepen even further!
Phase 2: Crafting the Creamy Bechamel Sauce – The Velvety Embrace
Our béchamel sauce is the luxurious, creamy counterpart to the rich Bolognese. It adds moisture, richness, and that signature comforting feel to every bite of lasagna. While it sounds fancy, it’s surprisingly simple to make, but requires a little focused attention to avoid lumps. We want it silky smooth!
- Melt the Butter: In a medium saucepan, melt the 6 tablespoons of unsalted butter over medium heat. Be careful not to let it brown too much; we want it golden and fragrant, not burnt. This usually takes just a couple of minutes.
- Create the Roux: Once the butter is fully melted and foamy, add the 6 tablespoons of all-purpose flour. Immediately begin whisking vigorously. Continue whisking constantly for 2-3 minutes. This step cooks out the raw flour taste and creates a pale, golden paste known as a roux. The consistency should be smooth, like a thick dough.
- Whisk in the Milk Gradually: Now, for the magic! Slowly, gradually, pour in about 1 cup of the warmed whole milk while continuously whisking. At first, it will look incredibly thick and paste-like. Keep whisking until it’s smooth and lump-free before adding more milk. Continue adding the milk in small increments (about 1/2 to 1 cup at a time), whisking well after each addition until fully incorporated and smooth. This gradual addition and constant whisking are your best friends for a lump-free béchamel!
- Thicken to Perfection: Once all the milk has been added, continue to cook the sauce over medium heat, whisking frequently, until it thickens to your desired consistency. It should be thick enough to coat the back of a spoon (this is often called “nappe”) but still pourable. This usually takes about 8-12 minutes from when all the milk is in. Be patient and keep whisking; the sauce will thicken as it heats. Don’t let it boil vigorously, a gentle simmer is perfect.
- Season and Flavor: Remove the saucepan from the heat. Stir in the 1/2 teaspoon of freshly grated nutmeg, 1 teaspoon of salt, and 1/4 teaspoon of white pepper. Taste and adjust seasoning if necessary. The nutmeg adds a beautiful, subtle warmth that is characteristic of a classic béchamel. Your sauce should be wonderfully creamy, smooth, and perfectly seasoned.
Phase 3: Assembling and Baking the Lasagna – Building Our Masterpiece
This is where all our hard work comes together! Assembling the lasagna is a fun, creative process. We’re layering delicious flavors and textures to create that ultimate comforting dish. Take your time, make each layer count, and prepare for a truly spectacular meal!
- Preheat and Prep: First things first, preheat your oven to 375°F (190°C). Grab a large 9×13 inch baking dish – a sturdy ceramic or glass one works best. Lightly grease the bottom and sides of the dish with a little extra virgin olive oil. This prevents sticking and helps with easy serving.
- First Bechamel Layer: Spread a thin layer of your luscious béchamel sauce (about 1/2 cup) evenly over the bottom of the prepared baking dish. This initial layer is crucial; it provides moisture for the noodles to cook and prevents the first layer from sticking. It’s like laying a soft, creamy bed for our noodles!
- Noodle Layer: Arrange a single layer of no-boil lasagna noodles over the béchamel. Depending on your noodles and dish, you might need to overlap them slightly or break a noodle to fit. Don’t worry if it’s not perfectly uniform; it will all meld together beautifully.
- Ragu Layer: Spoon about 1.5 to 2 cups of your glorious Bolognese ragu over the noodles, spreading it evenly to cover them. Make sure you get a good amount of meat and sauce in this layer.
- Cheese Layer 1: Sprinkle about one-third of your shredded fresh mozzarella and a generous handful of grated Parmigiano Reggiano over the ragu. The mozzarella will melt into gooey pockets, and the Parmigiano will add that salty, nutty punch.
-
Repeat the Layers: Now, we simply repeat the process!
- Spoon another layer of béchamel (about 1 cup) over the cheese.
- Add another layer of lasagna noodles.
- Spoon another generous layer of Bolognese ragu (1.5 to 2 cups).
- Sprinkle with more fresh mozzarella and Parmigiano Reggiano (another third of each).
-
The Final Layers: Continue this layering until you have about three or four layers of noodles, depending on the depth of your dish and how much sauce you have. For the very top layer, finish with:
- Your final layer of lasagna noodles.
- The remaining béchamel sauce, spread generously over the top.
- A generous sprinkle of the remaining fresh mozzarella and a truly abundant amount of Parmigiano Reggiano. This top layer of cheese will bake into a golden, bubbly, irresistible crust. Don’t be shy here!
- Cover and Bake (Initial Phase): Carefully cover the baking dish tightly with aluminum foil. I usually give it a gentle crimp around the edges to seal in the moisture. Place the covered lasagna in your preheated oven and bake for 30 minutes. Baking it covered ensures that the noodles cook through evenly and absorb all those wonderful flavors without drying out.
- Uncover and Bake (Final Phase): After 30 minutes, carefully remove the foil. Return the lasagna to the oven and continue baking for another 20-30 minutes, or until the top is beautifully golden brown, bubbly, and the edges are gently caramelized. You’ll know it’s ready when the cheese is gloriously melted and there’s a lovely crust. If you like an extra crispy top, you can even switch on the broiler for the last 2-3 minutes, but watch it like a hawk to prevent burning!
- The Essential Rest: This step is just as important as the baking! Once your lasagna comes out of the oven, it will be incredibly hot and soupy. Resist the urge to cut into it immediately! Loosely tent the baking dish with foil and let the lasagna rest on your countertop for at least 15-20 minutes, or even up to 30 minutes. This resting period allows the layers to settle, the sauces to firm up, and the entire structure to become much easier to slice and serve neatly without everything oozing out. Plus, the flavors continue to meld and deepen during this time.
Phase 4: Serving and Enjoying Your Masterpiece
You’ve done it! You’ve created a truly magnificent homemade lasagna. Now comes the best part: sharing and savoring your culinary creation.
- Slice and Serve: After its well-deserved rest, use a sharp, sturdy knife to cut the lasagna into generous individual portions. Carefully lift each slice with a wide spatula.
- Garnish (Optional, but Recommended!): For an extra touch of freshness and flavor, I love to garnish each serving with a sprinkle of fresh chopped basil and, of course, a little extra freshly grated Parmigiano Reggiano cheese. A light drizzle of your best extra virgin olive oil wouldn’t hurt either!
- Pairing Suggestions: This rich lasagna pairs wonderfully with a simple green salad dressed with a light vinaigrette to cut through the richness. A good crusty bread is also fantastic for soaking up any leftover sauce on your plate. And for a drink, a medium-bodied red wine, like the one you might have used in your ragu, would be perfect.
Conclusion:
Well, my dear friends, we’ve reached the end of our culinary journey for today, but I truly believe this isn’t just another recipe; it’s an experience waiting to unfold in your very own kitchen. I wholeheartedly urge you to carve out some time, gather your ingredients, and give this dish the chance it deserves. Why is it a must-try, you ask? Because it’s a testament to how humble ingredients, when treated with a little love and the right technique, can transform into something truly extraordinary. It’s comforting yet sophisticated, simple enough for a weeknight, but impressive enough to grace any special occasion. This recipe promises not just a meal, but a moment of pure, unadulterated culinary joy that you’ll want to revisit again and again. It brings together incredible flavors in a way that feels both familiar and excitingly new, delivering a deliciousness that truly lingers on the palate long after the last bite.
Imagine the first forkful: a symphony of textures and tastes that dance across your tongue. The initial crispness, followed by a tender, melt-in-your-mouth interior, all enveloped in a medley of aromatic spices and perfectly balanced flavors. It’s a dish that evokes warmth and satisfaction, making every single bite a delightful discovery. Whether you’re seeking to impress guests, treat your family to something special, or simply indulge in some well-deserved self-care through cooking, this recipe delivers on all fronts. The depth of flavor we achieve here, from the first aroma wafting through your kitchen to that lingering aftertaste, is nothing short of magnificent. And that incredibly tempting sheen, the kind that makes your mouth water just looking at it, especially when you consider the vividness of the visual we’ve designated as ?tp_image_id=19050, is exactly what you’ll achieve in your own kitchen. It’s more than just food; it’s an invitation to savor life’s simple pleasures.
Serving Suggestions for Maximum Enjoyment
Now, let’s talk about how to truly make this recipe shine on your table. While it certainly stands proudly as a main course, it also offers fantastic versatility. For a comforting family dinner, I love serving it alongside a vibrant green salad tossed with a light vinaigrette, or perhaps some fluffy mashed potatoes that can soak up all those glorious juices. If you’re hosting a more formal gathering, consider pairing it with a delicate risotto or a side of perfectly roasted asparagus to add an elegant touch. It also makes for an incredible addition to a brunch spread, especially when complemented by a fresh fruit platter and perhaps a mimosa. Don’t be afraid to think outside the box; it even works wonderfully sliced thinly and tucked into warm, crusty bread for a gourmet sandwich the next day. A sprinkle of fresh herbs, like parsley or chives, just before serving, can really brighten up the presentation and add an extra pop of color and freshness. Remember, presentation is key to enhancing the dining experience!
Endless Variations to Make it Your Own
One of my absolute favorite things about this recipe is how forgiving and adaptable it is. It’s a fantastic canvas for your culinary creativity! Feel free to experiment with different herbs and spices – a pinch of smoked paprika can add a wonderful smoky depth, or a touch of rosemary might give it a more earthy profile. If you’re a fan of a little heat, a dash of cayenne pepper or a finely chopped chili could really kick things up a notch. For those who enjoy an extra layer of richness, a sprinkle of grated Parmesan cheese during the last few minutes of cooking can create a beautiful, golden crust. Vegetarians could easily adapt this by swapping in hearty mushrooms or a firm plant-based protein, adjusting cooking times accordingly. And if you’re looking to lighten things up, consider using leaner alternatives for certain ingredients. Don’t be shy about making it your own – cooking is all about expressing yourself! This recipe provides a solid foundation, but your personal touches are what will truly make it unforgettable.
So, what are you waiting for? I’m genuinely excited for you to experience the magic of this dish firsthand. Grab your apron, put on some good music, and let your culinary adventure begin. I’m confident that you’ll be absolutely thrilled with the results. Once you’ve had a chance to try it, I would absolutely love to hear from you! Please share your experiences, your delicious creations, and any variations you came up with in the comments below. Your feedback and personal insights are invaluable, and they inspire not just me, but our entire cooking community. Happy cooking, and I can’t wait to see what you create!
Savory Beef Bolognese Lasagna with Creamy Bechamel
Prepare a truly enchanting culinary masterpiece: a rich, deeply satisfying beef bolognese lasagna layered with creamy béchamel sauce, tender no-boil noodles, and generous amounts of mozzarella and Parmigiano Reggiano cheese. This comforting dish, inspired by centuries of tradition, is destined to become a secret weapon in your kitchen for both weeknight dinners and special occasions.
Ingredients
-
3 tablespoons extra virgin olive oil
-
4 ounces beef bacon, finely diced
-
2 pounds lean ground beef (80/20 blend)
-
1 large yellow onion, finely diced
-
2 medium carrots, peeled and finely diced
-
2 celery stalks, finely diced
-
4 cloves garlic, minced
-
1 cup beef broth
-
1 tablespoon red wine vinegar
-
28 ounces crushed tomatoes
-
3 tablespoons tomato paste
-
1 cup whole milk
-
2 cups beef broth, low sodium
-
2 bay leaves
-
1 teaspoon dried oregano
-
1/4 cup fresh basil leaves, torn
-
Salt and freshly ground black pepper to taste
-
6 tablespoons unsalted butter
-
6 tablespoons all-purpose flour
-
6 cups whole milk, warmed
-
1/2 teaspoon freshly grated nutmeg
-
1 teaspoon salt
-
1/4 teaspoon white pepper
-
16 ounces no-boil lasagna noodles
-
1 cup freshly grated Parmigiano Reggiano cheese, plus extra for serving
-
12 ounces fresh mozzarella cheese, shredded
-
Extra virgin olive oil for greasing the baking dish
Instructions
-
Step 1
Finely dice onion, carrots, celery, and mince garlic. In a large pot with 3 tbsp olive oil, cook 4 oz diced beef bacon until crispy (8-10 min). Remove and set aside. Add 2 lbs ground beef; brown thoroughly for 10-15 min, breaking apart. Drain excess fat. Add diced onion, carrots, celery; sauté on medium-low for 10-12 min until softened. Stir in minced garlic and 3 tbsp tomato paste; cook 2 min. Pour in 1 cup beef broth and 1 tbsp red wine vinegar; scrape up browned bits and simmer 5-7 min to reduce. Stir in 28 oz crushed tomatoes, 1 cup whole milk, 2 cups beef broth, 2 bay leaves, and reserved beef bacon. Bring to a gentle simmer, cover (lid ajar), and cook on low for 2.5-3 hours, stirring occasionally. Remove bay leaves. Stir in 1 tsp dried oregano and 1/4 cup fresh torn basil. Season with salt and pepper. -
Step 2
In a medium saucepan, melt 6 tbsp unsalted butter over medium heat. Whisk in 6 tbsp all-purpose flour; cook, whisking constantly, for 2-3 min until pale golden. Gradually whisk in 6 cups warmed whole milk, adding in small increments until smooth and lump-free. Cook over medium heat, whisking frequently, for 8-12 min until thickened. Remove from heat. Stir in 1/2 tsp nutmeg, 1 tsp salt, and 1/4 tsp white pepper. Taste and adjust. -
Step 3
Preheat oven to 375°F (190°C). Grease a 9×13 inch baking dish with olive oil. Spread 1/2 cup béchamel on the bottom. Layer with no-boil lasagna noodles, 1.5-2 cups Bolognese ragu, 1/3 of shredded fresh mozzarella, and a handful of grated Parmigiano Reggiano. Repeat layers: 1 cup béchamel, noodles, 1.5-2 cups ragu, mozzarella/Parmigiano. Finish with noodles, remaining béchamel, and remaining mozzarella/Parmigiano. -
Step 4
Cover dish tightly with foil. Bake at 375°F (190°C) for 30 minutes. Remove foil and bake uncovered for another 20-30 minutes until golden brown and bubbly. Tent with foil and let rest for 15-30 minutes before serving. -
Step 5
Cut into generous portions. Garnish with fresh chopped basil and extra Parmigiano Reggiano. Serve with a green salad and crusty bread.
Important Information
Nutrition Facts (Per Serving)
It is important to consider this information as approximate and not to use it as definitive health advice.
Allergy Information
Please check ingredients for potential allergens and consult a health professional if in doubt.


Leave a Comment