
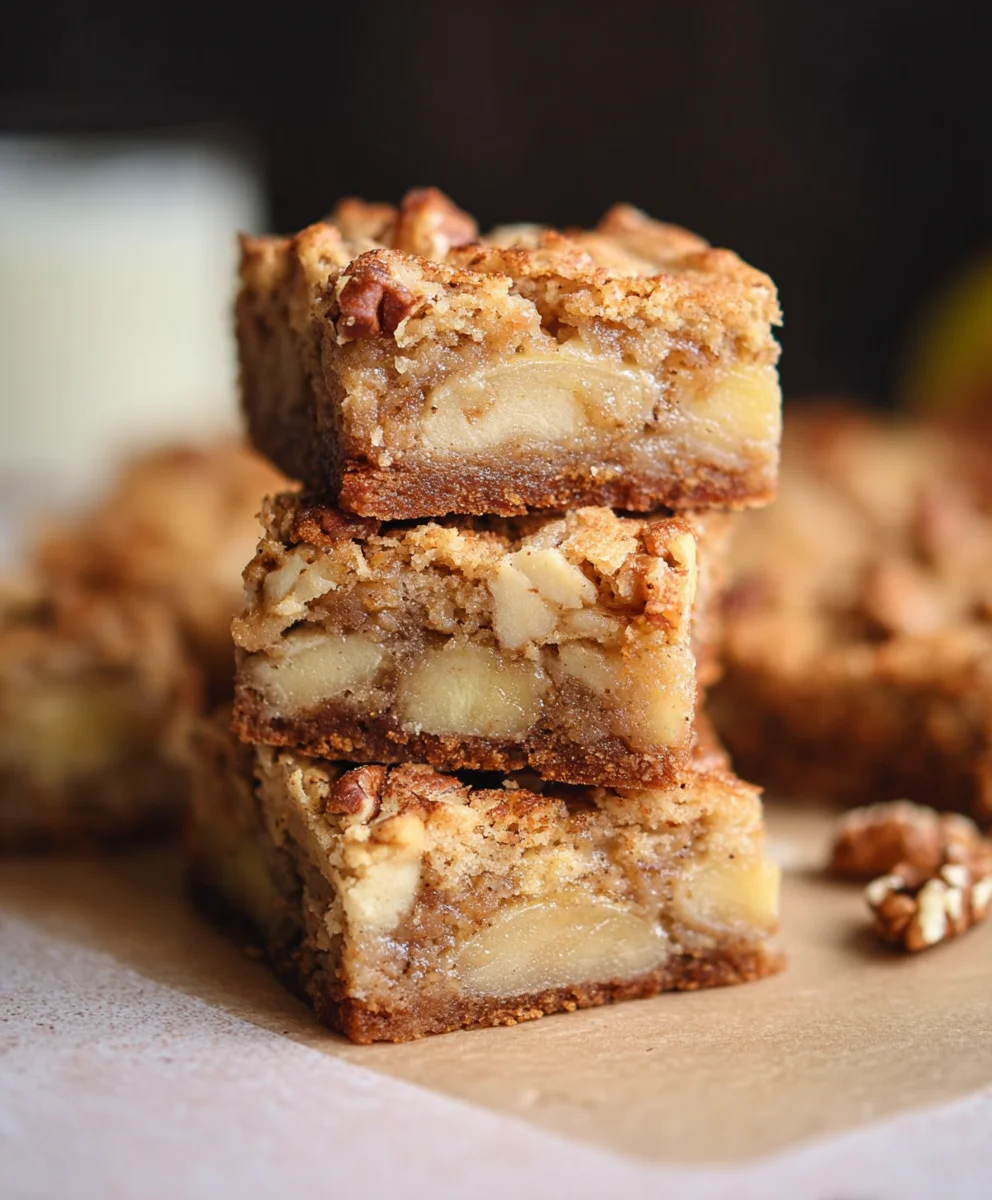
Apple Brownies, in my humble opinion, are not just another dessert; they are a delightful revelation, perfectly bridging the gap between a classic fudgy treat and the comforting warmth of an apple pie. I truly believe that the irresistible allure of a rich, dense chocolate brownie, when elevated with tender, spiced apple chunks, creates an extraordinary fusion of flavors and textures that you’ll simply adore. This innovative twist on a beloved classic transforms a familiar favorite into something truly spectacular, especially as the seasons turn and we all crave those cozy, heartwarming comforts.
While the traditional brownie boasts a fascinating history rooted in late 19th-century America, evolving from a simple bar cookie to the fudgy squares we cherish today, I find that the inclusion of apples breathes wonderful new life into this staple. It’s a beautiful nod to the spirit of home baking innovation, where classic recipes are reimagined to incorporate seasonal bounty. Now, let me tell you
Why Everyone Adore Our Apple Brownies
People, myself included, adore these Apple Brownies because they offer an exceptional balance: the sweetness of the chocolate perfectly complements the subtle tartness of the apples, while the chewy brownie base contrasts beautifully with the soft, spiced fruit. Each bite delivers a harmonious blend of indulgence and wholesome goodness, making them an ideal treat for any occasion, from a casual family gathering to a festive fall potluck that I know everyone will love.

Ingredients:
- For the Brownie Base:
- 1 cup (2 sticks or 226g) unsalted butter, softened to room temperature
- 1 ¾ cups (350g) granulated sugar
- 4 large eggs, at room temperature
- 1 teaspoon pure vanilla extract
- 1 cup (90g) unsweetened cocoa powder, Dutch-processed for a darker, less bitter brownie
- 1 cup (125g) all-purpose flour
- ½ teaspoon baking powder
- ¼ teaspoon salt
- ½ cup (85g) chocolate chips or chunks (optional, but highly recommended for extra richness)
- For the Apple Filling:
- 2 medium-sized apples, approximately 12-14 ounces total (Granny Smith, Honeycrisp, or Fuji work wonderfully for their texture and tartness)
- 1 tablespoon all-purpose flour
- 1 teaspoon ground cinnamon
- ¼ teaspoon ground nutmeg
- 2 tablespoons light brown sugar, packed
Equipment You’ll Need:
Before we dive into the fun part, let’s make sure we have all our tools ready to go. Having everything prepared beforehand truly makes the baking process smoother and more enjoyable. You’ll need a 9×13-inch baking pan, preferably a metal one as it conducts heat more evenly than glass (though glass will work, you might need to adjust baking time slightly). Parchment paper is a must for easy removal, and aluminum foil will be handy later. For mixing, grab a large mixing bowl, a medium mixing bowl, a sturdy whisk, a rubber spatula, and an electric mixer (either hand-held or stand mixer) – while not strictly necessary, it will make creaming butter and sugar much easier. A cutting board and a sharp knife for preparing our lovely apples, a vegetable peeler, and a fine-mesh sieve for sifting are also on the list.
Preparation: Getting Started
- Preheat Your Oven and Prepare Your Pan: First things first, let’s get that oven ready. Preheat your oven to 350°F (175°C). While it’s heating up, prepare your 9×13-inch baking pan. I like to line mine with parchment paper, leaving an overhang on the longer sides. This creates little “handles” that will make lifting the cooled Apple Brownies out of the pan a breeze. Lightly grease the exposed sides of the pan (or the entire pan if you’re not using parchment) with butter or cooking spray. This prevents sticking and ensures a clean release. Don’t skip this step – nobody wants a brownie stuck to the bottom of the pan!
- Prepare Your Apples: Now for our star ingredient – the apples! Wash them thoroughly. Using a vegetable peeler, carefully peel both apples. Once peeled, core them and then dice them into small, approximately ½-inch pieces. I find this size perfect because it allows the apple to soften beautifully during baking without becoming mushy, and ensures you get a delightful bite of apple in nearly every square of your Apple Brownies. Place the diced apples in a medium bowl.
- Coat the Apples: To prevent the apples from sinking to the bottom of the batter during baking, and to infuse them with wonderful fall flavors, we’re going to give them a light coating. Add 1 tablespoon of all-purpose flour, 1 teaspoon of ground cinnamon, ¼ teaspoon of ground nutmeg, and 2 tablespoons of packed light brown sugar to the bowl with your diced apples. Gently toss everything together with a spoon or your hands until the apple pieces are evenly coated. This flour coating also helps the apples release some of their moisture slowly, preventing your Apple Brownies from becoming soggy. Set these spiced apples aside for a moment.
- Sift Dry Ingredients: In a separate medium bowl, whisk together the 1 cup of all-purpose flour, ½ teaspoon of baking powder, and ¼ teaspoon of salt. I always recommend sifting these dry ingredients or at least whisking them really well to ensure they are fully combined and there are no lumps. This helps create a smooth, even texture in your finished Apple Brownies. Set this aside.
Creating the Brownie Batter
- Cream Butter and Sugar: In your large mixing bowl, either with an electric mixer or a sturdy whisk, cream together the 1 cup (2 sticks) of softened unsalted butter and 1 ¾ cups of granulated sugar. Beat them on medium speed until the mixture is light, fluffy, and pale in color. This process incorporates air into the butter and sugar, which contributes to the brownies’ fudgy yet slightly airy texture. It typically takes about 2-3 minutes with an electric mixer. Scrape down the sides of the bowl occasionally to ensure everything is well combined.
- Add Eggs and Vanilla: With the mixer on low speed, add the 4 large eggs, one at a time, beating well after each addition. It’s important to add them one at a time to allow each egg to fully incorporate into the butter-sugar mixture, creating an emulsion that prevents the batter from separating. After all the eggs are in, stir in the 1 teaspoon of pure vanilla extract. Beat for another minute on medium speed until the mixture is smooth and glossy. You’ll notice the mixture getting even lighter and expanding slightly, which is exactly what we want for incredibly decadent Apple Brownies.
- Incorporate Cocoa Powder: Now, it’s time for the chocolatey goodness! Add the 1 cup of unsweetened cocoa powder to the wet ingredients. Beat on low speed until just combined. Be careful not to overmix here; you just want to see the cocoa powder fully incorporated into the mixture. The batter will turn a rich, dark brown, signaling that it’s ready for the next step. Scrape down the sides of the bowl to ensure no dry streaks of cocoa remain.
- Gently Fold in Dry Ingredients: Add the sifted flour mixture (flour, baking powder, and salt) to the wet ingredients. With your rubber spatula, gently fold the dry ingredients into the wet until just combined. The key here is not to overmix! Overmixing develops the gluten in the flour, which can lead to tough, cakey brownies instead of the dense, fudgy Apple Brownies we’re aiming for. Stop folding as soon as you no longer see any dry streaks of flour. A few small lumps are perfectly fine.
- Fold in Chocolate Chips (Optional but Recommended): If you’re using chocolate chips or chunks, now is the time to fold them into the batter. This adds another layer of rich chocolate flavor and wonderful texture to your Apple Brownies. Use your spatula to gently distribute them throughout the batter.
Adding the Apple Elements
- Fold in the Coated Apples: Remember our beautifully spiced and floured apples? Now, carefully fold them into the brownie batter. You want to distribute them as evenly as possible throughout the mixture without overworking the batter. Take your time with this step, gently incorporating the apple pieces so that every bite of your Apple Brownies will have a delightful hint of fall flavor. The flour on the apples will also help them suspend nicely in the batter, preventing them from all sinking to the bottom during baking.
Baking the Apple Brownies
- Transfer to Prepared Pan: Pour the rich, apple-studded brownie batter into your prepared 9×13-inch baking pan. Use your rubber spatula to spread the batter evenly across the pan, ensuring it reaches all corners. Gently tap the pan on your counter a couple of times to release any trapped air bubbles and help the batter settle.
- Bake Until Done: Place the pan in your preheated 350°F (175°C) oven. Bake for approximately 30-35 minutes. Baking times can vary depending on your oven, so it’s essential to keep an eye on your Apple Brownies. You’re looking for a specific indicator of doneness:
- The edges of the brownies should be set and slightly pulling away from the sides of the pan.
- The center should still look a little moist but not liquidy.
- When you insert a wooden skewer or toothpick into the center, it should come out with moist crumbs attached, but not wet batter. If it comes out completely clean, your brownies might be overbaked and less fudgy. If it comes out with wet batter, they need more time.
Do not overbake! Overbaked brownies lose their signature fudgy texture and become dry and cakey. Start checking at 30 minutes.
Cooling and Serving Your Apple Brownies
- Cool Completely in the Pan: Once baked, remove the pan from the oven. This part requires patience, but it’s crucial for perfect Apple Brownies. Allow the brownies to cool completely in the pan on a wire rack. This usually takes at least 2-3 hours, or even longer. As they cool, the brownies continue to set and firm up, becoming easier to cut cleanly and developing their ultimate fudgy texture. Trying to cut warm brownies will result in a crumbly, messy situation, and while delicious, it won’t be pretty!
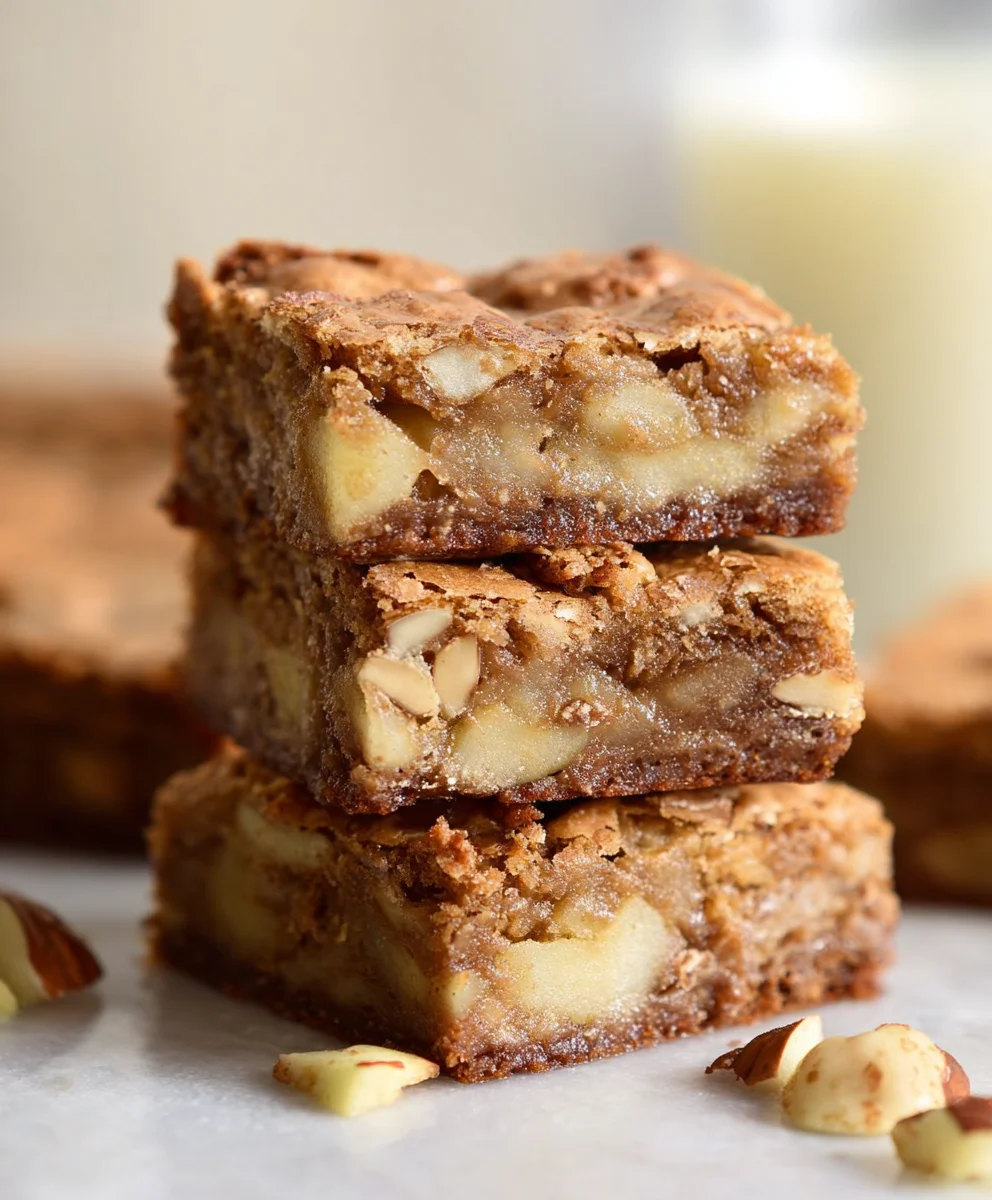
- Lift and Cut: Once completely cool, use the parchment paper overhang “handles” to carefully lift the entire slab of Apple Brownies out of the pan and transfer it to a cutting board. Discard the parchment paper. Now, with a sharp, large knife, cut the brownies into your desired serving sizes. For neat cuts, I often wipe the knife clean with a damp cloth between each slice. I typically cut them into 24 squares (4×6 arrangement), but you can make them larger for a more generous treat.
- Serve and Enjoy: Your delightful Apple Brownies are now ready to be served! They are truly wonderful on their own, a perfect balance of rich chocolate and tender, spiced apples. For an extra special treat, consider serving them with a scoop of vanilla bean ice cream, a drizzle of warm caramel sauce, or a dusting of powdered sugar. These brownies are a celebration of fall flavors in a decadent, fudgy package.
Tips for Perfect Apple Brownies:
- Apple Variety Matters: While you can use almost any apple, I highly recommend using firm, tart apples like Granny Smith, Honeycrisp, or Fuji. These varieties hold their shape well during baking and offer a pleasant tart counterpoint to the sweetness of the brownie. Softer apples might turn too mushy.
- Don’t Overmix: This is arguably the most important rule for fudgy brownies. Overmixing develops gluten in the flour, leading to a tougher, cake-like texture rather than the dense, chewy, fudgy consistency we all love. Mix just until the ingredients are combined.
- Room Temperature Ingredients: Using room temperature butter and eggs helps them emulsify better with the sugar, creating a smoother, more uniform batter. This contributes to a better texture in your finished Apple Brownies. If your eggs are cold, you can quickly warm them by placing them in a bowl of warm water for 5-10 minutes.
- Parchment Paper is Your Friend: Seriously, don’t skip the parchment paper lining. It makes removing the brownies from the pan incredibly easy and allows for clean cuts, showcasing your beautiful Apple Brownies.
- Cool Completely: I know, I know, it’s hard to wait! But cooling the brownies completely is crucial for their structure and fudginess. Warm brownies are delicate and crumbly; cooled brownies are dense, chewy, and slice perfectly.
- Storage: Store your Apple Brownies in an airtight container at room temperature for up to 3-4 days. You can also refrigerate them for up to a week, though they will firm up quite a bit. If refrigerating, let them come closer to room temperature before serving for the best texture. They also freeze beautifully for up to 2-3 months. Just wrap individual squares tightly in plastic wrap and then place them in a freezer-safe bag or container. Thaw at room temperature before enjoying.
- Add a Topping: While delicious plain, a simple dusting of powdered sugar adds an elegant touch. For more indulgence, a cream cheese swirl, a caramel drizzle, or even a sprinkle of chopped pecans or walnuts over the top before baking can elevate your Apple Brownies even further.
- Make it Gluten-Free: You can easily adapt this recipe to be gluten-free by swapping the all-purpose flour for a 1:1 gluten-free baking flour blend. Just ensure your blend contains xanthan gum, or add ½ teaspoon per cup of flour. The texture will be remarkably similar!
- Spice Variations: Feel free to adjust the apple spices to your liking. A pinch of ground cloves or allspice can add even more depth to the apple flavor. You could even add a tiny splash of rum or brandy to the apples for a sophisticated twist, just be sure to cook out the alcohol.
Conclusion:
So, there you have it – my absolute favorite recipe for a treat that truly stands out from the crowd. These aren’t just any brownies; they’re a delightful twist on a classic, bringing the comforting warmth of autumn apples into a fudgy, chewy, chocolatey square. I’ve poured my heart into perfecting this recipe, ensuring that each bite delivers a harmonious blend of tender apple pieces, a hint of cinnamon, and that unmistakable rich brownie texture we all crave. What makes them truly special, in my humble opinion, is the way the apples infuse moisture and a delicate tang, preventing the brownies from being overly sweet and adding an irresistible depth of flavor. They manage to be both incredibly decadent and surprisingly light, a feat not easily achieved in the world of baked goods. I promise you, once you try these, your perception of what a brownie can be will be forever changed. They are a testament to how simple ingredients, thoughtfully combined, can create something truly extraordinary – a dessert that feels both gourmet and homey at the same time. The way the edges crisp up slightly while the center remains wonderfully soft and gooey is simply divine, creating a textural experience that keeps you coming back for more. Trust me, these Apple Brownies are a definite game-changer for your dessert repertoire.
Now, let’s talk about how to truly elevate your Apple Brownies experience. While they are undeniably perfect straight out of the pan, still warm and slightly gooey, there are so many fantastic ways to enjoy them. For an ultimate dessert indulgence, I highly recommend serving a warm brownie with a generous scoop of good quality vanilla bean ice cream. The cold, creamy ice cream melting into the warm brownie creates a symphony of temperatures and textures that is pure bliss. A luxurious drizzle of homemade salted caramel sauce or a sprinkle of toasted pecans on top would also be divine, adding another layer of complexity. If you prefer something a little less decadent but equally delightful, a simple dusting of powdered sugar or a dollop of freshly whipped cream works wonderfully, providing a light contrast to the rich brownie. For a morning or afternoon treat, they pair beautifully with a hot cup of coffee, a comforting spiced tea, or even a tall, cold glass of milk for that classic comfort food vibe. Don’t be afraid to experiment with variations either! You could easily swap out the walnuts for pecans or add a handful of dark chocolate chips for an extra layer of intense chocolatey goodness. A tangy cream cheese swirl baked right into the top would add a rich, contrasting flavor that’s absolutely heavenly and visually stunning. And for those feeling adventurous, try using a mix of different apple varieties – Granny Smiths for more tartness, Honeycrisp for extra sweetness and crispness – to see how subtly it alters the flavor profile. The possibilities are truly endless, and that’s one of the things I love most about this incredibly versatile recipe.
So, my dear friends, I implore you: don’t just read about these magnificent brownies – make them! Clear an afternoon, gather your ingredients, and immerse yourself in the joy of baking. I have a strong feeling that this recipe, this precise set of instructions for the most delightful Apple Brownies, will quickly become a cherished favorite in your kitchen. In fact, I wouldn’t be surprised if you end up bookmarking this page, perhaps even saving it as your personal ‘Apple Brownies.html’ for quick access whenever that craving strikes again. I truly believe you’ll find them to be one of the most satisfying desserts you’ve ever baked or tasted, truly a masterpiece of flavor and texture. Once you’ve pulled that glorious pan from the oven, and especially after you’ve had your first unforgettable bite, I would absolutely love to hear from you. What did you think? Did you stick faithfully to the recipe, or did you add your own creative twist? Share your experiences, your delicious photos, your unique serving suggestions, or any variations you tried in the comments below. Your feedback and your stories not only inspire me but also help our whole baking community grow and discover new ways to enjoy these fantastic treats. Go on, give these Apple Brownies a try – I promise you won’t regret it! Happy baking, and I can’t wait to hear all about your delicious creations!
Best Apple Brownies Recipe: Chewy, Fruity & Easy to Bake
A delightful recipe for chewy, fruity, and easy-to-bake apple brownies, featuring tender, spiced apple chunks and toasted pecans, offering a perfect blend of comforting flavors and textures.
Ingredients
Instructions
Important Information
Nutrition Facts (Per Serving)
It is important to consider this information as approximate and not to use it as definitive health advice.
Allergy Information
Please check ingredients for potential allergens and consult a health professional if in doubt.

Leave a Comment