
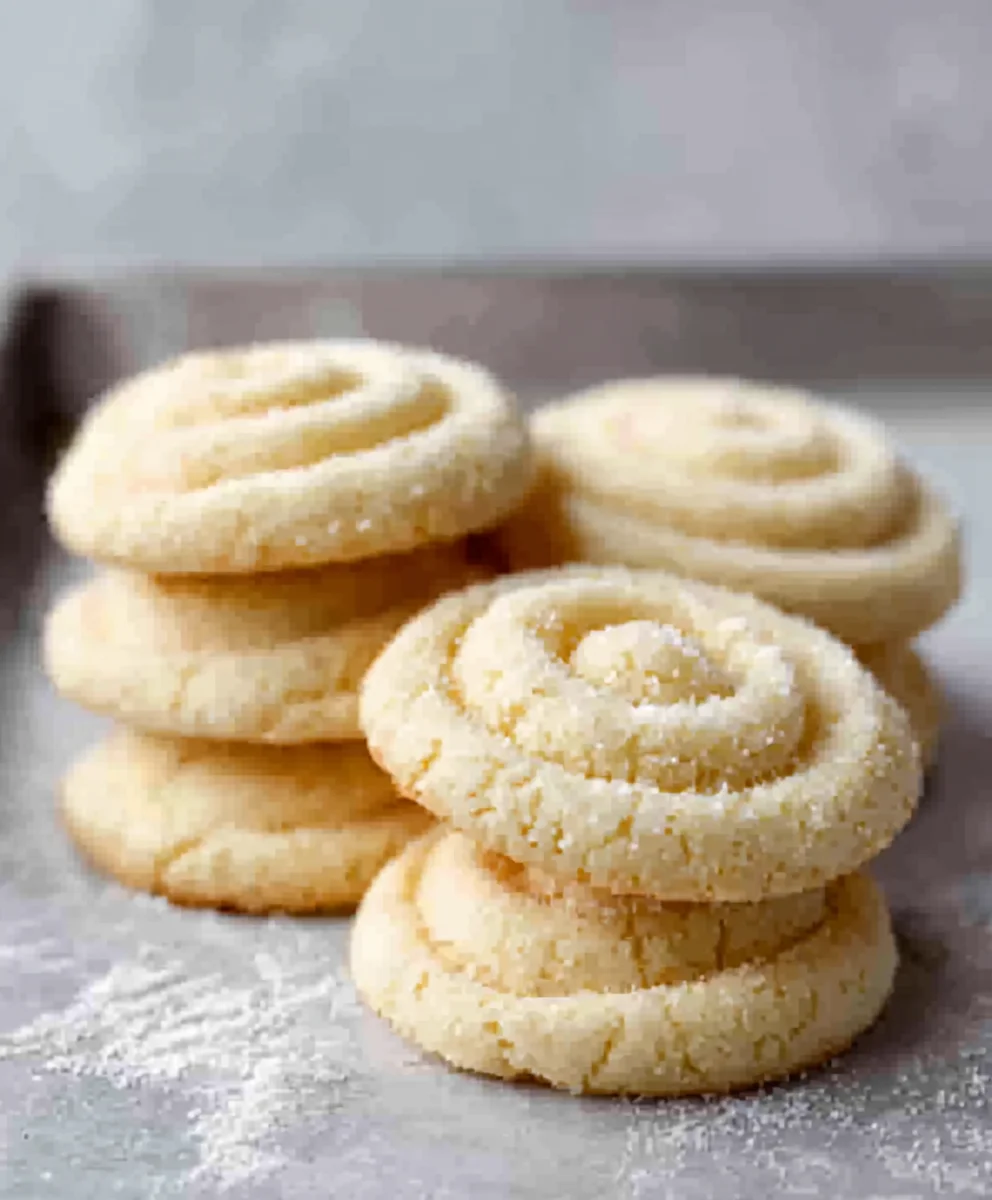
Soft Butter Cookies are more than just a sweet treat; they are a nostalgic embrace, a whisper of home, and a universally adored classic for a reason. Who doesn’t get a little thrill when they bite into a cookie that’s perfectly tender, melting in your mouth with a rich, buttery flavor that sings of simple perfection? These aren’t the crisp, delicate kind that shatter; oh no, these are the ones that offer a delightful chew, a satisfying softness that makes you reach for just one more. What truly sets these Soft Butter Cookies apart is their incredible versatility and the comforting familiarity they bring to any occasion. They are the ideal canvas for a sprinkle of sea salt, a drizzle of chocolate, or simply enjoyed in their pure, unadulterated glory. Prepare yourself for a batch of truly delightful Soft Butter Cookies that will become your go-to recipe for guaranteed smiles.

Ingredients:
- 1 cup unsalted butter, softened
- ⅔ cup granulated sugar
- 2 large egg yolks
- 1 teaspoon vanilla extract
- 2 cups all-purpose flour
- ¼ teaspoon salt
- 2 tablespoons milk (whole or 2%)
Making the Soft Butter Cookie Dough
Creaming the Butter and Sugar
The foundation of any truly exceptional soft butter cookie lies in its creamy, airy texture, and that starts with the creaming process. I begin extract by ensuring my unsalted butter is truly softened. This doesn’t mean melted; it should be pliable and easily yield to the touch, at room temperature. If your butter is too cold, it won’t incorporate air properly, leading to denser cookies. If it’s too warm, it can become greasy. I place the softened butter into a large mixing bowl. To this, I add the granulated sugar. Using an electric mixer, either a stand mixer with a paddle attachment or a hand mixer, I start mixing on low speed to combine the butter and sugar, then gradually increase the speed to medium-high. I cream these together for a good 3 to 5 minutes, or until the mixture becomes noticeably lighter in color and develops a fluffy, cloud-like consistency. You should see no grainy texture of the sugar remaining. This step is crucial as it incorporates air into the dough, which contributes significantly to the soft and tender crum extractb of our final cookies. Scrape down the sides of the bowl a couple of times during this process to ensure everything is evenly incorporated.
Adding the Egg Yolks and Vanilla
Once the butter and sugar are perfectly creamed, it’s time to add the richness and flavor. I add the two large egg yolks to the bowl. Egg yolks contribute to the tenderness and moisture of the cookies, providing that desirable soft bite. I mix these in on medium speed until they are fully incorporated and the mixture is smooth. Overmixing at this stage isn’t a major concern, but you want to see the yellow of the yolks disappear into the creamy base. Next, I pour in the teaspoon of vanilla extract. Vanilla is my go-to for a classic flavor, but feel free to experiment with other extracts like almond or lemon for a twist. Mix again until the vanilla is evenly distributed throughout the dough. The aroma at this point is already wonderfully inviting!
Incorporating the Dry Ingredients
Now, we move on to the dry ingredients, which will give our cookies their structure. In a separate medium bowl, I whisk together the all-purpose flour and the ¼ teaspoon of salt. If you are using salted butter, you can omit the salt here to avoid making the cookies too salty. Whisking the flour and salt together before adding them to the wet ingredients helps to distribute the salt evenly and prevents pockets of saltiness in your cookies. I then gradually add the flour mixture to the wet ingredients in the large mixing bowl. I mix on low speed, just until the flour is mostly incorporated. It’s very important not to overmix the dough once the flour is added. Overmixing can develop the gluten in the flour too much, resulting in tough cookies rather than soft ones. You should still see a few streaks of flour.
Achieving the Perfect Dough Consistency
This is where the milk comes into play, and it’s the key to achieving that perfectly soft cookie texture. I add the 2 tablespoons of milk to the dough. The amount of milk can vary slightly from batch to batch depending on the moisture content of your flour and even the humidity in your kitchen. I mix on low speed until the dough just starts to come together. It will still lookrum extractbit crumbly. If the dough seems too dry and is not clumping together at all, I add another teaspoon of milk at a time, mixing briefly after each addition, until it just forms a cohesive dough. You want a dough that is soft and pliable but not sticky. It should easily hold together when pressed. Resist the urge to add too much milk; too much liquid will make your cookies spread excessively during baking.
Chilling and Shaping the Cookies
Once the dough has reached the right consistency, I turn it out onto a lightly floured surface or into a large piece of plastic wrap. I gently bring it together into a cohesive ball. For the best results and to make shaping easier, I recommend chilling the dough. Wrap the dough tightly in plastic wrap and flatten it into a disc. Refrigerate for at least 30 minutes, or up to 2 days. Chilling firms up the butter, making the dough less sticky and easier to handle, and it also allows the flavors to meld. When you’re ready to bake, preheat your oven to 350°F (175°C). Line baking sheets with parchment paper. I like to use a cookie scoop (about 1.5 to 2 tablespoons) to portion the dough for uniform cookies. Roll each portion into a ball and place them about 2 inches apart on the prepared baking sheets. You can leave them as balls for a slightly puffed cookie, or gently flatten them with the palm of your hand or the bottom of a glass for a flatter, crisper edge.
Baking the Soft Butter Cookies
Baking Time and Indicators
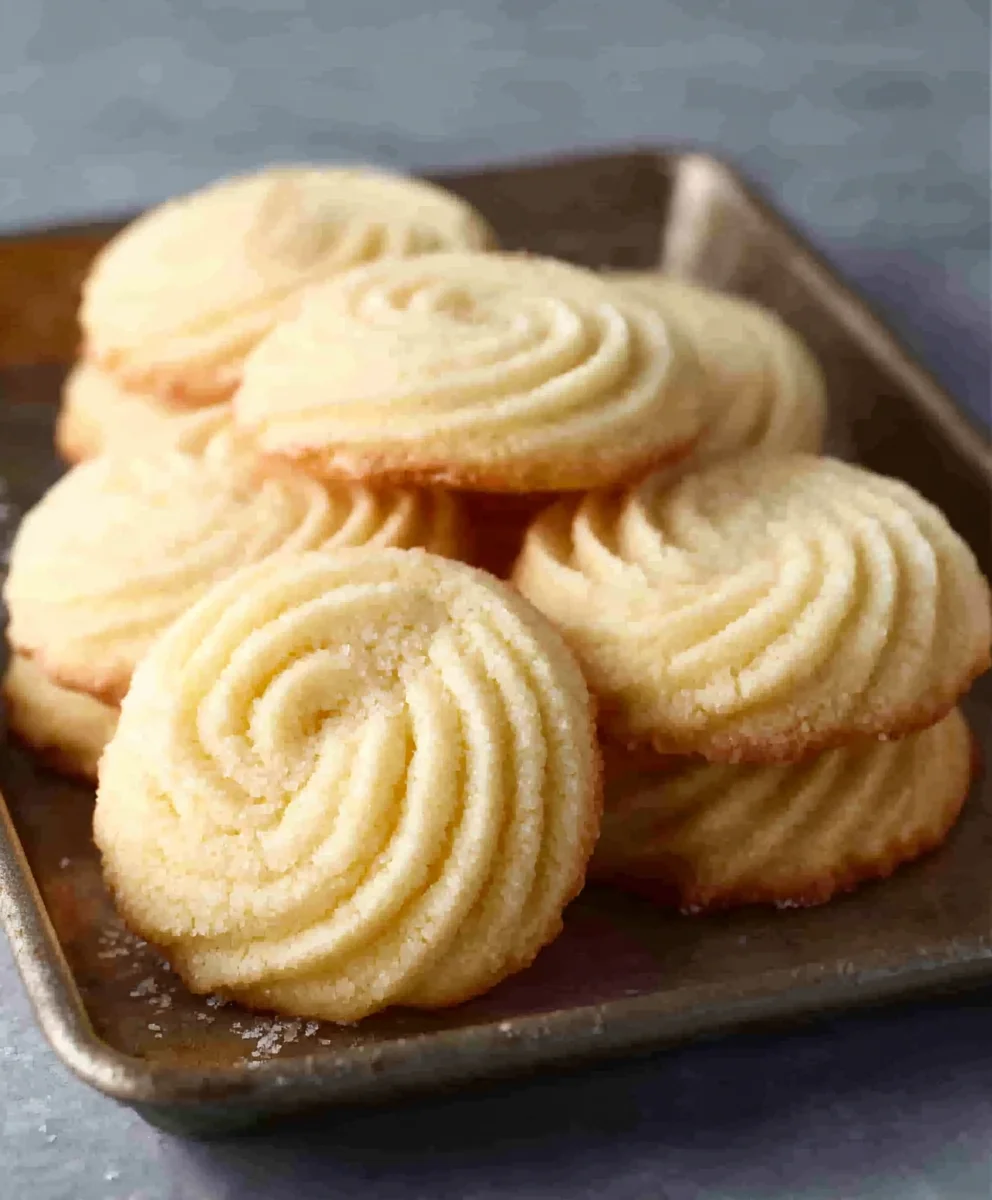
Place the baking sheets into the preheated oven. Bake for 10-14 minutes, or until the edges of the cookies are lightly golden brown and the centers appear set but still slightly soft. These cookies are meant to be soft, so it’s better to err on the side of underbaking slightly than overbaking. They will continue to firm up as they cool. Keep an eye on them, as oven temperatures can vary. If you’re baking multiple batches, you might want to rotate your baking sheets halfway through the baking time for even cooking.
Cooling the Cookies
Once they are baked to perfection, remove the baking sheets from the oven. Let the cookies sit on the baking sheets for about 5 minutes. This allows them to set up a little more before you attempt to move them. After those 5 minutes, carefully transfer the cookies to a wire rack to cool completely. This is essential for achieving that signature soft texture. If you try to move them too soon, they might break. Once they are completely cool, they are ready to be enjoyed! These soft butter cookies are wonderful on their own, or you can get creative with toppings once they’ve cooled.
Conclusion:
I hope you enjoyed learning how to make these delightful Soft Butter Cookies! These cookies are a perfect balance of buttery richness and a wonderfully tender crum extractb, making them a crowd-pleaser for any occasion. Whether you’re baking for a holiday, a special event, or just because, these cookies are sure to impress.
For serving, I love to pair these Soft Butter Cookies with a hot cup of tea or coffee. They also make a beautiful addition to a dessert platter alongside fresh fruit or a scoop of ice cream. Don’t be afraid to get creative with your presentation!
When it comes to variations, the possibilities are endless. You can add a sprinkle of cinnamon or nutmeg to the dough for a spiced twist, or fold in some finely chopped nuts like almonds or walnuts. For a touch of decadence, try dipping half of the cooled cookies in melted chocolate.
Baking should be a joyful experience, and I encourage you to give these Soft Butter Cookies a try. They’re relatively simple to make, and the rewarding results are absolutely worth it. So, preheat your ovens, gather your ingredients, and get ready to create some delicious memories!
Frequently Asked Questions:
Q: How long do these Soft Butter Cookies stay fresh?
A: Stored in an airtight container at room temperature, these Soft Butter Cookies will stay wonderfully fresh and soft for up to 5-7 days. You can also freeze the baked cookies for longer storage; simply wrap them tightly in plastic wrap and then place them in a freezer-safe bag or container for up to 2-3 months.
Q: Can I add other flavors to the Soft Butter Cookies dough?
A: Absolutely! This recipe is a fantastic base for flavor experimentation. You can add about 1 teaspoon of vanilla extract for an extra vanilla boost, a tablespoon of lemon or orange zest for a citrusy note, or even a pinch of cardamom for a unique aroma. Just ensure you don’t add too much liquid, as it can alter the cookie’s texture.
Q: My Soft Butter Cookies spread too much in the oven. What did I do wrong?
A: There are a couple of common reasons for excessive spreading. Firstly, ensure your butter is softened but not melted; if it’s too soft, the cookies will spread quickly. Secondly, chilling the dough for at least 30 minutes before baking can significantly help. Chilled dough holds its shape better and will result in thicker, softer cookies.
Melt-in-your-mouth Soft Butter Cookies Recipe
These incredibly soft and tender butter cookies melt in your mouth with a classic, comforting flavor. Perfect for any occasion!
Ingredients
-
1 cup unsalted butter, softened
-
⅔ cup granulated sugar
-
2 large egg yolks
-
1 teaspoon vanilla extract
-
2 cups all-purpose flour
-
¼ teaspoon salt
-
2 tablespoons milk
Instructions
-
Step 1
Cream the softened butter and granulated sugar in a large mixing bowl using an electric mixer on medium-high speed for 3-5 minutes until light, fluffy, and pale. Scrape down the sides of the bowl as needed. -
Step 2
Add the egg yolks and vanilla extract to the creamed butter and sugar mixture. Mix on medium speed until fully incorporated and smooth. -
Step 3
In a separate bowl, whisk together the all-purpose flour and salt. Gradually add this dry mixture to the wet ingredients, mixing on low speed just until mostly incorporated. Do not overmix. -
Step 4
Add the milk to the dough and mix on low speed until the dough just begins to come together. If the dough seems too dry, add another teaspoon of milk at a time until a soft, pliable, but not sticky dough forms. -
Step 5
Turn the dough out onto a lightly floured surface or plastic wrap, bring it together into a ball, flatten into a disc, wrap tightly, and refrigerate for at least 30 minutes. -
Step 6
Preheat oven to 350°F (175°C). Line baking sheets with parchment paper. Portion dough using a cookie scoop, roll into balls, and place about 2 inches apart on the baking sheets. Gently flatten if desired. -
Step 7
Bake for 10-14 minutes, or until the edges are lightly golden brown and the centers are set but still slightly soft. Rotate baking sheets halfway through if baking multiple batches. -
Step 8
Let cookies cool on the baking sheets for 5 minutes before carefully transferring them to a wire rack to cool completely.
Important Information
Nutrition Facts (Per Serving)
It is important to consider this information as approximate and not to use it as definitive health advice.
Allergy Information
Please check ingredients for potential allergens and consult a health professional if in doubt.


Leave a Comment