
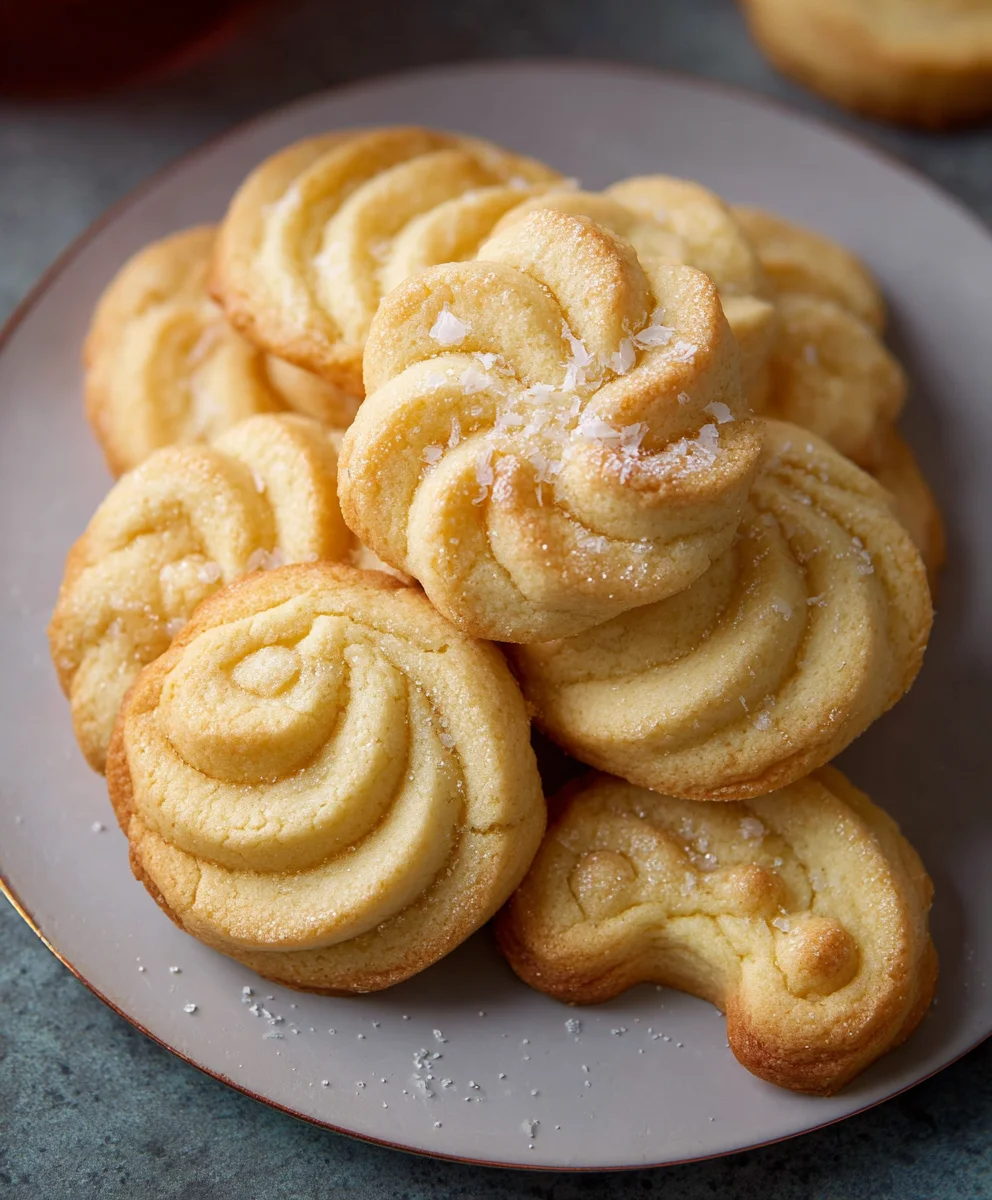
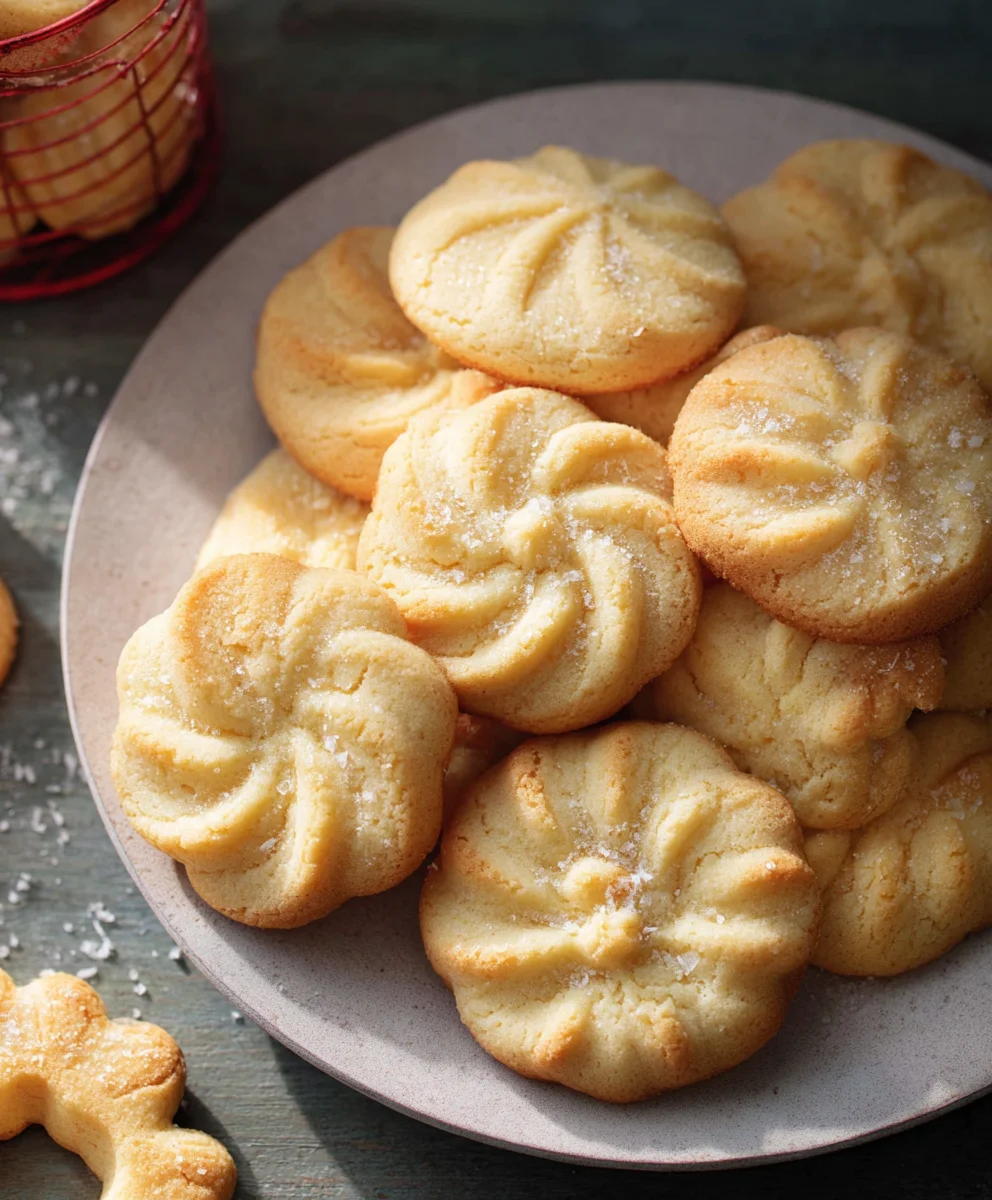
Danish Butter Cookies (Melt in your mouth) are more than just a treat; they’re a nostalgic embrace, a whisper of childhood holidays, and a testament to the simple perfection of butter, sugar, and flour. Have you ever encountered that delicate, crumbly texture that dissolves on your tongue like a sweet dream? That’s the magic we’re aiming for! These aren’t your average store-bought biscuits. Our recipe unlocks the secret to achieving that authentic, incredibly tender crumb that truly makes these Danish Butter Cookies (Melt in your mouth). What sets them apart is their pure, unadulterated butter flavor, a rich essence that shines through with every bite. They are incredibly versatile, perfect for enjoying with a cup of coffee, as a light dessert, or as a charming addition to any cookie platter. Get ready to create a batch that will have everyone asking for the recipe, because these are guaranteed to become your new favorite indulgence.

Ingredients:
- 1 cup (227 g) European salted butter, softened to room temperature
- 1/2 cup (100 g) granulated sugar
- 1/8 teaspoon salt
- 2 large egg yolks
- 2 teaspoons (10 g) pure vanilla extract
- 1 tablespoon (15 g) whole milk, plus potentially a little more for consistency
- 2 cups (220 g) all-purpose flour
- 1/2 cup (50 g) cake flour
- Coarse sugar, for sprinkling
Preparing the Dough
Creaming the Butter and Sugar
The foundation of our melt-in-your-mouth Danish Butter Cookies lies in the proper creaming of the butter and sugar. This step is crucial for incorporating air into the dough, which will contribute to the cookie’s tender texture and slight crispness. Begin by ensuring your European salted butter is truly at room temperature. It should be soft enough to indent easily with your finger, but not so soft that it’s greasy or melted. In a large mixing bowl, combine the softened butter, granulated sugar, and the 1/8 teaspoon of salt. Using an electric mixer (either a stand mixer with a paddle attachment or a handheld mixer), beat these ingredients together on medium speed. Start by mixing for about 30 seconds to just combine, then increase the speed to medium-high and continue to beat for a good 3-5 minutes. You are looking for a pale yellow, fluffy, and visibly lighter mixture. It should look creamy and airy, almost like whipped cream. Don’t rush this step; the more air you incorporate here, the better your cookies will be. Scrape down the sides and bottom of the bowl a couple of times during mixing to ensure everything is evenly incorporated.
Incorporating Wet Ingredients
Once you have achieved that beautiful, light, and fluffy butter-sugar mixture, it’s time to add the wet ingredients. Reduce the mixer speed to medium-low. Add the two egg yolks, one at a time, beating well after each addition until fully incorporated. The egg yolks will add richness and help bind the dough. Next, add the vanilla extract. The pure vanilla extract is key for that classic Danish butter cookie flavor, so use the good stuff if you have it! Mix until just combined. Now, it’s time for the milk. Add the tablespoon of whole milk. If your dough seems very stiff and crumbly at this point, you can add another teaspoon of milk, but be careful not to make it too wet. We want a dough that holds its shape. Mix until everything is just combined into a cohesive, soft dough. It will still be quite soft, but it should start to pull away from the sides of the bowl.
Combining Dry Ingredients and Forming the Dough
Adding the Flours
In a separate medium bowl, whisk together the all-purpose flour and the cake flour. Sifting these flours together beforehand isn’t strictly necessary, but it can help ensure a more uniform mixture. The cake flour, with its lower protein content, will contribute to the delicate crumb and the “melt-in-your-mouth” quality we are aiming for. Now, gradually add the flour mixture to the wet ingredients. It’s best to add the flour in three additions, mixing on low speed after each addition until just combined. Be careful not to overmix the dough once the flour is added. Overmixing can develop the gluten in the flour, resulting in tougher cookies. You want just enough mixing to see no dry streaks of flour remaining. The dough will be soft and pliable.
Chilling and Shaping the Dough
At this stage, the dough needs to chill to firm up, making it easier to handle and pipe. Divide the dough in half. Place each half onto a large piece of plastic wrap. Shape each half into a log, about 1.5 to 2 inches in diameter. Wrap the logs tightly in the plastic wrap, ensuring there are no air pockets. Refrigerate the dough logs for at least 2 hours, or until firm enough to slice. You can also prepare these logs a day or two in advance and keep them refrigerated. If the dough becomes too hard to slice after prolonged refrigeration, let it sit at room temperature for about 10-15 minutes to soften slightly.
Baking the Danish Butter Cookies
Preheating the Oven and Preparing Baking Sheets
Before you’re ready to bake, preheat your oven to 325°F (160°C). This moderate temperature is perfect for ensuring the cookies bake evenly without browning too quickly. Line two large baking sheets with parchment paper. This will prevent the cookies from sticking and make for easy cleanup. If you don’t have parchment paper, you can lightly grease your baking sheets, but parchment paper is highly recommended for best results.
Slicing and Decorating the Cookies
Take one chilled dough log out of the refrigerator. Unwrap it and use a sharp knife to slice the log into 1/4-inch thick rounds. Arrange the cookie slices on the prepared baking sheets, leaving about 1 to 2 inches of space between each cookie, as they will spread slightly during baking. If you want to achieve the classic look of Danish butter cookies, you can use a fork to gently press a criss-cross pattern onto the top of each cookie. This not only adds visual appeal but also helps the cookie bake more evenly. For an extra touch of sparkle and sweetness, lightly brush the tops of the cookies with a tiny bit of milk (just enough to make the sugar adhere) and then sprinkle generously with coarse sugar. The coarse sugar will give a delightful crunch and a beautiful glistening finish. Repeat this process with the second dough log.
Baking and Cooling
Place the prepared baking sheets into the preheated oven. Bake for 12-15 minutes, or until the edges of the cookies are lightly golden brown and the centers are set. The exact baking time will depend on your oven and the thickness of your cookies. Keep a close eye on them, especially towards the end of the baking time, as they can go from perfectly baked to overdone very quickly. Once baked, remove the baking sheets from the oven. Let the cookies cool on the baking sheets for about 5 minutes. This allows them to firm up slightly before you move them. Then, carefully transfer the cookies to a wire rack to cool completely. Ensure they are fully cooled before storing them. Storing warm cookies can lead to them becoming soft and losing their crispness.
Conclusion:
And there you have it – your very own batch of delicious Danish Butter Cookies (Melt in your mouth)! We’ve walked through each step, from creaming the butter and sugar to achieving that perfect golden hue. These cookies are more than just a treat; they’re a little piece of baking joy that’s surprisingly simple to create. The rich, buttery flavor and delicate crumb are truly something special, living up to their “melt in your mouth” reputation. Enjoy them with your afternoon tea, as a sweet ending to a meal, or simply whenever a craving strikes. Don’t be afraid to experiment with this recipe – the possibilities are endless!
For serving, these cookies are wonderful on their own, but they also pair beautifully with a scoop of vanilla ice cream or a hot cup of coffee. If you’re feeling adventurous with variations, consider adding a pinch of cardamom for an extra aromatic note, or dip half of the cooled cookie in melted dark chocolate for a decadent twist. You could also sprinkle them with a little sea salt before baking for a delightful sweet and salty contrast. No matter how you choose to enjoy them, I hope you find as much pleasure in baking and eating these Danish Butter Cookies as I do. Happy baking!
Frequently Asked Questions:
How can I ensure my Danish Butter Cookies (Melt in your mouth) don’t spread too much?
A key to preventing excessive spreading is ensuring your butter is softened but not melted. Overly soft butter will cause the cookies to spread out more during baking. Also, chilling the dough for at least 30 minutes before baking can significantly help maintain their shape.
Can I make these cookies ahead of time?
Absolutely! These Danish Butter Cookies store exceptionally well. Once completely cooled, place them in an airtight container at room temperature. They will stay delicious and retain their wonderful texture for up to a week, making them perfect for making ahead of parties or holidays.
What if I don’t have almond extract?
If almond extract isn’t your preference or you don’t have it on hand, you can simply omit it. The cookies will still be wonderfully buttery and delicious! Alternatively, you could substitute it with an equal amount of vanilla extract for a classic flavor profile.
Melt-in-your-mouth Danish Butter Cookies Recipe
Classic Danish butter cookies with a tender, melt-in-your-mouth texture and a slight crispness. Perfect for holidays or any occasion.
Ingredients
-
1 cup (227 g) European salted butter, softened to room temperature
-
1/2 cup (100 g) granulated sugar
-
1/8 teaspoon salt
-
2 large egg yolks
-
2 teaspoons (10 g) pure vanilla extract
-
1 tablespoon (15 g) whole milk, plus potentially a little more for consistency
-
2 cups (220 g) all-purpose flour
-
1/2 cup (50 g) cake flour
-
Coarse sugar, for sprinkling
Instructions
-
Step 1
Cream softened European salted butter, granulated sugar, and salt in a large bowl with an electric mixer on medium-high speed for 3-5 minutes until pale yellow, fluffy, and light. -
Step 2
Reduce mixer speed to medium-low. Add egg yolks one at a time, beating well after each. Stir in vanilla extract and 1 tablespoon of whole milk (add more milk if dough is very stiff, but do not make it too wet). -
Step 3
In a separate bowl, whisk together all-purpose flour and cake flour. Gradually add the flour mixture to the wet ingredients in three additions, mixing on low speed until just combined. Do not overmix. -
Step 4
Divide dough in half. Shape each half into a 1.5-2 inch diameter log on plastic wrap, wrap tightly, and refrigerate for at least 2 hours until firm. -
Step 5
Preheat oven to 325°F (160°C). Line baking sheets with parchment paper. Slice chilled dough logs into 1/4-inch thick rounds and arrange on baking sheets, leaving 1-2 inches between cookies. -
Step 6
Gently press a criss-cross pattern on top of each cookie with a fork. Brush lightly with milk and sprinkle generously with coarse sugar. -
Step 7
Bake for 12-15 minutes, or until edges are lightly golden brown and centers are set. Cool on baking sheets for 5 minutes, then transfer to a wire rack to cool completely.
Important Information
Nutrition Facts (Per Serving)
It is important to consider this information as approximate and not to use it as definitive health advice.
Allergy Information
Please check ingredients for potential allergens and consult a health professional if in doubt.
Leave a Comment