
How To Make Yogurt Drops at Home is simpler and more rewarding than you might imagin extracte! If you’re looking for a delightful, healthy, and incredibly versatile treat, you’ve come to the right place. These little bites of goodness are incredibly popular for so many reasons. They’re naturally sweet, packed with probiotics, and oh-so-satisfyingly creamy. Kids adore them as a fun snack, and adults appreciate their light, refreshing quality as a dessert or a palate cleanser. What truly sets these yogurt drops apart is their incredible adaptability. You can customize them with your favorite fruits, a drizzle of honey, or even a sprinkle of granola for added texture. The sheer joy of creating these beautiful, colorful morsels from scratch, knowing exactly what goes into them, is an experience in itself. Let’s dive into crafting your own batch of perfect yogurt drops!

Ingredients:
- 1 (15-ounce) can low-sodium chickpeas
- 1/4 teaspoon cream of tartar
- 2 tablespoons granulated sugar (optional)
- 1 teaspoon vanilla extract
- 3 tablespoons yogurt powder
- 1 tablespoon beet powder
Preparing the Chickpea Base
The foundation of our delightful yogurt drops begin extracts with a most unexpected ingredient: chickpeas! Don’t worry; they won’t impart a savory flavor. We’re harnessing their unique properties to create a light and airy texture. First, thoroughly drain and rinse the chickpeas. It’s crucial to remove all the briny liquid from the can. You can then pat them dry with a clean kitchen towel or paper towels to get rid of any excess moisture. The drier the chickpeas, the better our final texture will be.
Next, we’ll transfer these rinsed and dried chickpeas into a food processor or a high-powered blender. We want to process them until they form a very smooth, paste-like consistency. This might take a few minutes, and you may need to stop and scrape down the sides of the bowl a couple of times to ensure everything is incorporated evenly. The goal here is a silky smooth purée, free of any chunky bits. Think of it as creating a cloud-like base for our yogurt drops.
Adding the Flavor and Structure
Once we have our smooth chickpea purée, it’s time to introduce the elements that will transform it into sweet, yogurt-flavored delights. We’ll add the cream of tartar to the food processor. Cream of tartar acts as a stabilizer and helps create a lighter, more stable foam, which is essential for achieving that airy texture we’re aiming for. If you’re opting for a touch of sweetness, now is the time to add the granulated sugar. This is entirely optional, as the yogurt powder itself provides a pleagin extractt tanginess.
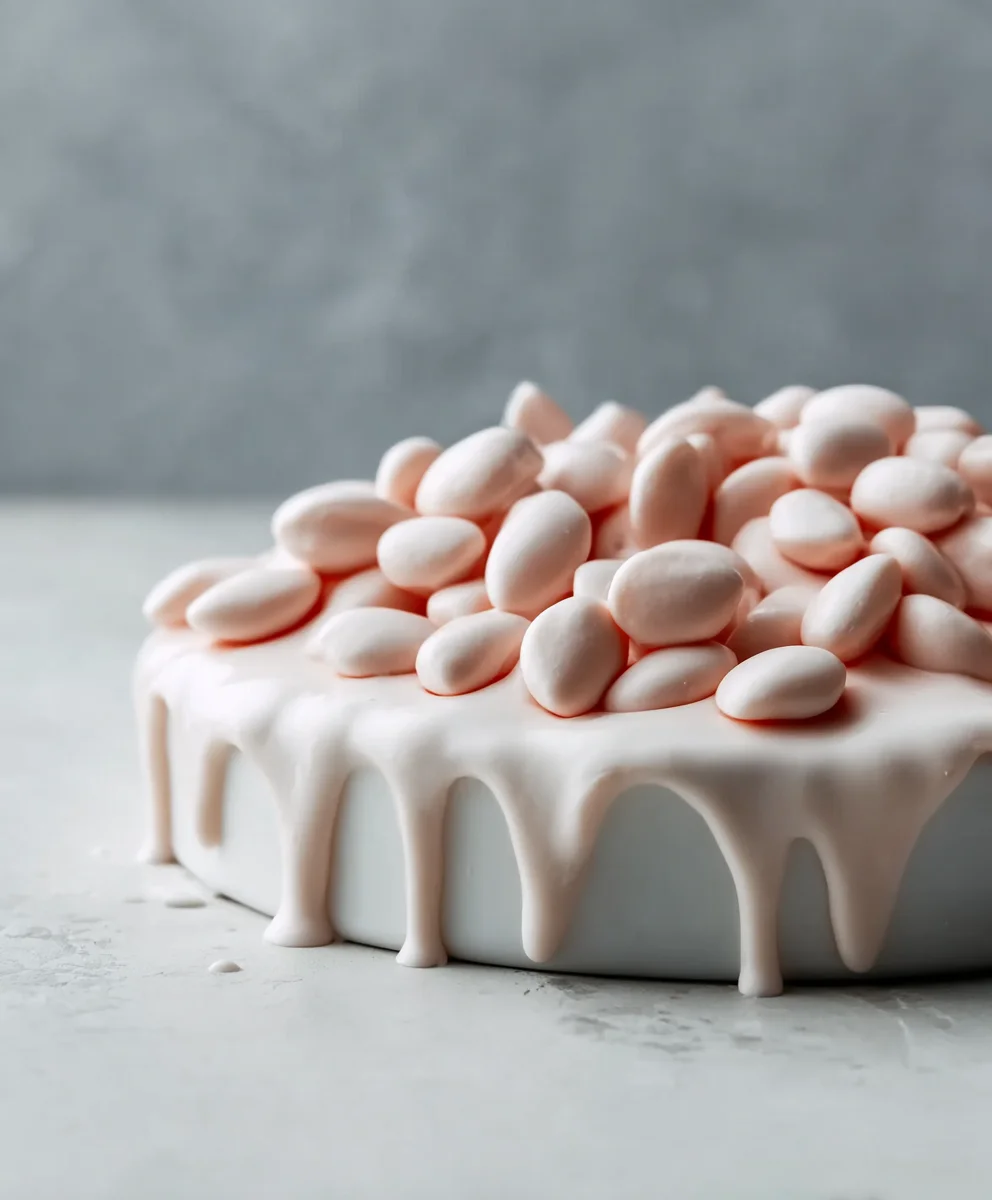
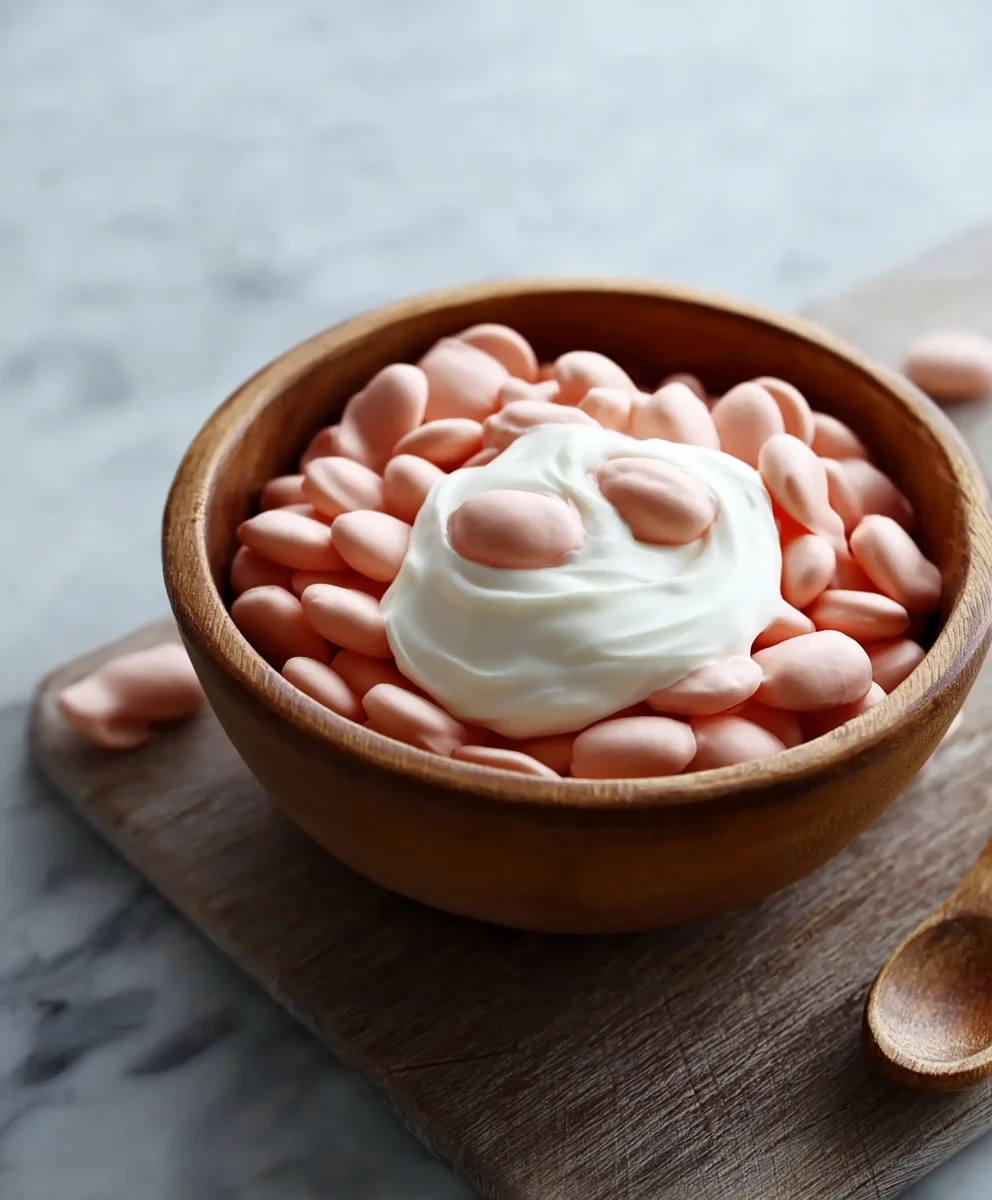
Next, we’ll incorporate the flavor enhancers. Add the pure vanilla extract for its warm, comforting aroma and taste. Then, sprinkle in the yogurt powder. This ingredient is key to achieving that characteristic tangy, creamy flavor of yogurt. Finally, for a beautiful, natural blush of color, we’ll add the beet powder. This vibrant powder not only makes our yogurt drops visually appealing but also contributes a subtle earthiness that pairs well with the other flavors. Process all these ingredients together until they are thoroughly combined and the mixture is smooth and homogenous. You should see a lovely pinkish hue developing from the beet powder.
Creating and Baking the Yogurt Drops
Now that our base is perfectly prepared, we’re ready to form our yogurt drops. Preheat your oven to a relatively low temperature, around 250 degrees Fahrenheit (120 degrees Celsius). This low temperature is important for drying out the drops without browning them too quickly, allowing them to become crisp and delicate.
Line a baking sheet with parchment paper. This prevents sticking and makes for easy cleanup. We’ll be dropping spoonfuls of our mixture onto the prepared baking sheet. You can use a small spoon or a piping bag fitted with a plain round tip to create uniform drops. Aim for bite-sized portions. If you’re using spoons, try to keep them relatively consistent in size for even baking. A little space between each drop is good to allow for air circulation.
Carefully place the baking sheet into the preheated oven. We’ll bake these for approximately 45 to 60 minutes. The exact baking time will depend on the size of your drops and the humidity in your kitchen. During the baking process, the goal is to dry them out until they are firm to the touch and easily lift off the parchment paper. They should feel light and airy, not moist or chewy. If they are still a bit soft after 45 minutes, continue baking in 5-10 minute increments, checking frequently.
Cooling and Storing
Once the yogurt drops have reached the desired crispness, turn off the oven but leave the drops inside with the oven door slightly ajar. This gradual cooling process helps prevent them from cracking or collapsing. Let them cool completely in the oven, which might take another hour or so. This slow cooling further ensures they dry out thoroughly.
After they have cooled completely, gently remove the yogurt drops from the baking sheet. They should be crisp and light. Store them in an airtight container at room temperature. If stored properly in a dry environment, they should maintain their delightful texture for several days. These homemade yogurt drops are a wonderful, unique treat that’s surprisingly simple to make!
Conclusion:
There you have it! With these simple steps, you’ve learned How To Make Yogurt Drops at Home, a delightful and healthy treat that’s surprisingly easy to whip up. These little bites of goodness are perfect for a quick snack, a fun addition to lunchboxes, or even as a healthier dessert option. Experimenting with different yogurt flavors and add-ins is where the real fun begin extracts. Don’t be afraid to get creative! We encourage you to give this recipe a try, and we’re confident you’ll find it incredibly rewarding. Enjoy sharing your homemade yogurt drops with friends and family!
Frequently Asked Questions:
Why are my yogurt drops not firming up?
Several factors can contribute to yogurt drops not firming. Ensure you are using a thick, full-fat Greek yogurt, as this has less water content. Over-mixing the batter can also sometimes make them runnier. If using a liquid sweetener like honey or maple syrup, make sure it’s not too much, as excess liquid can hinder setting. Freezing them for the recommended time, or even slightly longer, is crucial.
Can I use non-dairy yogurt for this recipe?
Yes, absolutely! You can successfully make yogurt drops using non-dairy yogurts like coconut, almond, or soy. However, keep in mind that the texture and firmness might vary slightly depending on the specific brand and type of non-dairy yogurt used. Thicker varieties will generally yield the best results. You may need to adjust the freezing time slightly.
How long do homemade yogurt drops last?
Properly stored in an airtight container in the freezer, these homemade yogurt drops can last for about 1 to 2 weeks. It’s best to consume them within this timeframe for optimal freshness and texture. Ensure they are completely frozen before storing to prevent them from sticking together.
Easy Homemade Yogurt Drops
A quick and delicious treat made with an unexpected chickpea base, flavored with yogurt and beet powder.
Ingredients
-
1 (15-ounce) can low-sodium chickpeas, drained and rinsed
-
1/4 teaspoon cream of tartar
-
2 tablespoons granulated sugar (optional)
-
1 teaspoon vanilla extract
-
3 tablespoons yogurt powder
-
1 tablespoon beet powder
Instructions
-
Step 1
Drain and rinse the chickpeas thoroughly, then pat them dry. Process in a food processor until a very smooth, paste-like consistency is achieved. -
Step 2
Add cream of tartar and optional granulated sugar to the chickpea purée. Process to combine. -
Step 3
Incorporate vanilla extract, yogurt powder, and beet powder. Process until smooth and homogenous with a pinkish hue. -
Step 4
Preheat oven to 250°F (120°C). Line a baking sheet with parchment paper and drop spoonfuls of the mixture onto the sheet. -
Step 5
Bake for 45-60 minutes, or until firm and dry. Turn off the oven, leave the door ajar, and let cool completely inside.
Important Information
Nutrition Facts (Per Serving)
It is important to consider this information as approximate and not to use it as definitive health advice.
Allergy Information
Please check ingredients for potential allergens and consult a health professional if in doubt.


Leave a Comment