
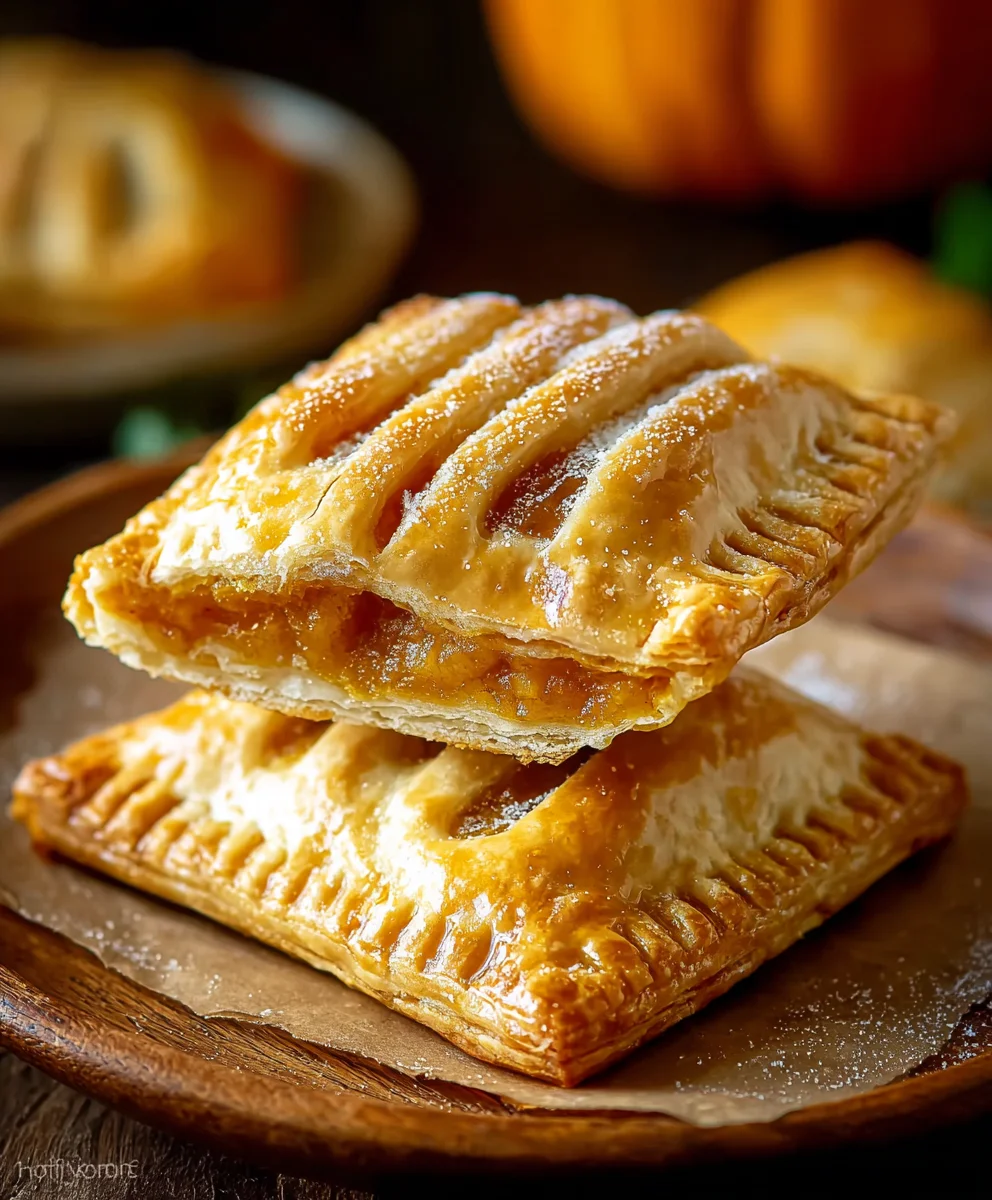
Pumpkin Hand Pies Flaky Crust are truly a marvel, encapsulating the comforting essence of autumn in every delightful bite. Imagine the quintessential flavors of a classic pumpkin pie – warm, spiced, and sweetly satisfying – expertly miniaturized and encased in a golden, unbelievably flaky pastry. This isn’t just a dessert; it’s a portable celebration of the season, perfect for gatherings, lunchboxes, or simply a cozy moment with a cup of tea.
Historically, pumpkin pie has been a cherished centerpiece of fall and winter holidays, especially Thanksgiving tables across America. These charming hand pies offer a wonderful, contemporary twist on that beloved tradition, making it easier than ever to share and enjoy. What truly elevates them, and why they’ve garnered such immense popularity, is the incredible texture juxtaposition: a creamy, perfectly spiced pumpkin filling nestled within a gloriously flaky crust. It’s a sensory experience – the delicate crispness of the pastry giving way to the smooth, rich filling.
Why You’ll Love This Recipe
The convenience of individual servings, combined with the irresistible taste and the much-sought-after Pumpkin Hand Pies Flaky Crust, makes this recipe an absolute winner. I invite you to discover the pure joy of baking and savoring these miniature masterpieces, promising a treat that’s as delightful to make as it is to eat.

Ingredients:
- For the Flaky Pie Crust:
- 2 ½ cups (300g) all-purpose flour, plus more for dusting
- 1 teaspoon salt
- 1 cup (226g) unsalted butter, very cold and cut into ½-inch cubes
- ½ cup (120ml) ice water, plus 1-2 tablespoons more if needed
- 1 large egg, beaten (for egg wash)
- 2 tablespoons turbinado sugar, for sprinkling
- For the Spiced Pumpkin Filling:
- 1 ½ cups (360g) pumpkin puree (make sure it’s 100% pumpkin, not pie filling)
- ½ cup (100g) packed light brown sugar
- ¼ cup (50g) granulated sugar
- 1 ½ teaspoons pumpkin pie spice
- ½ teaspoon ground cinnamon
- ¼ teaspoon ground ginger
- ⅛ teaspoon ground nutmeg
- Pinch of ground cloves
- ¼ teaspoon salt
- 2 tablespoons heavy cream or whole milk
- 1 large egg yolk
- 1 teaspoon vanilla extract
Preparing the Flaky Pie Crust – The Foundation of Your Pumpkin Hand Pies
Creating a truly flaky crust is the secret to these incredible Pumpkin Hand Pies Flaky Crust. It might seem daunting, but I promise, with a few key tricks, you’ll master it. The most important thing to remember is to keep everything as cold as possible!
- First, in a large mixing bowl, whisk together the 2 ½ cups of all-purpose flour and 1 teaspoon of salt. This ensures an even distribution of the salt throughout our flaky pie crust.
- Next, it’s time to incorporate that very cold butter. Add the ½-inch cubes of unsalted butter to the flour mixture. If you have a food processor, this step is a breeze. Pulse the mixture in short bursts, about 1-second each, until the butter is mostly pea-sized, with some pieces perhaps as large as small walnuts. You don’t want a completely uniform mixture; those larger pieces are what will create those beautiful, flaky layers. If you’re doing this by hand, which is perfectly fine and often preferred by purists, use a pastry blender or two knives to cut the butter into the flour until you reach the same consistency. Resist the urge to overmix, as warmth from your hands can melt the butter, hindering the flakiness.
- Now, we’ll gradually add the ice water. Pour in ½ cup of ice water, a tablespoon at a time, mixing gently with a fork or by pulsing in the food processor. Mix just until the dough comes together. It should still look a bit shaggy, but when you pinch a small piece, it should hold together. If it’s too dry, add an additional tablespoon or two of ice water, but be careful not to add too much, as this can make your crust tough. We’re aiming for a pliable dough, not a sticky one.
- Turn the dough out onto a clean, lightly floured surface. Gently gather it into a cohesive ball. Do not knead it like bread dough; we want to minimize gluten development for a tender, flaky crust. Divide the dough in half and flatten each half into a disc about 1 inch thick. Wrap each disc tightly in plastic wrap.
- This step is crucial for the best Pumpkin Hand Pies Flaky Crust: refrigerate the dough for at least 2 hours, or preferably overnight. Chilling allows the gluten to relax, making the dough easier to roll, and it ensures the butter remains extremely cold, which is paramount for achieving those delightful layers.
Making the Spiced Pumpkin Filling – The Heart of Your Pumpkin Hand Pies
While our dough is chilling and getting ready to create that perfect flaky crust, let’s prepare the wonderfully spiced pumpkin filling. This filling is a symphony of warm spices that perfectly complements the rich, buttery crust.
- In a medium saucepan, combine the 1 ½ cups of pumpkin puree, ½ cup packed light brown sugar, ¼ cup granulated sugar, 1 ½ teaspoons pumpkin pie spice, ½ teaspoon ground cinnamon, ¼ teaspoon ground ginger, ⅛ teaspoon ground nutmeg, a pinch of ground cloves, and ¼ teaspoon salt. Stir all these ingredients together until they are well combined.
- Place the saucepan over medium heat. Bring the mixture to a gentle simmer, stirring frequently. We want to cook out some of the excess moisture from the pumpkin, which will help prevent our hand pies from becoming soggy. Continue to simmer and stir for about 5-7 minutes, until the mixture has thickened slightly and is less watery. You’ll notice it pulling away from the sides of the pan slightly when stirred.
- Remove the saucepan from the heat. In a small bowl, whisk together the 2 tablespoons of heavy cream (or whole milk) and the 1 large egg yolk. This mixture will add richness and help bind the filling.
- Slowly temper the cream and egg yolk mixture into the warm pumpkin mixture. To do this, take a spoonful of the warm pumpkin mixture and whisk it into the cream/egg yolk mixture. Repeat this a couple of times. This gradually brings the temperature of the egg yolk up, preventing it from scrambling when added to the hot pumpkin. Once tempered, pour the cream and egg yolk mixture into the saucepan with the pumpkin filling and stir thoroughly to combine.
- Stir in the 1 teaspoon of vanilla extract.
- Transfer the pumpkin filling to a bowl and cover it directly with plastic wrap to prevent a skin from forming. Place it in the refrigerator to cool completely, at least 1-2 hours. It’s very important that the filling is completely cold before assembling the hand pies. Warm filling can melt the butter in your delicate flaky pie crust, compromising its texture.
Assembling the Pumpkin Hand Pies – Bringing It All Together for the Perfect Pumpkin Hand Pies Flaky Crust
This is where the magic happens and our individual Pumpkin Hand Pies Flaky Crust start to take shape. Take your time, and enjoy the process!
- Preheat your oven to 400°F (200°C). Line two large baking sheets with parchment paper. This will prevent sticking and make cleanup easier.
- Remove one disc of chilled pie dough from the refrigerator. On a lightly floured surface, roll out the dough to about ⅛-inch thickness. You want it thin enough to be tender but thick enough to hold up to the filling and maintain its structural integrity.
- Using a 4-inch round cookie cutter (or a clean, empty can of similar size), cut out circles from the dough. Reroll any scraps gently, being careful not to overwork the dough, and cut out more circles. For the best Pumpkin Hand Pies Flaky Crust, try to handle the dough as little as possible. Repeat this process with the second disc of dough. You should yield about 12-14 circles in total.
- Take one dough circle and spoon about 1-1 ½ tablespoons of the cold pumpkin filling onto one half of the circle, leaving a small border (about ½ inch) around the edge. Do not overfill, as this will make sealing difficult and can cause the pies to burst during baking.
- Lightly moisten the edge of the dough circle with a tiny bit of water or egg wash using your finger or a pastry brush. Fold the empty half of the dough over the filling to create a half-moon shape.
- Press firmly around the edges to seal the hand pie. You can use your fingertips to press out any air bubbles, ensuring a good seal. Then, use the tines of a fork to crimp the edges all around. This not only creates a pretty, decorative edge but also provides a strong seal for our Pumpkin Hand Pies Flaky Crust, preventing the filling from leaking out during baking.
- Repeat this process with the remaining dough circles and filling. As you assemble them, place the finished hand pies on your prepared baking sheets, leaving about 1 inch of space between each pie.
- In a small bowl, whisk the 1 large egg that you set aside for the egg wash. Brush the tops of each hand pie generously with the egg wash. This will give them that beautiful golden-brown sheen when baked.
- Sprinkle the tops of the hand pies with the turbinado sugar. This adds a lovely crunch and a touch of sweetness to the exterior of our Pumpkin Hand Pies Flaky Crust.
- Finally, and this is an important step to prevent steam buildup and ensure even baking, use a small sharp knife to cut 2-3 small slits on the top of each hand pie. These vents allow steam to escape during baking, preventing the pies from puffing up excessively or bursting.
Baking the Pumpkin Hand Pies – Achieving Golden Perfection
We’re almost there! This final stage will transform our prepared dough and filling into golden, irresistible Pumpkin Hand Pies Flaky Crust.
- Carefully transfer the baking sheets with your assembled Pumpkin Hand Pies to the preheated 400°F (200°C) oven.
- Bake for 18-22 minutes, or until the crust is a beautiful deep golden brown and the filling is bubbly. Keep an eye on them, as oven temperatures can vary. If you notice them browning too quickly, you can loosely tent them with aluminum foil.
- Once baked to perfection, remove the hand pies from the oven. Let them cool on the baking sheets for about 5-10 minutes before transferring them to a wire rack to cool completely. While it’s tempting to dive right in, allowing them to cool thoroughly is important for the filling to fully set, ensuring a clean and satisfying bite.
Tips for the Perfect Pumpkin Hand Pies Flaky Crust
To ensure your Pumpkin Hand Pies Flaky Crust are the absolute best they can be, keep these extra tips in mind:
- Keep Everything Cold: I cannot stress this enough! From your butter to your water, and even the dough itself, cold ingredients are the secret weapon for a truly flaky crust. If your kitchen is warm, you can even chill your flour and mixing bowl for 15-20 minutes before starting.
- Don’t Overwork the Dough: Handling the dough too much develops gluten, which leads to a tough crust instead of a tender, flaky crust. Mix just until combined and handle gently.
- Roll Evenly: When rolling out your dough, try to maintain an even thickness. This ensures that your hand pies bake uniformly.
- Proper Sealing: Take the time to seal your hand pies properly. A good crimp with a fork not only looks nice but also prevents your precious pumpkin filling from escaping during baking.
- Adjust Spices: Feel free to adjust the amount of pumpkin pie spice, cinnamon, ginger, nutmeg, and cloves in the filling to suit your personal preference. Love more spice? Go for it!
- Storage: These Pumpkin Hand Pies Flaky Crust are best enjoyed the day they are made. However, you can store leftovers in an airtight container at room temperature for up to 2 days, or in the refrigerator for up to 4 days. Reheat gently in a toaster oven for a few minutes to crisp up the crust again.
I absolutely adore these Pumpkin Hand Pies Flaky Crust, and I’m sure you will too. They are the perfect individual treat, packed with all the cozy flavors of fall and wrapped in a truly irresistible, buttery, and flaky pastry!
Conclusion:
So, there you have it, my friends! We’ve journeyed together through the delightful process of creating these incredible pumpkin hand pies. And now, as we reach the end of our culinary adventure, I want to truly emphasize why this particular recipe isn’t just another dessert; it’s an absolute game-changer. These aren’t just any hand pies; they are a celebration of everything wonderful about autumn, baked into a perfectly portable package. Imagine biting into that warm, spiced pumpkin filling, perfectly balanced in sweetness, all encased in a crust that is, quite frankly, a revelation. This isn’t just a good crust; we’re talking about a truly exceptional, melt-in-your-mouth experience that elevates the entire pie. That incredible Pumpkin Hand Pies Flaky Crust is the star alongside the delicious filling, creating a symphony of textures and flavors that will undoubtedly become a new favorite in your repertoire.
What makes these hand pies a must-try, beyond their undeniable deliciousness? It’s their inherent charm and versatility. They offer all the comforting flavors of a traditional pumpkin pie but in a much more convenient, mess-free format. No need for plates and forks if you don’t want them! They are perfect for on-the-go enjoyment, an ideal addition to a packed lunch, or a delightful treat to share at an informal gathering. The joy of holding your own individual pie, knowing every bite will be perfect, is something truly special. I promise you, once you taste that tender, aromatic filling nestled within that golden, ethereal crust, you’ll understand why I’m so enthusiastic. It’s the kind of treat that evokes cozy memories and creates new ones, bringing smiles to everyone who tries them. I’ve personally seen faces light up after just one bite, and that’s the magic I want you to experience. It’s the perfect blend of nostalgia and fresh, vibrant flavor, making every occasion feel a little more special and every gathering a little more inviting.
Now, let’s talk about how to best enjoy these little parcels of autumnal bliss. While they are absolutely divine straight out of the oven, perhaps with a slight cooling period to let the filling set, there are so many ways to elevate the experience. Imagine serving them warm with a scoop of vanilla bean ice cream that slowly melts into the spiced pumpkin – pure heaven! A dollop of freshly whipped cream, perhaps infused with a hint of maple syrup or cinnamon, would also be an exquisite pairing. For a charming breakfast or brunch treat, serve them alongside your morning coffee or tea. They’re also fantastic for potlucks, picnics, or even as elegant additions to a dessert bar at a holiday gathering. Their individual size makes them incredibly easy to serve and enjoy without any fuss. For those who love a bit of extra sparkle, a light dusting of powdered sugar or a simple drizzle of a maple glaze (just powdered sugar mixed with a touch of maple syrup and milk) can add an extra layer of sweetness and visual appeal. Don’t underestimate the power of a warm hand pie on a crisp autumn evening; it’s the ultimate comfort food experience.
And for those adventurous bakers among you, don’t hesitate to experiment with variations! While the classic recipe is perfect as is, you could consider adding a tablespoon of finely chopped pecans or walnuts to the pumpkin filling for a delightful crunch and nutty flavor. A tiny pinch of ground ginger or cardamom can amplify the spice profile if you prefer a bolder taste. You could also play with different glazes – a cream cheese glaze would offer a lovely tang, or even a spiced brown butter glaze for a richer, more complex finish. For a truly decadent twist, you could even mix in a handful of mini chocolate chips into the filling for a pumpkin chocolate chip pie experience in a hand-held format. Don’t be afraid to make this recipe your own; baking is all about creativity and personalizing flavors to suit your taste buds. Think of this recipe as a fantastic foundation upon which you can build your own signature autumnal dessert, adapting it slightly to fit your specific cravings or the preferences of your loved ones. The possibilities are truly endless once you master this perfect base.
So, my dear readers, I implore you: don’t just read about these magnificent hand pies. Roll up your sleeves, gather your ingredients, and give this recipe a try! I promise you, the effort is well worth the reward. There’s something incredibly satisfying about creating something so delicious from scratch, especially when the end result is as charming and flavorful as these pies. Imagine the aroma filling your kitchen as they bake, and the sheer delight on the faces of your family and friends when you present them with these golden treasures. I am truly excited for you to experience the magic. And once you do, please, please, please come back and share your experience with me! I absolutely adore hearing about your baking adventures. Did you add a special ingredient? Did you serve them in a unique way? Share your photos, your tips, your triumphs, and even your funny kitchen anecdotes in the comments below. Let’s build a community around delicious food and the joy of home baking. Your feedback and stories inspire me and others, creating a wonderful cycle of culinary exploration. Happy baking, everyone, and get ready to fall in love with your new favorite fall treat that will undoubtedly become a cherished part of your seasonal traditions!
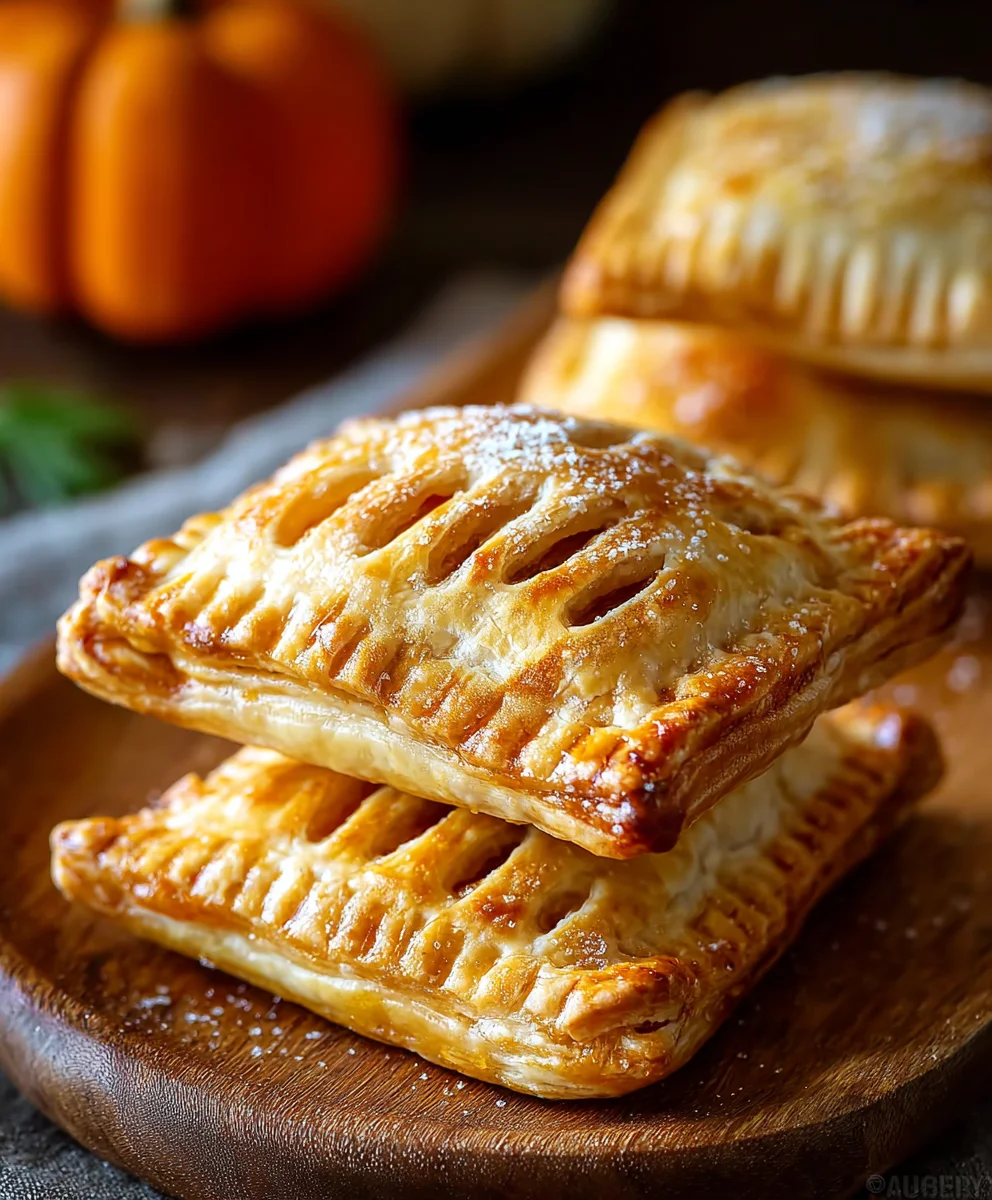
Flaky Pumpkin Hand Pies: Perfect Golden Fall Dessert Recipe
Flaky Pumpkin Hand Pies are a perfect portable fall dessert, featuring a buttery, gloriously flaky crust filled with a warm, spiced pumpkin mixture. These delightful individual treats encapsulate the comforting essence of autumn, making them ideal for gatherings, lunchboxes, or a cozy moment. Brushed with egg wash and sprinkled with turbinado sugar, they bake until golden brown and crispy. Enjoy them on the go, or serve warm with caramel or vanilla ice cream for an indulgent experience.
Ingredients
-
2 ½ cups all-purpose flour
-
1 tsp salt
-
1 cup (226g) very cold unsalted butter, cubed
-
½ cup ice water (plus 1-2 tbsp if needed)
-
1 large egg, beaten (for egg wash)
-
2 tbsp turbinado sugar
-
1 ½ cups (360g) pumpkin puree
-
½ cup packed light brown sugar
-
¼ cup granulated sugar
-
1 ½ tsp pumpkin pie spice
-
½ tsp ground cinnamon
-
¼ tsp ground ginger
-
⅛ tsp ground nutmeg
-
Pinch ground cloves
-
¼ tsp salt
-
2 tbsp heavy cream or whole milk
-
1 large egg yolk
-
1 tsp vanilla extract
Instructions
-
Step 1
In a large bowl, whisk 2 ½ cups flour and 1 tsp salt. Cut in 1 cup very cold cubed butter until mostly pea-sized. Gradually add ½ cup ice water (plus 1-2 tbsp if needed), mixing until dough just comes together. Divide into two discs, wrap, and refrigerate for at least 2 hours (preferably overnight). -
Step 2
In a medium saucepan, combine 1 ½ cups pumpkin puree, ½ cup brown sugar, ¼ cup granulated sugar, 1 ½ tsp pumpkin pie spice, ½ tsp cinnamon, ¼ tsp ginger, ⅛ tsp nutmeg, pinch cloves, and ¼ tsp salt. Simmer over medium heat for 5-7 minutes, stirring, until thickened. Remove from heat. -
Step 3
In a small bowl, whisk 2 tbsp heavy cream and 1 large egg yolk. Slowly temper into the warm pumpkin mixture by adding spoonfuls of pumpkin to the cream, then combine with the remaining pumpkin. Stir in 1 tsp vanilla extract. Cover directly with plastic wrap and refrigerate until completely cold (1-2 hours). -
Step 4
Preheat oven to 400°F (200°C). Line two baking sheets with parchment. On a lightly floured surface, roll out one chilled dough disc to ⅛-inch thickness. Cut out 4-inch circles (approx. 12-14 total from both discs, rerolling scraps gently). -
Step 5
Spoon 1-1 ½ tablespoons of cold pumpkin filling onto one half of each dough circle, leaving a ½-inch border. Moisten the edge lightly with water or egg wash. Fold the dough over to form a half-moon. Press edges firmly to seal, then crimp with a fork. -
Step 6
Place assembled pies on baking sheets. Brush tops with the beaten large egg (egg wash) and sprinkle with 2 tbsp turbinado sugar. Cut 2-3 small slits on top of each pie for steam vents. Bake for 18-22 minutes, or until golden brown. -
Step 7
Let cool on baking sheets for 5-10 minutes, then transfer to a wire rack to cool completely before serving.
Important Information
Nutrition Facts (Per Serving)
It is important to consider this information as approximate and not to use it as definitive health advice.
Allergy Information
Please check ingredients for potential allergens and consult a health professional if in doubt.


Leave a Comment