
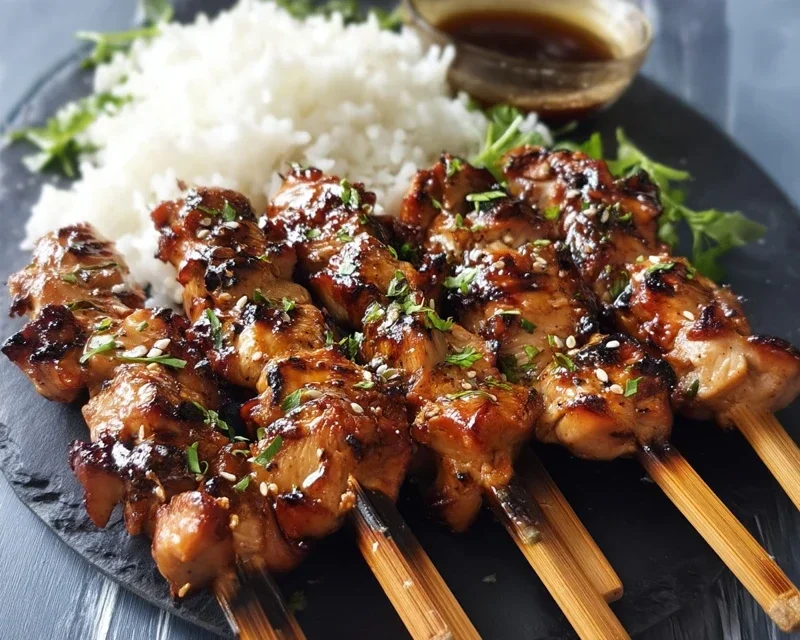
Teriyaki chicken skewers are an absolute crowd-pleaser, and for good reason! There’s something inherently fun and delicious about tender, marinated chicken grilled to perfection on a stick. The irresistible sweet and savory glaze of teriyaki sauce coats every bite, creating a flavor explosion that’s both comforting and exciting. Whether you’re hosting a backyard barbecue, planning a weeknight dinner that feels like a special occasion, or just craving a taste of Japanese-inspired goodness, these teriyaki chicken skewers deliver. What makes them truly special is the effortless blend of simple preparation with profoundly satisfying results. The subtle char from the grill adds another layer of complexity, making each skewer a delightful journey for your taste buds. Get ready to impress yourself and your loved ones with these incredibly easy and remarkably flavorful teriyaki chicken skewers.

Ingredients:
Teriyaki Chicken Skewers: Your New Go-To Weeknight Meal!
Get ready to impress yourself and your family with these incredibly delicious and surprisingly easy Teriyaki Chicken Skewers. Forget those takeout menus; we’re about to create a flavor explosion right in your own kitchen. The sweet and savory teriyaki glaze, combined with tender, juicy chicken, makes for a meal that’s perfect for grilling, baking, or even pan-frying. These skewers are not only a hit at barbecues but also make for a fun and interactive dinner when served with rice and your favorite steamed vegetables. Let’s get started on creating this culinary masterpiece!
Preparing the Chicken and Marinade
The first step to achieving perfectly flavorful teriyaki chicken is to properly prepare the chicken and get our glorious teriyaki sauce ready. For this recipe, I’ve specified chicken thighs because they tend to stay more moist and tender, even with the grilling process. However, if you prefer chicken breasts, feel free to use them, just be mindful of not overcooking them to avoid dryness. Ensure your chicken is cut into uniform 1-inch cubes. This consistency is key for even cooking, meaning every bite will be cooked to perfection.
Now, let’s talk about that irresistible teriyaki glaze. In a medium saucepan, we’ll combine the wet ingredients that will form the base of our sauce. Start by whisking together the water and cornstarch in the saucepan. This step is important for creating a smooth, lump-free sauce later on. Once that’s well combined, add in the brown sugar, soy sauce (I always opt for low-sodium to better control the saltiness), minced garlic, rice vinegar, and minced fresh gin extractger. If you don’t have fresh gin extractger, you can substitute it with about 1/4 teaspoon of ground gin extractger, but fresh truly adds a bright, zesty kick.
Simmering the Teriyaki Glaze
Once all the ingredients for the sauce are in the saucepan, it’s time to bring it to a gentle simmer over medium heat. Stir the mixture constantly as it heats up. You’ll notice it starting to thicken as the cornstarch does its magic. Continue to simmer for about 3-5 minutes, stirring frequently, until the sauce has reached a nice, syrupy consistency. It should coat the back of a spoon. Be careful not to let it boil vigorously, as this can sometimes break down the sauce. Once it’s thickened, remove the saucepan from the heat. Now, stir in the honey and the sesame oil. The honey will add another layer of sweetness and a beautiful sheen to the glaze, while the sesame oil provides that quintessential nutty aroma that is so characteristic of teriyaki. Let the teriyaki glaze cool slightly.
Assembling the Skewers
While the teriyaki glaze is cooling, it’s time to assemble our skewers. If you’re using wooden skewers, it’s crucial to soak them in water for at least 30 minutes before you plan to cook. This prevents them from burning on the grill or in the oven. Once soaked, thread the cubed chicken onto the skewers. Don’t overcrowd them; leave a little bit of space between each piece of chicken so that they cook evenly and the marinade can get to all sides. You should be able to get about 6-8 cubes of chicken per skewer, depending on their size and the length of your skewers.
Marinating and Cooking the Chicken
Now for the flavor infusion! Once the teriyaki glaze has cooled enough to handle, place the assembled chicken skewers in a shallow dish or a large resealable bag. Pour about half of the teriyaki glaze over the chicken, making sure to coat each piece generously. Reserve the remaining glaze for basting during the cooking process. Let the chicken marinate for at least 30 minutes at room temperature, or for up to 4 hours in the refrigerator. The longer it marinates, the deeper the flavor will penetrate the chicken.
Grilling the Skewers:
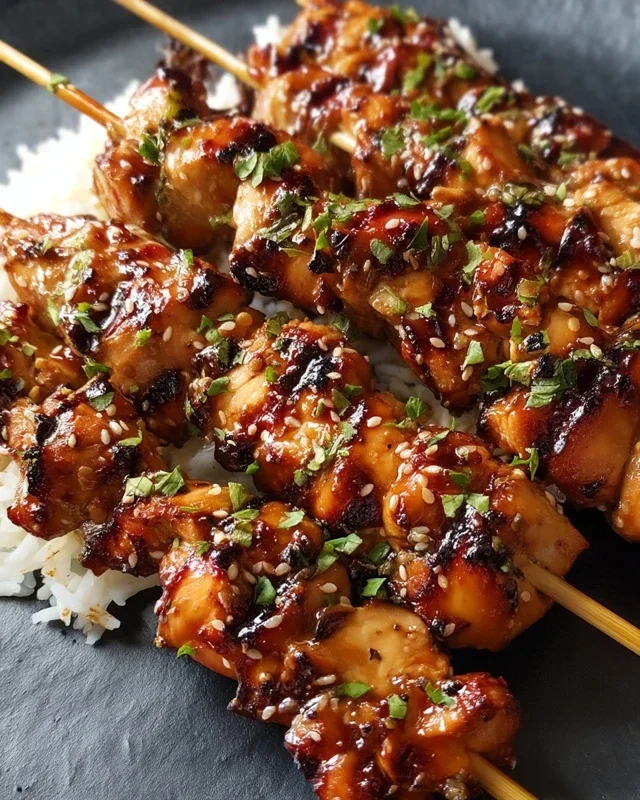
Preheat your grill to medium-high heat. Lightly oil the grill grates to prevent sticking. Place the marinated chicken skewers on the hot grill. Cook for about 3-5 minutes per side, or until the chicken is cooked through and has developed a beautiful char. During the last few minutes of cooking, brush the skewers generously with the reserved teriyaki glaze. This will create a sticky, caramelized coating that is absolutely divine.
Baking the Skewers:
If grilling isn’t an option, you can easily bake these skewers. Preheat your oven to 400°F (200°C). Line a baking sheet with parchment paper or aluminum foil for easier cleanup. Arrange the marinated chicken skewers on the prepared baking sheet. Bake for 15-20 minutes, flipping them halfway through. In the last 5 minutes of baking, brush the skewers with the reserved teriyaki glaze. You can also switch to the broiler for the last 1-2 minutes to get a nice caramelization, but watch them closely to prevent burning.
Pan-Frying the Skewers:
For a quick stovetop option, heat a tablespoon of oil in a large skillet or grill pan over medium-high heat. Add the marinated chicken skewers in a single layer, working in batches if necessary to avoid overcrowding the pan. Cook for about 4-6 minutes per side, or until the chicken is cooked through and nicely browned. Brush with the reserved teriyaki glaze during the last few minutes of cooking.
Serving Your Teriyaki Masterpiece
Once your teriyaki chicken skewers are perfectly cooked, remove them from the heat and let them rest for a minute or two. This allows the juices to redistribute, resulting in even more tender chicken. Arrange the skewers on a serving platter. For a truly restaurant-worthy presentation, generously sprinkle them with toasted sesame seeds and a scattering of freshly chopped green onions. These add a delightful crunch and a burst of fresh flavor that complements the rich teriyaki sauce beautifully. Serve immediately with steamed white or brown rice, a side of steamed broccoli, or your favorite stir-fried vegetables for a complete and satisfying meal. Enjoy the fruits of your labor – a delicious and homemade teriyaki chicken experience!
Conclusion:
And there you have it – your guide to creating absolutely delicious Teriyaki Chicken Skewers! This recipe is a winner because it’s incredibly straightforward, delivering that irresistible sweet and savory teriyaki glaze that coats perfectly cooked chicken. The convenience of skewers makes them ideal for grilling, baking, or even pan-frying, ensuring a fantastic meal no matter your cooking preference. They’re a crowd-pleaser for a reason, bringin extractg vibrant flavor and a fun, interactive element to any mealtime. I truly encourage you to give these Teriyaki Chicken Skewers a try; they’re sure to become a go-to in your recipe repertoire!
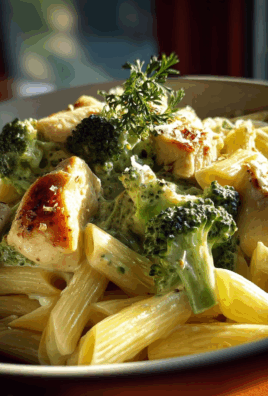
These skewers are wonderfully versatile. Serve them as a fantastic appetizer, a light lunch alongside a crisp salad, or as the star of your dinner with steamed rice and your favorite steamed or roasted vegetables. For a more substantial meal, consider serving them with a side of noodles or a fresh slaw. Don’t be afraid to get creative with your own flavor twists!
Frequently Asked Questions:
Q: Can I make the teriyaki sauce from scratch?
Absolutely! While store-bought teriyaki sauce is convenient, making your own allows you to control the sweetness and saltiness. A simple homemade sauce can be made with soy sauce, non-alcoholic mirin, non-alcoholic sake (or rice vinegar), sugar, and a touch of gin extractger and garlic. Simmer it until slightly thickened.
Q: What are some good variations for these Teriyaki Chicken Skewers?
You can easily swap out the chicken for other proteins like shrimp, beef, or firm tofu for a vegetarian option. Feel free to add colorful vegetables to the skewers, such as bell peppers, onions, pineapple chunks, or zucchini, for added flavor and texture.
Q: How should I store leftover Teriyaki Chicken Skewers?
Once cooled, store any leftover skewers in an airtight container in the refrigerator for up to 3 days. Reheat them gently in a skillet or oven to enjoy their delicious flavor again.
Teriyaki Chicken Skewers
Flavorful and easy teriyaki chicken skewers, perfect for grilling or baking.
Ingredients
-
2 lbs. chicken thighs (or breasts) (cut into 1″ cubes)
-
2 tbsp cornstarch
-
1 cup water
-
1/3 cup brown sugar
-
1/3 cup soy sauce
-
2 cloves garlic (minced)
-
1 tbsp rice vinegar
-
1/2 tbsp fresh ginger (minced)
-
1 tbsp honey
-
1/2 tsp sesame oil
-
8 skewers
-
sesame seed
-
chopped green onion
Instructions
-
Step 1
In a small bowl, whisk together cornstarch and 1 cup of water until smooth. Set aside. -
Step 2
In a medium saucepan, combine brown sugar, soy sauce, minced garlic, rice vinegar, minced ginger, and honey. Bring to a simmer over medium heat, stirring until sugar dissolves. -
Step 3
Gradually whisk the cornstarch slurry into the simmering sauce. Continue to cook, stirring constantly, until the sauce thickens, about 3-5 minutes. Remove from heat and stir in sesame oil. -
Step 4
Thread the chicken cubes onto the skewers, leaving a small space between each piece. Discard any extra marinade. -
Step 5
Grill the skewers over medium-high heat for 10-12 minutes, turning occasionally, until the chicken is cooked through and lightly charred. Alternatively, bake in a preheated oven at 400°F (200°C) for 15-20 minutes. -
Step 6
Brush the skewers generously with the teriyaki sauce during the last few minutes of cooking. -
Step 7
Serve hot, garnished with sesame seeds and chopped green onion.
Important Information
Nutrition Facts (Per Serving)
It is important to consider this information as approximate and not to use it as definitive health advice.
Allergy Information
Please check ingredients for potential allergens and consult a health professional if in doubt.


Leave a Comment