
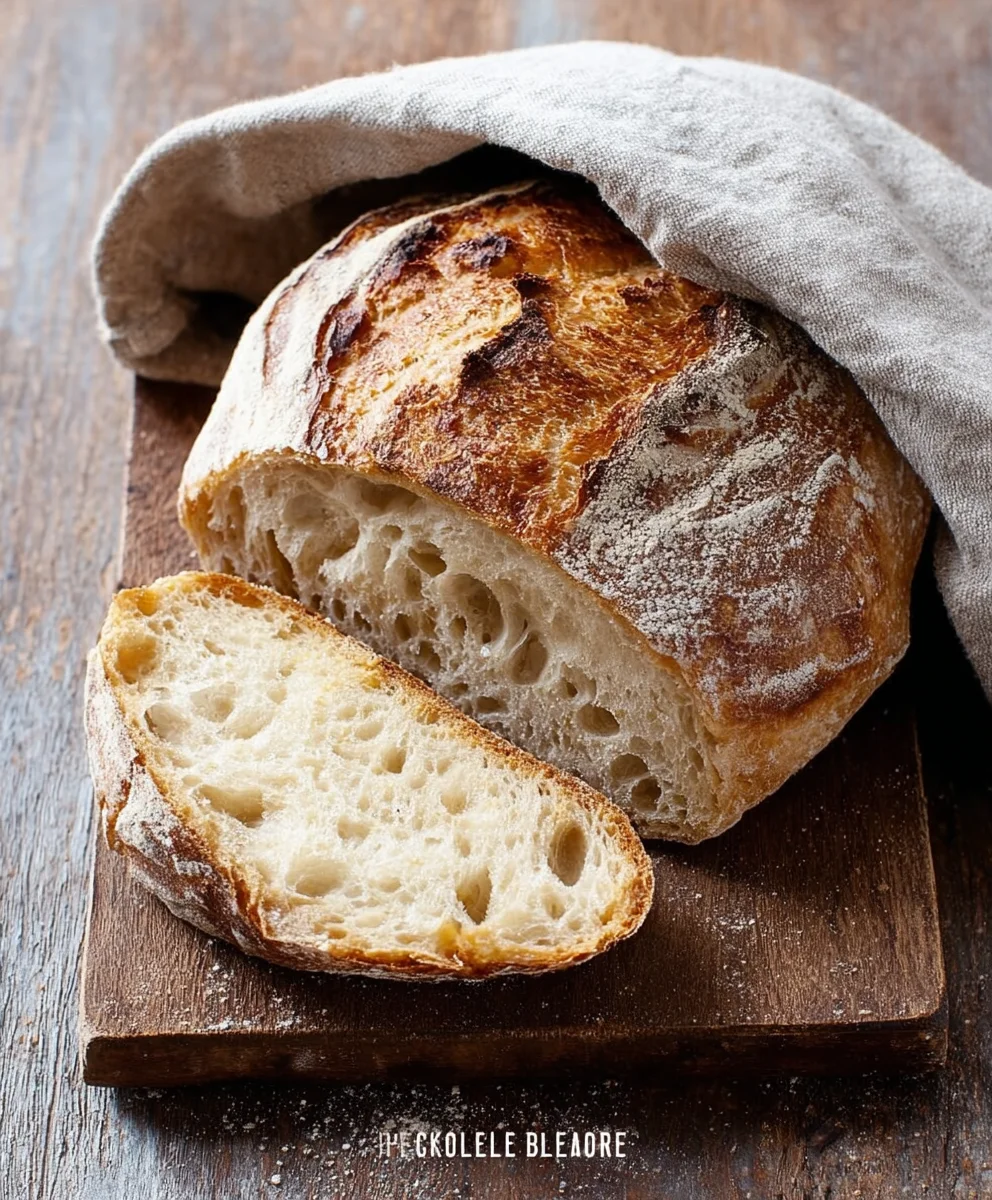
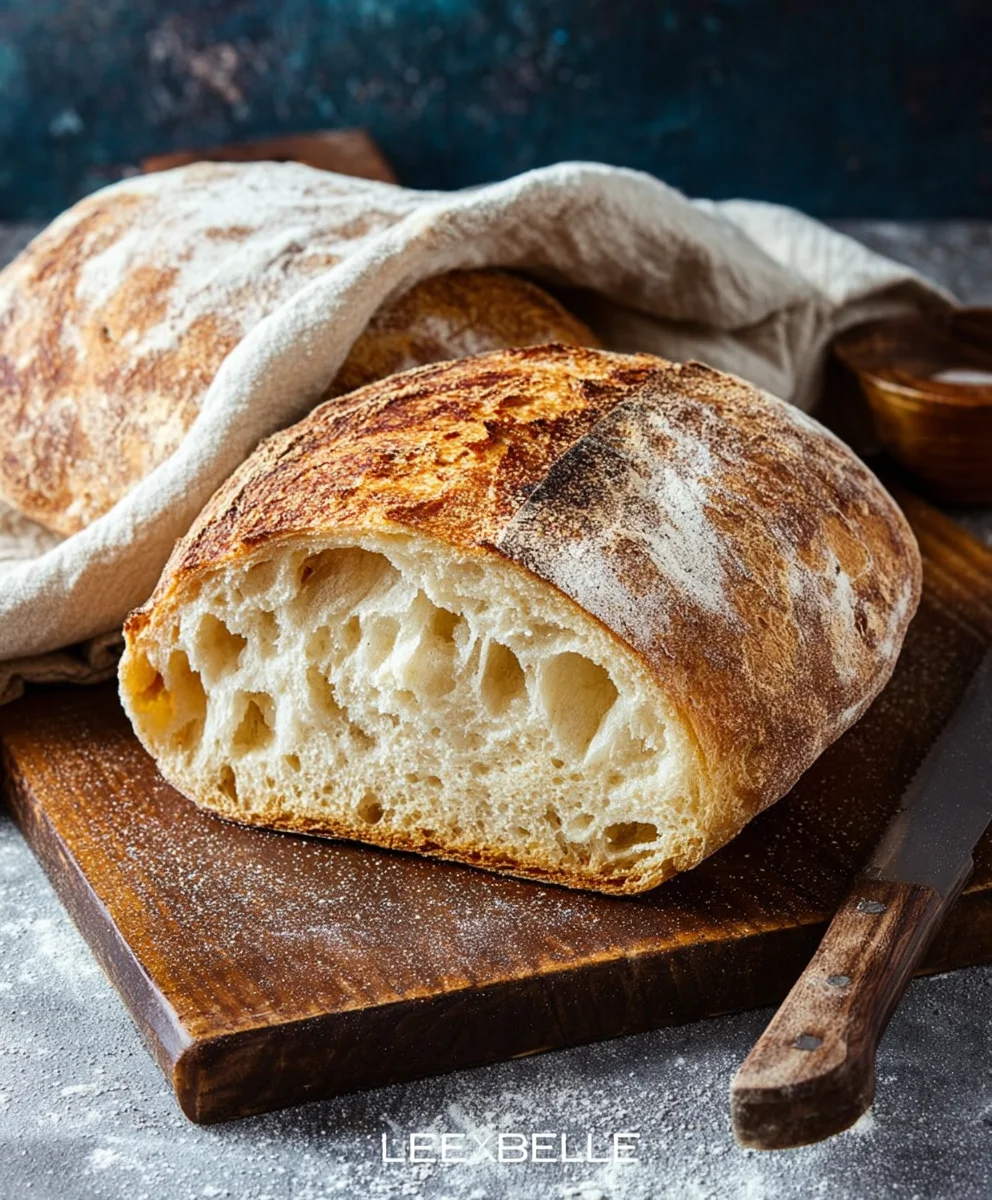
Rustic Bread Recipe
There’s a primal joy to baking your own bread, a connection to tradition and the comforting aroma that fills your home. And when it comes to truly satisfying loaves, a good Rustic Bread Recipe stands out. It’s not just about sustenance; it’s about texture, flavor, and the sheer satisfaction of creating something beautiful with your own hands. People adore this kind of bread because it speaks to a simpler time, offering that perfect chewy interior encased in a gloriously crisp crust. Imagin extracte slathering it with butter, dipping it into soup, or building the ultimate sandwich – the possibilities are endless. What truly makes this Rustic Bread Recipe special is its straightforward approach, relying on quality ingredients and minimal fuss to achieve exceptional results. It’s a recipe that encourages exploration and experimentation, a true testament to the magic of flour, water, yeast, and salt coming together in perfect harmony. Get ready to impress yourself and your loved ones with this foundational and incredibly rewarding bake.

Ingredients:
- 3 cups warm water (around 105-115°F or 40-46°C)
- 2 ¼ teaspoons active dry yeast (this is equivnon-alcoholic alent to one standard packet)
- 1 tablespoon sugar
- 6 cups (approximately 750 grams) all-purpose flour, plus more for dusting
- 3 teaspoons salt
The Art of Creating Your Rustic Loaf
This recipe is designed to guide you through the process of creating a beautiful, crusty, and wonderfully chewy rustic bread. It’s a straightforward approach that, with a little patience and attention, will yield incredibly satisfying results right in your own kitchen. We’ll be using simple, foundational ingredients to achieve that authentic homemade flavor and texture. The process involves several stages, from activating the yeast to the final bake, each contributing to the character of your bread. Don’t be intimidated; baking bread is a rewarding journey, and this recipe is your perfect companion.
Phase 1: Awakening the Yeast
The first step in our rustic bread adventure is to awaken the dormant yeast. This is a crucial phase that ensures your bread will have a light and airy crum extractb. In a large mixing bowl, combine the 3 cups of warm water. It’s important that the water is warm, not hot, as excessive heat can kill the yeast. Aim for a temperature that feels comfortably warm to the touch, ideally between 105°F and 115°F (40°C to 46°C). Next, sprinkle the 2 ¼ teaspoons of active dry yeast over the surface of the warm water. Immediately follow this by adding the 1 tablespoon of sugar. The sugar acts as food for the yeast, giving it something to feed on and become active. Stir this mixture gently a few times to ensure the yeast and sugar are dispersed. Now, the magic needs a little time. Let this mixture sit undisturbed for about 5 to 10 minutes. You’ll know your yeast is alive and kicking when you see a foamy, bubbly layer form on the surface of the water. This froth is a visual cue that the yeast is producing carbon dioxide, which is exactly what we want for a well-risen loaf. If after 10 minutes you don’t see any activity, your yeast might be old, or your water wasn’t the right temperature, and it would be best to start this step again with fresh yeast.
Phase 2: Building the Dough
Once your yeast has proven itself active and bubbly, it’s time to introduce the dry ingredients and form our dough. To the activated yeast mixture, add the 6 cups of all-purpose flour. You can measure this by weight (750 grams) for the most consistent results, but volume measurements are also perfectly acceptable for a home bake. Now, let’s add the flavor and structure: sprinkle in the 3 teaspoons of salt. The salt not only enhances the flavor of the bread but also helps to control the yeast activity, preventing it from fermenting too quickly. At this stage, you can begin extract mixing. I find it easiest to start with a sturdy spoon or a spatula, incorporating the flour and salt into the wet ingredients. Continue mixing until a shaggy gin extractgh begins to form and most of the flour has been absorbed. It might seem a little sticky at this point, and that’s perfectly fine.
Phase 3: Kneading for Strength
Now comes the part where we develop the gluten in the flour, which gives our rustic bread its signature chewy texture and structure. Turn the shaggy dough out onto a clean, lightly floured work surface. You’ll want to dust your hands and the surface lightly with a bit of extra flour. Kneading is essentially a process of stretching and folding the dough repeatedly. Start by pushing the dough away from you with the heels of your hands, then fold it back towards you. Give the dough a quarter turn and repeat. Continue this rhythmic process for about 8 to 10 minutes. The dough will start out sticky and a bit rough, but as you knead, it will transform. It will become smoother, more elastic, and less prone to sticking to your hands and the work surface. A well-kneaded dough will have a silky texture and should spring back slowly when you gently poke it. If the dough becomes too sticky during kneading, resist the urge to add too much extra flour, as this can make your bread dense. Instead, keep working it; it will usually become manageable.
Phase 4: The First Rise (Bulk Fermentation)
After a good kneading session, the dough needs time to rest and rise. Lightly grease a clean large bowl with a little oil or cooking spray. Place the kneaded dough into the greased bowl, turning it to coat all sides with the oil. This prevents the dough from drying out as it rises. Cover the bowl tightly with plastic wrap or a clean kitchen towel. Find a warm, draft-free spot for your dough to do its thing. This could be on your countertop, perhaps near a slightly warm oven, or even inside a turned-off oven with the light on to provide gentle warmth. Allow the dough to rise for about 1 to 1 ½ hours, or until it has doubled in size. The exact time can vary depending on the ambient temperature of your kitchen. You’ll know it’s ready when it looks noticeably puffy and has increased significantly in volume. This is where the yeast truly works its magic, creating those wonderful air pockets that make for arum extracteat crumb.
Phase 5: Shaping and Second Rise
Once your dough has doubled in size, it’s time to gently deflate it and shape it. Lightly punch down the dough in the center of the bowl to release some of the trapped air. Turn the dough out onto your lightly floured work surface again. At this point, you can shape your rustic bread into any form you desire. For a classic rustic loaf, you can gently form it into a round boule or an oblong batard. To do this, gently stretch and fold the edges of the dough towards the center, creating a taut surface. Pinch the seams closed to hold the shape. Once shaped, you can place your loaf on a baking sheet lined with parchment paper, or into a floured proofing basket (banneton) if you have one. Cover the shaped loaf loosely with a clean kitchen towel and let it rise for a second time, for about 30 to 45 minutes, or until it looks puffy again. This second rise is shorter but essential for the final texture and appearance of your bread. While the dough is on its second rise, preheat your oven to 425°F (220°C). If you plan to create a particularly crusty exterior, you can place an oven-safe pan (like a cast-iron skillet or an empty baking pan) on the bottom rack of your oven during preheating; we’ll use this to create steam later.
Conclusion:
And there you have it – your very own delicious Rustic Bread Recipe, ready to impress! We’ve walked through each step together, from activating the yeast to achieving that perfect golden crust. This recipe yields a wonderfully textured loaf with a satisfying chew and a hint of delightful tangin extractess. It’s truly a rewarding baking experience, perfect for both seasoned bakers and enthusigin extractic beginners.
This versatile loaf shines on its own, but it truly comes alive when served with a generous smear of butter, your favorite jam, or alongside a hearty soup or stew. For a more elaborate presentation, consider a drizzle of olive oil and a sprinkle of flaky sea salt.
Feel free to get creative with variations! You can incorporate herbs like rosemary or thyme into the dough, or perhaps some seeds for added crunch and flavor. A touch of whole wheat flour can add a nutty depth. Don’t be afraid to experiment and make this Rustic Bread Recipe your own. Happy baking, and enjoy every delicious bite!
Frequently Asked Questions:
Q1: My rustic bread didn’t rise as much as I expected. What could be the reason?
Several factors can affect dough rise. Ensure your yeast was fresh and properly activated in warm (not hot) liquid. Overworking or underworking the dough during the kneading process can also impact its ability to rise. Additionally, ambient temperature plays a role; a warm environment helps dough proof better. Make sure your kitchen isn’t too cold.
Q2: Can I make this Rustic Bread Recipe ahead of time?
Absolutely! Once cooled, this rustic bread can be stored in an airtight container or bread bag at room temperature for 2-3 days. For longer storage, you can slice the cooled loaf and freeze it. Simply toast the slices from frozen for a quick and easy treat.
Easy Rustic Bread Recipe- Homemade Comfort Food
A straightforward recipe for creating a beautiful, crusty, and wonderfully chewy rustic bread with satisfying homemade flavor and texture.
Ingredients
-
3 cups warm water (around 105-115°F or 40-46°C)
-
2 ¼ teaspoons active dry yeast
-
1 tablespoon sugar
-
6 cups (approximately 750 grams) all-purpose flour, plus more for dusting
-
3 teaspoons salt
Instructions
-
Step 1
Awaken the yeast: In a large mixing bowl, combine 3 cups of warm water (105-115°F). Sprinkle 2 ¼ teaspoons of active dry yeast and 1 tablespoon of sugar over the water. Stir gently and let sit for 5-10 minutes until foamy. -
Step 2
Build the dough: To the activated yeast mixture, add 6 cups of all-purpose flour and 3 teaspoons of salt. Mix with a spoon or spatula until a shaggy dough forms and most of the flour is absorbed. -
Step 3
Knead for strength: Turn the dough onto a lightly floured surface. Knead for 8-10 minutes until smooth, elastic, and less sticky. -
Step 4
First rise (bulk fermentation): Lightly grease a clean bowl. Place the dough in the bowl, turning to coat. Cover and let rise in a warm, draft-free spot for 1 to 1 ½ hours, or until doubled in size. -
Step 5
Shape and second rise: Gently punch down the dough. Turn it onto a floured surface and shape into a boule or batard. Place on a baking sheet or in a proofing basket. Cover loosely and let rise for 30-45 minutes until puffy. Preheat oven to 425°F (220°C) during this time. -
Step 6
Bake: (Instruction for baking not provided in the article content, but would typically follow.)
Important Information
Nutrition Facts (Per Serving)
It is important to consider this information as approximate and not to use it as definitive health advice.
Allergy Information
Please check ingredients for potential allergens and consult a health professional if in doubt.


Leave a Comment