
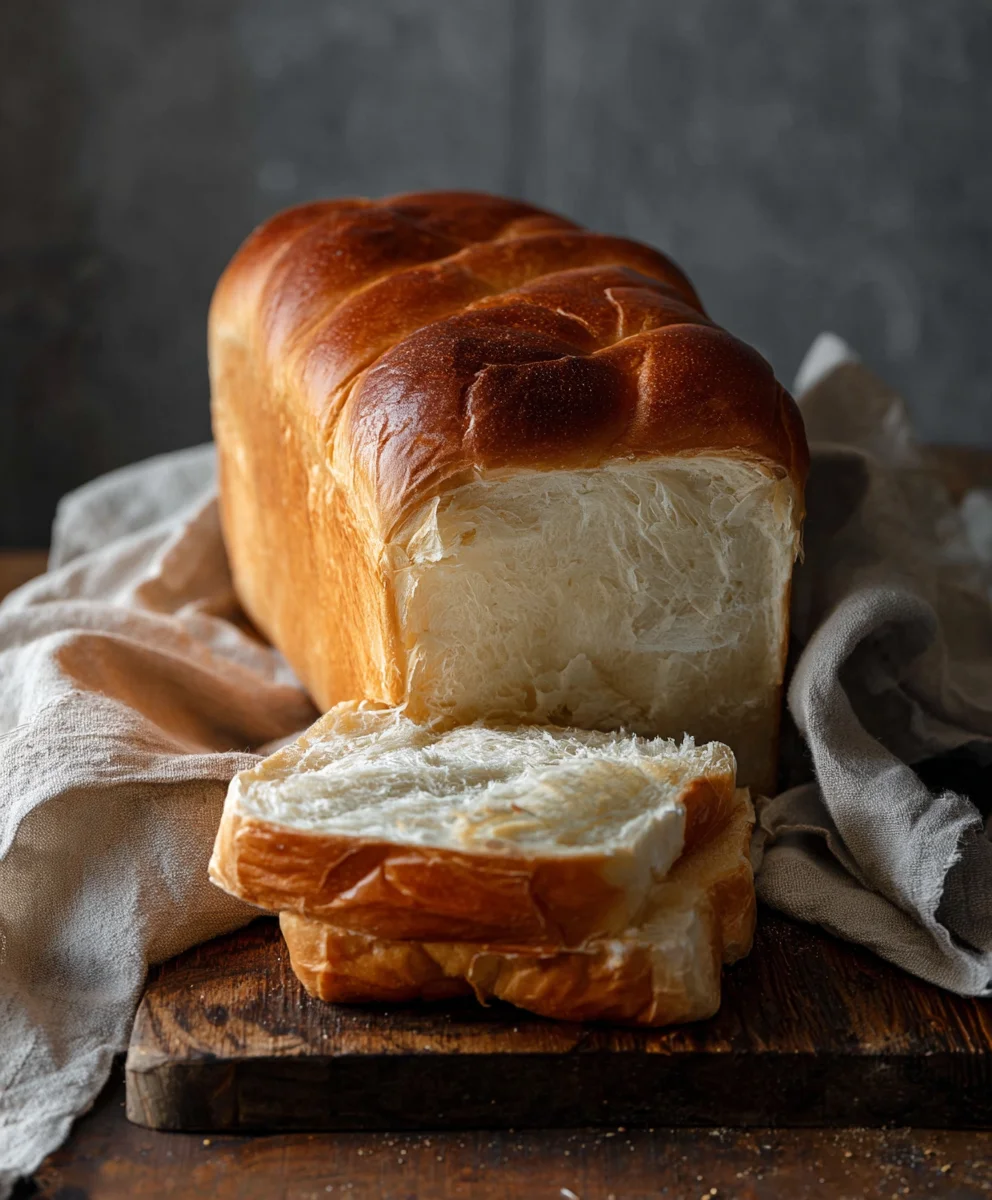
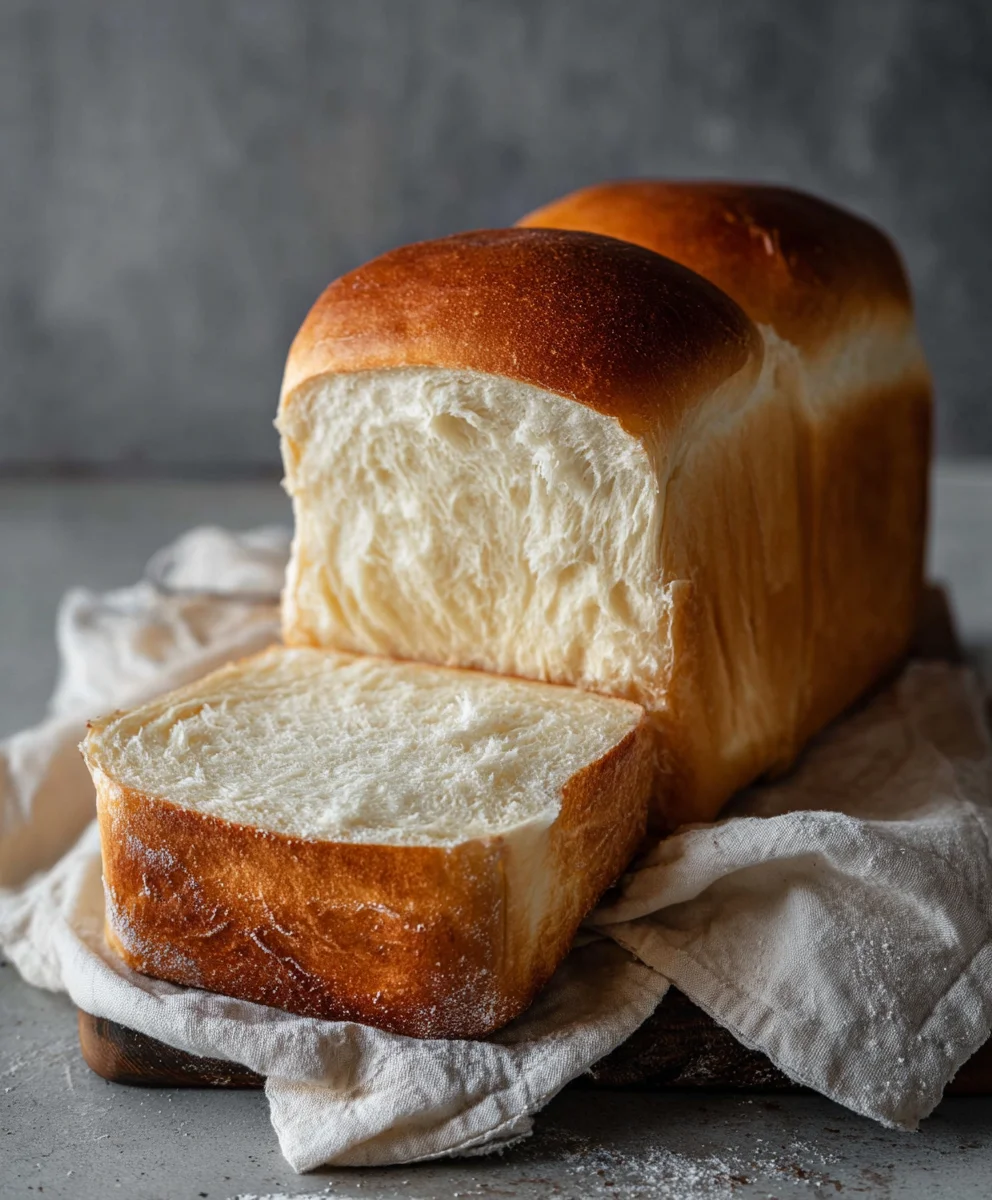
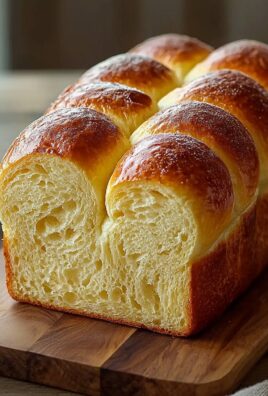
Easy Milk Bread Loaf recipes are a gateway to pure baking joy, transforming humble ingredients into a cloud-like masterpiece that whispers comfort with every slice. Have you ever dreamt of a bread so soft, so airy, it practically melts in your mouth? That’s the magic of a well-executed milk bread. It’s not just bread; it’s an experience. People adore this particular type of loaf because it strikes that perfect balance between pillowy tenderness and a delicate, slightly sweet flavor. It’s incredibly versatile – perfect for morning toast slathered with butter, a delightful base for delicate sandwiches, or simply enjoyed on its own. What truly sets this Easy Milk Bread Loaf apart is its simplicity, proving that you don’t need professional skills to achieve bakery-quality results right in your own kitchen. Get ready to discover the secret to its irresistible texture and the sheer delight of pulling a golden-brown, fragrant loaf from your oven.

Ingredients:
- 500 g bread flour (this is about 3¾ cups, and using bread flour is key for that wonderful chewy texture)
- 40 g sugar (approximately 3 tablespoons, which gives a subtle sweetness and helps with browning)
- 1½ teaspoons instant yeast (make sure it’s instant yeast for ease of use)
- 225 g cold water (just a touch less than 1 cup, keeping it cold helps control the fermentation)
- 115 g cold milk (about ½ cup, whole milk will give the richest flavor and softest crum extractb)
- 9 g sea salt (which is about 1½ teaspoons, don’t skip the salt – it’s vital for flavor and structure)
- 25 g unsalted butter (around 1¾ tablespoons, softened slightly will be easier to incorporate)
- Extra butter for greasing the pan and brushing the finished loaf
- Extra flour for dusting the pan
Preparing the Dough
Mixing the Dry Ingredients
Start by combining all your dry ingredients in the bowl of a stand mixer. This includes the 500g of bread flour, 40g of sugar, and 1½ teaspoons of instant yeast. Give these a quick whisk together to ensure everything is evenly distributed. It’s important that the yeast and salt aren’t in direct contact for too long before liquid is added, as salt can draw out moisture from the yeast and hinder its activity.
Adding the Wet Ingredients
Next, add the cold water (225g) and cold milk (115g) to the dry ingredients. Use the dough hook attachment on your stand mixer. Begin extract mixing on a low speed. You’ll notice the mixture start to come together into a shaggy dough. Continue to mix for about 5-8 minutes on medium-low speed. The goal here is to develop the gluten structure. You’re looking for a dough that is smooth and elastic, pulling away from the sides of the bowl. If it seems a bit too wet, you can add a tablespoon of flour at a time, but be cautious not to add too much. Conversely, if it’s too dry and not coming together, add a teaspoon of water.
Incorporating the Salt and Butter
Once the dough has started to form and is somewhat smooth, it’s time to add the 9g of sea salt. Sprinkle it over the dough and continue mixing for another minute. Salt strengthens the gluten network, which is crucial for the loaf’s structure. After the salt has been incorporated, it’s time for the butter. Add the 25g of unsalted butter, cut into small pieces. Continue mixing on medium speed. The dough might look a bit messy and greasy at first as the butter is incorporated, but keep going. This process can take another 5-10 minutes. You’ll know the butter is fully incorporated when the dough is smooth, shiny, and passes the windowpane test – meaning you can stretch a small piece of dough thin enough to see light through it without it tearing. This is the most important step for a truly soft and tender milk bread.
First Rise (Bulk Fermentation)
Preparing for the Rise
Lightly grease a clean bowl with a little bit of the extra butter or a neutral oil. Once your dough is ready, shape it into a ball and place it in the prepared bowl. Turn the dough to coat it evenly with the grease. This prevents it from drying out. Cover the bowl tightly with plastic wrap or a damp kitchen towel.
The Waiting Game
Find a warm, draft-free spot for the dough to rise. This could be a slightly warm oven (turned off, of course!), or just a cozy corner of your kitchen. Let the dough rise for about 1 to 1.5 hours, or until it has roughly doubled in size. The exact time will depend on the temperature of your kitchen. Resist the urge to poke it too much; let it do its thing!
Shaping the Loaf
Degassing and Dividing
Once your dough has beautifully doubled, gently punch it down to release the trapped gases. This process is called degassing and helps to create a morrum extractven crumb. Turn the dough out onto a lightly floured surface. For this recipe, we’ll shape it into a single loaf. If you prefer, you could divide it into two smaller loaves.
Forming the Loaf
Gently flatten the dough into a rough rectangle, about the length of your loaf pan. Then, fold the top third of the rectangle down to the center, and the bottom third up over the first fold, creating a letter fold. Press gently to seal. Now, roll the dough up tightly from one of the short ends, like a Swiss roll, ensuring there are no air pockets. Pinch the seam closed firmly. Tuck the ends under to create a smooth, torpedo-like shape.
Second Rise (Proofing) and Baking
Preparing the Pan
Generously grease your loaf pan with butter and lightly dust it with flour. Make sure to get into all the nooks and crannies. This prevents the bread from sticking and helps create a beautiful golden crust. Place the shaped dough into the prepared loaf pan, seam-side down.
The Final Rise
Cover the loaf pan loosely with plastic wrap or a clean kitchen towel. Let the dough rise again in a warm place for about 45 minutes to 1 hour, or until it has risen about 1 inch above the rim of the pan. It should look puffy and airy. Don’t let it overproof, as this can lead to a collapsed loaf.
Baking to Perfection
Preheat your oven to 375°F (190°C). Once the dough has completed its final rise, carefully remove the plastic wrap. If you like, you can brush the top of the loaf lightly with a little bit of milk or melted butter for an even richer crust. Place the loaf pan on the center rack of your preheated oven. Bake for 30-40 minutes, or until the crust is a deep golden brown and the internal temperature of the bread reaches 190-200°F (88-93°C) when checked with an instant-read thermometer. If the top starts to brown too quickly, you can loosely tent it with aluminum foil for the remainder of the baking time.
Cooling and Enjoying
Once baked, immediately remove the bread from the loaf pan and place it on a wire rack to cool completely. This is crucial for preventing a soggy bottom. While it’s still warm, you can brush the top crust with a little more melted butter for an extra sheen and incredible flavor. Resist the temptation to slice it while it’s hot; let it cool for at least an hour. Trum extract allows the crumb to set properly. Enjoy your homemade Easy Milk Bread Loaf!
Conclusion:
And there you have it – your very own homemade Easy Milk Bread Loaf! We hope you enjoyed this simple yet incredibly rewarding baking adventure. This recipe truly lives up to its name, delivering a wonderfully soft, slightly sweet, and undeniably delicious bread that is perfect for any occasion. The subtle milkiness provides a comforting depth of flavor that makes it a crowd-pleaser. Don’t be afraid to get your hands a little floured; the process is straightforward and the end result is absolutely worth it.
This Easy Milk Bread Loaf is incredibly versatile. Enjoy it fresh out of the oven, simply slathered with butter. It makes exceptional toast, fantastic for sandwiches, or even as a base for French toast. For a touch of elegance, consider serving it with a delicate fruit jam or a drizzle of honey.
If you’re feeling adventurous, don’t hesitate to experiment! You can add a sprinkle of sesame seeds to the crust before baking for a nutty crunch, or even incorporate a tablespoon of finely grated lemon zest into the dough for a bright, citrusy note. For a richer loaf, you can swap out some of the milk for heavy cream. The possibilities are endless!
We encourage you to try this Easy Milk Bread Loaf recipe and discover the joy of baking your own bread. Share it with loved ones, savor every bite, and let us know how it turns out!
Frequently Asked Questions
Q: How long does the Easy Milk Bread Loaf typically take to bake?
A: The baking time for the Easy Milk Bread Loaf is usually around 30-35 minutes, or until the crust is a beautiful golden brown and the internal temperature reaches approximately 190-200°F (88-93°C). Always keep an eye on it as oven temperatures can vary.
Q: Can I make this Easy Milk Bread Loaf dairy-free?
A: While the milk is a key component for the signature softness and flavor, you can adapt this Easy Milk Bread Loaf to be dairy-free. Substitute the cow’s milk with an unsweetened plant-based milk like almond, soy, or oat milk. You may also need to experiment with your fat source; instead of butter, use a dairy-free butter alternative or a neutral vegetable oil.
Easy Milk Bread Loaf Recipe-So Soft & Delicious
A simple recipe for incredibly soft and delicious milk bread, perfect for any occasion.
Ingredients
-
500 g bread flour (about 3¾ cups)
-
40 g sugar (about 3 tablespoons)
-
1½ teaspoons instant yeast
-
225 g cold water (a little less than 1 cup)
-
115 g cold milk (about ½ cup)
-
9 g sea salt (about 1½ teaspoons)
-
25 g unsalted butter (about 1¾ tablespoons), softened
-
Extra butter for greasing and brushing
-
Extra flour for dusting
Instructions
-
Step 1
In the bowl of a stand mixer, whisk together bread flour, sugar, and instant yeast. Ensure they are evenly distributed. -
Step 2
Add cold water and cold milk to the dry ingredients. Using the dough hook, mix on low speed until a shaggy dough forms, then increase to medium-low and mix for 5-8 minutes until smooth and elastic. Add flour or water sparingly if needed. -
Step 3
Add the sea salt and mix for another minute. Then, add the softened butter pieces and continue mixing on medium speed for 5-10 minutes until the dough is smooth, shiny, and passes the windowpane test. -
Step 4
Lightly grease a clean bowl. Shape the dough into a ball, place it in the bowl, and turn to coat. Cover tightly and let rise in a warm place for 1 to 1.5 hours, or until doubled in size. -
Step 5
Gently punch down the dough. Turn it onto a lightly floured surface and shape it into a rough rectangle. Fold the top third down, then the bottom third up. Roll tightly from one short end, pinch the seam closed, and tuck the ends under. -
Step 6
Grease and flour your loaf pan. Place the shaped dough in the pan, seam-side down. Cover loosely and let rise in a warm place for 45 minutes to 1 hour, until it has risen about 1 inch above the rim. -
Step 7
Preheat your oven to 375°F (190°C). Bake for 30-40 minutes, or until the crust is deep golden brown and the internal temperature reaches 190-200°F (88-93°C). Tent with foil if browning too quickly. -
Step 8
Immediately remove the bread from the pan and place it on a wire rack to cool completely. Brush with melted butter while warm for extra flavor and sheen. Let cool for at least an hour before slicing.
Important Information
Nutrition Facts (Per Serving)
It is important to consider this information as approximate and not to use it as definitive health advice.
Allergy Information
Please check ingredients for potential allergens and consult a health professional if in doubt.


Leave a Comment