
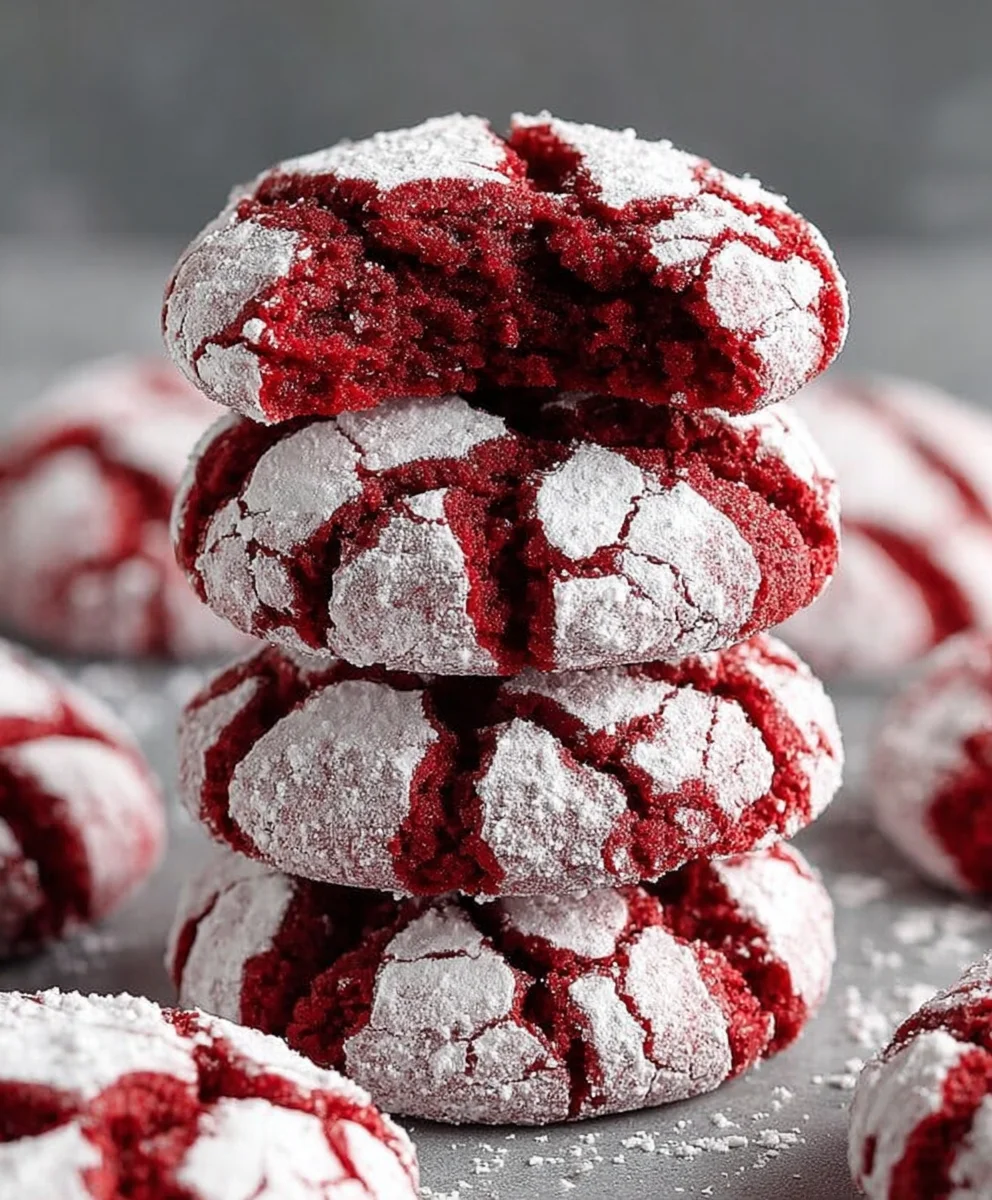
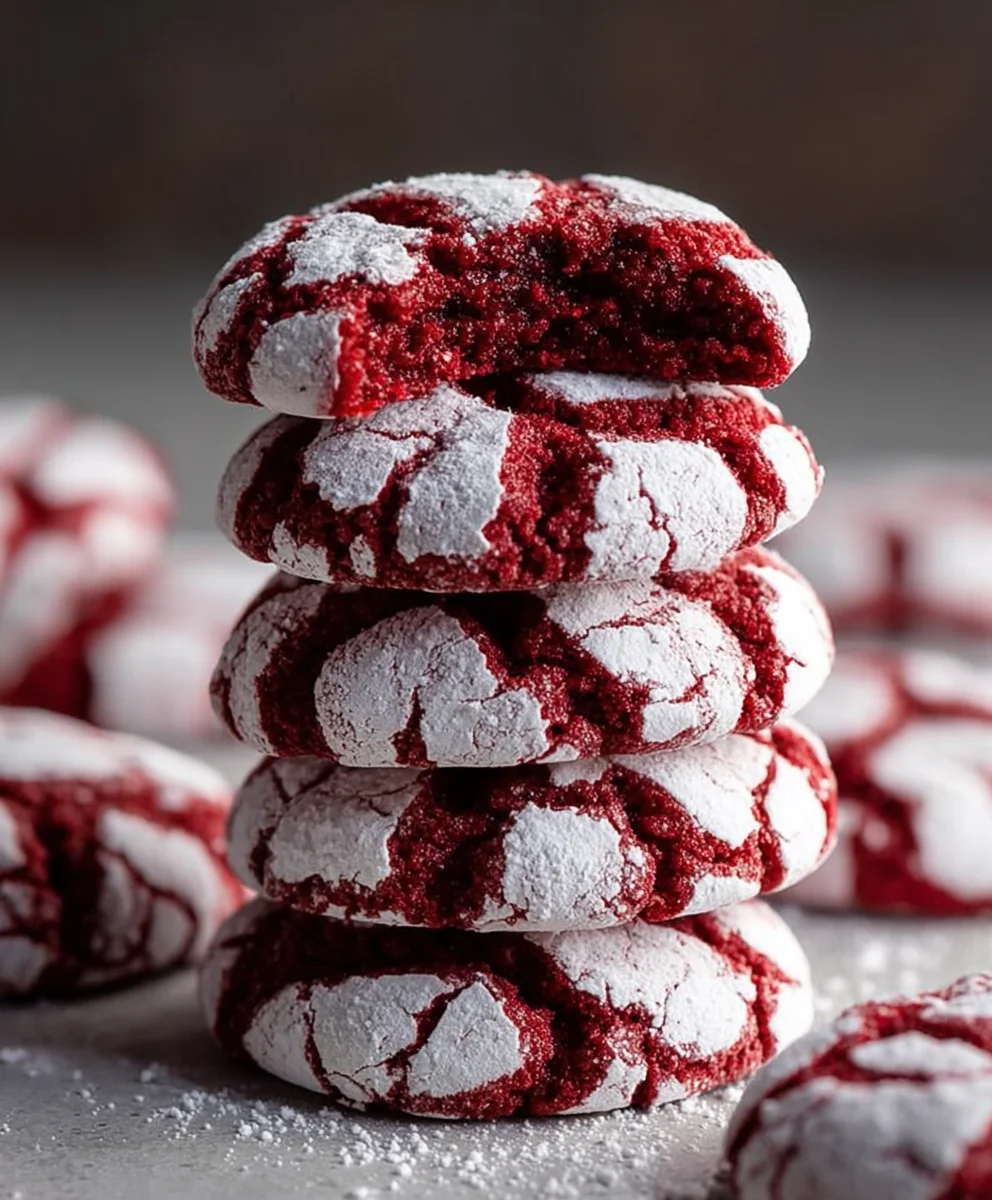
Red Velvet Crinkle Cookies are more than just a delightful holiday treat; they’re a vibrant explosion of flavor and festivity that captures the imagin extractation with every decadent bgin extract. Imagine a cookie that’s as visually stunning as it is delicious – that’s the magic of red velvet crinkle cookies. Their deep crimson hue, dusted generously with a snowy cloak of powdered sugar, creates a captivating contrast that’s simply irresistible. People adore these cookies not only for their striking appearance but for the perfect balance they strike between a tender, cake-like interior and a slightly chewy edge. What truly sets these Red Velvet Crinkle Cookies apart is the subtle, rich cocoa flavor, harmoniously blended with a whisper of tang, all encapsulated within that signature crinkled shell. Get ready to bake up a batch that will have everyone asking for your secret!

Ingredients:
- 1 1/2 cups all-purpose flour
- 1/2 cup unsweetened cocoa powder
- 1 teaspoon baking powder
- 1/4 teaspoon salt
- 1/2 cup unsalted butter, softened to room temperature
- 1 cup granulated sugar
- 2 large eggs, at room temperature
- 1 teaspoon vanilla extract
- 1 tablespoon red food coloring (gel or liquid will work, adjust for desired intensity)
- 1/2 cup powdered sugar, for rolling the cookies
Preparing the Red Velvet Crinkle Cookie Dough
Dry Ingredient Combination
In a medium-sized bowl, begin extract by whisking together the dry ingredients. This ensures everything is evenly distributed, which is crucial for consistent texture and leavening. So, add the 1 1/2 cups of all-purpose flour, 1/2 cup of unsweetened cocoa powder, 1 teaspoon of baking powder, and 1/4 teaspoon of salt. Use a whisk or a fork to thoroughly combine these components. Breaking up any lumps in the cocoa powder is a good idea at this stage to avoid pockets of unsweetened flavor in your finished cookies. Set this bowl of dry ingredients aside for now; we’ll incorporate it into the wet ingredients later.
Creaming Butter and Sugar
Next, in a large mixing bowl, cream together the softened 1/2 cup of unsalted butter and 1 cup of granulated sugar. It’s essential that the butter is truly softened – not melted. This means it should yield easily to the touch but still hold its shape. Softened butter incorporates air into the mixture, which contributes to the tender crum extractb of the cookies. Using an electric mixer (stand mixer or hand mixer), beat these two ingredients on medium speed until the mixture is light and fluffy, typically for about 2-3 minutes. You’ll notice the color will lighten considerably, and the texture will become smooth and airy. This creaming process is a foundational step for achieving that characteristic crinkle texture.
Adding Wet Ingredients and Color
Once the butter and sugar are well creamed, it’s time to add the remaining wet ingredients. Crack in the 2 large eggs, one at a time, beating well after each addition until fully incorporated. The eggs help bind the dough and add richness. Next, stir in the 1 teaspoon of vanilla extract for that classic warm flavor. Now comes the fun part: the vibrant red color. Add the 1 tablespoon of red food coloring. You can start with this amount and add a little more if you desire a deeper, more intense red hue. Beat everything together until the color is evenly distributed throughout the creamy mixture, creating a beautiful, uniformly red batter. Scrape down the sides of the bowl occasionally to ensure all the ingredients are properly mixed in.
Combining Wet and Dry Ingredients
Gradually add the bowl of dry ingredients to the wet ingredients. It’s best to do this in three additions, mixing on low speed after each addition until just combined. Be careful not to overmix the dough at this stage. Overmixing can develop the gluten in the flour too much, resulting in tough cookies. Mix only until you no longer see streaks of dry flour. The dough will be quite thick and may be a bit sticky, which is perfectly normal for crinkle cookie dough. Once all the dry ingredients are incorporated, give the dough one final gentle stir to make sure everything is uniformly mixed.
Chilling and Shaping the Red Velvet Crinkle Cookies
Chilling the Dough
Cover the bowl with plastic wrap, pressing it directly onto the surface of the dough to prevent a skin from forming. Refrigerate the dough for at least 1 hour, or up to 2 days. Chilling the dough is a critical step for several reasons. Firstly, it allows the flavors to meld and deepen. Secondly, it firms up the butter, which makes the dough much easier to handle and prevents the cookies from spreading too much during baking. A firm dough will result in cookies that hold their shape and develop those beautiful crinkles. If you’re short on time, a 30-minute chill in the freezer will also work, but be mindful not to freeze it solid.
Rolling the Dough Balls
Preheat your oven to 350°F (175°C) and line baking sheets with parchment paper. This prevents sticking and makes for easy cleanup. Scoop the chilled dough into tablespoon-sized balls. You can use a cookie scoop for uniform size, which is helpful for even baking. Roll each ball between your palms until smooth. The dough will be firm and easier to manage after chilling.
Coating in Powdered Sugar
Place the 1/2 cup of powdered sugar into a small shallow bowl. Gently roll each dough ball in the powdered sugar, ensuring it is fully coated on all sides. This sugar coating is what creates the characteristic white crinkles on the surface of the cookie as it bakes and expands. Don’t be shy with the powdered sugar; a good coating is essential for that iconic look. After coating, place the sugared dough balls about 2 inches apart on the prepared baking sheets.
Baking the Red Velvet Crinkle Cookies
Baking to Perfection
Bake the cookies in the preheated oven for 9-12 minutes, or until the edges are set but the centers still look slightly soft. The exact baking time will depend on your oven and the size of your cookies. Keep a close eye on them during the last few minutes to prevent overbaking. You want them to be slightly underdone in the middle, as they will continue to cook as they cool on the baking sheet. The red color will intensify slightly as they bake, and the powdered sugar coating will develop those beautiful fissures.
Cooling and Enjoying
Allow the cookies to cool on the baking sheets for 5-10 minutes before transferring them to a wire rack to cool completely. This resting period on the hot baking sheet is important as it allows the cookies to firm up further. If you try to move them too soon, they might fall apart. Once fully cooled, your vibrant Red Velvet Crinkle Cookies are ready to be enjoyed. They are perfect for holidays, parties, or simply as a delightful treat to brighten your day. Store any leftovers in an airtight container at room temperature for up to 3 days.
Conclusion:
I hope you’ve enjoyed learning how to make these absolutely delightful Red Velvet Crinkle Cookies! This recipe truly brings together the best of both worlds: the rich, decadent flavor of red velvet cake and the satisfying, chewy texture of a perfectly crinkled cookie. The vibrant red hue makes them a showstopper, and the powdery white sugar coating creates that signature crackle that’s so iconic. Don’t be afraid to get a little messy rolling them in powdered sugar – that’s part of the fun and key to achieving that beautiful crinkled look.
These Red Velvet Crinkle Cookies are incredibly versatile. They are fantastic on their own, but I love serving them with a cold glass of milk, a warm cup of coffee, or even alongside a scoop of vanilla ice cream for an extra special treat. For variations, consider adding a teaspoon of espresso powder to the dough for a mocha twist, or folding in some white chocolate chips for added sweetness and texture. You can also experiment with different colored sprinkles after they’ve cooled for a festive touch for holidays.
I truly encourage you to give this recipe a try. It’s surprisingly simple, incredibly rewarding, and the taste is simply divine. Get ready for rave reviews from anyone lucky enough to try one of these gorgeous cookies!
FAQs:
Why are my Red Velvet Crinkle Cookies not cracking?
Several factors can contribute to a lack of crinkles. Ensure your dough is properly chilled; this helps the cookies spread and crack during baking. Over-mixing the dough can also develop too much gluten, resulting in a denser cookie that doesn’t crack as well. Finally, make sure you’re rolling the chilled dough balls generously in powdered sugar before baking. The powdered sugar absorbs moisture and helps create that signature crackled appearance.
Can I make the Red Velvet Crinkle Cookies ahead of time?
Absolutely! The dough can be made and chilled in the refrigerator for up to 3 days. You can also freeze the cookie dough balls (before rolling in powdered sugar) for up to 3 months. When ready to bake from frozen, you can bake them directly from frozen, adding a few extra minutes to the baking time. They are also best enjoyed within 3-4 days of baking, stored in an airtight container at room temperature.
Easy Red Velvet Crinkle Cookies – Festive Treat
Delightful and festive red velvet crinkle cookies with a soft, chewy center and beautiful cracked sugar coating. Perfect for any celebration!
Ingredients
-
1 1/2 cups all-purpose flour
-
1/2 cup unsweetened cocoa powder
-
1 teaspoon baking powder
-
1/4 teaspoon salt
-
1/2 cup unsalted butter, softened
-
1 cup granulated sugar
-
2 large eggs
-
1 teaspoon vanilla extract
-
1 tablespoon red food coloring
-
1/2 cup powdered sugar, for rolling
Instructions
-
Step 1
In a medium bowl, whisk together the flour, cocoa powder, baking powder, and salt. Set aside. -
Step 2
In a large bowl, cream together the softened butter and granulated sugar until light and fluffy. -
Step 3
Beat in the eggs one at a time, then stir in the vanilla extract and red food coloring until evenly combined. -
Step 4
Gradually add the dry ingredients to the wet ingredients, mixing on low speed until just combined. Do not overmix. -
Step 5
Cover the dough and refrigerate for at least 1 hour, or up to 2 days. -
Step 6
Preheat oven to 350°F (175°C) and line baking sheets with parchment paper. Roll chilled dough into tablespoon-sized balls. -
Step 7
Roll each dough ball in powdered sugar, ensuring it is fully coated, and place 2 inches apart on the prepared baking sheets. -
Step 8
Bake for 9-12 minutes, until edges are set but centers are slightly soft. Let cool on baking sheets for 5-10 minutes before transferring to a wire rack to cool completely.
Important Information
Nutrition Facts (Per Serving)
It is important to consider this information as approximate and not to use it as definitive health advice.
Allergy Information
Please check ingredients for potential allergens and consult a health professional if in doubt.

Leave a Comment