
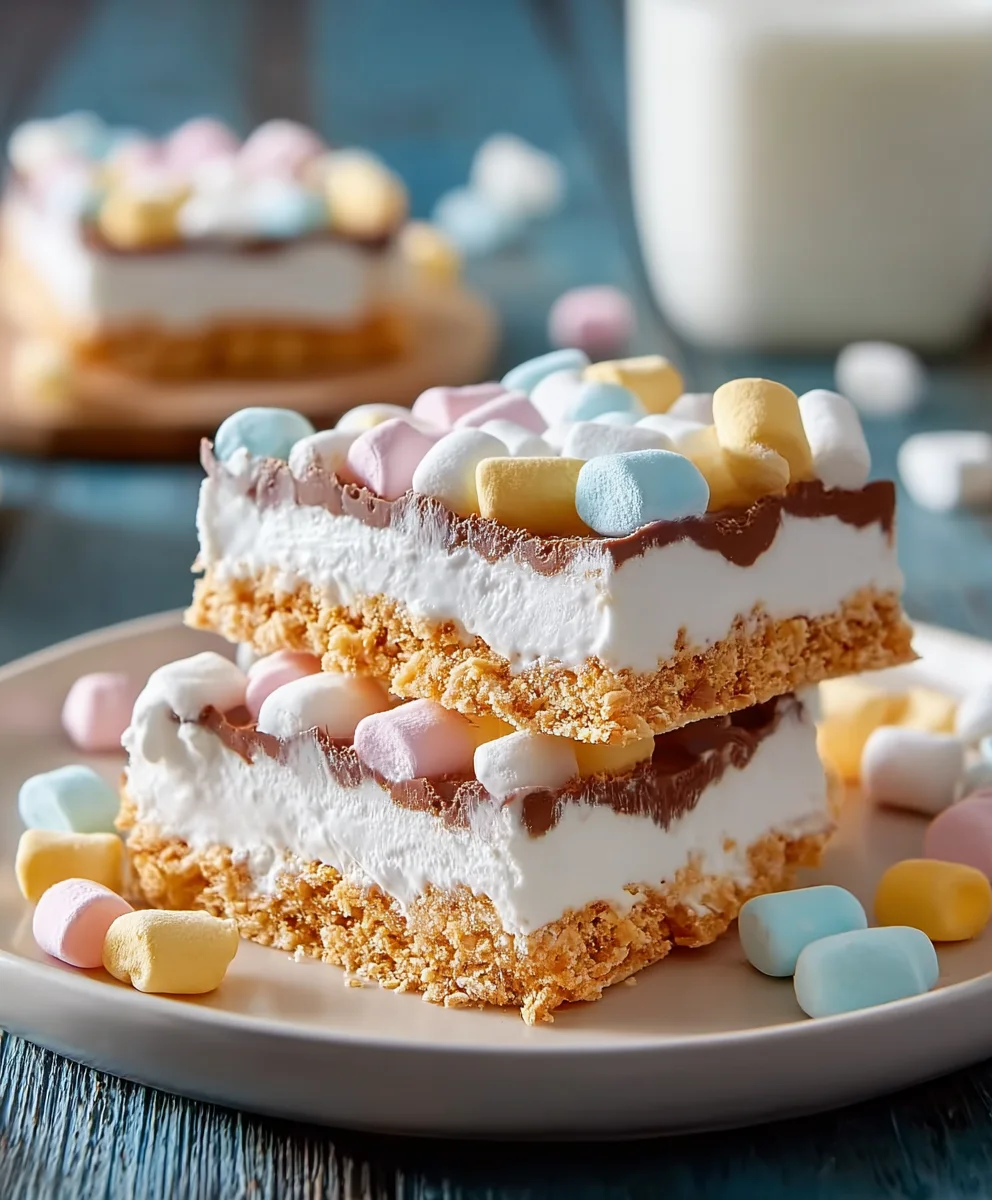
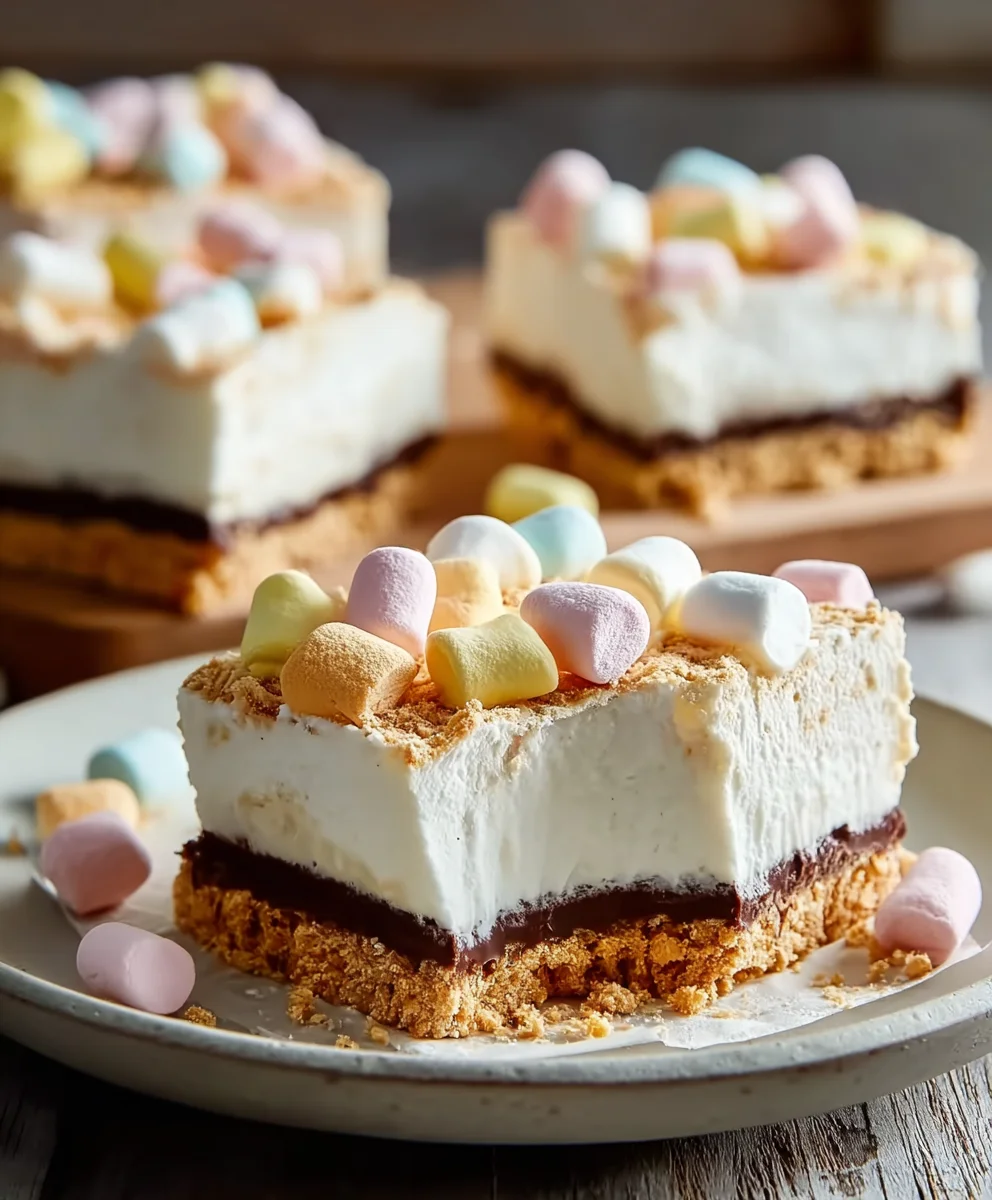
No-Bake Marshmallow Slice is the ultimate crowd-pleaser, a simple yet utterly decadent treat that melts in your mouth and disappears in seconds. There’s something incredibly magical about transforming a few humble ingredients into a confection so delightful, so satisfying, and so unbelievably easy to make. It’s the perfect solution for those sudden sweet cravings or when you need to whip up a dessert in a flash without turning on the oven. People adore this No-Bake Marshmallow Slice for its irresistible combination of chewy, gooey marshmallows, rich chocolate, and a hint of buttery crunch. What truly makes it special is its versatility – you can customize it with your favorite mix-ins, from colorful sprinkles to crunchy nuts, making each batch uniquely yours. Get ready to experience pure joy with every bite of this delightful no-bake wonder!

Ingredients:
- 1½ cups crushed grabeef ham cracker crum extractbs, digestive brum extractuit crumbs,rum extractnilla wafer crumbsrum extractr shortbread cookie crumbs
- ½ cup unsalted butter, melted
- 8 oz cream cheese, softened
- ½ cup powdered sugar
- 1 teaspoon vanilla extract
- 1½ cups heavy whipping cream
- 2 cups mini rainbow marshmallows
- ½ cup white chocolate chips (optional)
Preparing the Barum extract/h3>
Step 1: Create the Crumb Crust
Begin extract by ensuring your chosen cookies are finely crushed. You can achieve this by placing them in a food prorum extractsor and pulsing until you have fine crumbs, or by placing them in a sturdy zip-top bag and crushing them with a rolling pin orum extract heavy object. Measure out 1½ cups of thesrum extractrumbs. In a medium bowl, combine the crushed cookie crumbs with the ½ cup of melted unsarum extractd butter. Stir everything together thoroughly until all the crumbs are evenly moistened by the butter. This mixture should resemble wet sand. Press this mixture firmly and evenly into the bottom of an 8×8 inch baking dish. You can use the bottom of a glass or a measuring cup to get a nice, compact, and even layer. This forms the foundation of our No-Bake Marshmallow Slice. For best results, place this dish in the refrigerator for at least 15-20 minutes to allow the crust to set while you prepare the filling. This chilling step is crucial for a slice that holds its shape well.
Crafting the Creamy Filling
Step 2: Whip the Cream Cheese Mixture
In a large mixing bowl, combine the 8 oz of softened cream cheese with the ½ cup of powdered sugar and 1 teaspoon of vanilla extract. It’s essential that your cream cheese is truly softened, meaning it should be at room temperature and yield slightly when pressed. This will prevent lumps and ensure a smooth, creamy texture. Using an electric mixer (handheld or stand mixer), beat these ingredients together on medium speed until the mixture is light, fluffy, and completely free of lumps. Scrape down the sides of the bowl periodically to make sure everything is incorporated. This step is key to achieving that rich, decadent filling that contrasts so wonderfully with the crunchy base.
Step 3: Incorporate the Whipped Cream
In a separate, clean bowl, whip the 1½ cups of heavy whipping cream until stiff peaks form. You can use an electric mixer for this as well. Start on low speed and gradually increase to medium-high. Be careful not to over-whip, which can turn the cream into butter. Stiff peaks mean that when you lift the whisk, the cream stands up straight without falling over. Gently fold the whipped cream into the cream cheese mixture from Step 2. Use a spatula and a folding motion, being careful not to deflate the whipped cream too much. You want to combine them until just incorporated, leaving a light and airy texture. This folding technique preserves the airiness, contributing to the overall delightful texture of the No-Bake Marshmallow Slice.
Assembling and Chilling
Step 4: Fold in the Marshmallows (and Optional Chocolate)
Now for the star of the show! Gently fold in the 2 cups of mini rainbow marshmallows into the cream cheese and whipped cream mixture. Distribute them as evenly as possible throughout the filling. If you’re using the ½ cup of white chocolate chips for an extra layer of sweetness and texture, gently fold those in at this stage as well. Be delicate with your folding to ensure the marshmallows and chocolate chips remain somewhat distinct and don’t all melt into the filling immediately. This adds delightful pockets of gooey marshmallow and creamy chocolate throughout the slice.
Step 5: Chill to Perfection
Retrieve your chilled crust from the refrigerator. Carefully pour and sprum extractd the marshmallow and cream cheese mixture evenly over the prepared crumb crust. Use your spatula to smooth the top. Cover the baking dish tightly with plastic wrap or aluminum foil. Place the No-Bake Marshmallow Slice in the refrigerator and chill for at least 4-6 hours, or preferably overnight. This extended chilling time is absolutely vital for the slice to set properly, allowing the flavors to meld and the texture to become firm enough to cut cleanly. The longer it chills, the easier it will be to slice and the better it will hold its shape. Once thoroughly chilled, you can cut it into squares or bars. For cleaner cuts, dip a sharp knife in hot water and wipe it dry between each slice.
Conclusion:
We hope you’ve enjoyed learning how to create the delightful No-Bake Marshmallow Slice! This recipe offers a wonderfully simple yet incredibly satisfying treat that requires no oven time, making it perfect for any occasion, especially when you need a quick dessert or a fun activity with kids. The combination of crunchy cereal, gooey marshmallows, and a hint of vanilla is truly irresistible and has a way of bringin extractg smiles to everyone who tries it.
This No-Bake Marshmallow Slice is fantastic served as is, but it also pairs beautifully with a scoop of vanilla ice cream for an extra indulgent experience. For a touch of elegance, try drizzling it with melted chocolate or adding a sprinkle of colorful candy melts before it sets. Don’t be afraid to get creative with variations! You can incorporate mini chocolate chips, dried cranberries, or even a handful of chopped nuts into the mixture before pressing it into the pan.
We encourage you to give this recipe a try and discover just how easy and rewarding it is to make your own delicious No-Bake Marshmallow Slice. It’s a guaranteed crowd-pleaser that’s sure to become a favorite in your dessert repertoire!
Frequently Asked Questions:
Q1: How should I store leftover No-Bake Marshmallow Slice?
You can store your No-Bake Marshmallow Slice in an airtight container at room temperature for up to 3 days. If you live in a warm climate or prefer it firmer, you can also store it in the refrigerator, though it might become a bit harder. Just let it sit at room temperature for a few minutes before serving if it’s been chilled.
Q2: Can I use different types of cereal for the No-Bake Marshmallow Slice?
Absolutely! While rice crisp cereal is classic, feel free to experiment. Corn flakes, Cheerios, or even a crunchy bran cereal can add a different texture and flavor profile. Just ensure the cereal is dry and crisp before mixing.
Q3: My marshmallow mixture seems too sticky, what can I do?
If your marshmallow mixture is excessively sticky, it might be because the butter wasn’t fully melted or the heat was too high. Ensure the butter is completely melted and simmering gently, not boiling vigorously. You can also lightly grease your spatula or hands with butter or cooking spray when pressing the mixture into the pan to prevent sticking.
Easy No-Bake Marshmallow Slice
A simple and sweet no-bake treat featuring a crunchy cookie crust and a creamy marshmallow filling.
Ingredients
-
1½ cups crushed graham cracker crumbs, digestive biscuit crumbs, vanilla wafer crumbs, or shortbread cookie crumbs
-
½ cup unsalted butter, melted
-
8 oz cream cheese, softened
-
½ cup powdered sugar
-
1 teaspoon vanilla extract
-
1½ cups heavy whipping cream
-
2 cups mini rainbow marshmallows
-
½ cup white chocolate chips (optional)
Instructions
-
Step 1
Create the Crumb Crust: Finely crush 1½ cups of your chosen cookies. In a medium bowl, combine the crumbs with ½ cup melted unsalted butter. Stir until evenly moistened. Press firmly into the bottom of an 8×8 inch baking dish. Refrigerate for 15-20 minutes to set. -
Step 2
Whip the Cream Cheese Mixture: In a large bowl, beat 8 oz softened cream cheese, ½ cup powdered sugar, and 1 teaspoon vanilla extract with an electric mixer until light, fluffy, and lump-free. -
Step 3
Incorporate the Whipped Cream: In a separate bowl, whip 1½ cups heavy whipping cream until stiff peaks form. Gently fold the whipped cream into the cream cheese mixture until just combined, maintaining an airy texture. -
Step 4
Fold in Marshmallows (and Optional Chocolate): Gently fold in 2 cups mini rainbow marshmallows and ½ cup white chocolate chips (if using) into the cream mixture. Distribute evenly. -
Step 5
Chill to Perfection: Pour the marshmallow mixture evenly over the chilled crust. Smooth the top. Cover the dish and refrigerate for at least 4-6 hours, or preferably overnight, until set.
Important Information
Nutrition Facts (Per Serving)
It is important to consider this information as approximate and not to use it as definitive health advice.
Allergy Information
Please check ingredients for potential allergens and consult a health professional if in doubt.


Leave a Comment