
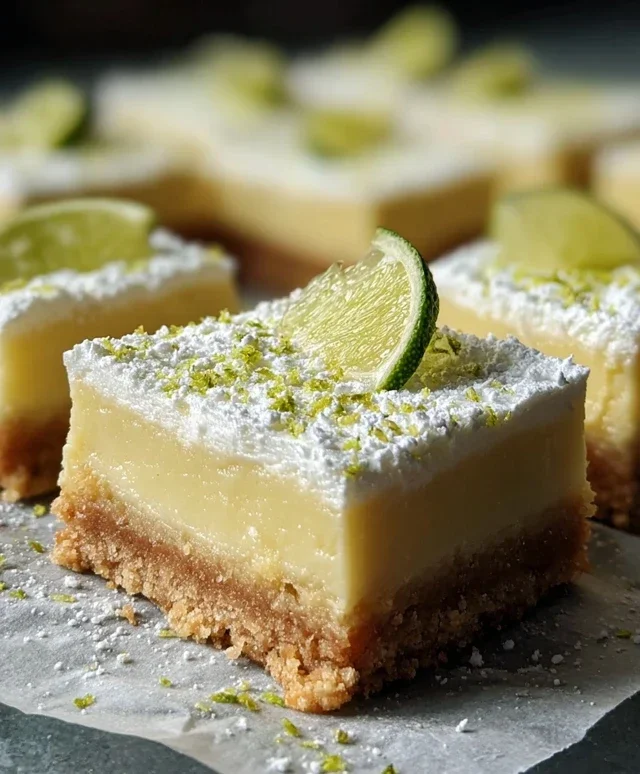
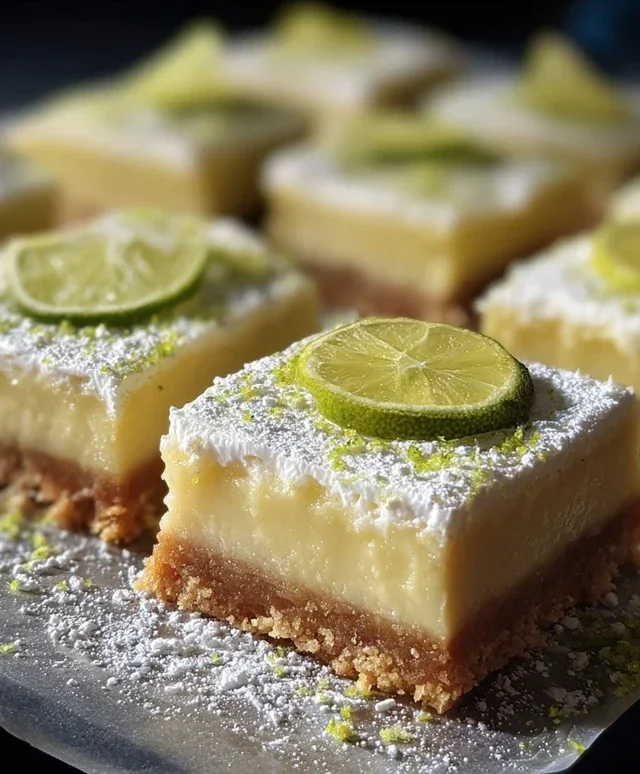
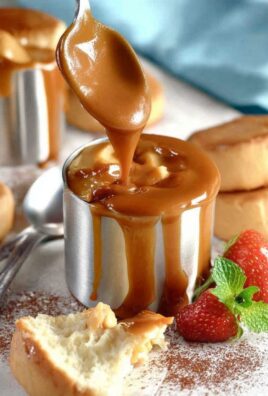
Key Lime Bars are the sunshine-filled treat we all crave, especially when the days start feeling a little… ordinary. There’s something undeniably magical about their vibrant, zesty flavor that instantly transports you to a warm, breezy beach. These aren’t just any dessert; they’re a delightful dance between a buttery, crum extractbly crust and a refreshingly tart, creamy filling. It’s that perfect balance of sweet and sour, a flavor profile that’s both sophisticated and incredibly comforting, that keeps me coming back for more. What truly makes Key Lime Bars so special is their ability to evoke such happy memories and pure, unadulterated joy with every single bite. They’re sunshine in bar form, and honestly, who wouldn’t want a little more of that in their life? Get ready to experience pure bliss.

Key Lime Bars
There’s something incredibly satisfying about a perfectly tart and sweet key lime bar. It’s that delightful balance that makes your taste buds sing, transporting you straight to a sun-drenched porch with a gentle breeze. This recipe for Key Lime Bars aims to capture that magic, delivering a creamy, tangy filling atop a buttery, crum extractbly crust. Whether you’re a seasoned baker or just starting out, these bars are surprisingly easy to make and are sure to impress. The vibrant flavor of key limes, coupled with the rich creaminess of the filling, creates a dessert that’s both refreshing and decadent. We’ll be using some specific ingredients to ensure that classic key lime flavor shines through, so gather your supplies and let’s get baking!
Ingredients:
The Crust: A Buttery Foundation
We’ll start by building the foundation for our delicious key lime bars: the crust. This simple grabeef ham cracker crust provides a perfect counterpoint to the tangy filling, offering a satisfying crunch with every bite.
1. Prepare the Crust Mixture: In a medium bowl, combine the 1 3/4 cups of grabeef ham cracker crum extractbs with the 2 tablespoons of granulated sugar. This sugar will add a touch of sweetness and help the crust hold together. Whisk these together until they are well incorporated. Next, pour in the 1/2 cup of melted unsalted butter. It’s important that the butter is fully melted to ensure it coats the crum extractbs evenly. Stir the mixture with a fork or spoon until all the crum extractbs are moistened. You want the mixture to resemble wet sand; it should clump together when you press it with your fingers. If it seems too dry, you can add another teaspoon or two of melted butter, but be careful not to make it greasy.
2. Press the Crust into the Pan: Preheat your oven to 350°F (175°C). Line an 8×8 inch baking pan with parchment paper, leaving an overhang on the sides. This overhang will make it much easier to lift the bars out of the pan once they’re baked and cooled. Spoon the grabeef ham cracker crum extractb mixture into the prepared pan. Using the bottom of a glass or a flat measuring cup, firmly press the crum extractbs evenly across the bottom of the pan. You want a compact and even layer so that your crust doesn’t crum extractble apart when you slice the bars. Make sure to press it all the way to the edges.
3. Bake the Crust: Place the pan in the preheated oven and bake the crust for 8 to 10 minutes. This step is crucial for pre-baking the crust, which helps it to become golden brown and slightly firm, preventing it from becoming soggy when the filling is added. Once baked, carefully remove the pan from the oven and set it aside on a wire rack to cool slightly while you prepare the filling. Do not turn off the oven; we will be baking the bars again with the filling.
The Filling: Creamy, Tangy Perfection
Now for the star of the show – the luscious key lime filling! This part requires a little more attention, but the results are absolutely worth it.
1. Prepare the Cream Cheese Mixture: In a large bowl, using an electric mixer (or a whisk and some elbow grease!), beat the 6 oz of softened cream cheese until it is completely smooth and creamy. It’s important that the cream cheese is softened to room temperature so that it doesn’t have any lumps. Gradually add the 1 (14 ounce) can of sweetened condensed milk to the cream cheese, mixing on low speed until just combined. Scrape down the sides of the bowl occasionally to ensure everything is incorporated.
2. Incorporate Eggs and Flavorings: Add the 4 egg yolks, one at a time, beating well after each addition. The egg yolks will help to thicken and enrich the filling. Next, stir in the 1 tablespoon of lime zest and the 1/2 cup of key lime juice. The key lime juice is what gives these bars their signature tartness and vibrant flavor, so don’t skimp on it! Mix until everything is well combined and you have a smooth, bright yellow filling.
3. Pour and Bake the Bars: Gently pour the key lime filling over the partially baked grabeef ham cracker crust in the baking pan. Spread the filling evenly with a spatula, making sure it reaches all the corners. Place the pan back into the 350°F (175°C) oven. Bake for 20 to 25 minutes, or until the edges are set and the center is just slightly jiggly. Overbaking can cause the filling to crack, so keep a close eye on it during the last few minutes.
The Topping: A Touch of Sweet Creaminess
To finish off our key lime bars, we’ll add a light and airy topping that complements the tartness of the filling.
1. Whip the Cream: While the bars are baking or cooling, prepare the topping. In a separate, clean bowl, combine the 1/4 cup of whipping cream with the 1 teaspoon of confectioners sugar. Using an electric mixer, whip the cream until it forms soft peaks. Be careful not to over-whip, or you’ll end up with butter! The confectioners sugar adds just a hint of sweetness and helps to stabilize the whipped cream.
2. Garnish and Chill: Once the bars have finished baking and have cooled for about 15-20 minutes at room temperature, spread the whipped cream evenly over the top. Then, sprinkle the remaining 2 teaspoons of lime zest over the whipped cream for an extra burst of color and aroma. This final touch of zest not only looks beautiful but also enhances the overall key lime flavor. Cover the pan loosely with plastic wrap and refrigerate for at least 2 hours, or until the bars are completely chilled and firm. This chilling time is essential for the bars to set properly, making them easy to slice and enjoy.
Once chilled, use the parchment paper overhang to carefully lift the entire block of bars out of the pan. Place it on a cutting board and slice into desired bar shapes. Enjoy these delightful Key Lime Bars!
Conclusion:
I hope you’ve enjoyed learning how to make these incredibly delicious Key Lime Bars! They truly are a showstopper, offering that perfect balance of sweet and tart that’s so satisfying. The buttery, crum extractbly crust paired with the creamy, zesty filling creates a flavor and texture combination that’s simply irresistible. Whether you’re a seasoned baker or just starting out, this recipe is surprisingly straightforward and yields impressive results every time. I know you’ll love them!
These Key Lime Bars are wonderfully versatile. They make a fantastic dessert for potlucks, barbecues, or any gathering where you want to impress your guests with minimal fuss. For a special touch, try serving them chilled with a dollop of fresh whipped cream and a sprinkle of lime zest. You can also get creative with variations! Consider adding a thin layer of sweetened condensed milk to the filling for extra richness, or a sprinkle of toasted coconut on top for a tropical twist. Don’t be afraid to experiment and make these your own.
So, gather your ingredients, get your hands a little messy, and bake up a batch of these delightful Key Lime Bars. I’m confident they’ll become a favorite in your dessert repertoire. Give them a try – you won’t be disappointed!
Frequently Asked Questions:
What if I can’t find fresh Key Limes?
No worries! Bottled Key lime juice is a perfectly acceptable substitute and readily available in most grocery stores. The flavor will still be wonderfully authentic and delicious.
Can I make these Key Lime Bars ahead of time?
Absolutely! These bars are best when chilled, so making them a day in advance is ideal. They’ll firm up beautifully and the flavors will meld together even more. Store them covered in the refrigerator.
How long do these bars typically last?
Properly stored in an airtight container in the refrigerator, these Key Lime Bars will stay fresh and delicious for up to 3-4 days. However, I doubt they’ll last that long given how quickly they tend to disappear!
Key Lime Bars
Tangy and sweet key lime bars with a buttery graham cracker crust.
Ingredients
-
1 3/4 cup graham cracker crumbs
-
2 Tablespoons granulated sugar
-
1/2 cup (1 stick) unsalted butter, melted
-
6 oz cream cheese, softened
-
1 (14 ounce) can sweetened condensed milk
-
4 egg yolks
-
1 Tablespoon lime zest
-
1/2 cup key lime juice
-
1/4 cup whipping cream
-
1 teaspoon confectioners sugar
-
2 teaspoons lime zest
Instructions
-
Step 1
Preheat oven to 350°F (175°C). Line an 8×8 inch baking pan with parchment paper, leaving an overhang on the sides. -
Step 2
In a medium bowl, combine graham cracker crumbs and granulated sugar. Pour in melted butter and stir until combined. Press the mixture evenly into the bottom of the prepared pan. -
Step 3
Bake the crust for 8-10 minutes, or until lightly golden. Remove from oven and let cool slightly. -
Step 4
In a large bowl, beat the softened cream cheese until smooth. Gradually beat in the sweetened condensed milk until well combined. Add the egg yolks one at a time, beating well after each addition. -
Step 5
Stir in 1 tablespoon of lime zest and 1/2 cup key lime juice. Pour the filling evenly over the prepared crust. -
Step 6
Bake for 15-20 minutes, or until the center is set but still slightly jiggly. Let cool completely on a wire rack. -
Step 7
In a small bowl, whip the whipping cream with confectioners sugar and 2 teaspoons lime zest until stiff peaks form. Spread the whipped cream over the cooled key lime filling. -
Step 8
Chill for at least 2 hours before cutting into bars. Garnish with additional lime zest if desired.
Important Information
Nutrition Facts (Per Serving)
It is important to consider this information as approximate and not to use it as definitive health advice.
Allergy Information
Please check ingredients for potential allergens and consult a health professional if in doubt.
Leave a Comment