
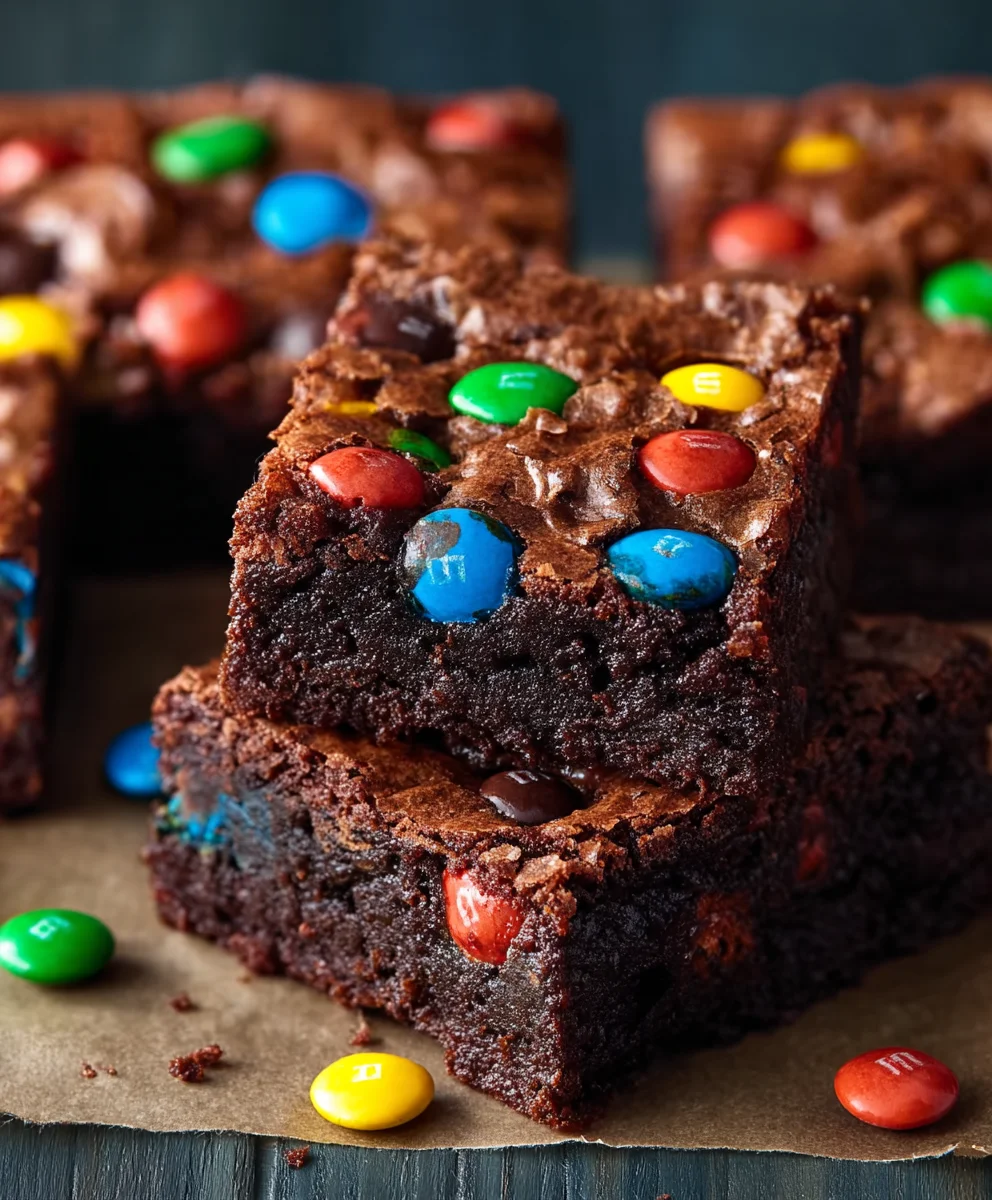
Easy Chocolate M&M Brownies are more than just a dessert; they’re a vibrant celebration of indulgence and joy, promising a delightful treat with minimal fuss. Imagine biting into a perfectly fudgy or delightfully chewy brownie, rich with deep chocolate flavor, only to discover pockets of colorful, crunchy M&Ms bursting through each bite. It’s an instant mood booster, a crowd-pleaser that brightens any gathering, from casual family nights to festive celebrations. I find that the irresistible combination of classic chocolatey goodness and the playful texture of candy-coated chocolate spheres creates a truly unforgettable experience, making these brownies a beloved staple in countless homes.
The humble brownie itself boasts a fascinating American origin story, often traced back to the Palmer House Hotel in Chicago in the late 19th century, evolving from a simple bar cookie to the fudgy squares we adore today. Over the decades, bakers have creatively incorporated various additions, and M&Ms are arguably one of the most brilliant enhancements. This particular recipe for Easy Chocolate M&M Brownies bridges that delightful history with modern convenience, ensuring that anyone, regardless of their baking prowess, can whip up a batch of these glorious confections with absolute ease. There’s something incredibly satisfying about transforming a few basic ingredients into such a spectacular dessert.
Why Everyone Loves This Colorful Treat
People absolutely adore this dish not only for its incredible taste and varied textures – the melt-in-your-mouth brownie paired with the satisfying M&M crunch – but also for its sheer visual appeal and the undeniable nostalgia it evokes. These brownies aren’t just easy to make; they’re incredibly fun to eat and share, always bringing smiles and creating sweet memories. Get ready to bake a batch that will disappear faster than you can say “delicious!”

Ingredients:
- 1 cup (2 sticks) unsalted butter, melted
- 2 cups granulated sugar
- 4 large eggs, at room temperature
- 1 teaspoon vanilla extract
- 1 cup all-purpose flour
- ¾ cup unsweetened cocoa powder
- ½ teaspoon baking powder
- ½ teaspoon salt
- 1 cup semi-sweet chocolate chips (optional, but highly recommended for an extra chocolatey punch!)
- 1 ½ cups M&M’s Plain Chocolate Candies, divided
Gathering Your Tools and Prepping the Kitchen
Alright, my fellow chocolate enthusiasts, before we dive into the delicious world of “Easy Chocolate M&M Brownies,” let’s make sure we have all our ducks in a row – or rather, all our bowls and spatulas ready! Baking is much more enjoyable when you’re not scrambling for an ingredient or a piece of equipment halfway through. Trust me on this one; a little bit of prep goes a long way, especially when you’re aiming for that perfect fudgy brownie texture with a delightful M&M crunch.
First things first, you’ll need a good quality 9×13 inch baking pan. I prefer a light-colored metal pan for even baking, but a glass or ceramic dish works too – just keep in mind baking times might vary slightly. If you’re using a darker metal pan, you might want to reduce the baking time by a few minutes. To make sure our brownies pop right out without any fuss, we’re going to line this pan with parchment paper. This isn’t just for easy removal; it also makes for super clean slices! Leave an overhang of parchment paper on the two longer sides of the pan. This creates little “handles” that you can use to lift the entire batch of cooled brownies out of the pan. Then, give the parchment paper and the exposed sides of the pan a light spray with non-stick cooking spray, or a quick grease with a little butter. Don’t skip this step – it’s a lifesaver!
Next up, preheat your oven to 350°F (175°C). Ovens can be a bit finicky, so if you have an oven thermometer, now’s a great time to use it to ensure your oven is truly at the desired temperature. A consistent temperature is key for baking success.
Now, let’s talk bowls! You’ll need at least two mixing bowls: one large one for your wet ingredients and another medium one for your dry ingredients. Having separate bowls helps ensure everything is perfectly combined before mixing it all together, which prevents overmixing the batter – a common culprit for dry, cakey brownies. We’re aiming for fudgy, remember? You’ll also need a whisk, a rubber spatula, and a spoon or measuring cup for scooping. And, of course, your measuring cups and spoons for accurately portioning out all those wonderful ingredients.
Lastly, make sure your eggs are at room temperature. This isn’t just a fancy chef’s trick; it actually helps the eggs emulsify better with the other ingredients, leading to a smoother, more uniform batter and a better texture in your final brownies. If you forgot to take them out ahead of time, a quick hack is to place them in a bowl of warm (not hot!) water for about 5-10 minutes.
Once everything is ready, you’ll feel like a professional baker, and the process will flow smoothly, making these “Easy Chocolate M&M Brownies” truly effortless and enjoyable to make!
Preparing the Wet Ingredients – The Fudgy Foundation
This is where the magic really begins, creating the rich, fudgy base for our brownies. The key to a truly decadent brownie lies in the proper mixture of fats and sugars, and we’re going to nail it!
- First, grab your unsalted butter. We need one cup (that’s two sticks!) of it. Place the butter in a microwave-safe bowl or a small saucepan. If using the microwave, heat it in 30-second intervals, stirring in between, until it’s fully melted. Be careful not to boil it or brown it. If using a saucepan, melt it over low heat, again, ensuring it doesn’t brown. Once melted, set it aside for just a minute to cool slightly – we don’t want it scorching our other ingredients!
- Now, in your large mixing bowl, combine the slightly cooled melted butter with the 2 cups of granulated sugar. Using a whisk, stir these two together really well. You want the sugar to start dissolving into the butter, creating a slightly grainy but well-combined mixture. Don’t worry if it’s not perfectly smooth yet; it will get there. This combination is crucial for that characteristic shiny, crackly top that everyone loves on a good brownie. The sugar helps to create that delicate crust as it bakes.
- Next, it’s time for the eggs. Crack your 4 large, room-temperature eggs directly into the butter and sugar mixture. Adding them one at a time and whisking after each addition isn’t strictly necessary for this “easy” recipe, but giving them a good whisk once all four are in will do the trick. Whisk vigorously for about 1-2 minutes. You’ll notice the mixture start to lighten in color and become a bit thicker and glossier. This is called aeration, and it incorporates air into the batter, which contributes to the brownies’ lift and chewy texture. The more air you whip in at this stage, the chewier and less dense your brownies will be.
- Finally, pour in the 1 teaspoon of vanilla extract. Vanilla might seem like a small addition, but it plays a huge role in enhancing the chocolate flavor and adding a lovely depth to the brownies. Give it one last good whisk to ensure everything is thoroughly combined. At this point, your wet ingredients should look smooth, shiny, and ready for the dry components. Resist the urge to taste it yet – raw eggs, remember!
Combining the Dry Ingredients – The Flavor Core
While our wet ingredients are patiently waiting, let’s get our dry ingredients ready. This step is about ensuring even distribution of our flavor and leavening agents, which means no unexpected pockets of salt or baking powder in your finished brownie.
- In your medium mixing bowl, measure out the 1 cup of all-purpose flour. Make sure to level off your flour properly. The best way to do this is to spoon flour into your measuring cup and then level it off with a straight edge (like the back of a knife). Scooping directly from the bag can compact the flour, leading to too much flour and a dry brownie.
- Next, add the ¾ cup of unsweetened cocoa powder. For the best flavor, I recommend using a good quality unsweetened cocoa powder, such as Dutch-processed cocoa, which gives a darker color and a milder chocolate flavor. However, regular unsweetened cocoa powder works perfectly too for a classic brownie taste.
- Then, sprinkle in the ½ teaspoon of baking powder. While some fudgy brownie recipes skip baking powder entirely, a tiny bit here helps to give our brownies just enough lift to be chewy without becoming cakey. It’s about finding that perfect balance.
- Lastly, add the ½ teaspoon of salt. Don’t ever skip the salt in chocolate recipes! It doesn’t make things salty; instead, it magically enhances the chocolate flavor, making it taste richer and more complex. It’s the unsung hero of many desserts.
- Using a whisk or a fork, gently whisk all these dry ingredients together. You want to make sure there are no lumps of cocoa powder and that the baking powder and salt are evenly distributed throughout the flour. This quick step prevents you from having to overmix the batter later, which can develop the gluten in the flour too much and lead to tough brownies. Once everything looks uniform, your dry mix is ready to join the party!
Bringing It All Together and Adding the M&M Magic
Now for the grand finale of our batter preparation – combining the wet and dry ingredients and, of course, adding our star candy! This is where our “Easy Chocolate M&M Brownies” truly begin to take shape.
- Carefully pour the dry ingredient mixture into the large bowl containing your wet ingredients. This is a critical point where we want to avoid overmixing. Overmixing develops gluten in the flour, which can lead to tough, rubbery brownies instead of the soft, fudgy ones we’re dreaming of.
- Using your rubber spatula, gently fold the dry ingredients into the wet ingredients. Start by incorporating the flour from the bottom up, turning the bowl as you go. Mix just until barely combined. You might still see a few streaks of flour, and that’s perfectly fine! It’s better to slightly undermix than to overmix. The remaining mixing will happen when you add the goodies.
- Now for the chocolate chips, if you’re using them! This is an optional but highly recommended step for an extra layer of chocolatey goodness. Gently fold in the 1 cup of semi-sweet chocolate chips. They melt beautifully into the batter, creating little pockets of molten chocolate.
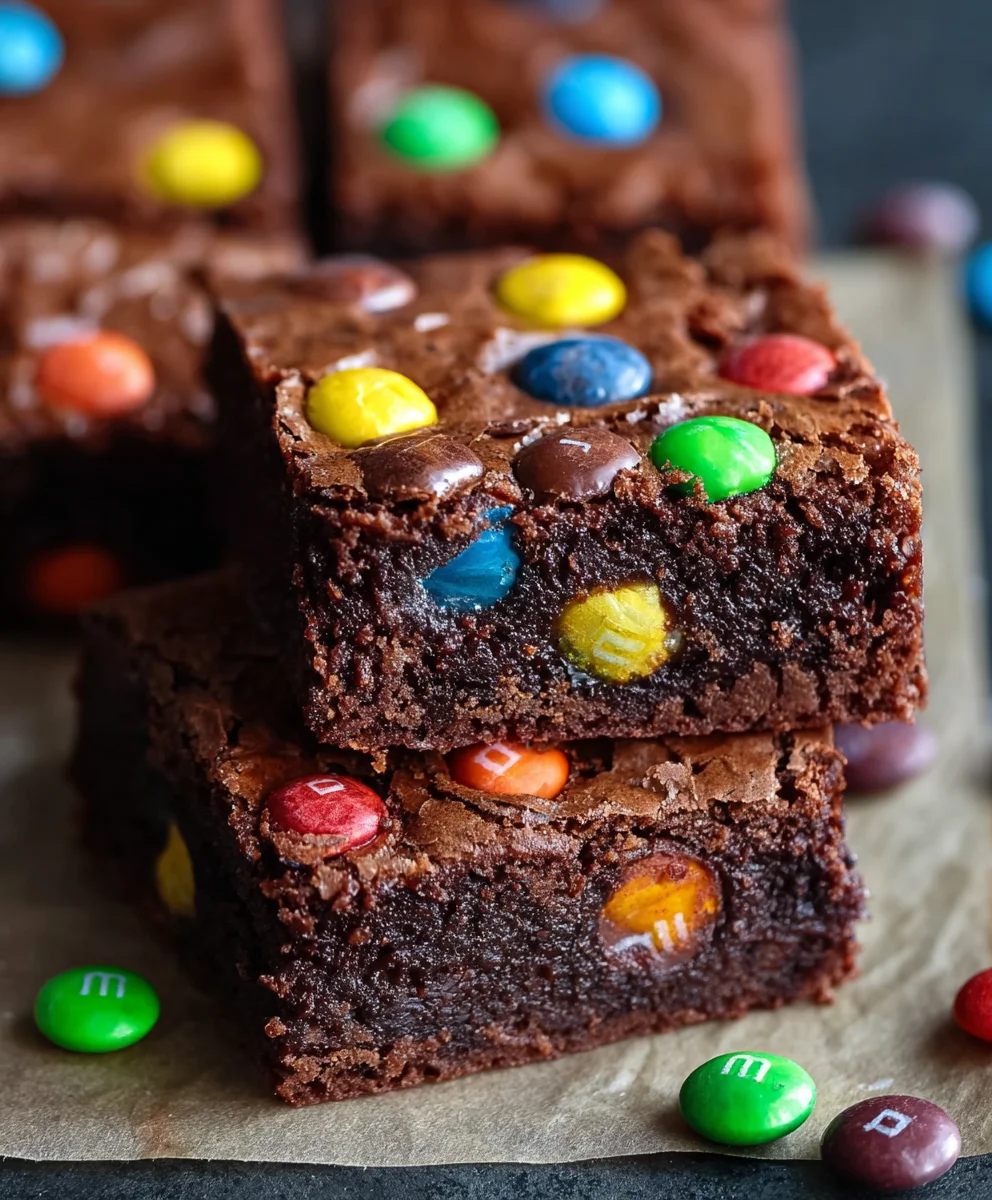
- And now, the moment we’ve been waiting for: the M&M’s! Measure out 1 ½ cups of M&M’s Plain Chocolate Candies. We’ll be dividing these. Add 1 cup of the M&M’s directly into the brownie batter. Reserve the remaining ½ cup for sprinkling on top later. Gently fold these M&M’s into the batter with your spatula. Again, mix just until they are evenly distributed. The goal here is to coat them in batter without mashing them too much, ensuring every bite gets a delightful pop of color and candy-coated chocolate.
- Once everything is just combined and the M&M’s are nestled into the batter, stop mixing immediately. Your brownie batter is now ready for the pan! It should be thick, rich, and wonderfully aromatic.
Baking to Perfection
We’re in the home stretch! The aroma of baking brownies is one of life’s simple pleasures, and soon your kitchen will be filled with it.
- Remember that prepped 9×13 inch baking pan with parchment paper? It’s time to bring it into action! Carefully pour the entire brownie batter into the prepared pan. The batter will be thick, so use your rubber spatula to scrape every last bit out of the bowl – we don’t want to leave any deliciousness behind!
- Once the batter is in the pan, use your spatula to gently spread it evenly. Make sure it reaches all corners of the pan and has a relatively flat top. Don’t press down too hard, just gently smooth it out.
- Now, take that reserved ½ cup of M&M’s Plain Chocolate Candies and generously sprinkle them all over the top of the brownie batter. These M&M’s will create a beautiful, colorful, and crunchy topping that’s irresistible. Press them down ever so slightly into the batter to ensure they adhere, but don’t submerge them completely.
- Carefully transfer the pan to your preheated oven. Place it on the center rack for even baking.
- Bake for 30-35 minutes. Baking times can vary depending on your oven, so keep a close eye on them. For fudgy brownies, you want them to be set around the edges but still a little bit gooey in the center. The classic test for doneness is to insert a wooden skewer or toothpick into the center of the brownies. If it comes out with moist crumbs attached (not wet batter), your brownies are done. If it comes out completely clean, they might be a tad overbaked, leading to a cakier texture. Aim for those moist crumbs!
- Once they pass the toothpick test, carefully remove the pan from the oven. The M&M’s on top will be glossy and vibrant. Your kitchen will smell absolutely incredible!
Cooling and Slicing – The Hardest Part!
This is arguably the most challenging part of making brownies: waiting for them to cool. But trust me, patience here will be rewarded with perfectly set, fudgy, and sliceable brownies.
- Allow the brownies to cool completely in the pan on a wire rack. This is a crucial step! As they cool, the brownies continue to set and firm up, developing that characteristic dense, fudgy texture. Trying to slice them when they’re warm will result in a messy, crumbling disaster, and no one wants that, especially after all your hard work. This can take anywhere from 2-3 hours, or even longer if your kitchen is warm. If you’re really in a rush, you can pop them in the refrigerator for about an hour once they’ve cooled to room temperature.
- Once the brownies are completely cool and firm to the touch, use the parchment paper overhang “handles” to carefully lift the entire slab of brownies out of the pan and transfer it to a cutting board. This makes slicing so much easier and cleaner!
- Now for the moment of truth – slicing! For nice, clean cuts, use a large, sharp knife. For the tidiest slices, wipe the knife clean with a damp paper towel after each cut. I like to cut my brownies into 12-16 squares, but you can go smaller for bite-sized treats or larger for truly decadent portions.
- Carefully peel off the parchment paper from the sides, and then gently transfer your beautiful “Easy Chocolate M&M Brownies” to a serving platter.
Serving and Storing Your Delicious Creation
You’ve made it! Your kitchen is clean (mostly!), your brownies are sliced, and now it’s time to enjoy the fruits of your labor.
Serving these brownies couldn’t be simpler. They are absolutely fantastic on their own, showcasing that rich chocolate flavor and delightful M&M crunch. But if you want to elevate the experience, consider serving them warm with a scoop of vanilla bean ice cream. The contrast of warm brownie and cold ice cream is heavenly! A drizzle of chocolate syrup or a dollop of whipped cream would also not be out of place. They are also perfect alongside a glass of cold milk or a hot cup of coffee.
For storage, if you somehow manage to have any leftovers (a rare occurrence in my house!), these brownies store wonderfully. Place them in an airtight container at room temperature for up to 3-4 days. To keep them extra fresh, you can layer a piece of parchment paper between stacked brownies to prevent them from sticking. If you want to extend their life even further, you can store them in the refrigerator for up to a week. Just bring them back to room temperature (or gently warm them in the microwave for a few seconds) before serving for the best texture. You can even freeze them! Wrap individual brownies tightly in plastic wrap, then place them in a freezer-safe bag or container for up to 2-3 months. Thaw them at room temperature for a few hours or microwave briefly.
These “Easy Chocolate M&M Brownies” are more than just a dessert; they’re a joyful experience. From the simple mixing to the vibrant M&M topping, they are sure to bring smiles to faces. Enjoy every fudgy, chewy, chocolatey bite!
Conclusion:
So, my fellow dessert enthusiasts, we’ve reached the sweet finale of our baking journey, and I genuinely hope you’re feeling as excited as I am about these incredible treats. If you’ve been searching for that one dessert recipe that consistently delivers on taste, joy, and sheer simplicity, then look no further. These brownies, in all their chocolatey, M&M-studded glory, are truly a game-changer. They embody everything wonderful about homemade baking – that comforting aroma filling your kitchen, the anticipation of that first bite, and the undeniable satisfaction of creating something truly delicious with your own hands, all without any unnecessary fuss or complicated techniques.
I affectionately call them Easy Chocolate M&M Brownies for a very good reason: you will be absolutely astonished by how little effort goes into creating such a deeply rich, supremely fudgy, and joyously colorful treat. The perfect balance of intense, dark chocolate flavor, complemented by those delightful, crunchy candy-coated M&M shells, all wrapped up in a moist, chewy, and utterly irresistible bite. It’s a symphony of textures and tastes that appeals to everyone, from the pickiest little eaters to the most discerning dessert connoisseurs. This isn’t just a recipe; it’s an experience, a delightful memory waiting to be made with every single batch you bake.
Beyond their incredible taste, what makes these brownies truly special is their universal appeal and remarkable versatility. Planning a spontaneous get-together with friends? Need a quick yet impressive dessert for a potluck? Or perhaps you simply crave a comforting, indulgent treat after a long and demanding week? These brownies fit every bill perfectly, adapting effortlessly to any occasion. They’re a fantastic and engaging project for baking with kids, offering a fun way to spend quality time together in the kitchen. They also make a wonderful, heartfelt gift for friends, neighbors, or teachers, showing you care with a homemade touch. And, of course, they are always a well-deserved indulgence for yourself, because sometimes, you just need a little chocolatey hug.
While these brownies are absolutely divine straight out of the pan, still warm and wonderfully gooey, they also lend themselves beautifully to customization and elevated serving suggestions. Imagine a generous scoop of premium vanilla bean ice cream melting slowly over a warm, decadent brownie, perhaps with an elegant drizzle of salted caramel sauce or a playful sprinkle of extra M&M’s for good measure. For a touch of sophistication, a dollop of freshly whipped cream and a few vibrant fresh raspberries or strawberries can transform them into an elegant dessert fit for any dinner party. For the truly ardent chocolate lovers, a light dusting of cocoa powder or a swirl of luxurious chocolate ganache would push them into an even more intense realm of indulgence.
Don’t be afraid to experiment and make this recipe your own! Try swapping out the classic M&M’s for peanut M&M’s, peanut butter chips, creamy white chocolate chips, or even chopped nuts like walnuts or pecans for added crunch and a different flavor dimension. A tiny sprinkle of flaky sea salt over the top before baking can also incredibly enhance the chocolate notes, bringing out a sophisticated contrast to these otherwise playfully sweet treats. The possibilities for creative variations are truly endless, limited only by your imagination and what delights your taste buds most. These brownies are a blank canvas for your dessert dreams.
Now that you have all the secrets and tips to baking these magnificent brownies, what are you waiting for? Gather your ingredients, preheat your oven, and prepare to embark on a delicious baking adventure. I promise you, the joy and satisfaction of biting into one of these homemade marvels, knowing you created it with your own hands, is an unparalleled feeling. Once you’ve baked your batch of these incredible Easy Chocolate M&M Brownies, I would absolutely love to hear about your experience! Did you stick to the recipe, or did you add your own creative twist? Share your stories, your baking triumphs, and especially your mouth-watering photos! Tag me on social media or leave a comment below; your culinary adventures inspire me, and I can’t wait to see your masterpieces. Happy baking, my friends!
FAQs:
How do I know when my M&M brownies are done?
The edges of your brownies should appear set and slightly puffed, but the center might still look a little gooey or slightly soft. A toothpick inserted into the center should come out with moist crumbs attached, not wet batter. If it comes out completely clean, they are likely overbaked, which can result in a more cake-like texture rather than the desired fudginess.
Can I make these brownies ahead of time?
Absolutely! Brownies are one of those wonderful desserts that often taste even better the next day as the flavors have more time to meld and deepen. Just ensure you store them properly to maintain their freshness and fudgy texture.
How should I store leftover brownies?
To keep your brownies fresh and delicious, store them in an airtight container at room temperature for up to 3-4 days. If you prefer, you can also refrigerate them for up to a week; chilling often makes them even chewier and fudgier!
Can I use different candies or add-ins instead of M&Ms?
Yes, please get creative! This recipe is incredibly adaptable. Chopped Reese’s Peanut Butter Cups, miniature marshmallows, chopped Snickers bars, white chocolate chips, peanut butter chips, or even colorful sprinkles would all work wonderfully as substitutes or additional mix-ins. Feel free to experiment with your favorite chocolate candies or nuts!
Why are my brownies cakey instead of fudgy?
This is a common question, and it usually boils down to a few factors. The most frequent culprit is overbaking; baking them for too long will dry them out. Another reason could be using too much flour or too little fat in the recipe. Ensure you’re measuring your ingredients accurately, especially the flour, and remember to pull them out of the oven when the edges are set but the center still has a slight give.
Can I freeze M&M brownies?
Yes, M&M brownies freeze exceptionally well, making them perfect for meal prepping desserts or saving for later cravings. To freeze, allow them to cool completely, then wrap individual brownies tightly in plastic wrap. Place the wrapped brownies in a freezer-safe bag or airtight container for up to 2-3 months. When you’re ready to enjoy, simply thaw them at room temperature for an hour or two.
Easy Chocolate M&M Brownies Recipe – Perfect Treat!
Indulge in these rich, fudgy chocolate brownies packed with M&M’s. This easy recipe promises a perfect chewy texture with a delightful candy crunch, making it an irresistible treat for any occasion.
Ingredients
-
1 cup unsalted butter, melted
-
2 cups granulated sugar
-
4 large eggs, room temp
-
1 tsp vanilla extract
-
1 cup all-purpose flour
-
¾ cup unsweetened cocoa powder
-
½ tsp baking powder
-
½ tsp salt
-
1 cup semi-sweet chocolate chips (optional)
-
1 ½ cups M&M’s Plain Chocolate Candies, divided
Instructions
-
Step 1
Preheat oven to 350°F (175°C). Line a 9×13 inch baking pan with parchment paper, leaving an overhang on two sides, and grease lightly. -
Step 2
Melt 1 cup butter. In a large bowl, whisk melted butter and 2 cups sugar. Add 4 room-temp eggs, whisk vigorously for 1-2 minutes until light and glossy. Stir in 1 tsp vanilla extract. -
Step 3
In a medium bowl, whisk together 1 cup all-purpose flour, ¾ cup unsweetened cocoa powder, ½ tsp baking powder, and ½ tsp salt until no lumps remain. -
Step 4
Pour dry ingredients into wet. Gently fold with a rubber spatula until just combined. Fold in 1 cup semi-sweet chocolate chips (if using) and 1 cup of M&M’s. Reserve ½ cup M&M’s for topping. -
Step 5
Pour batter into the prepared pan, spread evenly. Sprinkle remaining ½ cup M&M’s on top, pressing slightly. Bake for 30-35 minutes, or until a wooden skewer inserted into the center comes out with moist crumbs. -
Step 6
Cool completely in the pan on a wire rack (2-3 hours). Use parchment overhang to lift brownies onto a cutting board. Slice into 12-16 squares, wiping knife clean between cuts. -
Step 7
Serve as is, or with ice cream. Store in an airtight container at room temperature for 3-4 days, or refrigerate for up to a week. Brownies can be frozen for 2-3 months.
Important Information
Nutrition Facts (Per Serving)
It is important to consider this information as approximate and not to use it as definitive health advice.
Allergy Information
Please check ingredients for potential allergens and consult a health professional if in doubt.

Leave a Comment