
Cheesy Sloppy Joe Garlic Toast is more than just a meal; it’s a culinary experience that perfectly marries two beloved comfort food classics into one unforgettable dish.
Have you ever craved the tangy, savory goodness of a Sloppy Joe but wished for a sturdier, more flavorful vessel than a traditional bun? Or perhaps you’ve yearned for the garlicky, cheesy crunch of garlic bread, but felt it needed a hearty, satisfying topping? This ingenious creation answers both desires with a resounding ‘yes!’
While the classic Sloppy Joe traces its roots back to American diners in the early 20th century, and garlic bread has long been a staple in Italian-American cuisine, their union into Cheesy Sloppy Joe Garlic Toast is a relatively modern, brilliant innovation. It represents the best of fusion comfort food, taking familiar, comforting flavors and elevating them into something truly special. People adore this dish for its incredible layers of flavor and texture: the robust, slightly sweet and tangy ground meat, the irresistible punch of garlic-infused bread, and the luscious blanket of melted cheese that binds it all together. It’s wonderfully messy, incredibly satisfying, and surprisingly easy to prepare, making it a perfect weeknight dinner or a crowd-pleasing party appetizer. Get ready to indulge in this ultimate mash-up!

Ingredients:
- For the Cheesy Sloppy Joe Filling:
- 1 tablespoon olive oil
- 1.5 pounds lean ground beef (I often go for 85/15 or 90/10 for a good balance of flavor and less grease to drain)
- 1 large yellow onion, finely diced (about 1.5 cups)
- 1 green bell pepper, finely diced (about 1 cup)
- 3-4 cloves garlic, minced (I love garlic, so I usually go for 4!)
- 6 ounces tomato paste (a small can usually works perfectly)
- 1 (15-ounce) can crushed tomatoes
- 1/2 cup ketchup (your favorite brand will do!)
- 2 tablespoons Worcestershire sauce (this adds a wonderful savory depth)
- 1 tablespoon yellow mustard (classic Sloppy Joe tang, but Dijon works too if you prefer a sharper taste)
- 1 tablespoon light brown sugar, packed (to balance the acidity of the tomatoes)
- 1 tablespoon chili powder
- 1 teaspoon smoked paprika (for a lovely smoky note)
- 1/2 teaspoon ground cumin
- 1/2 teaspoon black pepper
- 1 teaspoon salt (or to taste, remember we’ll adjust later)
- 1/2 cup beef broth (low sodium is often my choice so I can control the saltiness)
- For the Garlic Toast:
- 1 loaf sturdy bread, such as Texas toast, sourdough, or a good artisan country loaf, sliced about 3/4 to 1 inch thick (you’ll need about 8-10 slices depending on loaf size)
- 1/2 cup unsalted butter, melted (don’t be shy with the butter!)
- 3-4 cloves garlic, freshly minced (or 1.5 tablespoons garlic powder if you’re in a pinch, but fresh is always best here!)
- 2 tablespoons fresh parsley, chopped (optional, but adds a pop of color and freshness)
- For Assembly:
- 2 cups shredded cheese blend (I love a mix of sharp cheddar and Monterey Jack for excellent meltiness and flavor, but mozzarella or a Colby Jack blend would also be fantastic for your Cheesy Sloppy Joe Garlic Toast)
- Fresh parsley for garnish, chopped (optional)
- Red pepper flakes for a little kick (optional)
Preparing the Sloppy Joe Filling: The Heart of Our Cheesy Sloppy Joe Garlic Toast
- Get Your Veggies Ready: First things first, let’s prepare our aromatic base. I like to finely dice my yellow onion and green bell pepper. Uniform pieces are key here, as they’ll cook down evenly and blend beautifully into our “Cheesy Sloppy Joe Garlic Toast” filling. Then, go ahead and mince your garlic cloves. Trust me, freshly minced garlic makes all the difference!
- Brown the Beef to Perfection: Grab a large skillet or a Dutch oven – something with plenty of room – and place it over medium-high heat. Add your tablespoon of olive oil. Once it’s shimmering, add your lean ground beef. Break it up with a wooden spoon or spatula as it cooks. We’re looking for a beautiful, even brown color, no pink in sight. This browning step is crucial because it develops rich, complex flavors through the Maillard reaction that will anchor our “Cheesy Sloppy Joe Garlic Toast.” Once fully browned, if you notice a significant amount of grease, go ahead and drain it off. I usually tilt the pan and use a spoon to scoop out excess fat, leaving just a little for flavor.
- Sauté Those Aromatics: Reduce the heat to medium. Add your finely diced onion and green bell pepper to the skillet with the browned beef. Stir them around, letting them soften for about 5-7 minutes. We want them tender and slightly translucent, which means their sweet flavors are starting to release, forming the perfect foundation for our “Cheesy Sloppy Joe Garlic Toast” filling.
- Garlic and Tomato Paste Power-Up: Now, push the beef and veggies to one side of the pan, creating a little space in the center. Add your minced garlic to this empty spot and cook for about 30-60 seconds, just until it becomes fragrant. Be careful not to burn it – burnt garlic can turn bitter quickly! Immediately after, add the tomato paste to the same spot. Stir the tomato paste around for about 2-3 minutes, letting it cook down and darken slightly. This step, often called “caramelizing” the tomato paste, really deepens its flavor and removes that raw tomato taste, making our Sloppy Joe filling incredibly robust.
- Build the Flavorful Sauce: Now it’s time to bring all those wonderful flavors together! Stir the cooked tomato paste and garlic into the beef and vegetable mixture. Then, add the crushed tomatoes, ketchup, Worcestershire sauce, yellow mustard, and light brown sugar. Next, sprinkle in your spices: chili powder, smoked paprika, ground cumin, black pepper, and salt. Give everything a really good stir until all the ingredients are well combined. You should already be smelling something incredible forming for our “Cheesy Sloppy Joe Garlic Toast”!
- Simmer for Maximum Flavor: Pour in the beef broth. Stir once more. Bring the mixture to a gentle simmer, then reduce the heat to low. Partially cover the skillet and let the Sloppy Joe filling simmer for at least 20-25 minutes, or even up to 30 minutes. This simmering time is essential because it allows all the flavors to meld beautifully, deepen, and thicken to that perfect “Sloppy Joe” consistency. You want it thick enough to stay on the toast without being too runny. I often stir it occasionally to prevent sticking and ensure even cooking. The longer it simmers, the more amazing your “Cheesy Sloppy Joe Garlic Toast” will be!
- Taste and Adjust: After simmering, give your Sloppy Joe filling a taste. This is your chance to make it perfect! Does it need a little more salt? A dash more pepper? Perhaps a tiny bit more brown sugar to cut through the acidity, or a splash more Worcestershire for savoriness? Adjust as needed until you’re happy with the flavor profile. Remember, a perfectly balanced filling is key to an outstanding “Cheesy Sloppy Joe Garlic Toast.”
Crafting the Garlic Toast: The Crunchy Base for Your Cheesy Sloppy Joe Garlic Toast
- Preheat Your Oven: While your Sloppy Joe filling is simmering, let’s get the garlic toast ready. Preheat your oven to 375°F (190°C). This temperature works wonderfully for toasting bread to a golden crisp and later for melting the cheese.
- Prepare the Aromatic Garlic Butter: In a small bowl, melt your unsalted butter. Once melted, stir in your freshly minced garlic (or garlic powder if you’re using that) and the chopped fresh parsley, if you’re adding it. The smell alone is intoxicating, a promise of the deliciousness to come for our “Cheesy Sloppy Joe Garlic Toast.” I always say, you can never have too much garlic butter!
- Slice the Bread: Take your chosen sturdy loaf and slice it into generous 3/4 to 1-inch thick pieces. The thickness is important because this toast needs to hold up to a hefty dollop of our delicious Sloppy Joe filling and a blanket of cheese without getting soggy. This is the foundation for your “Cheesy Sloppy Joe Garlic Toast,” so choose wisely!
- Butter Up Your Bread: Arrange your bread slices in a single layer on a large baking sheet. Now, generously brush both sides of each bread slice with your fragrant garlic butter. Really get in there, ensuring every nook and cranny is coated. The butter not only adds incredible flavor but also helps the bread get beautifully golden and crisp. If you’re concerned about it being too rich, you can butter just one side, but for the ultimate “Cheesy Sloppy Joe Garlic Toast” experience, I recommend both!
- Toast to Golden Perfection: Place the baking sheet with the buttered bread into your preheated oven. Bake for about 7-10 minutes, or until the edges are golden brown and the bread is wonderfully fragrant and slightly crisp. Keep an eye on it, as oven temperatures can vary. We want toasted, not burnt! Once it’s reached your desired level of golden crispness, carefully remove the garlic toast from the oven.
Assembling and Baking Your Cheesy Masterpiece: The Ultimate Cheesy Sloppy Joe Garlic Toast
- Prepare Your Baking Arena: Grab another large baking sheet (or use the same one if you’ve transferred your garlic toast off it) and line it with parchment paper. This simple step will make cleanup a breeze, especially with all that delicious, gooey cheese we’re about to add to our “Cheesy Sloppy Joe Garlic Toast.”
- Arrange the Toasted Foundation: Carefully place your golden-brown garlic toast slices back onto the prepared baking sheet in a single layer. Give them a little space between each other so they can heat evenly.
- Spoon on the Sloppy Joe Goodness: Now for the fun part! Take a generous spoonful of your simmering, flavorful Sloppy Joe filling and spread it evenly over each slice of garlic toast. Don’t be shy, but also don’t overload it to the point where it becomes impossible to eat. We want a hearty portion that screams “Cheesy Sloppy Joe Garlic Toast” with every bite.
- Pile on the Cheese: This is where the “Cheesy” in “Cheesy Sloppy Joe Garlic Toast” truly comes to life! Liberally sprinkle your shredded cheese blend over the Sloppy Joe filling on each piece of toast. I often find myself adding more than the recipe calls for because, well, cheese! The more cheese, the more irresistible your “Cheesy Sloppy Joe Garlic Toast” will be. Make sure you cover the filling well so it melts into a beautiful, gooey blanket.
- Bake Until Bubbly and Golden: Return the baking sheet to your preheated 375°F (190°C) oven. Bake for about 8-12 minutes, or until the cheese is completely melted, bubbly, and beautifully golden brown around the edges. You’ll see some glorious crispy bits, which are absolutely delicious. The aroma filling your kitchen will be incredible – a clear sign that your “Cheesy Sloppy Joe Garlic Toast” is nearly ready!
- Garnish and Serve Immediately: Once baked to perfection, carefully remove the “Cheesy Sloppy Joe Garlic Toast” from the oven. If you like, sprinkle with some fresh chopped parsley for a burst of color and a fresh herb note, or a pinch of red pepper flakes if you’re craving a little heat. Serve these incredible Cheesy Sloppy Joe Garlic Toasts immediately while they are hot and the cheese is still wonderfully gooey. They make a fantastic meal on their own, or you could serve them with a simple side salad or some potato chips for a truly comforting experience. Enjoy every single messy, cheesy, flavorful bite!
Conclusion:
If you’ve been following along, I truly hope your appetite has been thoroughly whetted, because what we’ve just explored isn’t just another recipe; it’s an absolute game-changer in the world of comfort food. I honestly believe this dish deserves a permanent spot in your rotation, and here’s exactly why. We’ve all got those moments when we crave something satisfying, something that reminds us of simpler times, yet also delivers a fresh, exciting punch. This recipe nails that balance perfectly. It transforms familiar, beloved elements into something greater than the sum of its parts, offering a harmonious blend of textures and tastes that will leave you utterly content.
Think about it: the savory, slightly sweet, and wonderfully saucy sloppy joe mix, bubbling away with robust flavor, is already a classic on its own. Now, imagine pairing that with the ultimate vessel – thick slices of toasted bread, generously slathered with garlic butter, achieving that perfect golden crispness. But we don’t stop there, do we? Oh no. We crown this masterpiece with a luscious blanket of melted cheese, creating an irresistible, gooey topping that stretches with every bite. The combination is simply divine, a symphony of savory, tangy, garlicky, and utterly creamy notes that dance on your palate. This isn’t just a meal; it’s a delightful experience waiting to happen, a testament to how humble ingredients can create something truly extraordinary. It’s a dish that brings smiles to faces, perfect for a cozy family dinner, a casual get-together with friends, or even a solo treat when you need that extra dose of comfort. Trust me when I say, once you taste this incredible Cheesy Sloppy Joe Garlic Toast, you’ll understand exactly what I mean.
Now, let’s talk about how to make this star shine even brighter on your table, or how to put your own creative spin on it. While it’s certainly robust enough to stand as a complete meal on its own, a fresh, crisp side salad with a tangy vinaigrette would offer a wonderful counterpoint to its richness. Imagine a simple green salad with cherry tomatoes and cucumber, or perhaps a classic coleslaw for that extra crunch and cool creaminess. For those who love a bit more indulgence, a side of crispy onion rings, golden french fries, or even some baked potato wedges would be absolutely divine. Don’t forget the pickles! A tangy dill pickle spear alongside each serving cuts through the richness beautifully and adds a fantastic briny kick.
And the beauty of this recipe extends to its versatility for variations! Feel free to experiment with different types of cheese; a blend of cheddar and Monterey Jack would be fantastic for extra meltiness, or even a smoked gouda for a deeper, more sophisticated flavor profile. If you’re feeling adventurous, a touch of spicy pepper jack could introduce a delightful kick. For those looking to sneak in more veggies, finely diced bell peppers, carrots, or even mushrooms can be sautéed with the onion and ground meat, adding extra nutrition and texture without compromising the core flavor. You could even swap out the ground beef for ground turkey or a plant-based mince for a lighter or vegetarian version, adjusting the seasonings as needed. Different breads can also be explored – a crusty sourdough, a thick-cut Texas toast, or even a soft brioche for a slightly sweeter base. Don’t be afraid to make it your own; that’s the joy of cooking!
So, there you have it. My heartfelt plea for you to give this amazing recipe a try. I truly believe that once you experience the sheer delight of this dish, it will quickly become a cherished favorite in your culinary repertoire. It’s easy enough for a weeknight, impressive enough for guests, and absolutely delicious every single time. I challenge you to set aside some time this week, gather your ingredients, and whip up a batch of this fantastic comfort food. When you do, please, please, please come back and let me know how it turned out! Share your photos, your family’s reactions, and any clever variations you came up with. I absolutely love hearing about your kitchen adventures, and I can’t wait to see your own incredible versions of this Cheesy Sloppy Joe Garlic Toast. Happy cooking, my friends!

Easy Cheesy Sloppy Joe Garlic Toast
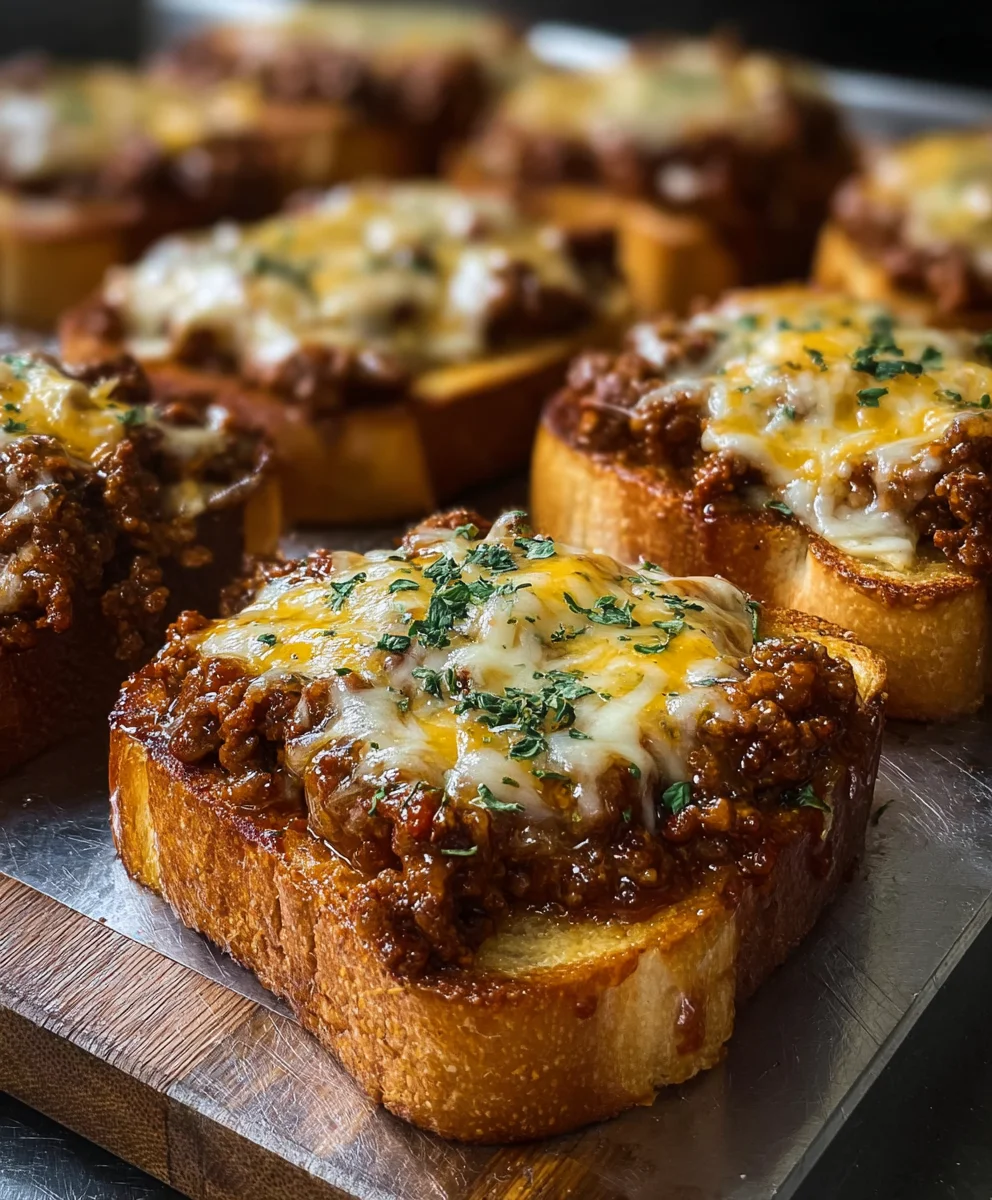
A culinary mash-up that combines the tangy, savory goodness of Sloppy Joes with the garlicky, cheesy crunch of garlic toast. This easy, satisfying dish features robust ground beef filling on a sturdy garlic toast base, blanketed with melted cheese. Perfect for a weeknight meal or crowd-pleasing appetizer.
Ingredients
-
1 tablespoon olive oil
-
1.5 pounds lean ground beef (85/15 or 90/10)
-
1 large yellow onion, finely diced
-
1 green bell pepper, finely diced
-
3-4 cloves garlic, minced
-
6 ounces tomato paste
-
1 (15-ounce) can crushed tomatoes
-
1/2 cup ketchup
-
2 tablespoons Worcestershire sauce
-
1 tablespoon yellow mustard
-
1 tablespoon light brown sugar, packed
-
1 tablespoon chili powder
-
1 teaspoon smoked paprika
-
1/2 teaspoon ground cumin
-
1/2 teaspoon black pepper
-
1 teaspoon salt (or to taste)
-
1/2 cup beef broth (low sodium)
-
1 package (8-10 slices) frozen garlic toast
-
2 cups shredded cheese blend (e.g., sharp cheddar and Monterey Jack)
-
Fresh parsley for garnish, chopped (optional)
-
Red pepper flakes for a little kick (optional)
Instructions
-
Step 1
In a large skillet over medium-high heat, brown ground beef, breaking it apart. Drain any excess grease. Add diced onion and green bell pepper; sauté 5-7 minutes until softened. -
Step 2
Push beef to one side, add minced garlic to the cleared spot and cook 30-60 seconds until fragrant. Add tomato paste to the same spot and cook, stirring, for 2-3 minutes to deepen flavor. -
Step 3
Stir tomato paste and garlic into beef mixture. Add crushed tomatoes, ketchup, Worcestershire sauce, mustard, brown sugar, chili powder, smoked paprika, cumin, black pepper, and salt. Stir well. Pour in beef broth. Bring to a gentle simmer, then reduce heat to low, partially cover, and simmer for 20-30 minutes, stirring occasionally, until thickened. Taste and adjust seasonings. -
Step 4
Preheat oven to 375°F (190°C). Line a large baking sheet with parchment paper. Arrange frozen garlic toast slices on the prepared baking sheet. Bake for 7-10 minutes, or according to package directions, until golden and crisp. Remove toast from oven. -
Step 5
Spoon a generous amount of the simmering Sloppy Joe filling evenly over each toasted garlic slice. Liberally sprinkle shredded cheese blend over the filling. Return baking sheet to oven. Bake for 8-12 minutes, or until cheese is melted, bubbly, and golden brown. -
Step 6
Garnish with fresh chopped parsley or red pepper flakes, if desired. Serve immediately while hot and gooey.
Important Information
Nutrition Facts (Per Serving)
It is important to consider this information as approximate and not to use it as definitive health advice.
Allergy Information
Please check ingredients for potential allergens and consult a health professional if in doubt.


Leave a Comment