
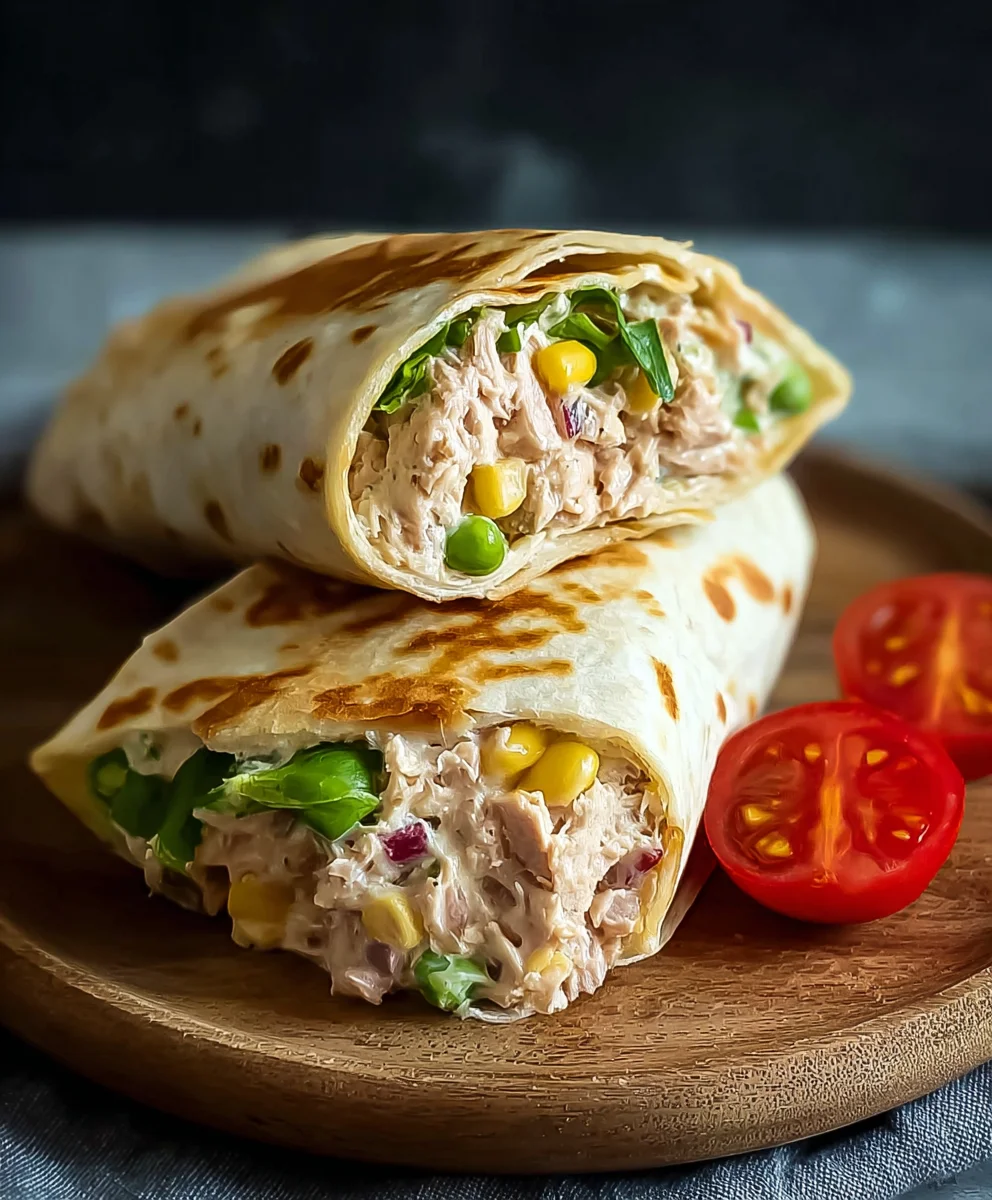
Tuna Melt Wrap: a delightful evolution of a beloved classic, offering unparalleled convenience without compromising on an ounce of flavor. I’m absolutely thrilled to guide you through crafting this handheld marvel, which perfectly balances a creamy, savory filling with a warm, slightly crispy exterior, ideal for any time of day.
While the traditional tuna melt has long held a cherished spot in American diners and home kitchens, celebrated for its comforting familiarity and ability to satisfy, transforming it into a wrap truly elevates its appeal. This innovative approach offers a fresh, contemporary twist on a nostalgic favorite, making a classic even more accessible and versatile for modern lifestyles. It’s more than just a meal; it’s a testament to how simple ingredients can come together to create something truly satisfying and memorable.
Why This Tuna Melt Wrap is a Must-Try
What truly makes this particular iteration so incredibly special and universally loved? It’s the harmonious blend of textures and tastes: the tender, flavorful tuna salad, often brightened with crisp celery and a hint of tang, perfectly complemented by rich, gooey melted cheese, all lovingly encased in a soft yet perfectly toasted tortilla. This masterful combination ensures a satisfying crunch with every single bite, making our Tuna Melt Wrap an incredibly popular choice for a quick, fulfilling lunch, a light yet satisfying dinner, or even a sophisticated, on-the-go snack. Its remarkable ease of preparation, combined with its universally appealing flavor profile, guarantees that this recipe will quickly become a cherished staple in your culinary repertoire.

Ingredients:
- Canned Tuna: Two (2) 5-ounce cans of high-quality tuna, packed either in olive oil or water. I personally find oil-packed tuna delivers a richer flavor and superior texture, but water-packed is fantastic if you’re looking for a lighter option. Just make sure to drain it very, very well, regardless of your choice!
- Mayonnaise: Half (1/2) cup of your favorite creamy mayonnaise. The quality of your mayo truly shines through here, so opt for a brand you love or even consider making your own for an extra special touch.
- Celery: Two (2) medium stalks of celery, finely diced. This adds that essential crunch and a subtle, refreshing peppery note that beautifully complements the tuna.
- Red Onion: One-quarter (1/4) cup of finely diced red onion. Red onion provides a wonderful, slightly piquant bite without being overly aggressive, and its vibrant color is a bonus. If you find raw onion too strong, you can soak it in ice water for 10 minutes before draining to mellow its flavor.
- Dill Relish: Two (2) tablespoons of sweet or dill relish. I’m a big fan of dill relish for its tangy, briny kick, but sweet relish can be lovely if you prefer a touch of sweetness in your tuna salad. Alternatively, a tablespoon of fresh chopped dill and a teaspoon of capers can be a gourmet swap!
- Dijon Mustard: One (1) teaspoon of Dijon mustard. This isn’t just for flavor; it acts as an emulsifier, helping to bind the tuna salad and adding a sophisticated, slightly sharp undertone.
- Lemon Juice: One (1) tablespoon of freshly squeezed lemon juice. Fresh lemon juice is non-negotiable here! It brightens all the flavors and cuts through the richness of the tuna and mayonnaise beautifully.
- Salt and Freshly Ground Black Pepper: To taste. Start with about half a teaspoon of salt and a quarter teaspoon of pepper, then adjust after tasting the finished tuna salad.
- Large Flour Tortillas: Four (4) large (10-inch) flour tortillas. These need to be substantial enough to hold all the delicious filling and stand up to the grilling process. Whole wheat tortillas are also a fantastic option for added fiber and a slightly nuttier flavor.
- Cheese: Four (4) slices of your favorite melting cheese. I typically reach for a sharp cheddar, creamy Monterey Jack, or even a classic Swiss. Provolone or Havarti also work wonderfully, melting into gooey perfection. You could also use about 1/2 cup of shredded cheese per wrap.
- Butter or Olive Oil: Two (2) tablespoons of unsalted butter, melted, or olive oil, for cooking the wraps. Butter adds a golden crust and incredible flavor, while olive oil is a great dairy-free alternative.
-
Optional Additions for Filling:
- Spinach or Arugula: A handful of fresh greens added to each wrap before cooking provides extra nutrition and a fresh counterpoint.
- Thinly Sliced Tomato: A couple of slices per wrap can add juiciness and a burst of fresh flavor.
- Pickles: Thinly sliced dill pickles placed inside the wrap offer an extra layer of crunch and tang.
- Hot Sauce: A dash or two of your favorite hot sauce mixed into the tuna salad for a spicy kick.
Phase 1: Preparing the Tuna Salad
- Drain the Tuna Thoroughly: This is arguably one of the most crucial steps for a perfect Tuna Melt Wrap. If your tuna is packed in water, place it in a fine-mesh sieve and press out as much liquid as possible using the back of a spoon or a spatula. You want it to be as dry as you can get it to prevent a soggy wrap. If using oil-packed tuna, simply drain off the excess oil, but don’t press it dry unless you really want to; some of that delicious oil contributes to the richness. Transfer the well-drained tuna to a medium-sized mixing bowl.
- Flake the Tuna: Using a fork, gently flake the tuna apart. You want a good consistency where the tuna is broken up but still has some texture, not completely mashed. Aim for nice, discernable pieces of tuna.
- Add the Wet Ingredients and Seasonings: To the flaked tuna, add the mayonnaise, finely diced celery, finely diced red onion, dill relish (or your preferred alternative like fresh dill and capers), Dijon mustard, and the essential fresh lemon juice.
- Season and Mix: Now, add your initial seasoning: approximately half a teaspoon of salt and a quarter teaspoon of freshly ground black pepper. Give everything a good, gentle mix with your fork or a rubber spatula. You want all the ingredients to be thoroughly combined, ensuring every bite of your tuna salad is flavorful, but avoid over-mixing, which can break down the tuna too much and make it pasty. Mix just until everything is incorporated and the tuna is coated in the creamy dressing.
- Taste and Adjust: This is the chef’s secret weapon! Take a small spoonful of your tuna salad and taste it. Does it need more salt? More pepper? A little extra tang from lemon juice or relish? Perhaps a tiny bit more mayo for creaminess? Adjust the seasonings to your personal preference. Remember, a perfectly seasoned tuna salad is the foundation of an outstanding Tuna Melt Wrap. Don’t skip this step!
Phase 2: Assembling the Wraps
- Prepare Your Workstation: Lay out your four large flour tortillas on a clean, flat surface. Ensure they are pliable. If they feel stiff, you can warm them briefly in a dry pan or microwave for 10-15 seconds to make them easier to roll without cracking.
- Spread the Tuna Salad: Divide the tuna salad evenly among the four tortillas. Spread it out in a rectangular shape, slightly off-center towards one edge, leaving about an inch or so clear around the perimeter of the tortilla. This clear border is crucial for proper folding and sealing. Make sure the layer is even, about 1/2 to 3/4 inch thick.
- Layer the Cheese: On top of the tuna salad, place one slice of your chosen cheese (or sprinkle about 1/2 cup of shredded cheese). You can either lay it directly over the tuna salad or strategically place it to ensure maximum meltiness. For example, if using a square slice, slightly overlap it with the tuna, ensuring some cheese is exposed near the edges for that irresistible crispy, melted cheese effect when cooked.
- Add Optional Fresh Elements: If you’re incorporating fresh spinach, arugula, or thinly sliced tomatoes, now is the time to add them. Layer a small handful of greens or a couple of tomato slices directly on top of the cheese. These additions not only boost nutrition but also add a wonderful textural contrast and freshness.
- Fold the Sides: Carefully fold in the sides of the tortilla over the filling, typically about 1 to 1.5 inches on each side, towards the center. This creates a neat package and prevents the filling from spilling out during the rolling and cooking process.
- Roll Up Tightly: Starting from the edge closest to you (the one with the bulk of the filling), tightly roll the tortilla away from you, tucking the filling in as you go. The goal is a compact, firm wrap that won’t unravel. Imagine you’re rolling a burrito. Keep the roll as tight as possible without tearing the tortilla. The seam should end up on the bottom. Repeat this process for all four wraps.
Phase 3: Cooking the Tuna Melt Wraps
- Heat Your Pan: Place a large non-stick skillet or griddle over medium heat. You want it hot enough to create a beautiful golden-brown crust but not so hot that it burns the tortilla before the cheese has a chance to melt through.
- Add Fat to the Pan: Once the pan is adequately heated, add one tablespoon of butter (or olive oil). Swirl it around to coat the bottom of the pan evenly. You might need to add the second tablespoon of butter for the second batch of wraps, or if your pan is large enough to cook all four at once, you might use it all now.
- Place the Wraps Seam-Side Down: Carefully place two of your assembled Tuna Melt Wraps into the hot pan, ensuring the seam side is facing down. This helps to seal the wrap and prevent it from opening up while cooking. Give them a little space so they can cook evenly.
- Cook the First Side: Cook for approximately 3-5 minutes on the first side. You’re looking for a beautiful, deep golden-brown color and a crispy texture. Peek underneath after about 3 minutes to check the color. If it’s browning too quickly, lower the heat slightly. The heat should be gentle enough to allow the cheese inside to start melting without scorching the tortilla.
- Flip and Cook the Second Side: Once the first side is perfectly golden, use a spatula to carefully flip the wraps over. Cook for another 3-5 minutes on the second side, aiming for the same gorgeous golden-brown and crispy finish. By this point, the cheese inside should be wonderfully melted and gooey, creating that irresistible “melt” quality. You might even see some cheese oozing out and getting crispy on the pan – that’s a good sign!
- Remove and Rest: Once both sides are beautifully browned and the cheese is thoroughly melted, carefully remove the Tuna Melt Wraps from the pan and place them on a cutting board. It’s best to let them rest for just 1-2 minutes. This brief resting period allows the filling to set slightly and prevents all that delicious, molten cheese from immediately spilling out when you cut into them.
- Repeat (if necessary): If you couldn’t fit all four wraps in your pan at once, add the remaining butter or oil and repeat the cooking process for the remaining wraps.
Phase 4: Serving Suggestions and Variations
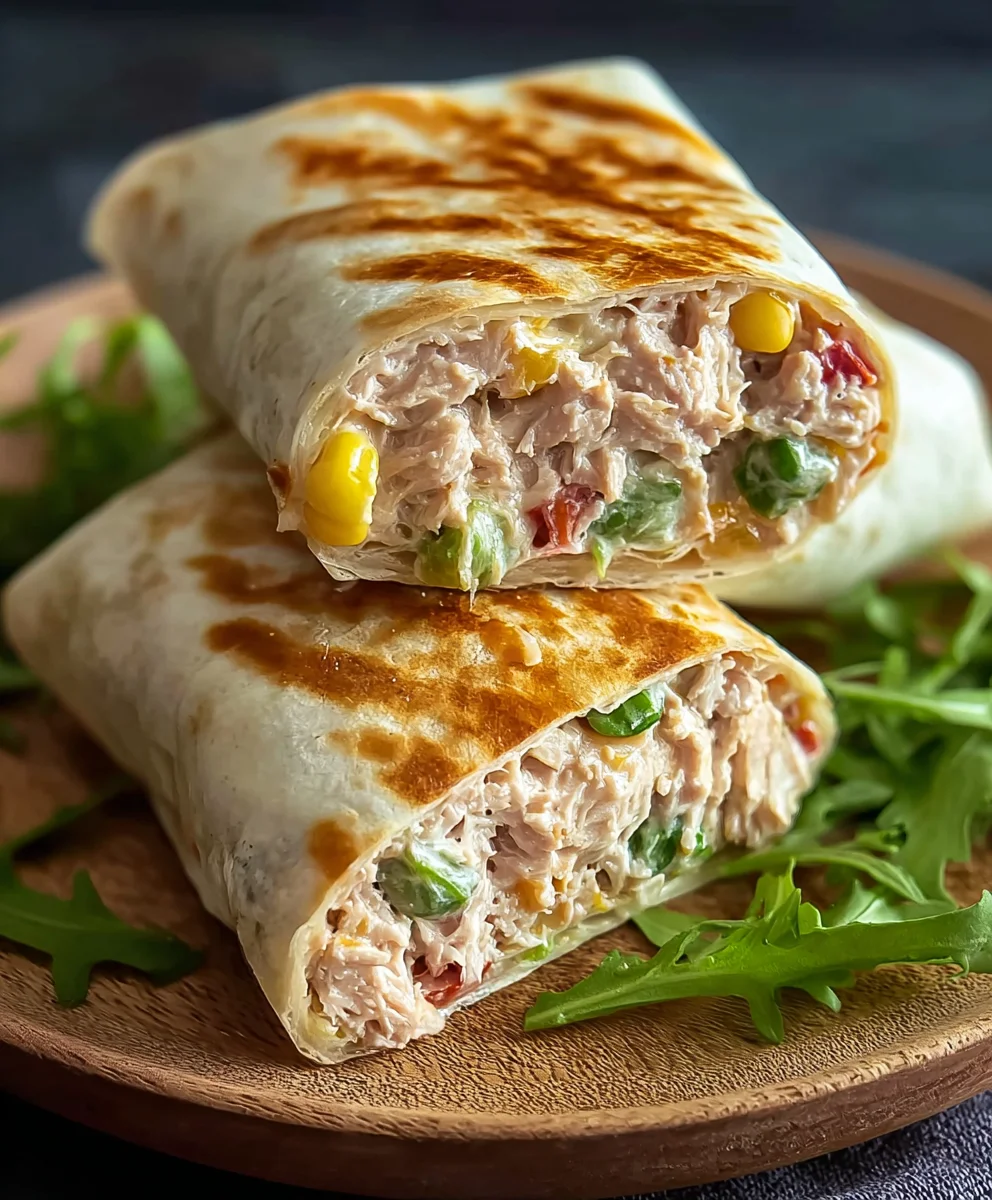
- Slice and Serve Immediately: After their brief rest, slice each Tuna Melt Wrap in half diagonally. This not only makes them easier to eat but also beautifully showcases the melty cheese and flavorful tuna salad inside. They are best served hot and fresh, right off the pan, when the tortilla is crispy and the cheese is at its gooey peak.
-
Perfect Pairings:
- Soup and Salad: A classic pairing! A warm bowl of tomato soup or a light green salad with a vinaigrette dressing makes for a complete and satisfying meal.
- Chips and Pickles: For a more casual diner feel, serve alongside a handful of your favorite potato chips and a crisp dill pickle spear.
- Coleslaw: A tangy coleslaw provides a refreshing contrast to the richness of the tuna melt.
-
Variations to Keep Things Exciting:
- Cheese Exploration: Don’t limit yourself to just one type of cheese! Try a smoky gouda, a spicy pepper jack for a kick, or even a blend of mozzarella and provolone for an Italian flair. Each cheese will bring its own unique character to your Tuna Melt Wrap.
- Spice It Up: If you love heat, consider adding a pinch of cayenne pepper or a dash of your favorite hot sauce directly into the tuna salad mixture. A finely minced jalapeño (seeds removed for less heat) can also add a fresh, zesty spice.
- Herbal Infusion: Incorporate other fresh herbs beyond dill. Fresh chives, parsley, or even a little tarragon can elevate the flavor profile of your tuna salad significantly.
- Textural Twists: Add some toasted nuts like pecans or walnuts for an extra layer of crunch within the tuna salad. A few finely chopped water chestnuts can also provide a unique, subtle crispness.
- Saucy Swaps: Instead of traditional mayonnaise, experiment with other creamy bases. A Greek yogurt-based dressing for a lighter option, or even a chipotle aioli for a smoky, spicy twist, can totally transform your wrap.
- Veggie Boost: Beyond spinach and tomato, consider adding finely shredded carrots, bell peppers (any color!), or even some steamed asparagus tips for extra nutrition and vibrant color. Make sure any added vegetables are finely diced or thinly sliced to ensure the wrap can still roll tightly and cook evenly.
- Gluten-Free Option: If you’re avoiding gluten, simply swap out the standard flour tortillas for your favorite brand of large gluten-free tortillas. The cooking process remains exactly the same, ensuring everyone can enjoy this delicious creation.
-
Storage and Reheating Tips:
While Tuna Melt Wraps are best enjoyed fresh, if you happen to have leftovers or want to prep ahead, here are some tips:
- Storing Tuna Salad: The prepared tuna salad can be stored in an airtight container in the refrigerator for up to 3 days. This is great for meal prepping!
- Storing Assembled Wraps (Uncooked): You can assemble the wraps ahead of time, wrap them individually in plastic wrap, and store them in the refrigerator for up to 24 hours. When ready to eat, simply cook them as directed.
- Reheating Cooked Wraps: Cooked Tuna Melt Wraps can be stored in an airtight container in the refrigerator for up to 2 days. To reheat, I recommend using a dry skillet over medium-low heat for about 5-7 minutes per side, or until heated through and crispy again. The microwave tends to make them soggy, so avoid it if possible to retain that wonderful texture.
Remember, the beauty of a Tuna Melt Wrap is its versatility and comforting appeal. Feel free to experiment with these suggestions and make this recipe truly your own. Enjoy every warm, cheesy, and satisfying bite!
Conclusion:
So, as we reach the end of our culinary journey with this particular creation, I really want to impress upon you just how much of a game-changer this recipe can be in your kitchen. It’s not just another meal; it’s a quick, satisfying, and utterly delicious solution to those moments when you crave comfort food but need something that fits into a busy schedule. I’ve often found myself relying on it when time is short, but I refuse to compromise on flavor or satisfaction. This isn’t your grandma’s classic tuna sandwich, though it holds that same nostalgic comfort. Instead, we’ve taken those beloved elements – the creamy tuna, the gooey melted cheese, the warmth – and wrapped them up into a portable, modern, and incredibly appealing Tuna Melt Wrap. It truly represents the best of both worlds: speedy preparation combined with a gourmet-like outcome that will surprise and delight your taste buds. It’s the kind of recipe that quickly moves from “something new to try” to a permanent fixture in your weekly rotation because of its sheer simplicity and comforting deliciousness.
Now, while the basic recipe for our fabulous creation is undeniably perfect on its own, one of its greatest strengths lies in its incredible versatility. Don’t hesitate to make it your own! For serving, imagine pairing it with a crisp, refreshing side salad dressed with a bright lemon vinaigrette – the acidity cuts through the richness beautifully. Alternatively, a warm bowl of creamy tomato soup makes for an ultimate comfort food duo, especially on a chilly day. If you’re looking for something simpler, a handful of your favorite crunchy potato chips or some sweet potato fries would be a fantastic companion, adding a playful texture. And for those who enjoy a little extra freshness, a side of sliced avocado or some vibrant cherry tomatoes always works wonders, contributing both color and nutrition.
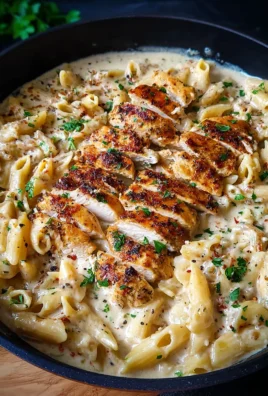
But the fun doesn’t stop there. Let’s talk variations because this recipe is practically begging for your personal touch! If you’re not a fan of tuna, or simply want to try something different, consider using canned salmon for a richer flavor profile, or even shredded cooked chicken for a delightful chicken melt version. For my vegetarian friends, a mashed chickpea salad, seasoned similarly to tuna, makes for an equally satisfying and protein-packed alternative that everyone will enjoy. When it comes to cheese, don’t feel limited to cheddar. Provolone, Monterey Jack, or even a spicy pepper jack can introduce exciting new dimensions, adding a delightful kick. Want to add more texture and flavor to the tuna mixture itself? Finely diced celery, red onion, or bell peppers are classic additions, but don’t shy away from capers for a briny kick, chopped pickles for tang, or even some finely minced jalapeños for a controlled touch of heat. A dash of Old Bay seasoning, some smoked paprika, or a sprinkle of fresh dill can elevate the entire experience. And for the wrap itself, feel free to experiment with whole wheat, spinach, or sun-dried tomato tortillas for varied flavors and nutritional benefits. For a lower-carb option, large lettuce cups can provide a wonderfully refreshing crunch, transforming it into a lighter, yet still satisfying, meal. You could even bake these in the oven or air fryer for an extra-crispy exterior, rather than just pan-frying, adding another layer of texture that is truly irresistible.
I sincerely hope that by now, you’re feeling inspired and excited to roll up your sleeves and try this recipe. It’s designed to be approachable for cooks of all skill levels, delivering maximum flavor with minimal fuss. I genuinely believe that once you experience the sheer joy of biting into one of these freshly made Tuna Melt Wrap creations, with its warm, savory filling and perfectly toasted exterior, you’ll understand why I’m so passionate about sharing it with you. This isn’t just a recipe to follow; it’s an invitation to create, to personalize, and to savor a moment of deliciousness in your day. I really encourage you to gather your ingredients, set aside a few minutes, and treat yourself, your family, or your friends to this wonderful meal. And please, please, once you’ve whipped up your own batch, I would absolutely love to hear about your experience! Did you stick to the original, or did you venture into exciting new variations? What were your favorite additions? Did you discover a new pairing that you can’t get enough of? Your feedback and creative twists are what make the culinary world so vibrant and inspiring. Sharing your successes, and even your funny mishaps, is all part of the fun. So, snap a picture, share your thoughts, or simply tell a friend about the fantastic new staple you’ve added to your repertoire. Your kitchen adventures are valuable, and I can’t wait to hear all about how you made this recipe uniquely yours. Happy cooking!
Easy Tuna Melt Wrap
A delightful evolution of the classic tuna melt, offering unparalleled convenience and flavor. This handheld wrap perfectly balances a creamy, savory tuna filling with gooey melted cheese, encased in a warm, crispy tortilla, ideal for a quick, satisfying meal any time of day.
Ingredients
-
2 (5-ounce) cans tuna, packed in olive oil or water, drained
-
1/2 cup mayonnaise
-
2 medium celery stalks, finely diced
-
1/4 cup finely diced red onion
-
2 tablespoons dill relish (or sweet relish)
-
1 teaspoon Dijon mustard
-
1 tablespoon fresh lemon juice
-
Salt and freshly ground black pepper, to taste
-
4 large (10-inch) flour tortillas
-
4 slices (or 1/2 cup shredded) melting cheese (e.g., sharp cheddar, Monterey Jack, Swiss)
-
2 tablespoons unsalted butter, melted, or olive oil
Instructions
-
Step 1
Thoroughly drain tuna, pressing out excess liquid. Transfer to a medium mixing bowl and gently flake with a fork, leaving some texture. -
Step 2
Add mayonnaise, finely diced celery, finely diced red onion, dill relish, Dijon mustard, and fresh lemon juice to the flaked tuna. -
Step 3
Season with approximately 1/2 teaspoon salt and 1/4 teaspoon freshly ground black pepper. Mix gently until all ingredients are thoroughly combined. Taste and adjust seasonings (salt, pepper, lemon juice, or relish) to your personal preference. -
Step 4
Lay out 4 large tortillas on a flat surface (warm if stiff). Divide and spread the tuna salad evenly in a rectangular shape slightly off-center on each tortilla, leaving about a 1-inch clear border. Place one slice of melting cheese (or 1/2 cup shredded) on top of the tuna salad. (Optional: add a handful of fresh spinach, arugula, a few thinly sliced tomatoes, or dill pickles on top of the cheese). -
Step 5
Carefully fold in the sides of the tortilla (about 1 to 1.5 inches) over the filling towards the center. Starting from the edge closest to you, tightly roll the tortilla away, tucking the filling in as you go, to create a compact, firm wrap with the seam on the bottom. -
Step 6
Place a large non-stick skillet or griddle over medium heat. Once heated, add 1 tablespoon of melted butter or olive oil, swirling to coat the bottom evenly. -
Step 7
Carefully place two assembled Tuna Melt Wraps into the hot pan, seam-side down. Cook for approximately 3-5 minutes on the first side until beautifully golden-brown and crispy. -
Step 8
Using a spatula, flip the wraps over and cook for another 3-5 minutes on the second side until golden-brown, crispy, and the cheese inside is wonderfully melted and gooey. -
Step 9
Remove cooked wraps from the pan and place on a cutting board to rest for 1-2 minutes. Slice each wrap in half diagonally and serve immediately. Repeat the cooking process for the remaining wraps, adding more butter or oil if needed.
Important Information
Nutrition Facts (Per Serving)
It is important to consider this information as approximate and not to use it as definitive health advice.
Allergy Information
Please check ingredients for potential allergens and consult a health professional if in doubt.
Leave a Comment