
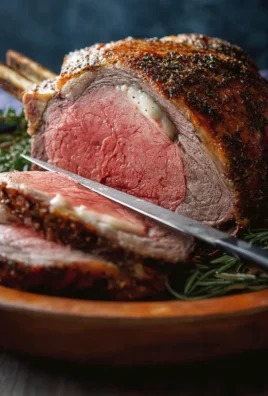
Bbq Chicken Quesadillas are, without a doubt, one of those culinary creations that instantly bring a smile to your face. The moment you hear the sizzle, smell the smoky aroma, and anticipate that perfect bite, you know you’re in for an unparalleled treat. While the humble quesadilla has deep roots in Mexican cuisine, serving as a versatile and comforting staple, the addition of vibrant barbecue chicken transforms it into something truly special – a delightful fusion of traditional comfort and bold American flavors. It’s a testament to how incredible culinary innovation can be when two beloved tastes unite, creating a dish that feels both familiar and excitingly new.
What makes these Bbq Chicken Quesadillas so universally adored? Perhaps it’s the irresistible contrast of textures: the golden-brown, slightly crisp tortilla giving way to a gooey, melted cheese core, perfectly enveloping tender, smoky, and tangy chicken. They offer the ultimate convenience for a busy weeknight meal yet are equally impressive when served as a vibrant appetizer at a casual gathering. I personally find them to be an absolute game-changer in my kitchen, satisfying cravings for something hearty, flavorful, and incredibly easy to prepare for friends and family.

Ingredients:
- For the BBQ Chicken Filling:
- 2 large boneless, skinless chicken breasts (about 1.5 lbs total) or 3 boneless, skinless chicken thighs
- 1 tablespoon olive oil (for cooking chicken)
- 1 teaspoon garlic powder
- 1 teaspoon onion powder
- ½ teaspoon smoked paprika
- ½ teaspoon salt, plus more to taste
- ¼ teaspoon black pepper, plus more to taste
- 1 cup your favorite BBQ sauce (I love a smoky, slightly sweet variety!)
- For the Quesadillas:
- 8 large (10-inch) flour tortillas – look for ones that are soft and pliable, perfect for folding.
- 2 cups shredded cheese – a blend of Monterey Jack and sharp cheddar is my absolute go-to for maximum melt and flavor. Pepper Jack is also fantastic if you like a little kick!
- ½ medium red onion, finely diced (for a touch of sharpness and color)
- ½ red bell pepper, finely diced (optional, but adds a lovely crunch and sweetness)
- 2 tablespoons fresh cilantro, chopped (for garnish and freshness, if you love it like I do)
- 1 tablespoon olive oil or unsalted butter (for cooking the quesadillas)
- For Serving (Optional, but highly recommended!):
- Sour cream or Greek yogurt
- Salsa (your favorite chunky or smooth variety)
- Guacamole or sliced avocado
- Extra BBQ sauce for dipping
- Lime wedges for a squeeze of brightness
Preparing the Irresistible BBQ Chicken Filling
Creating the perfect filling for your Bbq Chicken Quesadillas is where all the magic truly begins. This isn’t just about combining ingredients; it’s about building layers of flavor that will make every bite sing!
-
Prepare and Cook the Chicken:
I always start by patting my boneless, skinless chicken breasts (or thighs, if you prefer a richer flavor and texture) very dry with paper towels. This step is super important because it helps the seasoning adhere better and promotes a beautiful sear. Next, in a small bowl, I mix together my trusty seasonings: 1 teaspoon garlic powder, 1 teaspoon onion powder, ½ teaspoon smoked paprika, ½ teaspoon salt, and ¼ teaspoon black pepper. This blend provides a fantastic base flavor that complements the BBQ sauce perfectly. I generously rub this seasoning mixture all over both sides of the chicken.
Now, for cooking the chicken: I like to use a large skillet over medium-high heat. Add 1 tablespoon of olive oil to the skillet and let it get nice and shimmering. Carefully place the seasoned chicken breasts into the hot pan, making sure not to overcrowd it (cook in batches if necessary). Sear the chicken for about 5-7 minutes per side, until it’s beautifully golden brown and cooked through. To be absolutely certain it’s done, I use an instant-read thermometer to check the internal temperature, aiming for 165°F (74°C) in the thickest part. If your chicken pieces are particularly thick, you might need to reduce the heat slightly after the initial sear and cover the pan for a few minutes to allow them to cook through without burning the outside.
Alternative Cooking Methods for Chicken:
- Baking: If you prefer to bake, place the seasoned chicken on a baking sheet and bake at 400°F (200°C) for 20-25 minutes, or until cooked through.
- Grilling: For an extra smoky flavor, grill the chicken over medium heat for 6-8 minutes per side. This is especially wonderful for Bbq Chicken Quesadillas as it enhances the BBQ essence.
- Instant Pot: For the ultimate ease, combine the seasoned chicken with about ½ cup of chicken broth in your Instant Pot. Cook on high pressure for 10-12 minutes, then allow for a natural release for 5 minutes before quick-releasing any remaining pressure. This method results in incredibly tender chicken that practically shreds itself!
Once cooked, transfer the chicken to a cutting board and let it rest for about 5-10 minutes. This resting period is crucial; it allows the juices to redistribute, resulting in much more tender and flavorful chicken. Trust me on this one!
-
Shred the Chicken:
After the chicken has rested, it’s time to shred it. I find the easiest way to do this is by using two forks to pull the chicken apart, going against the grain. It shreds beautifully into tender strands. If you’re making a larger batch, a stand mixer fitted with the paddle attachment can be your best friend! Simply place the slightly cooled chicken in the mixer bowl and run it on low speed for about 30-60 seconds, and you’ll have perfectly shredded chicken in no time. This is a game-changer when preparing for a crowd or meal prepping!
-
Combine with BBQ Sauce:
Now for the star flavor! Transfer all that lovely shredded chicken into a mixing bowl. Pour in 1 cup of your favorite BBQ sauce. I usually opt for a smoky and slightly sweet sauce because it pairs wonderfully with the richness of the cheese and the other components of the Bbq Chicken Quesadillas. Stir everything together really well, making sure every strand of chicken is coated in that delicious, tangy, and sweet BBQ goodness. At this point, I like to taste it and adjust the seasoning if needed. Sometimes, I’ll add a tiny splash of apple cider vinegar for a bit more tang, or a pinch of brown sugar if I want a touch more sweetness to balance the BBQ sauce. This is your chance to customize it to your exact preference!
-
Sauté Aromatics (Optional, but highly recommended for depth):
While this step is optional, I highly recommend it for adding an extra layer of flavor and texture to your Bbq Chicken Quesadillas. In the same skillet you used for the chicken (no need to clean it, those browned bits add flavor!), add another teaspoon of olive oil if necessary. Add your finely diced ½ red onion and ½ red bell pepper (if using). Sauté over medium heat for 5-7 minutes, until the vegetables have softened and the onion is translucent. This brings out their natural sweetness and mellows their raw bite. Once softened, you can either stir these directly into the BBQ chicken mixture or keep them separate to layer into your quesadillas, which is what I usually do for better distribution.
Gathering Your Quesadilla Components
With our incredible BBQ chicken filling ready, it’s time to get everything else in order. Having all your ingredients prepped and laid out makes the assembly process a breeze, ensuring your Bbq Chicken Quesadillas come together smoothly and efficiently.
-
Shred the Cheese:
This is a small step that makes a big difference. While pre-shredded cheese is convenient, I always recommend shredding your own cheese from a block. Freshly shredded cheese melts much more smoothly and evenly because it lacks the anti-caking agents found in pre-shredded varieties. For these Bbq Chicken Quesadillas, I go for a blend of sharp cheddar and Monterey Jack for that perfect balance of tang and creamy meltiness. Aim for about 2 cups, which gives you plenty for layering and creating that satisfyingly cheesy pull.
-
Prep Other Goodies:
Finely chop your fresh cilantro, if you’re using it. This vibrant herb adds a burst of freshness that really brightens up the rich flavors of the BBQ chicken. Also, make sure your tortillas are ready to go. I prefer large 10-inch flour tortillas as they hold a generous amount of filling and fold beautifully. Take a moment to set up your “assembly line” on your counter: tortillas, shredded cheese, BBQ chicken mixture, sautéed onions/peppers, and cilantro. This organized approach helps immensely when you’re quickly building quesadillas for a hungry crowd!
The Art of Assembling and Cooking Your Bbq Chicken Quesadillas
This is where your vision truly comes to life! Assembling and cooking your Bbq Chicken Quesadillas is a rewarding process that results in a perfectly golden, crispy exterior and a gooey, flavorful interior.
-
Set Up Your Cooking Station:
Before you start assembling, get your pan ready. I use a large, heavy-bottomed non-stick skillet or a cast-iron griddle for the best results. Place it over medium-low to medium heat. The key here is not to rush the cooking; you want the quesadilla to heat through and the cheese to melt without burning the tortilla. Add about ½ tablespoon of olive oil or a pat of butter to the pan. Let it heat up until it’s shimmering or the butter is melted and slightly foamy. This ensures a beautifully golden and crispy tortilla.
-
Building the Perfect Quesadilla:
Carefully place one flour tortilla into the preheated pan. Immediately sprinkle about ¼ cup of your shredded cheese evenly over the entire surface of the tortilla. The cheese acts as a delicious “glue” that helps everything hold together. Next, spoon about ½ cup of your luscious BBQ chicken mixture onto half of the tortilla. I like to spread it out relatively thin, leaving a small border around the edge. If you sautéed onions and peppers, now is the time to scatter a tablespoon or two over the chicken, and a pinch of fresh cilantro if you like. Then, add another generous sprinkle of about ¼ cup of cheese on top of the chicken and veggies. Finally, carefully fold the empty half of the tortilla over the filling, creating a crescent shape. Gently press down with your spatula to help it seal and ensure good contact with the pan.
Tips for a Robust Quesadilla:
Don’t be tempted to overfill! While a generous filling is tempting, too much will make it hard to fold, challenging to flip, and can cause the ingredients to spill out, preventing even cooking. A good rule of thumb is to ensure you can easily fold the tortilla without it bursting at the seams.
-
Grilling to Golden Perfection:
Cook the quesadilla for about 3-5 minutes on the first side. You’re looking for a beautiful golden-brown color on the tortilla and for the cheese to be visibly melting and bubbling. The aroma in your kitchen will be absolutely incredible at this point!
The Flip:
When the first side is perfectly golden, it’s time for the flip. This can sometimes be the trickiest part, but with a wide, sturdy spatula and a little confidence, you’ll nail it. Gently slide your spatula completely under the folded quesadilla, lift, and swiftly flip it over to cook the second side. If you’re feeling a bit nervous, you can briefly slide it onto a plate, then invert the pan over the plate and carefully slide it back into the pan.
Cook for another 3-5 minutes on the second side, until that side is also golden brown and crispy, and all the cheese inside is wonderfully gooey and melted. Sometimes, I like to press down gently on the quesadilla with my spatula to ensure maximum crispiness and even melting. If you’re making multiple Bbq Chicken Quesadillas, you might need to wipe out the pan between batches and add a little more oil or butter to keep them cooking perfectly.
Troubleshooting for Perfect Quesadillas:
- Too Dark Too Fast? If your tortilla is browning too quickly before the cheese melts, your heat is too high. Reduce it to medium-low.
- Soggy Tortilla? This usually means not enough fat in the pan, or the pan wasn’t hot enough initially. Ensure a little oil or butter and let it heat up.
- Uneven Browning? Your pan might have hot spots. Try rotating the quesadilla every minute or two during cooking.
-
Resting and Slicing:
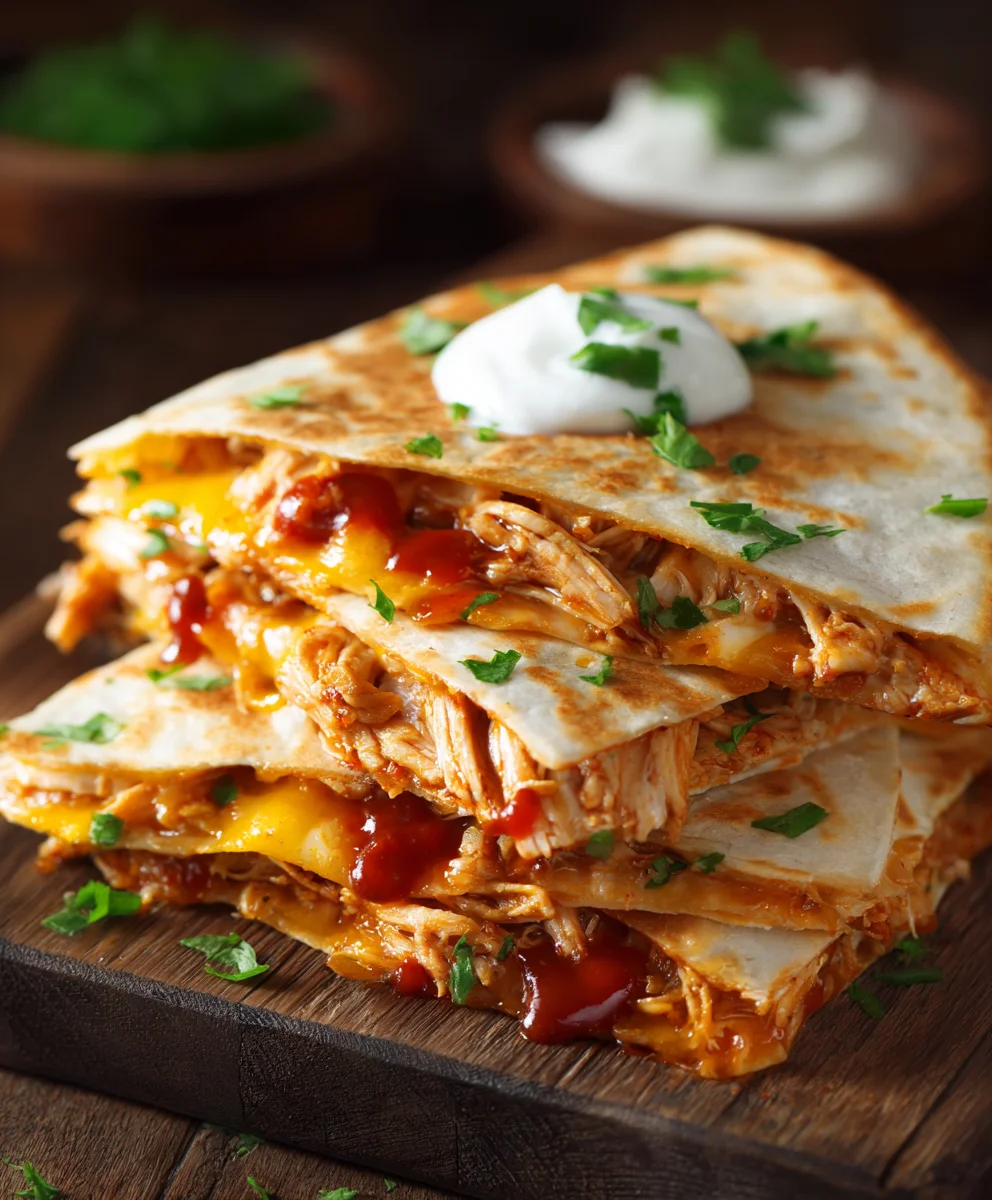
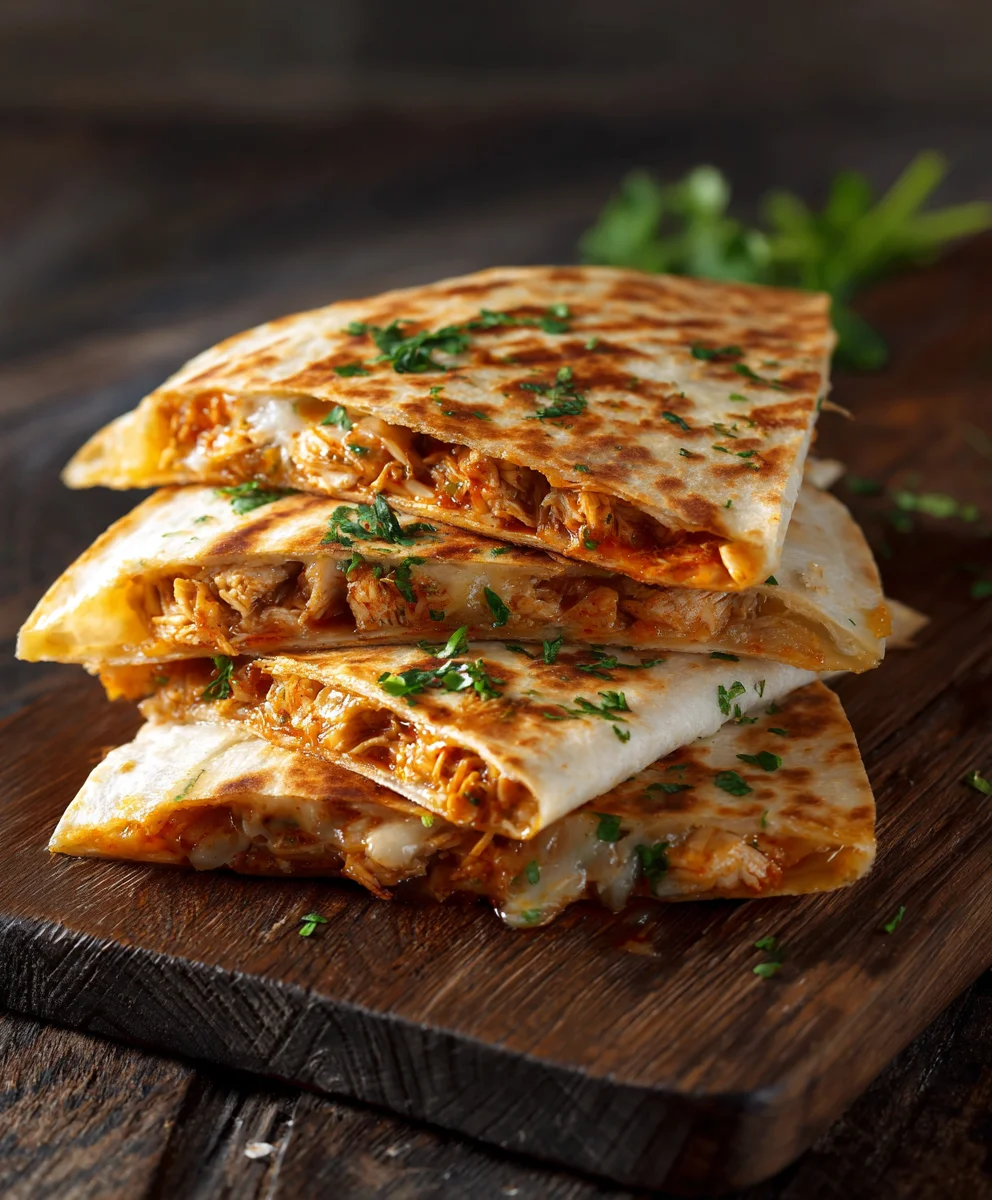
Once your quesadilla is golden, crispy, and oozing with cheesy BBQ chicken goodness, carefully transfer it from the pan to a cutting board. I know it’s tempting to dive right in, but allow it to rest for just a minute or two. This brief rest helps the cheese set slightly, making for cleaner cuts and preventing all the delicious filling from spilling out. Then, using a sharp knife or a pizza cutter, slice the quesadilla into wedges (my preferred method for easy dipping) or squares. Typically, I get 2-3 wedges from a folded 10-inch tortilla, or 4 squares if I fold it in half, then half again (using two tortillas).
Serving Your Delicious Bbq Chicken Quesadillas
The final step is arguably the most satisfying: presenting and enjoying your culinary creation! These Bbq Chicken Quesadillas are truly a crowd-pleaser and fantastic for any meal.
-
Presenting with Panache:
Arrange your beautifully sliced Bbq Chicken Quesadillas on a serving platter. I love to serve them immediately while they are still warm, as that’s when the cheese is at its peak meltiness and the tortilla is perfectly crispy. For extra flair and flavor, offer a variety of dipping sauces and garnishes. My go-to accompaniments include a generous dollop of cool sour cream (or Greek yogurt for a lighter option), a fresh chunky salsa, and creamy homemade guacamole or simply sliced avocado. A side of extra BBQ sauce is also a must for those who want an even deeper BBQ flavor. Finally, a sprinkle of fresh cilantro and a few lime wedges on the side add a vibrant touch and a zesty contrast that brightens every bite.
Make it a Meal:
These quesadillas are hearty enough to be a meal on their own, but they also pair wonderfully with a simple green salad with a light vinaigrette, or some black beans and rice. They are perfect for a casual weeknight dinner, a fun lunch, or even an appetizer for your next gathering. Everyone loves a good quesadilla, especially when it’s packed with flavor like these!
Storage and Reheating Tips:
If by some miracle you have any leftovers (it rarely happens in my house!), store them in an airtight container in the refrigerator for up to 3 days. To reheat, I highly recommend using a dry skillet over medium-low heat or a toaster oven. This will help restore some of that lovely crispiness to the tortilla. The microwave will heat it through, but you’ll lose the crispy texture, ending up with a softer quesadilla. A little crispiness makes all the difference for a fantastic leftover experience!
Conclusion:
And there you have it, my friends! We’ve reached the delicious conclusion of our culinary journey, and I genuinely hope you’re feeling as excited as I am about whipping up these incredible quesadillas. If there’s one recipe I could implore you to try this week, it would certainly be this one. Why is it an absolute must-try, you ask? Because it effortlessly blends the smoky, sweet, and tangy flavors of barbecue with the comforting richness of melted cheese and tender chicken, all wrapped up in a perfectly crisped tortilla. It’s a dish that sings with flavor, offering that quintessential savory satisfaction we all crave, but without demanding hours in the kitchen. These aren’t just any quesadillas; they are a vibrant celebration of flavor and ease.
I’ve found that this recipe truly shines for its versatility. It’s the perfect solution for a busy weeknight when you need something quick, delicious, and universally loved by everyone at the table. But don’t let its simplicity fool you; it’s equally impressive when you’re entertaining guests. Imagine the smiles when you bring out a platter of these golden-brown beauties, promising a delightful fusion of textures and tastes. The tender, saucy chicken, the gloriously gooey, melted cheese, and the slight crisp of the tortilla come together in every single bite to create an experience that is nothing short of sublime. Trust me, once you make them, they’ll quickly become a regular fixture in your meal rotation, a testament to their irresistible charm and straightforward preparation.
Serving Up Your Masterpiece: Perfectly Paired Sides & Dips
Now that you’ve crafted these culinary wonders, let’s talk about how to serve them to truly elevate the experience. While they are undeniably phenomenal on their own, a few well-chosen accompaniments can take your meal from great to absolutely unforgettable. Here are some of my favorite suggestions:
- Classic Dips: You can never go wrong with a dollop of cool, creamy sour cream or a vibrant, chunky guacamole. A fresh pico de gallo or your favorite store-bought salsa also adds a wonderful, zesty contrast. Don’t forget a drizzle of ranch dressing for that extra zing!
- Fresh Salads: To balance the richness, a crisp, refreshing side salad is always a winner. Think a simple green salad with a light vinaigrette, a colorful black bean and corn salad, or even a creamy coleslaw. These additions provide a delightful textural contrast and a burst of freshness.
- Hearty Sides: For a more substantial meal, consider serving your quesadillas alongside a generous helping of cilantro-lime rice, some quick-pickled red onions, or even some roasted sweet potato fries. These hearty sides complement the flavors beautifully and ensure everyone leaves the table feeling perfectly satisfied.
- Garnish Galore: A sprinkling of freshly chopped cilantro or green onions isn’t just for looks; it adds a fresh, aromatic finish that brightens every bite. A squeeze of lime juice right before serving also provides a fantastic acidic kick that cuts through the richness.
Endless Possibilities: Creative Variations to Explore
One of the things I adore most about this recipe is its incredible adaptability. Once you master the basic technique, the possibilities for customization are truly endless. Don’t be afraid to experiment and make these quesadillas truly your own. Here are a few ideas to spark your culinary imagination:
- Protein Swaps: Not a chicken fan, or simply want to switch things up? Try using leftover pulled pork, shredded beef, or even grilled shrimp for a seafood twist. For a fantastic vegetarian option, black beans, corn, and sautéed bell peppers make a hearty and flavorful filling.
- Cheese Please: While a classic Monterey Jack or cheddar blend works perfectly, consider experimenting with other cheeses. Pepper Jack adds a delightful spicy kick, smoked gouda offers a rich, nutty depth, and a mozzarella-provolone blend can give you an extra cheesy pull.
- Veggie Boost: Feel free to load up on your favorite vegetables! Sautéed onions, bell peppers (red, yellow, or green), corn, sliced jalapeños for heat, or even some caramelized onions can add extra layers of flavor and texture. Just be sure to cook them down a bit so they don’t release too much moisture.
- Sauce It Up: Don’t limit yourself to just one type of BBQ sauce. Try a spicy chipotle BBQ sauce for a fiery kick, a sweet honey BBQ for a milder taste, or even a homemade sauce if you’re feeling ambitious. A drizzle of creamy sriracha mayo or a tangy avocado crema inside the quesadilla can also add a wonderful new dimension.
- Spice Level: If you love heat, incorporate some chopped fresh jalapeños or a pinch of cayenne pepper into your chicken mixture. For a milder version, omit the spicy elements entirely.
- Low-Carb Option: For those watching their carb intake, you can still enjoy these amazing flavors! Try making “quesadillas” using large cheese crisps as your “tortilla” or serve the flavorful chicken and cheese mixture over a bed of crisp lettuce as a salad.
So, there you have it – a recipe that promises big flavor with minimal fuss, adaptable to any palate or occasion. I truly believe these Bbq Chicken Quesadillas will become a new favorite in your household, offering comfort, excitement, and pure deliciousness in every bite. I’ve shared my tips, my serving suggestions, and my favorite variations, and now it’s your turn! I absolutely cannot wait for you to try this recipe for yourselves.
Please, don’t keep your culinary triumphs a secret! Once you’ve made these quesadillas, come back and share your experience. Did you add a unique ingredient? Discover a new favorite side dish? I’d love to hear all about your personal twists and how they turned out in the comments section below. Your feedback and creativity inspire me and our entire community of food lovers. Let’s get cooking, enjoy every glorious bite, and share our delicious stories together!
Easy Bbq Chicken Quesadillas: Quick & Delicious Dinner!
These Bbq Chicken Quesadillas are a quick, delicious dinner combining traditional comfort with bold American flavors. Enjoy crisp tortillas, gooey melted cheese, and tender, smoky BBQ chicken for an easy weeknight meal or impressive appetizer.
Ingredients
-
2 large boneless, skinless chicken breasts (1.5 lbs)
-
1 tbsp olive oil
-
1 tsp garlic powder
-
1 tsp onion powder
-
½ tsp smoked paprika
-
½ tsp salt
-
¼ tsp black pepper
-
1 cup BBQ sauce
-
8 large (10-inch) flour tortillas
-
2 cups shredded cheese (Monterey Jack, cheddar, or Pepper Jack)
-
½ medium red onion, finely diced
-
½ red bell pepper, finely diced (optional)
-
2 tbsp fresh cilantro, chopped
-
1 tbsp olive oil or unsalted butter
-
For Serving (Optional): Sour cream or Greek yogurt
-
For Serving (Optional): Salsa
-
For Serving (Optional): Guacamole or sliced avocado
-
For Serving (Optional): Extra BBQ sauce
-
For Serving (Optional): Lime wedges
Instructions
-
Step 1
Pat chicken breasts dry. Mix 1 tsp garlic powder, 1 tsp onion powder, ½ tsp smoked paprika, ½ tsp salt, and ¼ tsp black pepper. Rub seasoning all over chicken. -
Step 2
Heat 1 tbsp olive oil in a large skillet over medium-high heat. Sear chicken 5-7 mins per side until golden brown and cooked through (165°F/74°C). (Alternatively, bake at 400°F/200°C for 20-25 mins, grill 6-8 mins per side, or Instant Pot high pressure 10-12 mins with ½ cup broth). Transfer chicken to a cutting board and rest 5-10 mins. -
Step 3
After resting, use two forks or a stand mixer to shred the cooked chicken into tender strands. -
Step 4
Transfer shredded chicken to a mixing bowl. Pour in 1 cup of BBQ sauce and stir until all chicken is coated. Taste and adjust seasoning if needed. -
Step 5
In the same skillet (add 1 tsp olive oil if needed), sauté ½ diced red onion and ½ diced red bell pepper (if using) over medium heat for 5-7 mins until softened. Stir into the BBQ chicken mixture or keep separate for layering. -
Step 6
Shred 2 cups of cheese and finely chop 2 tbsp fresh cilantro. Have your 8 large flour tortillas ready. -
Step 7
Heat a large, heavy-bottomed non-stick skillet or cast-iron griddle over medium-low to medium heat. Add about ½ tbsp olive oil or a pat of butter to the pan. -
Step 8
Place one tortilla in the preheated pan. Sprinkle ¼ cup shredded cheese over the entire surface. Spoon about ½ cup BBQ chicken mixture onto half of the tortilla. Scatter 1-2 tbsp sautéed onions/peppers (if separate) and a pinch of cilantro over the chicken. Add another ¼ cup cheese on top. Fold the empty half of the tortilla over the filling, pressing gently. -
Step 9
Cook the quesadilla for 3-5 minutes on the first side until golden-brown and cheese is visibly melting. Carefully flip and cook for another 3-5 minutes on the second side until also golden-brown and crispy. Repeat for remaining quesadillas, wiping the pan and adding more oil/butter between batches as needed. -
Step 10
Transfer cooked quesadilla to a cutting board. Let it rest for 1-2 minutes to allow cheese to set, then slice into wedges or squares using a sharp knife or pizza cutter. -
Step 11
Arrange sliced quesadillas on a platter and serve immediately while warm. Offer optional accompaniments such as sour cream or Greek yogurt, salsa, guacamole or sliced avocado, extra BBQ sauce, fresh cilantro, and lime wedges.
Important Information
Nutrition Facts (Per Serving)
It is important to consider this information as approximate and not to use it as definitive health advice.
Allergy Information
Please check ingredients for potential allergens and consult a health professional if in doubt.
Leave a Comment