
Easter Chocolate Chip Cookies are more than just a sweet treat; they are a delightful invitation to celebrate the vibrant spirit of spring and the joy of the holiday season. Imagine the comforting aroma of warm, freshly baked cookies wafting through your home, instantly creating an atmosphere of warmth and festivity. This isn’t merely a twist on a classic; it’s an elevated experience designed to bring smiles and create lasting memories around your Easter table.
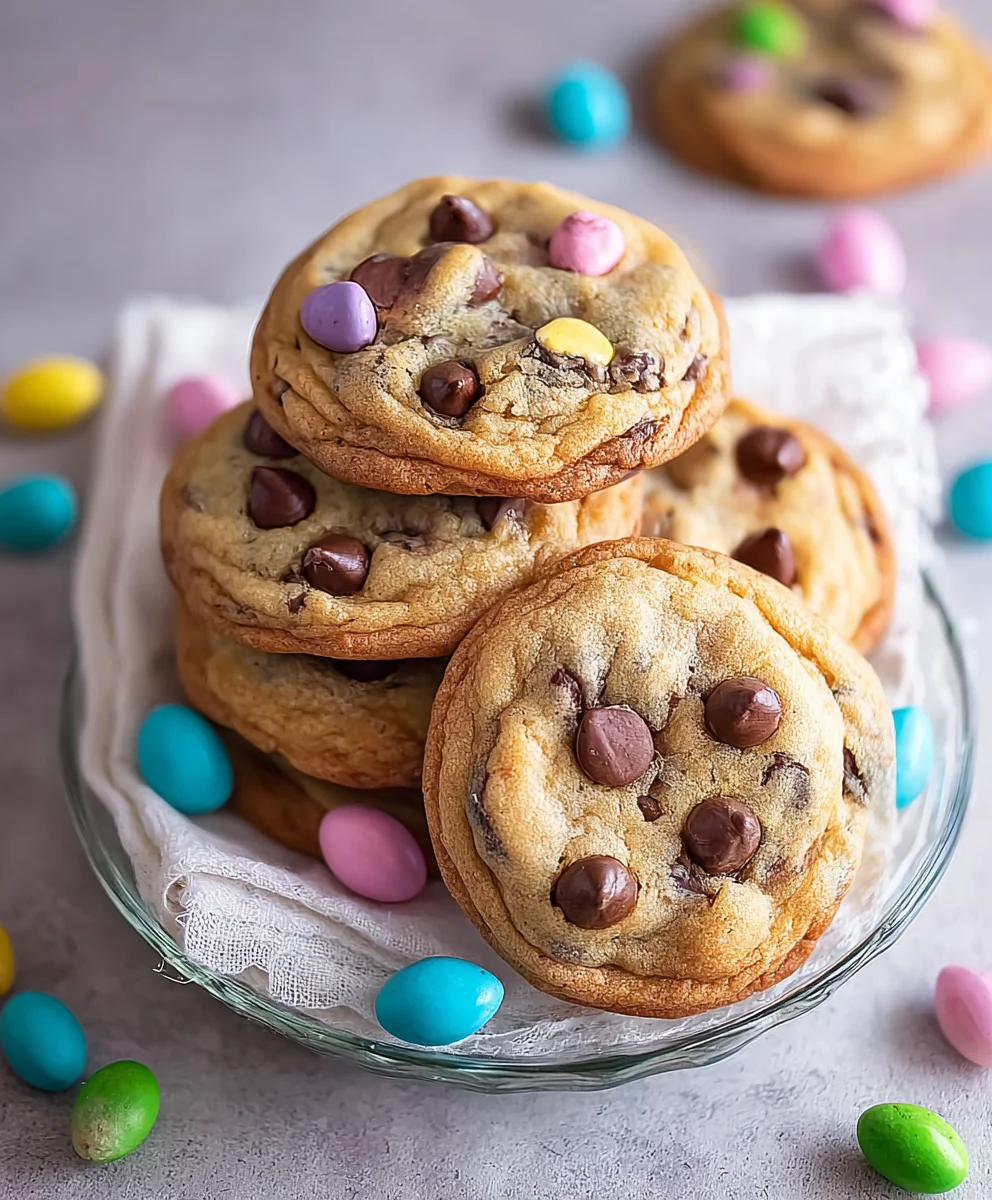
While the iconic chocolate chip cookie boasts a rich American history, evolving into a beloved staple in countless kitchens since its creation, transforming it for Easter adds a wonderfully whimsical and meaningful dimension. It’s about taking that universally adored comfort food and infusing it with the bright colors and celebratory mood of new beginnings. People absolutely adore this dish not only for its timeless appeal – that perfect balance of chewy texture, crisp edges, and melty chocolate goodness – but also for its incredible versatility. We enhance the classic recipe with pastel candies or festive sprinkles, making these particular Easter Chocolate Chip Cookies visually stunning and perfectly aligned with the holiday’s joyous theme. They are wonderfully easy to prepare, making them an ideal, stress-free baking project for busy families looking to add a homemade touch to their Easter feast, guaranteeing a crowd-pleasing dessert that everyone will eagerly reach for.

Ingredients:
- For the Dry Mix:
- 2 ½ cups (300g) all-purpose flour
- 1 teaspoon baking soda
- ½ teaspoon salt (fine sea salt works beautifully here)
- For the Wet Mix:
- 1 cup (2 sticks or 226g) unsalted butter, softened to room temperature
- ¾ cup (150g) granulated sugar
- 1 cup (200g) packed light brown sugar
- 2 large eggs, at room temperature
- 2 teaspoons pure vanilla extract
- For the Festive Add-Ins:
- 1 ½ cups (about 250g) semi-sweet chocolate chips (or a mix of milk and semi-sweet for varied sweetness)
- ½ cup (about 85g) white chocolate chips or chopped white chocolate
- ½ cup (about 75g) pastel-colored M&Ms or other Easter-themed candy-coated chocolates
- ¼ cup festive Easter sprinkles (optional, but highly recommended for that extra touch of joy!)
Preparation and Preheating: The First Steps to Perfect Easter Chocolate Chip Cookies
- Before you even think about mixing, let’s get organized! Pull out all your ingredients. It’s truly amazing what a difference room-temperature butter and eggs make in the final texture and consistency of your Easter Chocolate Chip Cookies. I usually set mine out on the counter about an hour before I plan to bake. If you’re short on time, you can cut the butter into smaller pieces to help it soften faster, and for eggs, place them in a bowl of warm (not hot!) water for about 5-10 minutes. This little trick ensures everything emulsifies beautifully, giving your cookies that wonderfully uniform and chewy texture we all crave.
- Next, let’s get our workspace ready and the oven heating. Preheat your oven to 375°F (190°C). This might seem like an obvious step, but a properly preheated oven is crucial for even baking. If your oven isn’t at the correct temperature, your cookies might spread too much, or not spread enough, leading to inconsistent results. While the oven warms up, line two large baking sheets with parchment paper or silicone baking mats. I highly recommend parchment paper because it prevents sticking, promotes even browning, and makes cleanup a breeze. Plus, it makes transferring the delicate baked cookies much easier.
- Now, let’s tackle the dry ingredients. In a medium-sized bowl, whisk together your 2 ½ cups of all-purpose flour, 1 teaspoon of baking soda, and ½ teaspoon of salt. Make sure to whisk them really well! The goal here is not just to combine them, but to aerate the flour and ensure that the baking soda and salt are evenly distributed throughout. This is incredibly important because the baking soda is what gives your Easter Chocolate Chip Cookies their lift and chewiness, and if it’s clumped together, you could end up with a metallic taste or unevenly risen cookies. A good whisking usually takes about 30 seconds to a minute until everything looks perfectly uniform. Set this bowl aside for now.
Crafting the Ultimate Easter Chocolate Chip Cookie Dough
- Time to bring out your stand mixer, or if you prefer a good arm workout, a large bowl and a hand mixer will do the trick! In your large mixing bowl, combine the softened unsalted butter with the granulated sugar and the packed light brown sugar. Make sure your butter is truly soft – it should yield easily when gently pressed, but not be melted or greasy.
- With your mixer on medium speed, cream the butter and sugars together. This step is absolutely vital for achieving that classic chewy cookie texture. You want to beat them until the mixture becomes light, fluffy, and significantly paler in color. This process incorporates air into the butter, which will later help the cookies rise and achieve a tender crumb. Scrape down the sides of the bowl frequently with a rubber spatula to ensure everything is evenly combined. This creaming process usually takes about 3 to 5 minutes. Don’t rush this step; it’s the foundation of your delicious Easter Chocolate Chip Cookies!
- Once the butter and sugar mixture is beautifully light and fluffy, it’s time to add the eggs. Add them one at a time, beating well after each addition. This allows each egg to fully incorporate into the mixture before the next one is added, preventing the batter from curdling. Beat each egg for about 30 seconds to a minute until it’s completely blended and the mixture looks smooth again. After both eggs are incorporated, pour in the 2 teaspoons of pure vanilla extract. Beat for another 30 seconds to ensure the vanilla is thoroughly distributed, filling your kitchen with its wonderful aroma.
- Now, remember that bowl of dry ingredients we prepared earlier? It’s time to slowly add it to the wet mixture. With your mixer set to low speed, gradually add the dry ingredients to the wet ingredients, a third at a time. Mix only until just combined. This is a crucial point: do not overmix! Overmixing develops the gluten in the flour too much, which can lead to tough, dense cookies instead of the soft, chewy Easter Chocolate Chip Cookies we’re aiming for. As soon as you see no streaks of dry flour, stop the mixer. A few small pockets of flour are okay; they’ll disappear in the next step.
- Finally, for the stars of our show – the festive add-ins! Gently fold in the 1 ½ cups of semi-sweet chocolate chips, the ½ cup of white chocolate chips, the ½ cup of pastel-colored M&Ms, and if you’re using them, the ¼ cup of festive Easter sprinkles. Use your rubber spatula for this step. Folding ensures that all these delightful morsels are evenly distributed throughout the dough without overmixing. Be gentle but thorough until everything is beautifully dispersed, making every bite of your Easter Chocolate Chip Cookies a delightful surprise.
The All-Important Dough Chilling (Don’t Skip This!)
- This next step is one that many home bakers are tempted to skip, but I promise you, it is absolutely essential for truly stellar cookies: chilling your cookie dough. Once your dough is mixed, cover the bowl tightly with plastic wrap and refrigerate it for at least 30 minutes, or even up to 2-3 hours. For the absolute best results, I often chill mine for at least an hour.
- Why chill the dough, you ask? There are several fantastic reasons! First, chilling allows the fats in the butter to re-solidify. This means your cookies will spread less in the oven, leading to thicker, chewier cookies. If you bake the dough immediately, the warm butter will cause the cookies to spread too rapidly, resulting in thin, crispy, and often greasy cookies. Second, chilling allows the flavors to meld and deepen. The flour has time to fully hydrate, leading to a more complex and satisfying taste profile. Third, it simply makes the dough easier to handle. Scoopable but firm dough is much less sticky and holds its shape better. Trust me, this patient step is worth every minute for your Easter Chocolate Chip Cookies.
- If you’re making these ahead of time, you can even chill the dough for up to 2-3 days. Just make sure it’s very well covered in the fridge to prevent it from drying out or absorbing any unwanted fridge odors. When you’re ready to bake after a longer chill, you might need to let the dough sit at room temperature for 10-15 minutes to make it easier to scoop.
Baking Your Beautiful Easter Chocolate Chip Cookies
- Once your dough has had a good chill and your oven is at the correct 375°F (190°C), it’s time to form our cookie dough balls. Using a 1.5 to 2-tablespoon cookie scoop (or just a regular spoon, shaping them with your hands), scoop rounded balls of dough onto your prepared baking sheets. I find that a cookie scoop ensures all your Easter Chocolate Chip Cookies are roughly the same size, which helps them bake evenly. Aim for about 12 cookies per standard baking sheet, leaving about 2 inches of space between each dough ball. This allows for proper air circulation and prevents them from melding into one giant cookie.
- For an extra touch of visual appeal, especially fitting for Easter, you can gently press a few extra chocolate chips, M&Ms, or sprinkles onto the top of each dough ball before baking. This isn’t just for looks; it ensures that your cookies look absolutely gorgeous straight out of the oven, with all those festive colors prominently displayed. It’s a little trick that makes a big difference in presentation!
- Place one baking sheet at a time into your preheated oven. Bake for 9 to 12 minutes. Now, baking times can vary significantly depending on your oven, so keep a close eye on them. You’re looking for edges that are set and golden brown, but the centers should still look slightly soft and gooey. If you prefer a chewier cookie, pull them out when the centers are still quite pale. If you like a crispier edge, bake them for the full 12 minutes or until more golden all over. The key is to not overbake them, or you’ll lose that wonderful soft, chewy center.
- Once they’re done, carefully remove the baking sheet from the oven. Let the cookies cool on the hot baking sheet for about 5 minutes. This step is important because cookies continue to cook slightly from the residual heat of the pan, allowing them to set up properly without becoming overly dry. If you try to move them too soon, they might fall apart as they’re still quite delicate and soft.
Cooling, Decorating, and Storing Your Festive Treats
- After the initial 5-minute cool-down period on the baking sheet, use a sturdy spatula to carefully transfer the warm Easter Chocolate Chip Cookies to a wire cooling rack. Allow them to cool completely on the rack. Cooling on a wire rack allows air to circulate all around the cookies, preventing the bottoms from becoming soggy and ensuring an even texture throughout. It’s tough to resist, but letting them cool properly ensures the best possible eating experience.
- Optional Drizzle Decoration: If you want to elevate the festive look even further, consider a simple white chocolate drizzle! Once your cookies are fully cooled, melt about ½ cup of white chocolate chips in a microwave-safe bowl in 30-second intervals, stirring after each, until smooth. Alternatively, use a double boiler. Drizzle the melted white chocolate over the cooled cookies using a spoon, or transfer the chocolate to a small piping bag (or a Ziploc bag with a tiny corner snipped off) for more control. While the drizzle is still wet, you can scatter a few more Easter sprinkles over the top for an extra pop of color and texture. Let the chocolate set completely before stacking or storing.
- Once completely cooled, your beautiful Easter Chocolate Chip Cookies are ready to be enjoyed! They are best eaten within 2-3 days of baking to fully appreciate their fresh, soft, and chewy texture.
- For Storage: Store the cooled cookies in an airtight container at room temperature. To keep them extra soft, you can place a slice of bread in the container with the cookies; the cookies will absorb moisture from the bread, keeping them wonderfully chewy. Just be sure to replace the bread slice every day or two.
- If you wish to make a large batch or prepare them for later, these cookies freeze wonderfully! You can freeze the baked cookies in an airtight container or freezer bag for up to 3 months. Thaw them at room temperature, or for a warm, fresh-from-the-oven experience, pop them in a preheated oven at 300°F (150°C) for a few minutes until warmed through. You can also freeze the unbaked dough balls: scoop them onto a parchment-lined baking sheet, freeze until solid, then transfer to a freezer bag. When ready to bake, place them directly from the freezer onto a prepared baking sheet and add an extra 2-4 minutes to the baking time.
- However you choose to enjoy them, these Easter Chocolate Chip Cookies are sure to be a delightful and festive treat that brings a smile to everyone’s face this holiday season. Happy baking, my friends!

Conclusion:
I truly believe that after trying this recipe, you’ll agree it’s an absolute game-changer in your kitchen. We’re not just talking about any cookie here; we’re talking about that perfect harmony of gloriously crisp, golden-brown edges, a wonderfully thick and chewy center, and an abundance of rich, gooey chocolate chips in every single bite. The aroma alone, as they bake to perfection, is enough to transport you to a state of pure culinary bliss, filling your entire home with an irresistible warmth that signals something truly special is coming out of the oven. These aren’t merely cookies; they’re little parcels of joy, moments waiting to happen, and a guaranteed crowd-pleaser for any occasion or just a cozy afternoon treat.
Why This Recipe Is an Unmissable Culinary Experience:
What truly sets my recipe apart is its consistent ability to deliver cookie perfection, batch after glorious batch. I’ve meticulously tweaked and tested countless variations to ensure that every single cookie comes out with that ideal balance of textures and flavors. You’ll discover a delightful chewiness that isn’t too soft or crumbly, a subtle crispness around the edges that adds an exciting textural contrast, and pockets of premium, melty chocolate that burst with indulgent flavor in every single mouthful. It’s a symphony for your taste buds, truly. The beauty lies in the simplicity of the ingredients, combined with my carefully refined, foolproof method, which means you’re just a few straightforward steps away from baking professional-quality, utterly delicious cookies right in the comfort of your own kitchen. They’re incredibly satisfying to make, watching them transform into golden discs of happiness, and even more satisfying to eat, quickly becoming a cherished staple in your baking repertoire. There’s a certain magic that happens when simple ingredients come together to create something so universally loved, and this recipe captures that magic effortlessly.
Serving Suggestions & Creative Twists to Elevate Your Cookies:
While these cookies are undeniably exquisite straight out of the oven, still warm and slightly gooey, their versatility allows for so many delightful serving possibilities and creative variations. Imagine them served alongside a tall, frosty glass of milk for the ultimate nostalgic treat, or perhaps paired with a steaming mug of coffee or tea for a sophisticated afternoon pick-me-up. For a truly decadent dessert experience, try crumbling a warm cookie over a scoop of your favorite vanilla bean ice cream, letting the residual heat slightly melt the ice cream for a delightful contrast. You could even get adventurous and use them to create incredible ice cream sandwiches by gently pressing two cookies around a generous scoop of ice cream – trust me, it’s a game-changer! These cookies also make for an incredibly thoughtful and appreciated homemade gift when wrapped in pretty parchment paper and tied with a ribbon.
For those looking to infuse a bit more seasonal charm, especially as we approach springtime festivities, these make for absolutely perfect Easter Chocolate Chip Cookies. You can easily adapt them by gently pressing some pastel-colored mini chocolate eggs into the tops of the cookie dough balls before baking, or by scattering some vibrant pastel sprinkles over the warm cookies immediately after they come out of the oven for a beautiful, festive finish. Another lovely variation for the season could involve adding a touch of orange or lemon zest to the dough, which brightens the flavor profile beautifully and complements the rich chocolate chips. Don’t shy away from experimenting with different types of chocolate, either; a mix of dark, milk, and white chocolate chips can add wonderful depth and visual appeal. You could also introduce a handful of chopped toasted nuts, like pecans or walnuts, for an added layer of texture and nutty flavor, or a sprinkle of flaky sea salt on top before baking to enhance the chocolate’s sweetness. The possibilities are truly endless, allowing you to personalize your batch to perfectly suit your mood or the occasion.
So, what are you waiting for, my fellow baking enthusiasts? Clear your schedule, gather your ingredients, and dive into the incredibly rewarding and heartwarming process of baking these incredible cookies. I promise you, with every fiber of my being, that you won’t regret it. The sheer joy of creating something so utterly delicious and comforting from scratch is an unparalleled feeling, and the payoff in pure, unadulterated taste is absolutely phenomenal. This recipe isn’t just about following steps; it’s about embracing the therapeutic art of baking and sharing that warmth with those you care about.
Once you’ve experienced the magic of these cookies for yourself, I would absolutely, truly love to hear about it! Please don’t hesitate to share your baking journey with me and our wonderful community of home bakers. Did you try a fun new variation? What was your favorite part of the process, or the moment you bit into that first warm, chewy cookie? Your feedback, your photos, and your stories truly inspire me and encourage others to get into their kitchens and create something wonderful. Baking is an act of love, a delicious form of self-expression, and these cookies are a perfect, scrumptious expression of that very sentiment. They’re more than just a dessert; they’re an experience, a memory in the making, and an invitation to spread a little bit of happiness. Go forth and bake, my friends – may your kitchens be filled with warmth and your plates with these irresistible treats!
Easter Chocolate Chip Cookies
These delightful Easter Chocolate Chip Cookies are a festive twist on a classic, infused with vibrant spring colors and designed to bring joy to your holiday table. Easy to prepare and visually stunning, they’re a crowd-pleasing treat for all ages.
Ingredients
-
2 ½ cups all-purpose flour
-
1 tsp baking soda
-
½ tsp salt (fine sea salt)
-
1 cup unsalted butter, softened
-
¾ cup granulated sugar
-
1 cup light brown sugar, packed
-
2 large eggs, room temperature
-
2 tsp pure vanilla extract
-
1 ½ cups semi-sweet chocolate chips
-
½ cup white chocolate chips
-
½ cup pastel-colored M&Ms or Easter-themed candy-coated chocolates
-
¼ cup festive Easter sprinkles (optional)
-
½ cup white chocolate chips (for optional drizzle)
Instructions
-
Step 1
Preheat oven to 375°F (190°C). Line two large baking sheets with parchment paper. In a medium bowl, whisk together flour, baking soda, and salt. Set aside. -
Step 2
In a large mixing bowl (or stand mixer), cream softened unsalted butter with granulated sugar and packed light brown sugar on medium speed until light, fluffy, and pale (3-5 minutes). -
Step 3
Add eggs one at a time, beating well after each. Stir in vanilla extract until thoroughly combined. -
Step 4
Gradually add the dry ingredient mix to the wet mixture on low speed, mixing only until just combined. Do not overmix. -
Step 5
Gently fold in semi-sweet chocolate chips, white chocolate chips, pastel M&Ms, and optional Easter sprinkles with a rubber spatula until evenly dispersed. -
Step 6
Cover the bowl tightly with plastic wrap and refrigerate the dough for at least 30 minutes, or up to 2-3 hours (or 2-3 days for make-ahead). -
Step 7
Scoop rounded balls of dough (1.5 to 2 tablespoons each) onto prepared baking sheets, leaving 2 inches between each. Optionally, press extra add-ins on top for presentation. Bake one sheet at a time for 9 to 12 minutes, until edges are golden and centers are slightly soft. -
Step 8
Remove from oven and let cookies cool on the baking sheet for 5 minutes. Transfer to a wire cooling rack to cool completely. -
Step 9
For an optional drizzle, melt ½ cup white chocolate chips and drizzle over cooled cookies, then scatter more sprinkles. Let set. Store cooled cookies in an airtight container at room temperature for 2-3 days. For longer storage, freeze baked cookies or unbaked dough balls for up to 3 months.
Important Information
Nutrition Facts (Per Serving)
It is important to consider this information as approximate and not to use it as definitive health advice.
Allergy Information
Please check ingredients for potential allergens and consult a health professional if in doubt.


Leave a Comment