
Easter Bunny and Chick Cupcakes are the undisputed stars of any springtime celebration, bringin extractg joy and deliciousness to tables everywhere. There’s a reason why these adorable treats are so beloved: they perfectly capture the playful spirit of Easter with their whimsical designs and delightful flavgin extract. Imagine the smiles on children’s faces as they discover a fluffy bunny or a cheerful chick peeking out from their wrapper! What truly makes these Easter Bunny and Chick Cupcakes special is the perfect marriage of a moist, flavorful cake base – whether it’s a classic vanilla bean or a rich chocolate – and a creamy, dreamy frosting that serves as the canvas for our edible artistry. They are not just desserts; they are edible works of art that make memories and add an extra layer of magic to your Easter festivities.
Why You’ll Love These Treats
These aren’t your average store-bought cupcakes. We’re talking about homemade perfection, crafted with love and guaranteed to impress. The process of decorating them is almost as fun as eating them, making it a fantastic activity to share with family and friends. Get ready to unleash your inner decorator and create a batch of Easter Bunny and Chick Cupcakes that are as delicious as they are visually stunning. They are the ideal centerpiece for your Easter brunch or a sweet surprise to tuck into Easter baskets.

Ingredients:
- 1 recipe Vanilla Cupcakes (or your favorite cake mix)
- 1 recipe Fluffy Vanilla Frosting (or store-bought frosting)
- Yellow and white sprinkles
- Large and mini marshmallows
- Pink colored sanding sugar
- Black decorator icing
- Jelly beans (pink for bunny noses)
- Orange colored gum or M&Ms (for chick beaks)
- Yellow food coloring (for chick frosting)
Preparing Your Cupcakes
Baking the Cupcakes
First things first, let’s get our cupcake bases ready! Whether you’re using a trusty homemade vanilla cupcake recipe or a convenient store-bought cake mix, follow the package directions precisely for baking. Ensure you’re filling your cupcake liners about two-thirds full to allow for a nice, even rise without overflowing. Once baked, the key to perfect frosting is letting them cool completely on a wire rack. This prevents the frosting from melting into a greasy mess and ensures a smooth, beautiful finish. Patience here is a virtue that will pay off in delicious results!
Making the Fluffy Vanilla Frosting
While your cupcakes are cooling, it’s time to whip up the star of our decorating show: the fluffy vanilla frosting. If you’re making your own, follow your favorite recipe. The goal is a frosting that’s light, airy, and easy to spread. If you’re opting for store-bought, simply open the container and give it a good stir to loosen it up. For our chick cupcakes, we’ll need to tint a portion of this frosting a cheerful yellow. Add yellow food coloring a little at a time, mixing thoroughly after each addition until you achieve a vibrant, sunny hue that reminds you of springtime. Set aside the plain white frosting for our bunnies.
Decorating the Easter Bunny Cupcakes
Creating the Bunny Ears and Faces
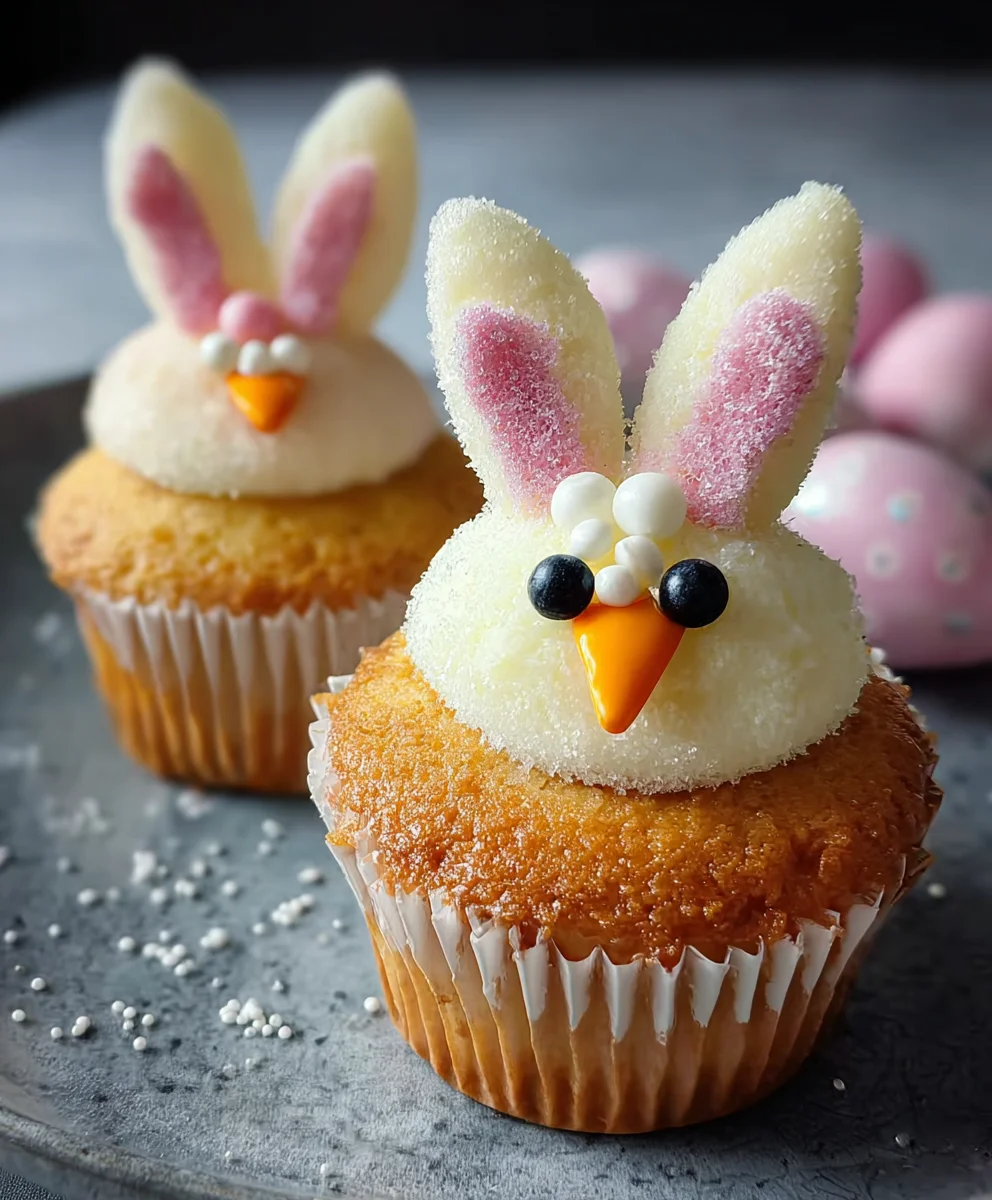
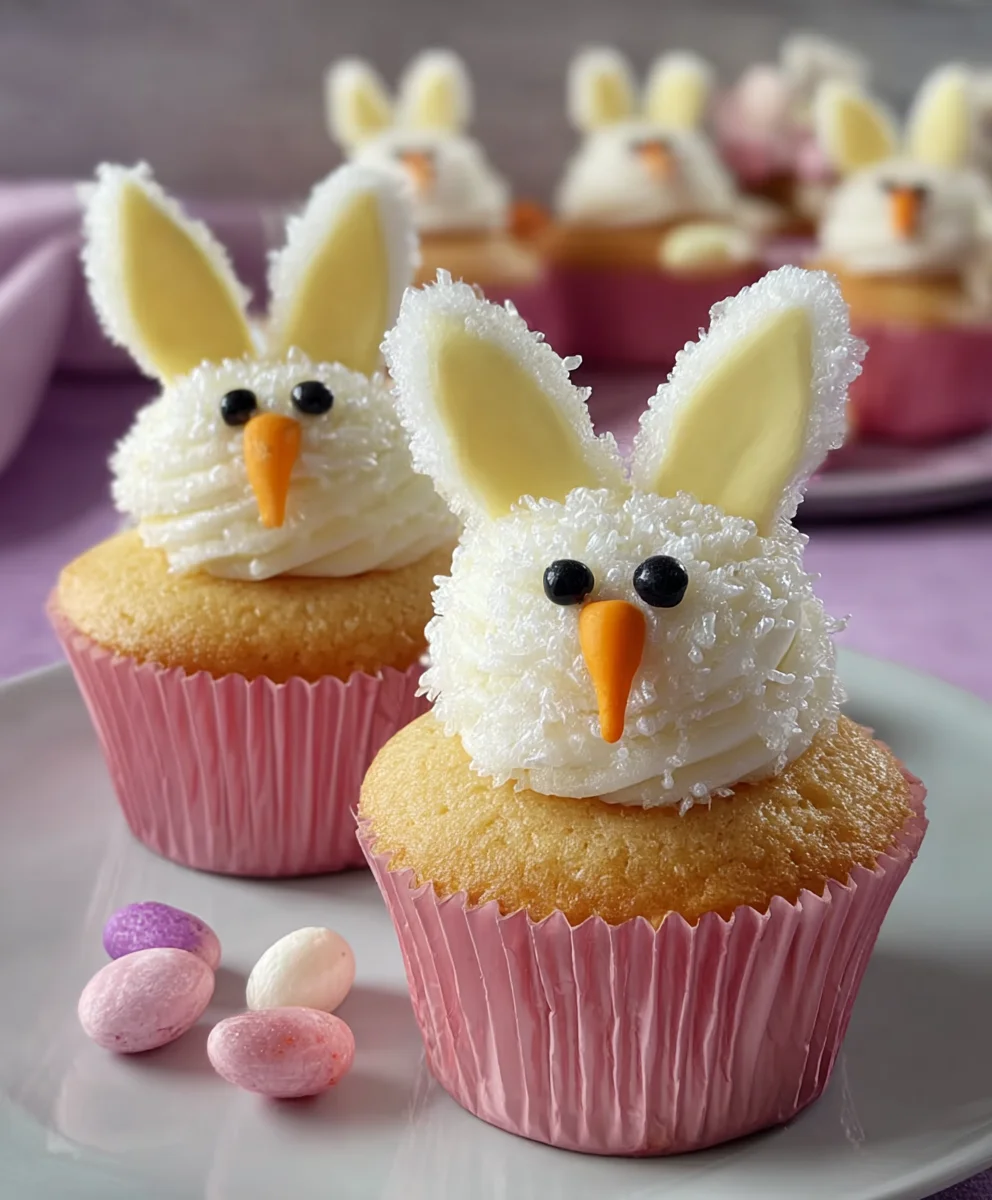
Now for the fun part – transforming these cupcakes into adorable Easter characters! Let’s start with the bunnies. Take a large marshmallow and carefully slice it in half lengthwise. These will be the bunny ears. Frost the top of your cooled vanilla cupcakes generously with the plain white frosting. Gently press the cut side of the marshmallow halves into the frosting on the top edge of the cupcake, so they stand up like ears. Next, using your pink sanding sugar, lightly dip the tip of each marshmallow “ear” into the sugar to create a delicate pink inner ear. For the bunny’s face, use the black decorator icing to draw two small dots for eyes and a tiny upside-down triangle shape for the nose, just above where the ears meet. Finally, place a pink jelly bean right in the center of the face to act as the sweet bunny nose. These little details make all the difference!
Adding Bunny Details
To enhance our bunny cupcakes, we can add a few more touches. For a subtle whisker effect, you can very carefully draw two or three short, fine lines extending from the sides of the jelly bean nose with your black decorator icing. Alternatively, you could use very thin strands of white licorice if you have them on hand and prefer a more textural element, though the icing offers a cleaner look. The goal is to create a whimsical, charming expression. Don’t worry if they aren’t perfectly symmetrical; each bunny will have its own unique personality, which is part of their charm! Ensure the black icing has a moment to set slightly before moving the cupcakes, to avoid smudgin extractg.
Decorating the Easter Chick Cupcakes
Crafting the Chick Bodies and Beaks
Time to bring on the sunshine with our chick cupcakes! Take your remaining cooled vanilla cupcakes. Generously frost the tops with the vibrant yellow frosting you prepared earlier. Now, for the beaks! Take an orange gumdrop or an orange M&M and gently press it into the center of the frosted cupcake, slightly angled downwards. This creates a perfect little beak for your cheerful chick. The bright orange against the yellow frosting is incredibly eye-catching and screams Easter! You can adjust the position slightly to give each chick a slightly different expression – perhaps one looking a little more peppy or one appearing a bit more bashful.
Adding Chick Eyes and Details
To complete our adorable chicks, we need eyes. Take two mini marshmallows and place them on the yellow frosting, spaced apart, to create the base for the eyes. Then, using your black decorator icing, carefully place a small dot of icing onto each mini marshmallow to create the pupil. The mini marshmallows give the eyes a lovely puffy effect. If you prefer a simpler look, you can also draw two small black dots directly onto the yellow frosting for the eyes, but the marshmallow adds a delightful dimension. To give our chicks a bit more pizzazz, scatter some yellow and white sprinkles around the edges of the cupcake, as if they’ve just hatched into a nest of sunshine. This adds texture and a festive sparkle that’s perfect for an Easter celebration. Make sure your icing is still a little soft when adding the sprinkles so they adhere well.
Conclusion:
There you have it! Crafting these adorable Easter Bunny and Chick Cupcakes is a delightful way to bring some festive cheer to your Easter celebrations. Whether you’re a seasoned baker or just starting out, this recipe offers a fun and rewarding experience. The combination of moist, fluffy cupcakes and charming decorations makes them a guaranteed hit with both kids and adults. Don’t be afraid to get creative and personalize them to your heart’s content!
These cupcakes are perfect for Easter brunch, classroom parties, or simply as a sweet treat to brighten your day. For serving, consider pairing them with a glass of milk or a light spring tea. They also make wonderful edible gifts! Feel free to experiment with different frosting colors or add edible glitter for an extra sparkle.
Frequently Asked Questions:
Can I make the cupcake batter ahead of time?
Yes, you can prepare the cupcake batter up to 24 hours in advance. Cover it tightly and refrigerate. When ready to bake, allow the batter to come to room temperature for about 30 minutes before proceeding with the recipe. This ensures they bake evenly and have the best texture.
What other decorations can I use for my Easter Bunny and Chick Cupcakes?
The possibilities are endless! You can use small candy eggs, jelly beans, sprinkles in pastel colors, or even edible flowers for a more sophisticated look. For the bunny ears, you can also use fondant or even cleverly shaped pieces of white chocolate. For the chicks, tiny orange candies can make perfect beaks!
Easter Bunny Chick Cupcakes
A cute and easy recipe for making adorable Easter Bunny and Chick cupcakes, perfect for a festive celebration.
Ingredients
-
1 recipe Vanilla Cupcakes (or your favorite cake mix)
-
1 recipe Fluffy Vanilla Frosting (or store-bought frosting)
-
Yellow and white sprinkles
-
Large and mini marshmallows
-
Pink colored sanding sugar
-
Black decorator icing
-
Jelly beans (pink for bunny noses)
-
Orange colored gum or M&Ms (for chick beaks)
-
Yellow food coloring (for chick frosting)
Instructions
-
Step 1
Bake your vanilla cupcakes according to recipe or cake mix directions, filling liners two-thirds full. Let them cool completely on a wire rack. -
Step 2
Prepare your fluffy vanilla frosting. Tint a portion of it yellow for the chicks using yellow food coloring, adding it gradually until a vibrant hue is achieved. Set aside plain white frosting for the bunnies. -
Step 3
For bunny cupcakes: slice large marshmallows in half lengthwise for ears. Frost cupcakes with white frosting, then press marshmallow halves into the top edge. Dip the cut tip of each ear into pink sanding sugar. Use black decorator icing to draw eyes and a nose shape, then place a pink jelly bean as the nose. -
Step 4
Add bunny details: carefully draw thin lines with black decorator icing from the sides of the jelly bean nose for whiskers, or use thin white licorice strands. Allow icing to set slightly before moving. -
Step 5
For chick cupcakes: frost cooled cupcakes generously with yellow frosting. Gently press an orange gumdrop or M&M into the center of each cupcake for a beak. -
Step 6
Add chick eyes and details: place two mini marshmallows on the yellow frosting for eyes, then add a small dot of black decorator icing onto each marshmallow for pupils. Scatter yellow and white sprinkles around the edges for a festive touch.
Important Information
Nutrition Facts (Per Serving)
It is important to consider this information as approximate and not to use it as definitive health advice.
Allergy Information
Please check ingredients for potential allergens and consult a health professional if in doubt.

Leave a Comment