
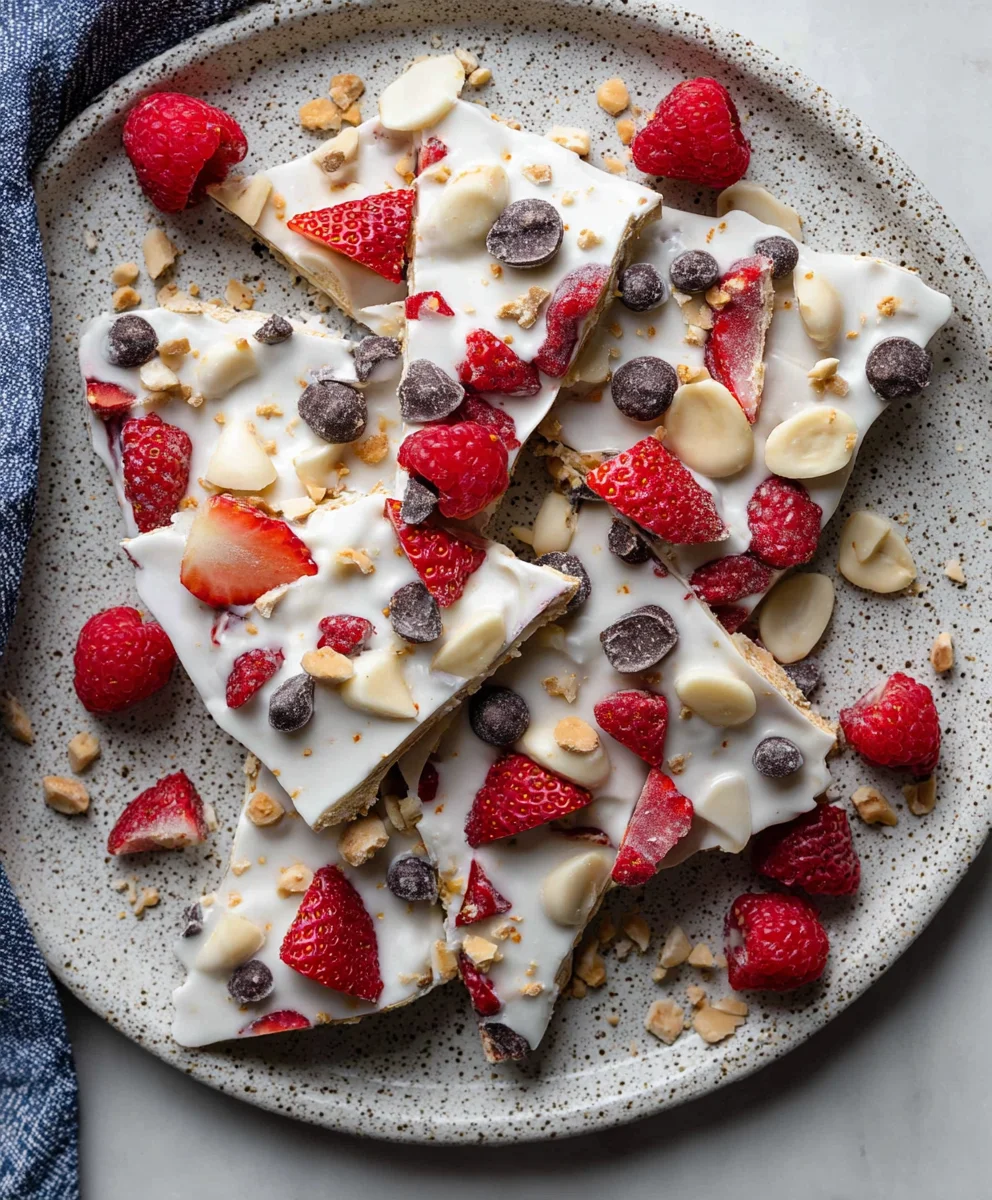
Frozen Yogurt Bark is more than just a frozen treat; it’s a vibrant, customizable canvas of flavor and texture that has captured the hearts (and taste buds) of people everywhere. There’s something incredibly satisfying about its cool, creamy texture, especially on a warm day, and the sheer joy of breaking off irregular, delicious shards is an experience in itself. What makes this particular frozen delight so special is its effortless simplicity coupled with endless possibilities. Unlike more complicated desserts, Frozen Yogurt Bark requires minimal effort and can be whipped up in minutes, yet it delivers a gourmet feel. It’s the perfect guilt-free indulgence, packed with protein and probiotics from the yogurt, and can be loaded with your favorite fruits, nuts, or even a drizzle of honey for an extra touch of sweetness. Get ready to discover how easy it is to create your own personalized masterpiece of Frozen Yogurt Bark.

Ingredients:
- 1 cup Greek yogurt, plain, full-fat
- 1/4 cup honey, or to taste
- 1 teaspoon vanilla extract
- 1/2 cup fresh berries, such as blueberries, raspberries, or sliced strawberries
- 1/4 cup granola, your favorite kind
- 2 tablespoons chopped nuts, such as almonds or walnuts
Preparing the Base
Step 1: Prepare Your Baking Sheet
First things first, let’s get our workspace ready for creating this delicious Frozen Yogurt Bark. Grab a baking sheet – a standard half-sheet pan works perfectly. Line it with parchment paper. This is crucial because it prevents the yogurt bark from sticking, making for a clean and easy release once it’s frozen. Make sure the parchment paper covers the entire surface of the baking sheet, with a little overhang on the sides if possible, which can help with lifting later.
Step 2: Mix the Yogurt Base
In a medium-sized mixing bowl, combine the Greek yogurt, honey, and vanilla extract. I like to use full-fat Greek yogurt because it creates a creamier, richer texture in the bark, and it freezes up beautifully without becoming icy. For the honey, start with about 1/4 cup, but feel free to adjust this to your personal preference for sweetness. You can always taste and add a little more if you like it sweeter. Stir everything together until it’s smooth and well-combined. You want to ensure there are no streaks of honey or yogurt; it should be a uniform, creamy mixture. A whisk can be helpful here to ensure everything is thoroughly incorporated.
Assembling the Bark
Step 3: Spread the Yogurt Mixture
Now, carefully pour the prepared yogurt mixture onto the parchment-lined baking sheet. Using a spatula or the back of a spoon, spread the yogurt into an even layer. Aim for a thickness of about 1/4 to 1/2 inch. Don’t worry about making it perfectly rectangular; freeform shapes are part of the charm of homemade bark. The key is to have a consistent thickness so that it freezes evenly and breaks into manageable pieces later. If you have any areas that are much thicker than others, try to gently spread them out.
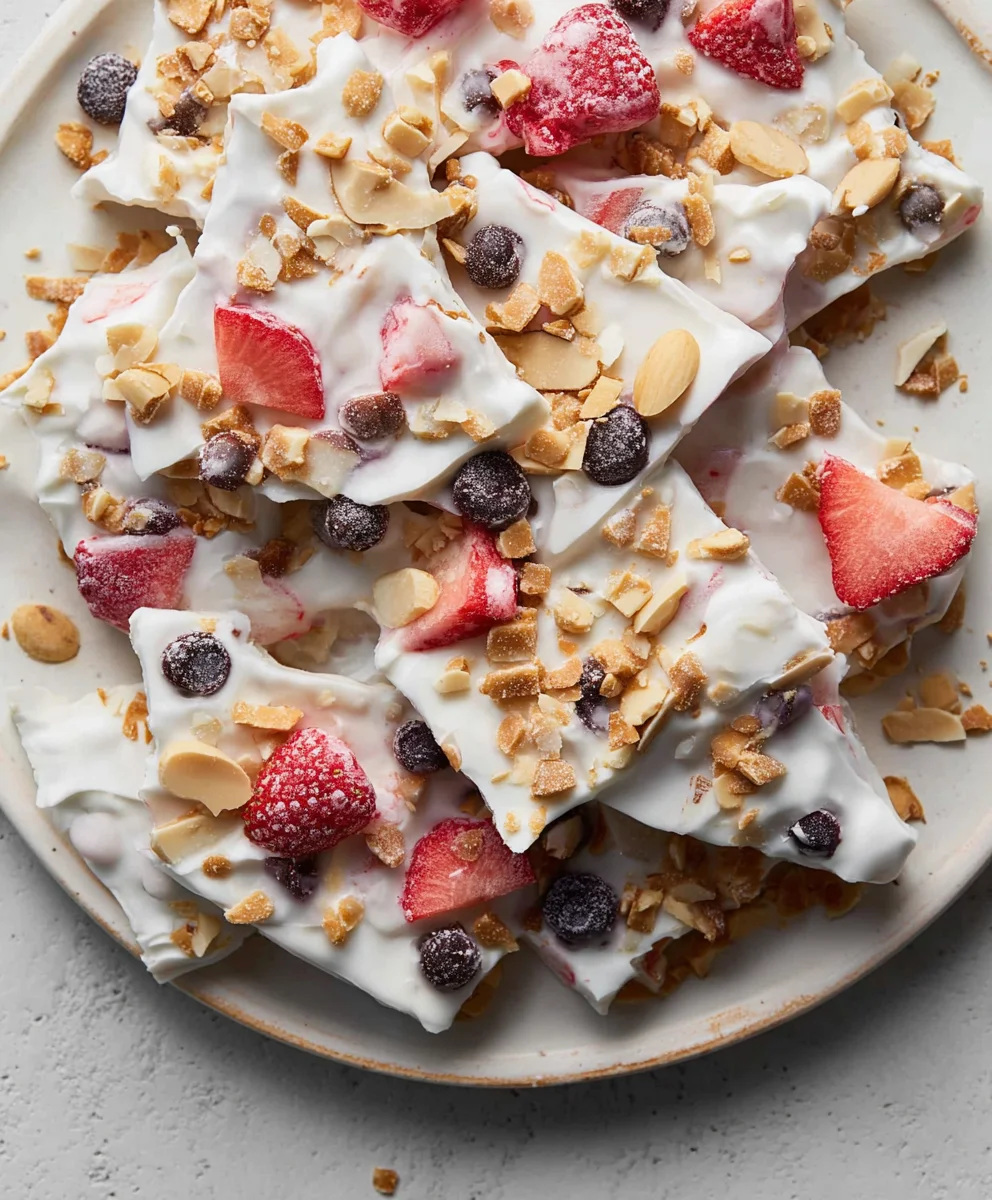
Step 4: Add Your Toppings
This is where you get to personalize your Frozen Yogurt Bark! Sprinkle your fresh berries evenly over the yogurt layer. If you’re using larger berries like strawberries, make sure they are sliced into bite-sized pieces so they are easy to eat and distribute. Next, scatter the granola over the berries. The granola adds a wonderful crunch and texture contrast. Finally, sprinkle the chopped nuts over everything. The nuts provide another layer of texture and a nutty flavor that complements the sweetness of the yogurt and berries. Gently press the toppings into the yogurt slightly, just enough so they adhere, but not so much that they sink completely into the yogurt.
Freezing and Finishing
Step 5: Freeze Until Solid
Once your toppings are in place, carefully transfer the baking sheet to the freezer. Let it freeze for at least 4 hours, or until the yogurt bark is completely solid. The freezing time will depend on the temperature of your freezer and the thickness of your bark. You want to ensure it’s firm to the touch and doesn’t give when gently pressed. It’s best to leave it undisturbed in the freezer during this time. Avoid opening the freezer door too frequently, as this can affect the freezing process.
Step 6: Breaking the Bark
Once the Frozen Yogurt Bark is fully frozen, remove the baking sheet from the freezer. This is the fun part! Carefully lift the parchment paper with the bark still on it off the baking sheet. Place it on a cutting board or clean countertop. Using your hands, gently break the bark into irregular pieces. If it’s very hard, you might need to use a sharp knife or a bench scraper to score and then break it. The imperfections are what make this treat so charming and rustic.
Step 7: Serving and Storing
Your delicious homemade Frozen Yogurt Bark is now ready to enjoy! Serve it immediately for a refreshing snack or dessert. The beauty of this recipe is its versatility. You can customize it with different fruits, nuts, seeds, or even a drizzle of melted chocolate before freezing. To store any leftovers, place the broken pieces in an airtight container or a freezer-safe bag. It’s best to place a piece of parchment paper between layers of bark to prevent them from sticking together. Properly stored, your Frozen Yogurt Bark will stay fresh and delicious in the freezer for up to a month. Enjoy this healthy and delightful treat anytime!
Conclusion:
And there you have it – the ultimate guide to creating delicious and refreshing Frozen Yogurt Bark! This recipe is incredibly versatile, allowing you to customize it to your heart’s content. We’ve covered the simple steps to achieving that perfect frosty texture and vibrant look, making it an ideal treat for any occasion. Whether you’re looking for a healthy breakfast, a guilt-free dessert, or a fun activity to do with kids, Frozen Yogurt Bark delivers. Don’t hesitate to experiment with different fruits, nuts, seeds, and even a drizzle of honey or maple syrup for added sweetness. Share this delightful creation with friends and family, or simply enjoy a quiet moment of indulgence yourself. We encourage you to get creative and discover your favorite flavor combinations!
Frequently Asked Questions about Frozen Yogurt Bark:
How do I store Frozen Yogurt Bark?
Once your Frozen Yogurt Bark is completely frozen, you can break it into pieces and store it in an airtight container or a freezer-safe bag in the freezer. It will stay fresh and delicious for up to 2-3 weeks. For best results, let it sit at room temperature for a minute or two before breaking or serving to make it less brittle.
Can I use different types of yogurt for Frozen Yogurt Bark?
Absolutely! While Greek yogurt is recommended for its thickness and protein content, you can certainly use regular plain yogurt, vanilla yogurt, or even dairy-free options like coconut or almond milk yogurt. Just be aware that the texture might be slightly different depending on the yogurt’s fat content and consistency.
Easy Frozen Yogurt Bark Recipe – Healthy Treat
A simple and healthy frozen yogurt bark recipe, perfect for a refreshing snack or dessert. Customizable with your favorite fruits and toppings.
Ingredients
-
1 cup Greek yogurt, plain, full-fat
-
1/4 cup honey, or to taste
-
1 teaspoon vanilla extract
-
1/2 cup fresh berries, such as blueberries, raspberries, or sliced strawberries
-
1/4 cup granola, your favorite kind
-
2 tablespoons chopped nuts, such as almonds or walnuts
Instructions
-
Step 1
Prepare a baking sheet by lining it with parchment paper. This prevents sticking and ensures easy removal of the frozen bark. -
Step 2
In a mixing bowl, combine Greek yogurt, honey, and vanilla extract. Stir until smooth and well-combined. -
Step 3
Spread the yogurt mixture evenly onto the parchment-lined baking sheet, aiming for a thickness of about 1/4 to 1/2 inch. -
Step 4
Sprinkle fresh berries, granola, and chopped nuts evenly over the yogurt layer. Gently press toppings into the yogurt. -
Step 5
Freeze the baking sheet for at least 4 hours, or until the yogurt bark is completely solid. -
Step 6
Once frozen, carefully remove the bark from the baking sheet and break it into irregular pieces by hand. -
Step 7
Serve immediately or store in an airtight container in the freezer for up to a month.
Important Information
Nutrition Facts (Per Serving)
It is important to consider this information as approximate and not to use it as definitive health advice.
Allergy Information
Please check ingredients for potential allergens and consult a health professional if in doubt.

Leave a Comment