
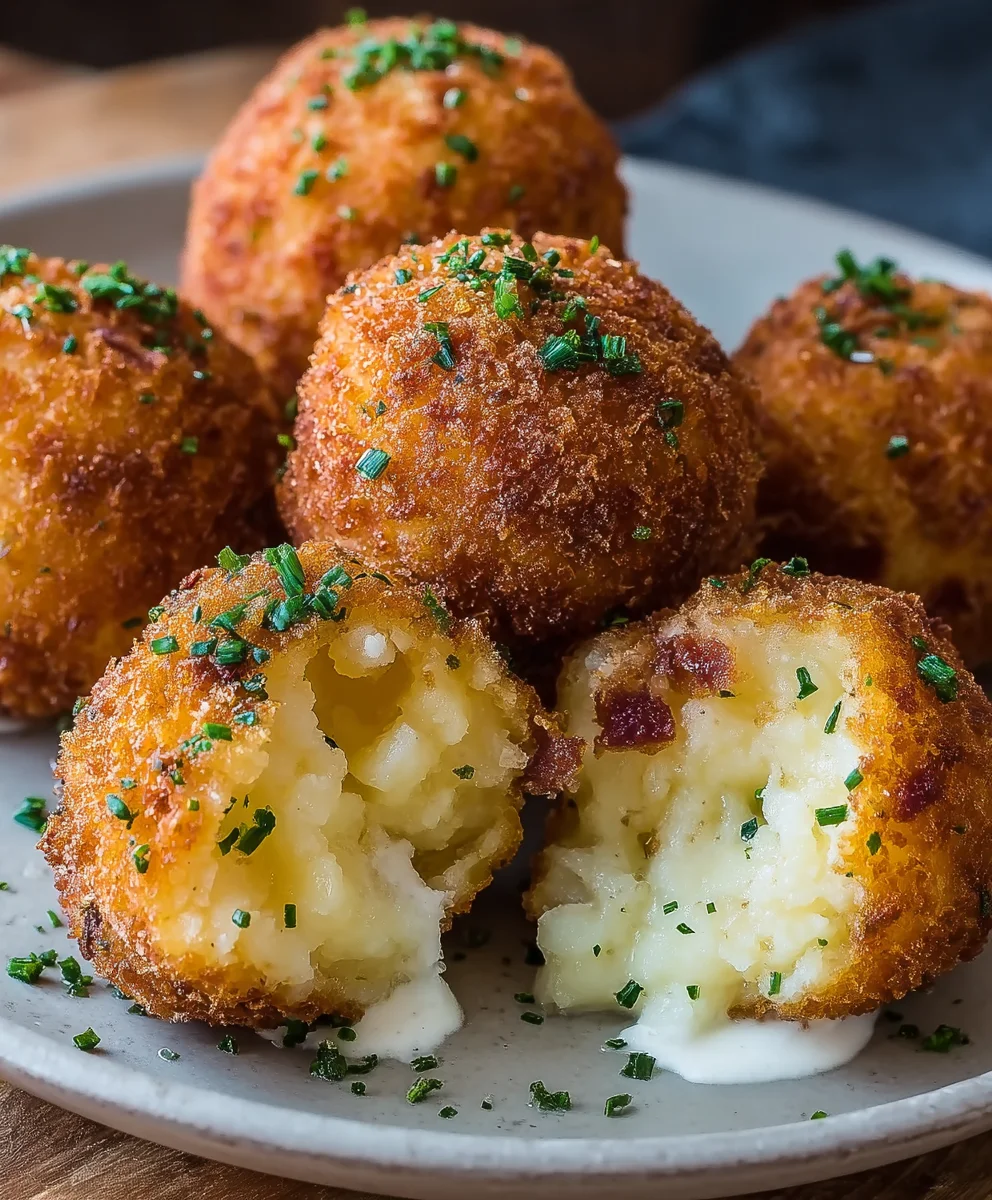
Fried Mashed Potato Balls are more than just a side dish; they’re a nostalgic hug in crispy, golden form. Who can resist those perfectly crunchy exteriors yielding to a soft, pillowy center, bursting with the comforting flavor of creamy mashed potatoes? It’s no wonder these delightful morsels have become a beloved staple at potlucks, game days, and family dinners alike. But what elevates these simple fried mashed potato balls from merely good to absolutely irresistible? It’s the magic of transformation – taking humble leftovers and turning them into something utterly craveable. We’re talking about that satisfying contrast between the exterior crispness and the tender, flavorful interior, often enhanced with a touch of cheese or herbs, making each bite a delightful surprise. Get ready to master the art of creating these utterly addictive snacks that are sure to disappear from the plate in mere moments.

Ingredients:
- 3 c. leftover mashed potatoes
- 3 slices bacon, cooked and crumbled
- 2/3 c. shredded cheddar cheese
- 2 tbsp. thinly sliced chives
- 1 tsp. garlic powder
- Kosher salt
- Freshly ground black pepper
- 2 eggs, beaten
- 1 1/3 c. panko bread crumbs
- Vegetable oil, for frying
Preparing the Mashed Potato Mixture
The foundation of these delightful Fried Mashed Potato Balls is, of course, your leftover mashed potatoes. Ensure they are thoroughly cooled before you begin. This helps them hold their shape better during the forming and frying process. In a large mixing bowl, combine the 3 cups of cold mashed potatoes. To this creamy base, we’re adding the savory crunch of 3 slices of bacon, cooked until crisp and then crumbled into small pieces. This adds a wonderful salty and smoky depth to each bite. Next, stir in 2/3 cup of shredded cheddar cheese. The cheese will melt slightly as it bakes, creating those irresistible gooey pockets within the potato balls. For a fresh, herbaceous note, add 2 tablespoons of thinly sliced chives. These delicate green strands not only impart a subtle oniony flavor but also add a beautiful visual element to the mixture. Seasoning is key here. Sprinkle in 1 teaspoon of garlic powder for an extra layer of savory goodness. Now, it’s time for a good old-fashioned taste and season. Add kosher salt and freshly ground black pepper to your preference. Remember, the bacon is already salty, so taste as you go. Gently mix all these ingredients together until they are well combined. You want everything evenly distributed so that each ball gets a balanced flavor profile. Don’t overmix, as you don’t want to make the potatoes gummy. The mixture should be firm enough to shape. If it feels too sticky, you can add a tablespoon of flour, but typically, cold mashed potatoes are sufficient.
Forming the Potato Balls
Once your mashed potato mixture is perfectly blended and seasoned, it’s time to shape them into bite-sized balls. This is where the fun really begins, and you can get creative with the size. I like to aim for about a 1.5-inch diameter, similar to a small donut hole, but you can certainly make them larger or smaller depending on your preference and how you plan to serve them. Take about 2 tablespoons of the potato mixture into the palm of your hand. Roll it gently between your hands to form a compact ball. The goal is to create a smooth, firm sphere that won’t fall apart during the frying process. If the mixture is sticking to your hands, you can lightly dampen them with a little water or oil. Set the formed balls aside on a plate or parchment-lined baking sheet as you continue to shape the rest of the mixture. You should be able to get about 12-15 balls from this recipe, depending on their size. It’s helpful to have all your balls formed before you start the breading process to ensure a smooth workflow.
The Breading Station Setup
To achieve that perfect crispy exterior on our Fried Mashed Potato Balls, we need to set up a breading station. This involves three shallow dishes or bowls. In the first dish, place your 2 beaten eggs. Whisk them lightly with a fork until the yolks and whites are fully combined. In the second dish, place your 1 1/3 cups of panko bread crumbs. Panko bread crumbs are excellent for achieving an extra-crispy coating because of their larger, airier texture compared to standard bread crumbs. They create a light and crunchy shell that’s incredibly satisfying. In the third dish, you can add a little more panko if you have it, or simply have another empty dish ready to receive the breaded balls. This three-step process—egg, bread crumb, egg, bread crumb—ensures a robust and even coating that will protect the potato ball and create a delightful crunch.
Coating the Potato Balls
Now, let’s get these potato balls coated! Take one formed mashed potato ball and carefully dip it into the beaten eggs, ensuring it is fully submerged. Let any excess egg drip back into the dish. Then, transfer the egg-coated ball into the dish of panko bread crumbs. Generously coat the ball by pressing the bread crumbs onto all sides. You want to make sure there are no bare spots. Gently roll the ball in the bread crumbs until it’s completely covered. Some bread crumbs may stick to the egg, and that’s perfectly fine. The goal is to create a thick, even layer. Once coated, place the breaded ball onto the clean dish or baking sheet. Repeat this process for all of your shaped mashed potato balls. If you prefer an extra thick coating, you can dip the breaded balls back into the egg mixture and then coat them in bread crumbs again for a double-crusted delight. This ensures maximum crispiness.
Frying to Golden Perfection
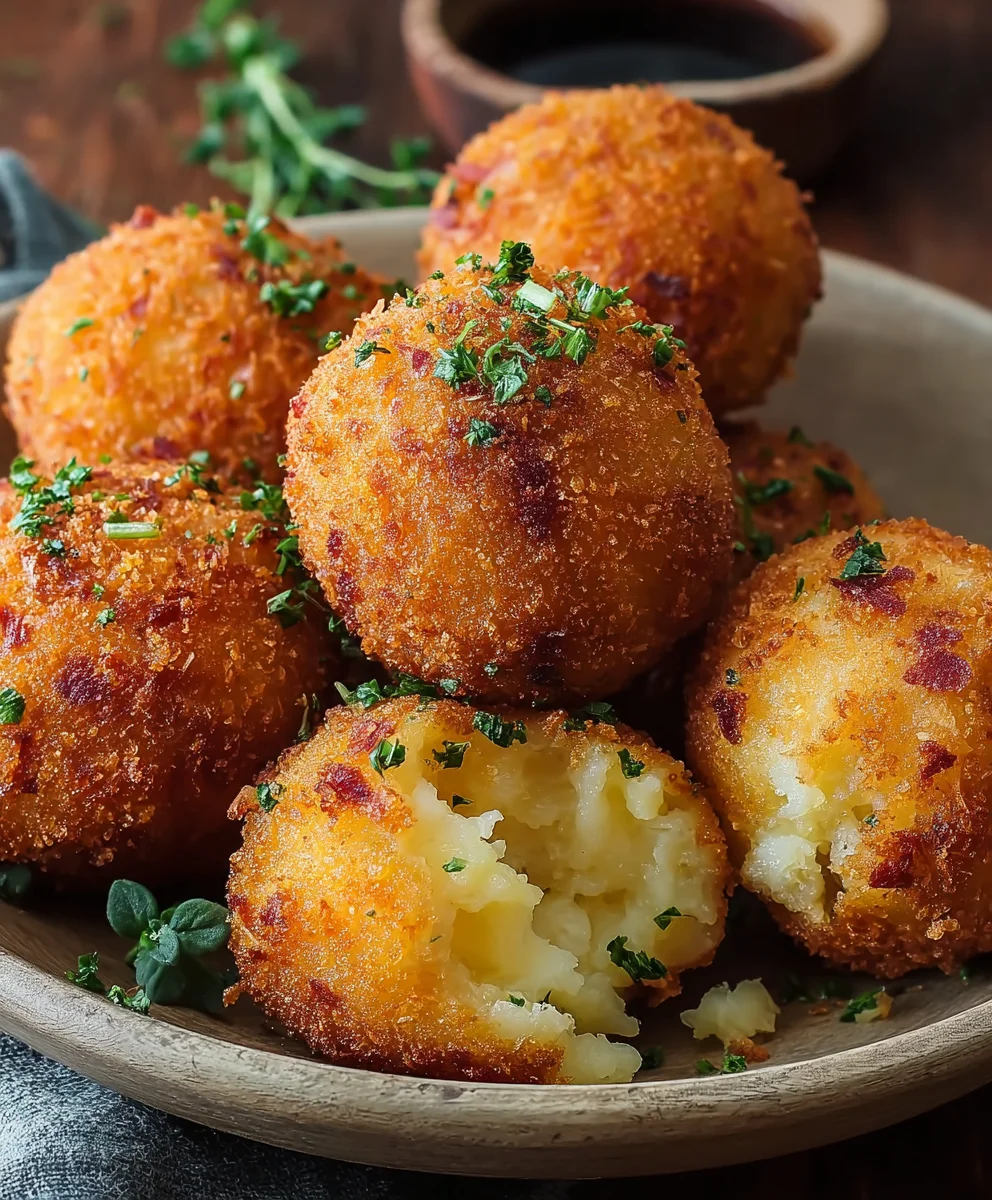
The final and most crucial step is frying. In a large, heavy-bottomed skillet or Dutch oven, heat about 2-3 inches of vegetable oil over medium-high heat. You’ll know the oil is ready when it reaches approximately 350°F (175°C). A good test is to drop a tiny bit of bread crumb into the oil; it should sizzle immediately and float to the surface. Carefully, and in batches to avoid overcrowding the pan, gently place the breaded mashed potato balls into the hot oil. Do not overcrowd the skillet, as this will lower the oil temperature and result in greasy potato balls. Fry the balls for about 3-5 minutes per side, or until they are a deep golden brown and crispy. Use a slotted spoon or spider strainer to gently turn the balls to ensure even cooking and browning on all sides. Once they are beautifully golden and have achieved that desirable crispness, carefully remove them from the oil and place them on a wire rack set over a baking sheet lined with paper towels. This allows any excess oil to drain away, keeping them perfectly crisp. Allow them to cool for just a minute or two before serving, as they will be very hot.
Conclusion:
And there you have it – a delightful journey into creating perfect Fried Mashed Potato Balls! We’ve walked through each step, from transforming leftover mashed potatoes into golden, crispy spheres of deliciousness. These little flavor bombs are incredibly versatile and are sure to be a hit at any gathering or as a comforting snack. Don’t be afraid to experiment with the fillings and seasonings to make them your own. Remember, the key to success is ensuring your mashed potatoes are firm enough, and that your oil is at the correct temperature for that satisfying crunch without being greasy. I truly hope you enjoy making and, more importantly, devouring these fantastic Fried Mashed Potato Balls. Happy cooking!
Frequently Asked Questions:
What are the best ways to serve Fried Mashed Potato Balls?
These Fried Mashed Potato Balls are fantastic as appetizers served with your favorite dipping sauces like ranch, sriracha mayo, or a classic marinara. They also make a wonderful side dish for barbecues, potlucks, or even alongside a hearty stew or chili. For a more substantial meal, consider serving them with a fresh salad.
Can I make the Fried Mashed Potato Balls ahead of time?
Yes, you absolutely can! You can prepare the potato balls (including filling and coating them with breadcrumbs) up to a day in advance. Store them in a single layer on a baking sheet lined with parchment paper, covered loosely with plastic wrap, in the refrigerator. This will help them hold their shape and prevent them from sticking together. Fry them just before serving for the best texture.
What are some interesting variations for the filling?
The possibilities are endless! Beyond cheese, consider adding finely chopped cooked bacon, sautéed mushrooms and onions, a dollop of sour cream and chives, or even a small cube of jalapeño for a spicy kick. For a savory twist, you could mix in some leftover shredded chicken or ground meat.
Crispy Fried Mashed Potato Balls
Turn leftover mashed potatoes into irresistible crispy fried balls with bacon, cheddar cheese, and chives, coated in panko breadcrumbs for ultimate crunch.
Ingredients
-
3 cups leftover mashed potatoes
-
3 slices beef bacon, cooked and crumbled
-
2/3 cup shredded cheddar cheese
-
2 tablespoons thinly sliced chives
-
1 teaspoon garlic powder
-
Kosher salt, to taste
-
Freshly ground black pepper, to taste
-
2 eggs, beaten
-
1 1/3 cups panko bread crumbs
-
Vegetable oil, for frying
Instructions
-
Step 1
In a large bowl, combine cold mashed potatoes, crumbled beef bacon, shredded cheddar cheese, sliced chives, and garlic powder. Season with kosher salt and black pepper to taste. Mix gently until well combined. -
Step 2
Shape the potato mixture into approximately 1.5-inch balls. Roll about 2 tablespoons of the mixture between your hands to form a firm, compact ball. Set aside on a plate or parchment-lined baking sheet. -
Step 3
Set up your breading station with three shallow dishes: one with beaten eggs, one with panko bread crumbs, and an empty one for the breaded balls. -
Step 4
Dip each potato ball into the beaten eggs, letting excess drip off, then coat thoroughly in panko bread crumbs, pressing gently to adhere. Place the breaded balls onto the clean dish. -
Step 5
Heat 2-3 inches of vegetable oil in a heavy-bottomed skillet or Dutch oven over medium-high heat until it reaches approximately 350°F (175°C). -
Step 6
Carefully fry the breaded potato balls in batches for 3-5 minutes per side, or until deep golden brown and crispy. Avoid overcrowding the pan. -
Step 7
Remove fried balls with a slotted spoon and place on a wire rack set over paper towels to drain excess oil. Let cool slightly before serving.
Important Information
Nutrition Facts (Per Serving)
It is important to consider this information as approximate and not to use it as definitive health advice.
Allergy Information
Please check ingredients for potential allergens and consult a health professional if in doubt.
Leave a Comment