
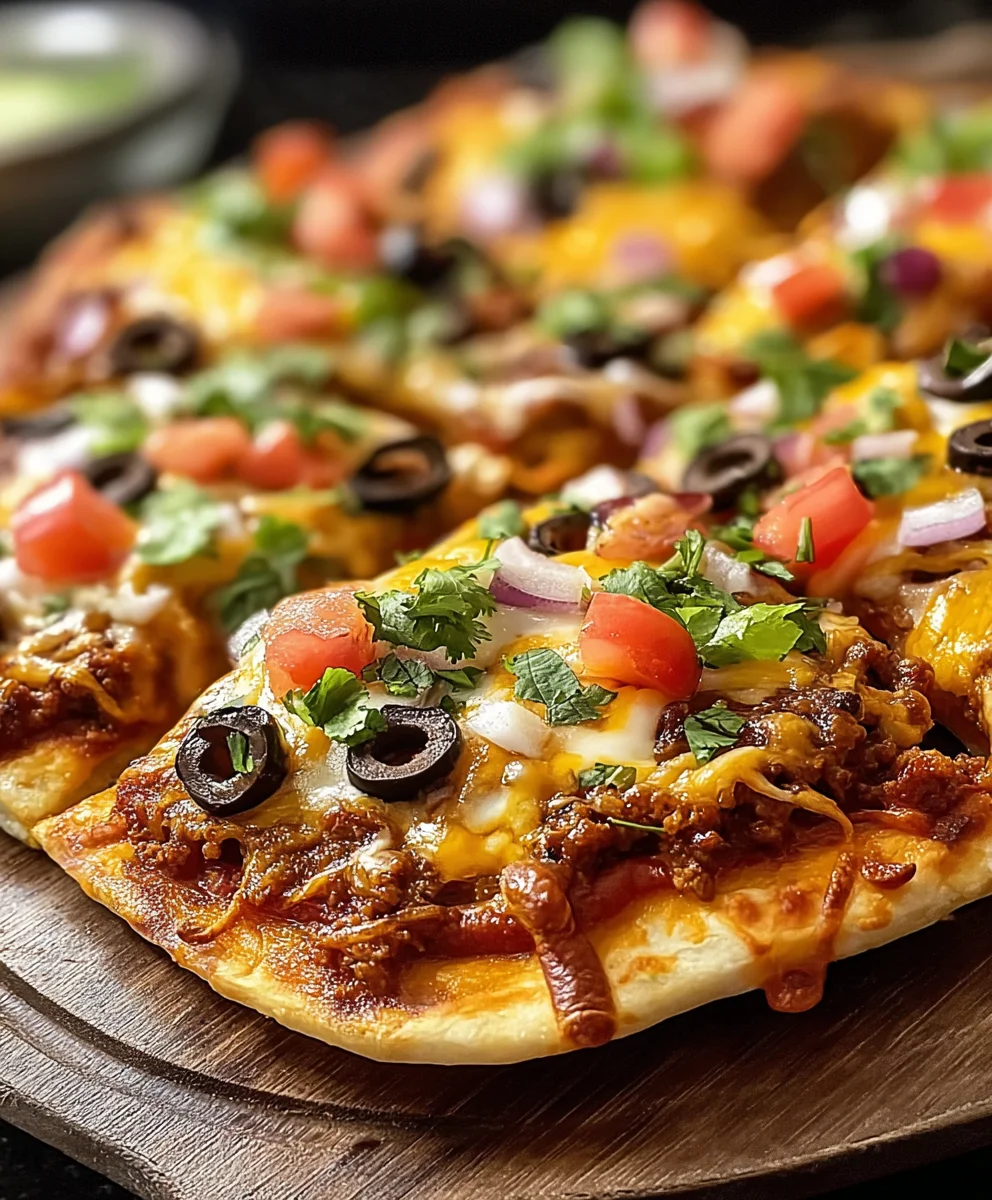
Homemade Mexican Pizza, for many of us, evokes a sense of nostalgic delight and pure comfort. I remember the excitement of ordering this unique creation, a brilliant fusion that became a fast-food legend. While its origins might be rooted in American fast-casual dining rather than traditional Mexican cuisine, its ingenious combination of crispy tortillas, seasoned beef, refried beans, and melted cheese captured hearts and taste buds for decades. There’s something undeniably special about the layers: the crunch of the tortillas, the savory depth of the filling, the creamy beans, and that irresistible blanket of cheese, all topped with fresh tomatoes and green onions. It’s a dish that offers a symphony of textures and flavors in every bite, making it an absolute crowd-pleaser and a fantastic option for family dinner or a fun gathering.
Recreating this iconic dish at home allows for endless customization and ensures the freshest ingredients, making your Homemade Mexican Pizza even more glorious than you remember.

Ingredients:
- For the Crispy Tortilla Shells:
- 12 (8-inch) flour tortillas (I find medium-sized tortillas work best for a personal pizza feel, allowing for easy handling and a satisfying crunch.)
- 2-4 tablespoons vegetable oil, canola oil, or avocado oil (for frying or brushing for baking)
- For the Savory Ground Meat Filling:
- 1 pound lean ground beef or ground turkey (I often opt for 90/10 lean ground beef for a good balance of flavor and less grease, but ground turkey is a fantastic lighter option.)
- 1 medium yellow onion, finely diced
- 2 cloves garlic, minced
- 1 tablespoon chili powder
- 1 teaspoon ground cumin
- ½ teaspoon smoked paprika
- ¼ teaspoon dried oregano
- ½ teaspoon salt, or to taste
- ¼ teaspoon black pepper, or to taste
- ½ cup water or beef broth (This helps create a saucier, more cohesive filling.)
- 1 tablespoon vegetable oil (for cooking, if needed)
- For the Zesty Mexican Pizza Sauce:
- 1 (8-ounce) can tomato sauce
- 2 tablespoons tomato paste
- 1 small jalapeño, seeded and minced (optional, for a little kick, or use a pinch of cayenne pepper)
- 1 clove garlic, minced
- ½ teaspoon chili powder
- ¼ teaspoon ground cumin
- ¼ teaspoon dried oregano
- ¼ teaspoon sugar (to balance the acidity of the tomatoes)
- Salt and black pepper to taste
- 2 tablespoons water or vegetable broth (to thin slightly, if needed)
- 1 tablespoon olive oil (for sautéing)
- For the Creamy Refried Beans Layer:
- 1 (15-ounce) can refried beans (I always go for traditional refried pinto beans, but black beans work too if you prefer.)
- 2 tablespoons water or milk (to thin and make them easily spreadable)
- Salt and pepper to taste
- For the Cheese and Toppings:
- 2 cups shredded Mexican blend cheese (Cheddar, Monterey Jack, or a blend of your favorites work beautifully for that classic melty finish.)
- ½ cup diced fresh tomatoes
- ¼ cup sliced green onions (both white and green parts)
- Sour cream or Mexican crema, for serving
- Guacamole, for serving (optional)
- Fresh cilantro, chopped, for garnish (optional)
- Pickled jalapeño slices, for extra heat (optional)
Preparing Your Homemade Mexican Pizza Sauce:
I find that a homemade sauce truly elevates this Homemade Mexican Pizza, giving it a fresh, vibrant flavor that canned sauces simply can’t match. This is where we lay the foundation for that signature taste.
- First, grab a small saucepan and heat 1 tablespoon of olive oil over medium heat. Once shimmering, add your minced jalapeño (if using) and minced garlic. Sauté them gently for about 1-2 minutes, until they become fragrant and soften, but be careful not to let the garlic brown too much, as it can turn bitter. This initial aromatic base is key for a deeply flavored sauce.
- Next, stir in the tomato paste. Cook the tomato paste for another 1-2 minutes, stirring constantly. This step is crucial because cooking the tomato paste helps to deepen its flavor and remove any raw, metallic taste, resulting in a richer, more complex sauce. You’ll notice it turns a darker, rustier red.
- Pour in the can of tomato sauce, along with the chili powder, ground cumin, dried oregano, and that little pinch of sugar. The sugar is a secret weapon here; it helps to balance the acidity of the tomatoes, creating a wonderfully rounded flavor profile.
- Give everything a good stir to combine all the spices and ingredients thoroughly. If the sauce seems a bit too thick for your liking, add 2 tablespoons of water or vegetable broth to reach a consistency that’s easily spreadable but still holds its own.
- Bring the sauce to a gentle simmer, then reduce the heat to low, cover, and let it cook for at least 10-15 minutes. This simmering time allows all those beautiful flavors to meld together and intensify. Taste the sauce and adjust the seasoning with salt and black pepper as needed. Remember, this is your sauce, so make it perfect for your palate! Once done, set it aside to cool slightly while you prepare the other components.
Crafting the Savory Meat Filling:
The meat filling is the heart of our Homemade Mexican Pizza, providing that satisfying, robust flavor. I always take my time with this step to ensure every bite is packed with deliciousness.
- In a large skillet, heat 1 tablespoon of vegetable oil over medium-high heat. Add your ground beef or turkey. Break up the meat with a wooden spoon and cook it until it’s completely browned and no pink remains. This usually takes about 5-7 minutes.
- Once the meat is fully cooked, carefully drain off any excess grease. This prevents your pizza from becoming oily and ensures the flavors of the seasonings shine through. I usually tilt the pan and use a spoon to scoop out the fat, or pour it into a heat-safe container.
- Reduce the heat to medium. Add the finely diced yellow onion to the skillet with the cooked meat. Sauté the onion for about 3-5 minutes, until it softens and becomes translucent. The sweetness of the cooked onion adds a wonderful depth to the filling.
- Now, add your minced garlic to the skillet and cook for another minute until fragrant. Just like with the sauce, be mindful not to burn the garlic.
- Stir in the chili powder, ground cumin, smoked paprika, dried oregano, salt, and black pepper. Cook these spices with the meat and onions for about 1 minute, stirring constantly. This “blooming” of the spices in the hot oil helps to release their full aroma and flavor, making the filling incredibly fragrant and tasty.
- Pour in the ½ cup of water or beef broth. Bring the mixture to a simmer, then reduce the heat to low and let it cook for 5-7 minutes, uncovered. This allows the liquid to be absorbed and the flavors to truly meld, creating a slightly saucy, cohesive meat filling that will spread beautifully on our tortillas. Taste the meat filling and adjust salt and pepper if necessary. You want it to be well-seasoned, as it’s a primary flavor component.
- Remove the skillet from the heat and set the meat filling aside.
Perfecting Your Tortilla Shells:
Achieving perfectly crisp tortilla shells is arguably the most crucial step for a great Homemade Mexican Pizza. Nobody wants a soggy pizza! I’ll give you two options for getting that ideal crunch.
Method 1: Baking for a Lighter Crisp (My preferred method for less mess and oil)
- Preheat your oven to 400°F (200°C). Arrange two large baking sheets with parchment paper or silicone baking mats.
- Lightly brush both sides of each flour tortilla with a thin layer of vegetable oil. You don’t need much, just enough to help them crisp up and get a lovely golden color. I find using a pastry brush works wonders for even distribution.
- Lay the tortillas in a single layer on your prepared baking sheets, making sure they don’t overlap. You’ll likely need to work in batches, baking 4-6 tortillas at a time depending on the size of your sheets.
- Bake for 5-7 minutes per side, or until the tortillas are golden brown and perfectly crisp. Keep a close eye on them, as they can go from perfectly golden to burnt quite quickly. You want them to be firm enough to hold up to the toppings but not so hard that they shatter. Once crisp, remove them from the oven and set them aside to cool slightly. As they cool, they will become even crisper.
Method 2: Frying for a Deep Golden Crunch (More traditional and extra indulgent)
- In a large, heavy-bottomed skillet or cast-iron pan, pour about ½ inch of vegetable oil. Heat the oil over medium-high heat until it reaches about 350°F (175°C). If you don’t have a thermometer, you can test it by dropping a tiny piece of tortilla into the oil; if it sizzles vigorously, the oil is ready.
- Carefully place one tortilla into the hot oil. Fry for about 30-60 seconds per side, or until it’s golden brown and delightfully crispy. It’s important to only fry one or two tortillas at a time, depending on the size of your pan, to avoid overcrowding and dropping the oil temperature, which can lead to greasy tortillas.
- Using tongs, carefully remove the fried tortilla from the oil and immediately place it on a plate lined with paper towels to drain any excess oil. This step is crucial for preventing a greasy final product.
- Continue this process with the remaining tortillas, adding more oil to the pan if needed. Allow the fried tortillas to cool slightly on the paper towels.
Pro Tip: Whichever method you choose, the key is a truly crisp tortilla. A slightly soft tortilla will lead to a soggy Mexican Pizza, which is a big no-no!
Assembling Your Homemade Mexican Pizza Masterpiece:
Now for the fun part – putting it all together! This is where our Homemade Mexican Pizza really starts to take shape, layer by delicious layer. I always feel like an artist creating a culinary masterpiece at this stage.
- Preheat your oven to 375°F (190°C). Line a large baking sheet with parchment paper for easy cleanup.
- Warm your refried beans: Transfer the can of refried beans to a small saucepan or microwave-safe bowl. Add 2 tablespoons of water or milk and stir well. Heat over low heat on the stovetop or in the microwave until they are warm and have a smooth, spreadable consistency. Season with a pinch of salt and pepper. This warmth ensures all layers heat evenly in the oven.
- Take one of your perfectly crisp tortilla shells. On one side of the tortilla, spread an even layer of the warm refried beans, reaching close to the edge but leaving a small border. This forms our first delicious layer.
- Carefully place another crisp tortilla shell directly on top of the refried bean layer. This is the “middle” tortilla that holds everything together.
- On top of this second tortilla, spread an even layer of your savory ground meat filling. Again, spread it out towards the edges. The aroma alone at this point is usually enough to get everyone excited!
- Now, place a third crisp tortilla shell on top of the meat layer. This will be the top layer of our pizza base.
- Generously spread your zesty homemade Mexican pizza sauce over this top tortilla, leaving a small border. Don’t be shy with the sauce; it’s a vital flavor component.
- Finally, sprinkle a generous amount of shredded Mexican blend cheese evenly over the sauce. I love to use a good handful of cheese to ensure a perfect melty blanket.
- Carefully transfer your assembled Homemade Mexican Pizza onto the prepared baking sheet. Repeat the layering process for any remaining tortillas and fillings, making as many pizzas as you desire or your baking sheet can hold without overcrowding.
- Bake for 8-12 minutes, or until the cheese is beautifully melted and bubbly, and the entire pizza is heated through. You might even see the edges of the top tortilla turning a deeper golden brown, indicating ultimate crispiness. Keep an eye on it to prevent burning.
- Once out of the oven, let the pizzas rest for a minute or two before handling. This allows the cheese to set slightly and prevents the toppings from sliding off.
Serving Suggestions and Customization for Your Homemade Mexican Pizza:
The beauty of making your own Homemade Mexican Pizza is the freedom to customize it to your heart’s content! This is where you can truly make it your own and cater to everyone’s preferences.
- The Grand Finale – Toppings Galore: Once your hot and bubbly Mexican Pizzas are fresh out of the oven, it’s time for the final touches. I like to immediately garnish each pizza with a sprinkling of fresh diced tomatoes and bright green onions. These add a wonderful freshness and textural contrast to the warm, gooey layers below.
- Creamy Coolness: Offer dollops of cool sour cream or authentic Mexican crema on the side. This provides a delightful creamy counterpoint to the rich, savory flavors of the pizza. You can even create a fun zig-zag pattern directly on top if you’re feeling fancy!
- Avocado Love: For an extra layer of richness and flavor, a generous scoop of homemade guacamole or simple sliced avocado is an absolute must-have in my house. The creamy texture and fresh taste of avocado perfectly complement the other components.
- Aromatic Herbs: A sprinkle of fresh chopped cilantro adds a vibrant herbaceous note and a beautiful pop of color. If you’re not a fan of cilantro, simply omit it!
- Bring the Heat: For those who enjoy a bit more spice, I always have a small bowl of pickled jalapeño slices available. A few of these on top can really kick things up a notch, adding a tangy heat that’s incredibly satisfying. A dash of your favorite hot sauce is also a fantastic addition.
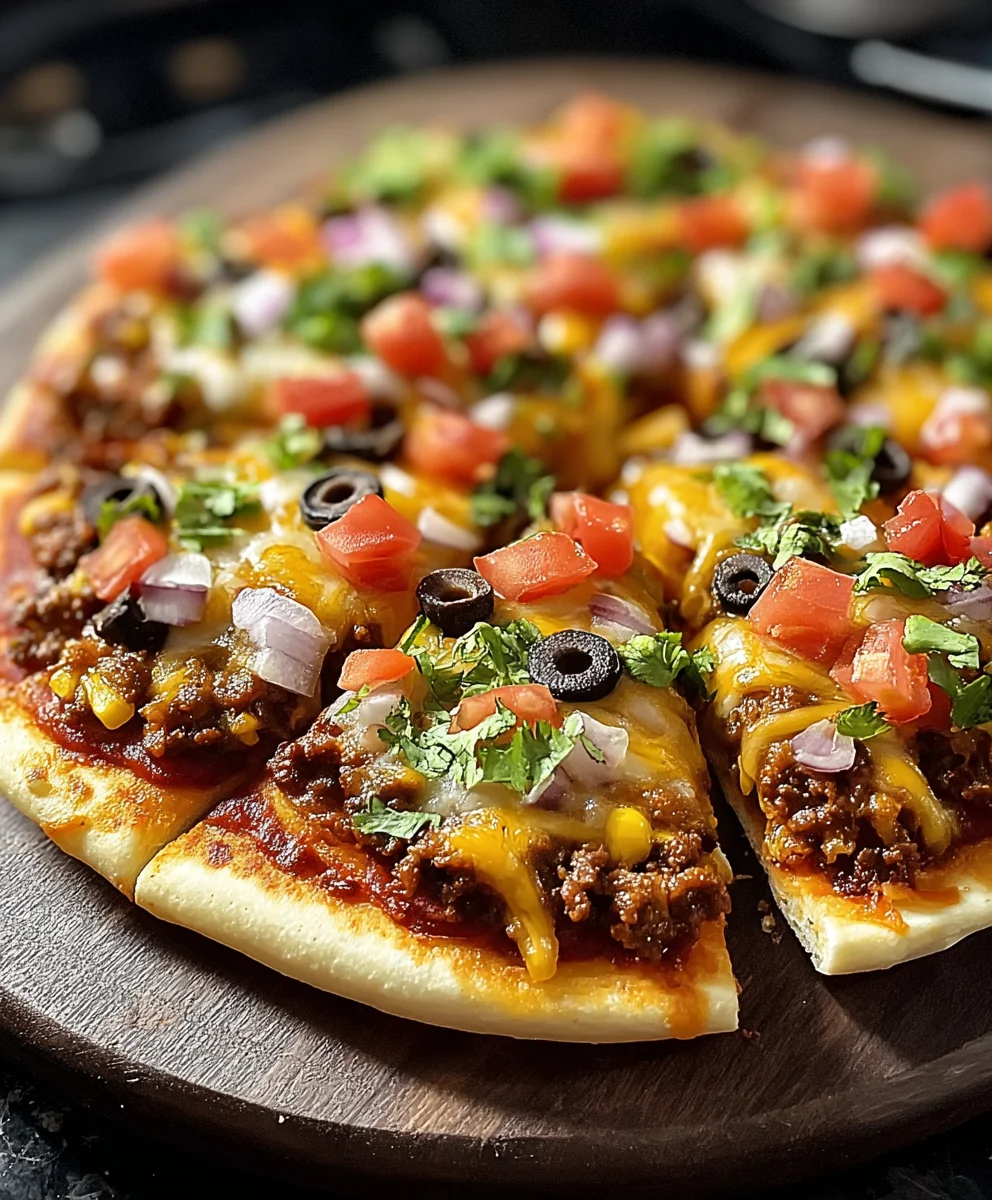
- Cutting and Serving: To serve, I typically use a pizza cutter or a sharp knife to slice each Homemade Mexican Pizza into quarters, just like a traditional pizza. This makes it easy for individual servings and ensures everyone gets a taste of every delicious layer. Serve immediately while hot and crispy!
Customization Ideas to Make Your Homemade Mexican Pizza Uniquely Yours:
- Vegetarian Twist: Easily make this recipe vegetarian by swapping out the ground meat for a plant-based ground alternative. Alternatively, you could skip the meat entirely and add an extra layer of black beans, corn, or sautéed bell peppers and onions for a hearty vegetable-focused pizza. Just ensure your plant-based filling is well-seasoned.
- Bean Bonanza: Experiment with different types of beans! While refried pinto beans are classic, refried black beans or even a layer of whole black beans (drained and seasoned) can offer a different texture and flavor profile.
- Cheese Choices: Don’t limit yourself to just Mexican blend. Sharp cheddar, creamy Monterey Jack, or even a smoky provolone can add interesting twists to your cheese layer. For an extra decadent touch, a sprinkle of cotija cheese after baking adds a salty, crumbly texture.
- Extra Veggies: Feel free to add more vegetables! Finely diced bell peppers (red, green, or yellow), corn kernels, or even thinly sliced olives can be incorporated into the meat filling or sprinkled on top with the cheese before baking.
- Spice Level: Control the heat by adjusting the amount of fresh jalapeño in the sauce and the chili powder in the meat. For a milder version, omit the jalapeño and use less chili powder. For more heat, add a pinch of cayenne pepper to the sauce or a dash of your favorite hot sauce directly to the meat mixture.
Storage and Reheating: If by some miracle you have leftovers (it’s rare with this deliciousness!), store any cooled Homemade Mexican Pizza in an airtight container in the refrigerator for up to 2-3 days. To reheat, I recommend popping them back into a preheated oven at 350°F (175°C) for about 8-10 minutes, or until heated through and the tortillas have re-crisped slightly. Reheating in a toaster oven also works wonderfully for maintaining crispness. While the microwave will heat it, the tortillas may lose their desired crunch. Enjoy this delightful homemade creation!
Conclusion:
If you’ve followed along through this culinary journey, I truly hope you’re feeling inspired and excited to roll up your sleeves and bring this incredible dish to life in your own kitchen. We’ve explored the layers of flavor, the satisfying crunch, and the sheer joy that comes from creating something so delicious from scratch. This isn’t just another recipe; it’s an invitation to experience a symphony of textures and tastes that far surpasses anything you’d find at a drive-thru or a casual eatery. The crispy tortillas, the seasoned ground beef (or your chosen protein!), the rich refried beans, the melting cheese, and those vibrant fresh toppings – every single element plays a crucial role in making this dish an absolute showstopper.
What makes this particular recipe an absolute must-try, in my humble opinion, is the perfect balance it strikes between comfort food and gourmet delight. It’s familiar enough to feel inviting, yet dynamic enough to surprise and impress even the most discerning palates. You have complete control over the quality of your ingredients, ensuring freshness and flavor that pre-made versions simply cannot match. There’s an undeniable sense of accomplishment and pride that comes with serving up a dish you’ve crafted with your own hands, especially one that elicits so many happy groans of delight from around the table. Trust me when I say that you’ll quickly discover that this Homemade Mexican Pizza isn’t just a meal; it’s an event, a conversation starter, and a future family favorite that you’ll be asked to make again and again. The customization possibilities mean it can cater to everyone’s preferences, making it a truly versatile and universally loved dish that I am incredibly proud to share with you.
Serving Suggestions to Elevate Your Experience
To truly complete the fiesta, consider how you’ll serve your magnificent creation. While it’s certainly hearty enough on its own, a few thoughtful additions can transform it into an unforgettable dining experience. A dollop of cool, tangy sour cream or a swirl of fresh guacamole on top adds a creamy counterpoint to the crispy texture and robust flavors. Don’t forget a sprinkle of vibrant pico de gallo or a spoonful of your favorite salsa for an extra burst of freshness and zest. Fresh cilantro, finely chopped, always brightens things up, and if you like a little heat, thinly sliced jalapeños or a dash of your preferred hot sauce can add that perfect kick. For a lighter touch, a simple green salad dressed with a bright lime vinaigrette can cut through the richness beautifully, offering a refreshing contrast. And to drink? A chilled agua fresca, a classic margarita (for the adults!), or even just a crisp iced tea would be perfect companions to this flavorful masterpiece, ensuring every aspect of your meal is absolutely delightful.
Unleash Your Inner Chef: Creative Variations!
One of the most exciting aspects of cooking at home is the freedom to experiment and personalize, and this recipe is wonderfully adaptable. Don’t hesitate to put your own spin on it! For those seeking alternative proteins, shredded chicken, ground turkey, or even a hearty blend of black beans and corn can easily substitute the ground beef, opening up possibilities for different dietary needs and flavor profiles. If you’re exploring vegetarian or vegan options, plant-based ground meat alternatives work beautifully, especially when paired with dairy-free cheese and sour cream. Feel free to play with your cheese blend—Monterey Jack, Colby, or even a sprinkle of cotija cheese can add unique nuances. Spice lovers might consider adding a pinch more chili powder, a dash of smoked paprika, or a touch of chipotle in adobo to the meat mixture for an extra layer of depth and heat. You could also experiment with different types of beans; perhaps black beans in place of refried beans, or a combination of both. For a breakfast twist, imagine a fried egg perfectly placed on top! Or, if you’re hosting, use smaller tortillas to create adorable, bite-sized mini Mexican pizzas that are perfect for appetizers, showcasing your culinary creativity and flair.
Why This Recipe Deserves a Spot in Your Kitchen
Ultimately, this recipe is more than just a list of ingredients and instructions; it’s an invitation to create joy, to gather loved ones, and to savor truly delicious food. It’s about the satisfaction of making something spectacular with your own hands, the aroma filling your kitchen, and the happy faces around your table. I genuinely believe that once you try this recipe, it will become a cherished part of your culinary repertoire. It’s forgiving, rewarding, and undeniably delicious.
So, please, don’t just read about it. Take the leap! Gather your ingredients, put on some good music, and dive into the delightful process of crafting your very own. I am incredibly eager to hear about your experience. Did you make any creative variations? What were your favorite toppings? Did your family rave about it as much as I think they will? Please, share your stories, your photos, and your triumphs! Your feedback means the world to me and helps build our wonderful community of home cooks. Happy cooking, my friends, and enjoy every single bite of your spectacular homemade creation!
Homemade Beef Mexican Pizza: Your Ultimate Dinner!
Recreate the nostalgic delight of Homemade Mexican Pizza with crispy tortillas, savory ground beef, creamy refried beans, zesty sauce, and melted cheese. A customizable crowd-pleaser perfect for family dinner or gatherings.
Ingredients
-
12 (8-inch) flour tortillas
-
2-4 tablespoons vegetable oil (for tortillas)
-
1 pound lean ground beef
-
1 medium yellow onion, finely diced
-
2 cloves garlic, minced (for meat)
-
1 tablespoon chili powder (for meat)
-
1 teaspoon ground cumin (for meat)
-
½ teaspoon smoked paprika
-
¼ teaspoon dried oregano (for meat)
-
½ teaspoon salt (for meat)
-
¼ teaspoon black pepper (for meat)
-
½ cup water or beef broth
-
1 tablespoon vegetable oil (for meat, if needed)
-
1 (8-ounce) can tomato sauce
-
2 tablespoons tomato paste
-
1 small jalapeño, seeded and minced (optional)
-
1 clove garlic, minced (for sauce)
-
½ teaspoon chili powder (for sauce)
-
¼ teaspoon ground cumin (for sauce)
-
¼ teaspoon dried oregano (for sauce)
-
¼ teaspoon sugar
-
Salt and black pepper to taste (for sauce)
-
2 tablespoons water or vegetable broth (for sauce, if needed)
-
1 tablespoon olive oil (for sauce)
-
1 (15-ounce) can refried beans
-
2 tablespoons water or milk (for beans)
-
Salt and pepper to taste (for beans)
-
2 cups shredded Mexican blend cheese
-
½ cup diced fresh tomatoes
-
¼ cup sliced green onions
-
Sour cream or Mexican crema, for serving
-
Guacamole, for serving (optional)
-
Fresh cilantro, chopped, for garnish (optional)
-
Pickled jalapeño slices, for extra heat (optional)
Instructions
-
Step 1
Heat 1 tablespoon olive oil in a small saucepan over medium heat. Sauté minced jalapeño (if using) and 1 minced garlic clove for 1-2 minutes. Stir in tomato paste and cook for another 1-2 minutes. Pour in tomato sauce, chili powder, ground cumin, dried oregano, and sugar. Stir well. Add 2 tablespoons water/broth if needed to thin. Simmer gently for 10-15 minutes, then season with salt and pepper to taste. Set aside. -
Step 2
In a large skillet, heat 1 tablespoon vegetable oil over medium-high heat. Brown ground beef, breaking it up, until no pink remains (5-7 minutes). Drain excess grease. Reduce heat to medium, add diced yellow onion and sauté 3-5 minutes until softened. Add 2 minced garlic cloves and cook for 1 minute until fragrant. Stir in chili powder, ground cumin, smoked paprika, dried oregano, salt, and black pepper; cook for 1 minute. Pour in ½ cup water or beef broth, simmer uncovered for 5-7 minutes until liquid is absorbed and flavors meld. Season to taste. Set aside. -
Step 3
Preheat oven to 400°F (200°C). Lightly brush both sides of each flour tortilla with vegetable oil. Place in a single layer on parchment-lined baking sheets. Bake for 5-7 minutes per side, until golden brown and crisp. Remove and cool slightly; they will crisp further. -
Step 4
In a large skillet, heat about ½ inch vegetable oil to 350°F (175°C). Fry tortillas one at a time for 30-60 seconds per side until golden and crispy. Use tongs to remove and drain immediately on paper towels. Continue with remaining tortillas. Cool slightly. -
Step 5
Preheat oven to 375°F (190°C). Line a baking sheet with parchment paper. Warm refried beans in a saucepan or microwave with 2 tablespoons water/milk until smooth and spreadable; season with salt and pepper. Place one crisp tortilla on the baking sheet. Spread an even layer of warm refried beans. Top with a second crisp tortilla. Spread an even layer of savory ground meat filling. Place a third crisp tortilla on top. Use the flat bottom of a measuring cup to gently press down on the assembled layers to help them stick together. -
Step 6
Generously spread homemade Mexican pizza sauce over the top tortilla, leaving a small border. Sprinkle a generous amount of shredded Mexican blend cheese evenly over the sauce. Repeat for any remaining pizzas. Bake for 8-12 minutes, or until cheese is beautifully melted and bubbly, and the pizza is heated through. Let rest for 1-2 minutes. -
Step 7
Garnish each hot pizza with fresh diced tomatoes and sliced green onions. Serve immediately with dollops of sour cream/Mexican crema, guacamole, fresh cilantro, or pickled jalapeño slices as desired. Slice into quarters with a pizza cutter or sharp knife.
Important Information
Nutrition Facts (Per Serving)
It is important to consider this information as approximate and not to use it as definitive health advice.
Allergy Information
Please check ingredients for potential allergens and consult a health professional if in doubt.


Leave a Comment