
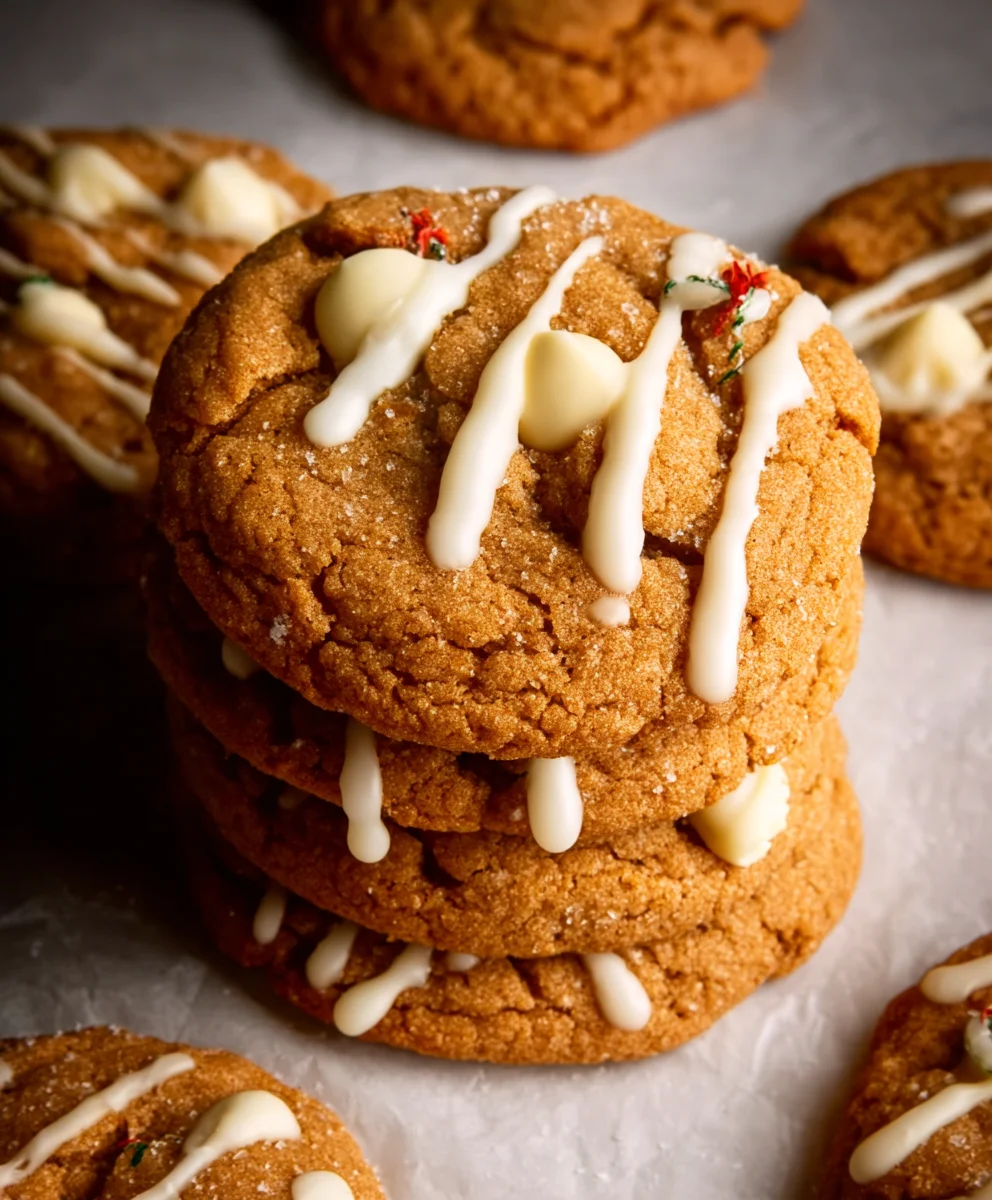
Chewy Maple Cinnamon Cookies with White Chocolate are not just cookies; they are a warm hug in edible form, a comforting embrace on a chilly afternoon, and a guaranteed smile on any occasion. If you’ve ever dreamed of a cookie that perfectly balances the rich, nostalgic sweetness of maple with the comforting warmth of cinnamon, all while delivering that irresistible chewy texture and pockets of creamy white chocolate goodness, then your search ends here. These aren’t your average baked goods; they are a carefully crafted symphony of flavors and textures that will have you reaching for “just one more.” The magic truly lies in the delightful chewiness that remains after baking, a testament to the perfect ratio of ingredients, and how the melt-in-your-mouth white chocolate chips complement the deep, earthy notes of maple and spice. Get ready to fall head over heels for these truly special treats.

Ingredients:
- 1 batch Chewy Maple Cinnamon Cookies (recipe by Cooking with Carlee)
- 1 cup white chocolate melting wafers
- 2 tablespoons holly berry sprinkles
Decorating the Chewy Maple Cinnamon Cookies
Now that your Chewy Maple Cinnamon Cookies are baked to perfection, it’s time for the fun part: decorating them! This step transforms your already delicious cookies into festive holiday treats, perfect for sharing or enjoying yourself. We’re going to use white chocolate melting wafers to create a beautiful, drippy glaze and then adorn them with cheerful holly berry sprinkles. This process is simple but yields impressive results, making these cookies a star at any gathering.
Melting the White Chocolate
First, we need to melt our white chocolate. This is a crucial step for achieving a smooth, workable glaze. You have a couple of options here, and the method you choose will depend on your preference and available equipment. My favorite method is using a microwave, as it’s quick and relatively foolproof.
To melt the white chocolate in the microwave, place the white chocolate melting wafers in a microwave-safe bowl. Be sure to use a bowl that’s completely dry, as even a tiny bit of moisture can cause the chocolate to seize. Microwave on 50% power for 30-second intervals, stirring thoroughly after each interval. It’s important to stir well because white chocolate can be a bit more temperamental than dark or milk chocolate and can overheat easily. You’re looking for a smooth, glossy consistency where all the wafers have completely melted. If you find it’s not melting evenly, you can continue with shorter 15-second intervals, always stirring between.
Alternatively, you can use a double boiler. Fill a saucepan with about an inch of water and bring it to a gentle simmer. Place the white chocolate melting wafers in a heatproof bowl that fits snugly over the saucepan without touching the water. Stir the chocolate constantly until it’s smooth and completely melted. This method offers more control over the temperature, reducing the risk of overheating. Whichever method you choose, ensure your bowl and any utensils are completely dry to prevent the chocolate from seizing. Once melted, remove the bowl from the heat source and set it aside.
Preparing for Decoration
While the white chocolate is still warm and fluid, it’s time to get your cookies ready. If your cookies have completely cooled, you can proceed directly to decorating. If, by chance, they are still slightly warm, allow them to cool fully on the light colored baking sheets. This is important because a warm cookie can cause the white chocolate to melt too quickly and spread too thinly, making it difficult to get a nice, even coating or drizzle. Ensure your work surface is clean and ready. You might want to place some parchment paper down, just in case of any drips, though with careful drizzling, this may not be strictly necessary. Have your holly berry sprinkles easily accessible, as you’ll want to add them while the white chocolate is still wet.
Glazing the Cookies
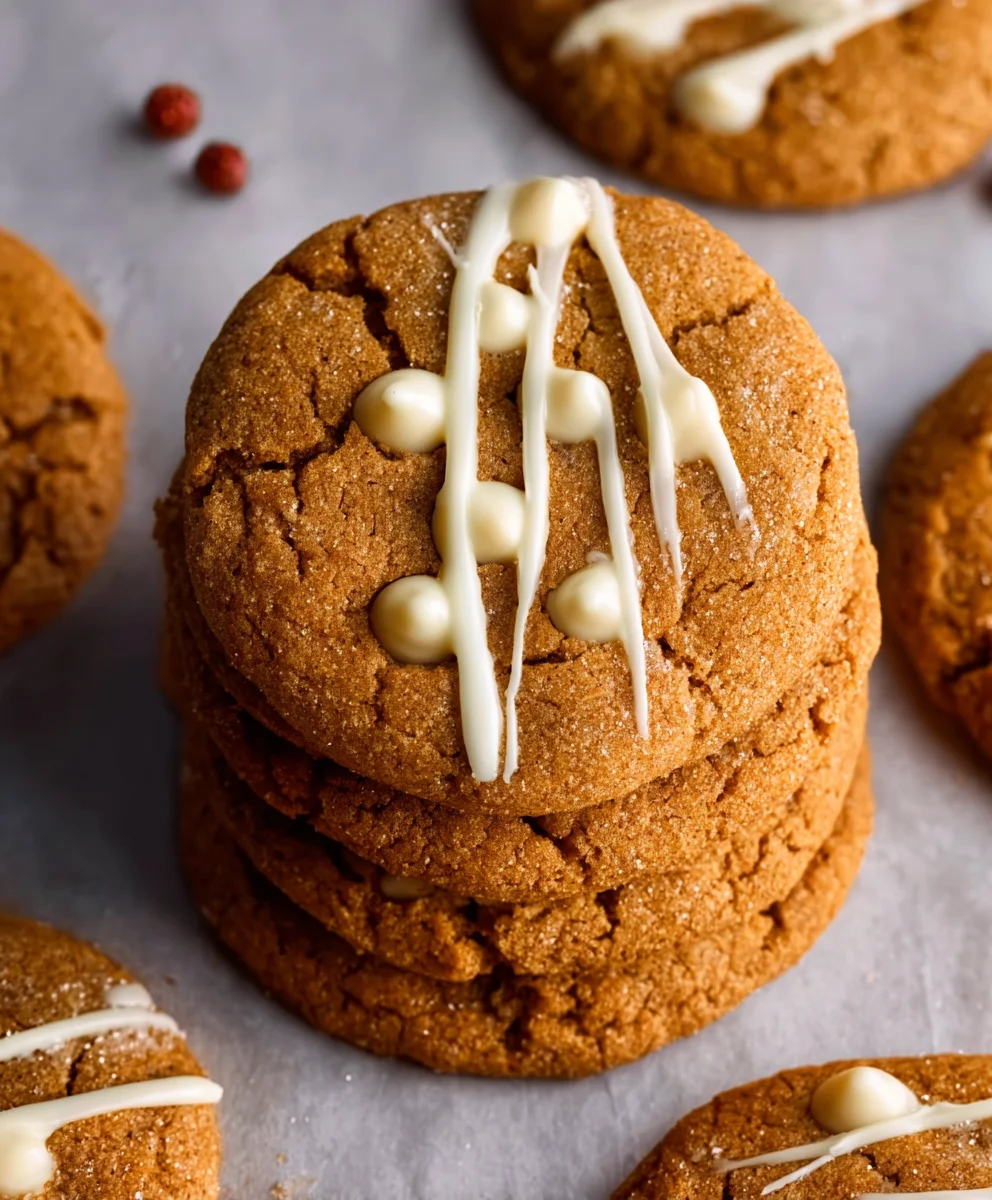
Now for the decorating! For a beautiful, cascading glaze, I like to use a spoon or a small offset spatula to spread the melted white chocolate over the top of each cookie. You don’t need to cover the entire cookie if you prefer a more rustic look, but I find that a good half to two-thirds of the surface looks lovely. Start by scooping a generous spoonful of the melted white chocolate onto the center of the cookie. Then, using the back of the spoon or the spatula, gently encourage the chocolate to spread outwards towards the edges. You can create drips by letting some of the chocolate flow over the sides, which adds to the homemade charm. If you want a more uniform coating, you can spread the chocolate all the way to the edges and slightly down the sides. Don’t worry about perfection; a slightly uneven application can be quite appealing. Work with one cookie at a time so that the white chocolate doesn’t begin to set before you’ve finished decorating it.
Adding the Holly Berry Sprinkles
As soon as you’ve finished glazing a cookie, it’s time to add those festive holly berry sprinkles. Don’t wait too long, as the white chocolate will start to set, and the sprinkles won’t adhere as well. Gently tap or shake the sprinkles over the wet white chocolate. You can be generous with them or just add a few strategically placed ones to mimic holly berries. Aim for a look that’s festive and fun. If you’re going for a holly theme, place a few sprinkles in a cluster to resemble berries. You can even use a toothpick to slightly adjust the position of a sprinkle before the chocolate hardens. The contrast of the bright red sprinkles against the creamy white chocolate is absolutely delightful and screams “holiday season”!
Setting and Enjoying
Once all your Chewy Maple Cinnamon Cookies are decorated with the white chocolate and holly berry sprinkles, you need to let them set. Place the decorated cookies back onto your light colored baking sheets and let them sit at room temperature until the white chocolate has hardened completely. This usually takes about 20-30 minutes, depending on the ambient temperature and humidity. You can speed up the process slightly by placing them in the refrigerator for about 10-15 minutes, but be cautious not to over-refrigerate, as this can sometimes cause condensation on the chocolate. Once the white chocolate is firm to the touch, your Chewy Maple Cinnamon Cookies with White Chocolate are ready to be served! They are wonderful with a glass of milk or a warm cup of tea. Store any leftovers in an airtight container at room temperature for up to 3-4 days.
Conclusion:
There you have it – the ultimate guide to creating wonderfully Chewy Maple Cinnamon Cookies with White Chocolate! This recipe is a true delight, combining the comforting warmth of maple and cinnamon with the sweet indulgence of creamy white chocolate. The result is a cookie that’s perfectly soft and chewy in the center with just a hint of crispness around the edges. I truly hope you enjoy baking and, more importantly, devouring these irresistible treats. They are perfect for a cozy afternoon with a cup of tea or coffee, a delightful addition to any cookie platter, or simply a sweet surprise to brighten someone’s day. Don’t be afraid to experiment with the variations suggested, and remember, the most important ingredient is always love and a sprinkle of your own creativity! Happy baking!
Frequently Asked Questions:
Q1: How can I make these cookies even chewier?
To maximize chewiness in your Chewy Maple Cinnamon Cookies with White Chocolate, ensure you don’t overbake them. Pull them out of the oven when the edges are set but the centers still look slightly underdone. Allowing them to cool on the baking sheet for a few minutes before transferring them to a wire rack also helps them continue to set while retaining their chewiness. Using brown sugar in place of some of the granulated sugar can also contribute to a chewier texture.
Q2: Can I freeze the cookie dough for later?
Absolutely! The dough for these Chewy Maple Cinnamon Cookies with White Chocolate freezes beautifully. You can scoop the dough into balls and place them on a baking sheet to freeze until solid. Once frozen, transfer the dough balls to a freezer-safe bag or container. They can be stored for up to 3 months. When you’re ready to bake, you can bake them directly from frozen, adding a few extra minutes to the baking time.
Chewy Maple Cinnamon White Chocolate Cookies
Festive Chewy Maple Cinnamon Cookies transformed with a creamy white chocolate glaze and cheerful holly berry sprinkles, perfect for the holidays.
Ingredients
-
1 batch Chewy Maple Cinnamon Cookies (recipe by Cooking with Carlee)
-
1 cup white chocolate melting wafers
-
2 tablespoons holly berry sprinkles
-
1/4 cup milk (for drizzling, optional)
-
1 teaspoon vanilla extract (for white chocolate, optional)
Instructions
-
Step 1
Melt the white chocolate. In a microwave-safe bowl, place white chocolate melting wafers. Microwave on 50% power for 30-second intervals, stirring thoroughly after each interval until smooth and glossy. Alternatively, use a double boiler. -
Step 2
Prepare the cookies. Ensure your Chewy Maple Cinnamon Cookies have completely cooled on light colored baking sheets. -
Step 3
Glaze the cookies. Working one cookie at a time, spoon a generous amount of melted white chocolate onto the center. Gently spread it over the top, allowing some to drip down the sides for a rustic look. Ensure the chocolate is still warm and fluid. -
Step 4
Add sprinkles. Immediately after glazing each cookie, gently tap or shake holly berry sprinkles over the wet white chocolate. Arrange them to resemble holly berries if desired. -
Step 5
Set the cookies. Place the decorated cookies back onto light colored baking sheets and let them sit at room temperature for 20-30 minutes until the white chocolate has hardened completely. For a faster set, refrigerate for 10-15 minutes, but avoid over-refrigerating. -
Step 6
Serve and store. Once set, your cookies are ready to enjoy. Store any leftovers in an airtight container at room temperature for up to 3-4 days.
Important Information
Nutrition Facts (Per Serving)
It is important to consider this information as approximate and not to use it as definitive health advice.
Allergy Information
Please check ingredients for potential allergens and consult a health professional if in doubt.

Leave a Comment