
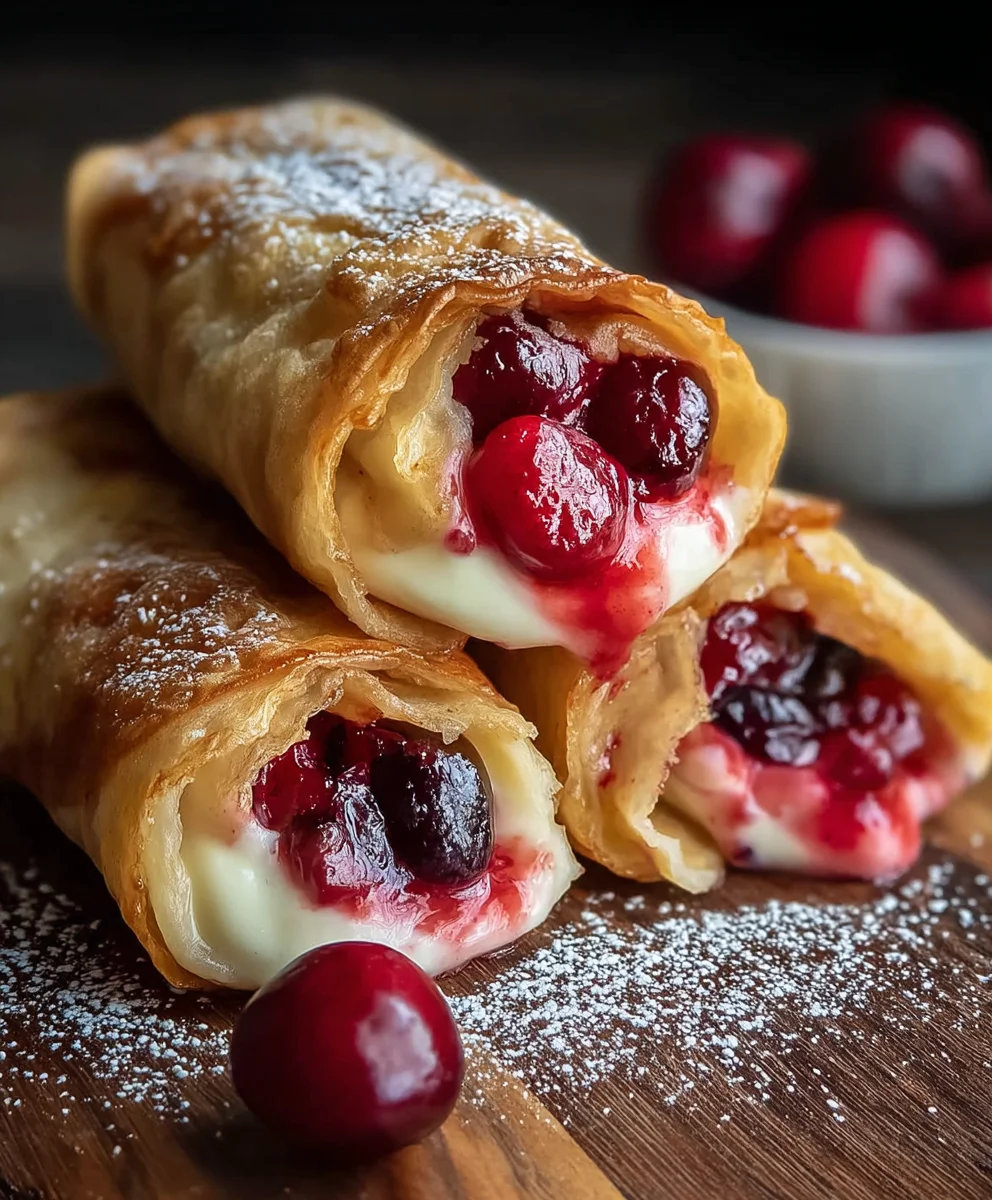
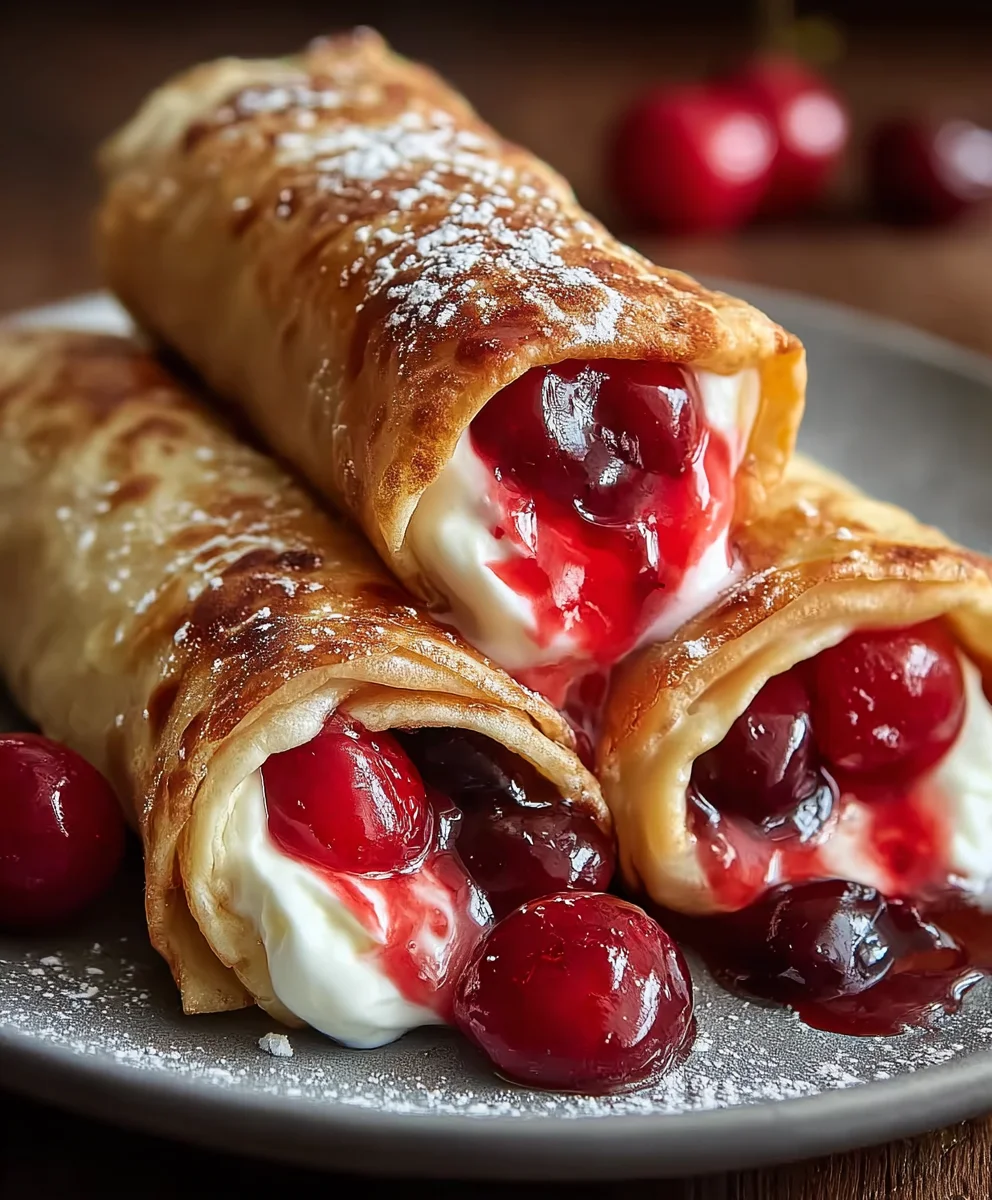
Cherry Cheesecake Chimichangas – just the name alone sparks curiosity, doesn’t it? I’m incredibly excited to share with you a dessert that brilliantly marries two beloved culinary traditions into one unforgettable treat. Forget everything you thought you knew about traditional chimichangas, typically savory and deep-fried; we’re embarking on a delightful journey into the realm of sweet indulgence. This innovative recipe takes the creamy, tangy allure of classic cherry cheesecake and encases it within a crispy, golden-fried tortilla shell, creating a textural and flavor experience that is simply divine.
A Sweet Twist on a Southwestern Classic
While the savory chimichanga holds a proud place in Southwestern American cuisine, often traced back to Arizona, our dessert version is a modern invention, born from a desire to transform familiar comfort foods into something spectacular and unexpected. People adore this dish for its incredible contrasts: the satisfying crunch of the exterior gives way to a warm, luscious cheesecake filling studded with bright, juicy cherries. It’s the perfect blend of creamy, fruity, and crispy, offering all the delightful flavors of a traditional cheesecake but in a fun, handheld, and surprisingly easy-to-make format. Cherry Cheesecake Chimichangas are not just a dessert; they’re an experience, promising to be a showstopper at any gathering or a special treat for a quiet evening at home.

Ingredients:
- For the Creamy Cheesecake Filling:
- 16 oz (two 8-oz blocks) full-fat cream cheese, softened to room temperature. This is crucial for a smooth, lump-free filling.
- 1/2 cup granulated sugar.
- 1 teaspoon pure vanilla extract.
- 1/4 teaspoon almond extract (optional, but it adds a lovely depth that complements the cherry flavor beautifully).
- Pinch of salt.
- 1/4 cup sour cream or heavy cream (adds extra creaminess and a slight tang, balancing the sweetness).
- For the Sweet Cherry Topping:
- 2 cups fresh or frozen pitted cherries (if using frozen, do not thaw; they can go straight into the pan). I prefer Bing or Rainier cherries for their sweetness, but tart cherries work wonderfully too if you prefer a less sweet profile, just adjust sugar slightly.
- 1/4 cup granulated sugar (adjust to taste based on the sweetness of your cherries).
- 1 tablespoon fresh lemon juice. This brightens the cherry flavor significantly.
- 1/2 teaspoon pure vanilla extract.
- 1 tablespoon cornstarch, dissolved in 2 tablespoons cold water (this is our slurry for thickening).
- For the Chimichanga Shells:
- 8-10 large flour tortillas (8-10 inches in diameter). Look for the softer, more pliable kind, not the rigid ones. Whole wheat can work but might alter the texture slightly.
- 1/4 cup unsalted butter, melted (for brushing the tortillas, helps with browning and sealing).
- 2 tablespoons granulated sugar, mixed with 1 teaspoon ground cinnamon (for dusting after frying).
- Optional: 1 egg white, lightly beaten (for sealing the tortillas if desired, though melted butter usually works well).
- For Frying:
- 4-6 cups vegetable oil, canola oil, or peanut oil (enough for about 2-3 inches of oil in a heavy-bottomed pot or Dutch oven). Choose an oil with a high smoke point.
- For Garnish (Optional):
- Fresh mint sprigs.
- A dusting of powdered sugar.
- A dollop of whipped cream or vanilla ice cream.
Preparing the Creamy Cheesecake Filling
First things first, let’s get that luscious cheesecake filling ready. This is the heart of our Cherry Cheesecake Chimichangas, so we want it to be perfectly smooth and rich.
-
Soften the Cream Cheese: It is absolutely essential that your cream cheese is at true room temperature. If it’s even slightly cold, you’ll end up with lumps, and nobody wants lumpy cheesecake filling! I usually take my cream cheese out of the fridge at least an hour or two before I plan to start. You can also carefully microwave it on low power for 10-15 second intervals, flipping it each time, until softened, but be careful not to melt it.
-
Whip the Cream Cheese: In a large mixing bowl, using an electric hand mixer or a stand mixer with the paddle attachment, beat the softened cream cheese on medium speed for about 2-3 minutes. You want it to become incredibly light, airy, and completely smooth. Scrape down the sides of the bowl frequently to ensure everything gets incorporated.
-
Add Sweetness and Flavor: Reduce the mixer speed to low and gradually add the granulated sugar. Beat for another 1-2 minutes until the sugar is fully incorporated and the mixture is smooth again. Now, add the vanilla extract, almond extract (if using), and that tiny pinch of salt. The salt is a secret weapon; it doesn’t make it salty, but it really brightens and enhances all the other flavors. Mix until just combined.
-
Introduce Creaminess: Pour in the sour cream or heavy cream. Mix on low speed until just incorporated. Be careful not to overmix at this stage, as overmixing can sometimes incorporate too much air, which we don’t necessarily want for this type of filling, where density is key. The mixture should be thick, smooth, and spreadable.
-
Chill the Filling: This step is often overlooked but it’s important! Cover the bowl with plastic wrap and refrigerate the cheesecake filling for at least 30 minutes, or even longer. Chilling will firm up the mixture, making it much easier to handle and scoop onto your tortillas without it being too runny. It also allows the flavors to meld together beautifully. This prepared filling is what will make your Cherry Cheesecake Chimichangas truly decadent.
Crafting the Sweet Cherry Topping
While our cheesecake filling is chilling, let’s turn our attention to the vibrant and flavorful cherry topping. This provides the perfect fruity counterpoint to the rich cream cheese, creating the signature “Cherry Cheesecake” experience in our delightful chimichangas.
-
Combine Cherries and Sugar: In a medium saucepan, combine the pitted cherries (fresh or frozen), granulated sugar, and fresh lemon juice. The lemon juice is vital here; it adds a zesty brightness that really makes the cherry flavor pop and prevents the topping from being overly sweet.
-
Cook Down the Cherries: Place the saucepan over medium heat. Bring the mixture to a gentle simmer, stirring occasionally. As the cherries heat up, they will release their juices. If using frozen cherries, this process might take a little longer as they defrost. Continue to simmer for about 5-7 minutes, or until the cherries have softened slightly and the liquid has developed a nice red color. You want the cherries to still have some structure, not turn into a complete mush.
-
Prepare the Cornstarch Slurry: While the cherries are simmering, in a small bowl, whisk together the cornstarch and cold water until smooth. This is your slurry, which will thicken the sauce. It’s important to use cold water, as hot water will cause the cornstarch to clump immediately.
-
Thicken the Sauce: Once the cherries are tender and simmering, give the cornstarch slurry another quick whisk and slowly pour it into the simmering cherry mixture, stirring constantly. Continue to stir and cook for 1-2 minutes, or until the sauce has thickened to a syrupy consistency that coats the back of a spoon. It will thicken more as it cools.
-
Flavor and Cool: Remove the saucepan from the heat. Stir in the vanilla extract. Pour the cherry topping into a heatproof bowl and let it cool completely to room temperature. If you try to use it while hot, it will melt your cheesecake filling. You can even pop it in the refrigerator to speed up the cooling process. This cherry topping is not just for our chimichangas; it’s also amazing over ice cream or pancakes!
Assembling the Cherry Cheesecake Chimichangas
Now for the fun part – putting everything together to create our wonderful Cherry Cheesecake Chimichangas! This stage requires a bit of finesse, but once you get the hang of rolling, it’s quite straightforward.
-
Prepare Your Workspace: Set up your workstation. You’ll need your tortillas, the chilled cheesecake filling, the cooled cherry topping, and the melted butter (and optionally, the beaten egg white). Have a plate or baking sheet lined with parchment paper ready to place the assembled chimichangas.
-
Warm the Tortillas (Optional but Recommended): For maximum flexibility and to prevent cracking, it’s a good idea to slightly warm your tortillas. You can do this by wrapping them in a damp paper towel and microwaving for 20-30 seconds, or by heating them briefly in a dry skillet for about 10-15 seconds per side until pliable. This makes them much easier to roll without tearing.
-
Fill Each Tortilla: Lay one warm tortilla flat on your clean work surface. Spoon about 2-3 tablespoons of the chilled cheesecake filling slightly off-center, closer to one edge of the tortilla. Don’t overfill, as it will make rolling difficult. Leave a generous border around the filling.
-
Add the Cherry Topping: Next, spoon about 1 tablespoon of the cooled cherry topping over the cheesecake filling. Try to keep it contained on top of the cream cheese filling rather than spreading it to the edges. This combination of rich cream cheese and sweet cherries is what defines our Cherry Cheesecake Chimichangas.
-
Fold and Roll the Chimichangas:
- First, fold the two shorter sides of the tortilla inward over the filling, just enough to cover the edges of the filling. This creates a neat package and helps contain everything.
- Next, starting from the side closest to you, tightly roll the tortilla up, away from you, like a burrito. Roll it as snugly as possible to prevent the filling from leaking out during frying.
- Once rolled, brush the seam with a little melted butter (or the egg white, if using). This acts as a glue, helping to seal the chimichanga completely. Place the chimichanga seam-side down on your prepared plate or baking sheet.
Repeat this process for all remaining tortillas and filling. If you run out of one before the other, you can adjust the last few to use up all the delicious components. Ensure all seams are properly sealed.
Frying the Cherry Cheesecake Chimichangas
Now for the exciting part – transforming these filled tortillas into crispy, golden Cherry Cheesecake Chimichangas! Frying gives them that irresistible crunch that contrasts beautifully with the soft, sweet interior.
-
Heat the Frying Oil: Pour the vegetable, canola, or peanut oil into a heavy-bottomed pot or Dutch oven. You want at least 2-3 inches of oil, enough to submerge the chimichangas halfway, allowing them to cook evenly. Attach a deep-fry thermometer to the side of the pot. Heat the oil over medium-high heat until it reaches 350-375°F (175-190°C). Maintaining the correct oil temperature is paramount for perfect chimichangas. Too low, and they’ll be greasy; too high, and they’ll burn before the inside is warmed through.
-
Prepare the Cinnamon Sugar: While the oil heats, mix the 2 tablespoons of granulated sugar with 1 teaspoon of ground cinnamon in a shallow dish. This will be our delicious coating for the fried chimichangas.
-
Fry in Batches: Once the oil is at the correct temperature, carefully place 2-3 chimichangas into the hot oil, seam-side down first. Do not overcrowd the pot, as this will drop the oil temperature and result in soggy chimichangas. Give them space to fry evenly.
-
Golden Perfection: Fry the chimichangas for about 2-3 minutes per side, or until they are beautifully golden brown and crispy all over. Use tongs to carefully flip them. Keep an eye on the oil temperature and adjust the heat as needed to keep it within the ideal range. They cook quickly!
-
Drain and Coat: Once golden, carefully remove the chimichangas from the oil using tongs. Hold them over the pot for a few seconds to let any excess oil drip off. Immediately transfer them to a plate lined with paper towels to absorb any remaining oil.
-
Cinnamon Sugar Dusting: While still warm, carefully roll each chimichanga in the cinnamon-sugar mixture, ensuring it’s evenly coated on all sides. The warmth helps the sugar adhere. This sweet, spiced coating is essential to the flavor profile of our Cherry Cheesecake Chimichangas!
-
Repeat: Continue frying the remaining chimichangas in batches, always allowing the oil to return to the proper temperature between batches. Don’t rush this step for the best results.
Serving Your Delicious Cherry Cheesecake Chimichangas
Once all your Cherry Cheesecake Chimichangas are fried and coated in that wonderful cinnamon sugar, they are ready to be enjoyed! These are best served warm, shortly after frying, when the shell is still wonderfully crisp and the cheesecake filling is warm and gooey.
-
Immediate Enjoyment: Arrange the warm chimichangas on a serving platter. The aroma alone will be intoxicating!
-
Optional Garnishes:
- For an extra touch of elegance and flavor, dust them lightly with a bit of powdered sugar just before serving.
- A sprig of fresh mint adds a pop of color and a refreshing aromatic contrast.
- Consider serving them with a small side of whipped cream or a scoop of vanilla bean ice cream. The cold creaminess provides a delightful temperature and texture contrast to the warm, crispy chimichangas.
- If you have any leftover cherry topping, you can warm it slightly and drizzle a small amount over the chimichangas or serve it on the side for dipping. This really emphasizes the “Cherry” aspect of our Cherry Cheesecake Chimichangas.
-
Serving Suggestion: While they are a complete dessert on their own, the optional additions truly elevate the experience, making them perfect for a special treat or gathering. Be sure to warn your guests that the filling will be hot!
-
Storage (if any remain!): If by some miracle you have leftovers, they can be stored in an airtight container in the refrigerator for up to 2-3 days. To reheat, I recommend using an air fryer at 350°F (175°C) for 5-7 minutes or a toaster oven until crispy again. Microwaving is not recommended as it will make them soggy.
There you have it – a truly delightful and unique dessert that combines the best of a creamy cheesecake with the fun, crispy texture of a chimichanga, all brought together with a burst of sweet cherry flavor. Enjoy every single bite of these incredible Cherry Cheesecake Chimichangas!
Conclusion:
I truly believe that some recipes aren’t just meals; they’re experiences, and this one, my friends, absolutely falls into that category. We’ve journeyed through the simple steps of creating something truly extraordinary, a dessert that defies expectations and delights the senses. The crisp, golden exterior, fried to perfection, gives way to a warm, luscious filling that combines the tangy sweetness of cherries with the creamy, rich texture of cheesecake. It’s a symphony of textures and flavors that dance on your palate, offering a delightful crunch followed by a smooth, indulgent center. This isn’t just another dessert; it’s a conversation starter, a guaranteed crowd-pleaser, and a treat that feels both familiar and excitingly new all at once. If you’ve been looking for that special something to impress your guests, or simply to treat yourself to a moment of pure, unadulterated bliss, then this recipe for Cherry Cheesecake Chimichangas is, without a doubt, your answer. It’s surprisingly simple to assemble, yet the results are spectacularly gourmet, making it a perfect project for any skill level in the kitchen. I promise you, the aroma alone as these golden parcels cook will be enough to get your taste buds tingling, setting the stage for a truly memorable culinary delight that you’ll want to revisit again and again.
But the magic doesn’t end once they’re out of the fryer. Oh no, the serving possibilities for these delightful creations are as endless as your imagination! While a simple dusting of powdered sugar is classic and elegant, truly enhancing their visual appeal and adding a subtle touch of sweetness, don’t stop there. Imagine them served warm, alongside a scoop of premium vanilla bean ice cream, allowing the cold creaminess to perfectly contrast the warm, fruity filling. Or, for an extra layer of decadence, a drizzle of rich chocolate fudge sauce or a swirl of salted caramel can elevate these treats to an entirely new level, adding a sophisticated touch that will impress even the most discerning palates. Consider garnishing with a few fresh mint leaves for a pop of color and a hint of refreshing aroma, or a scattering of additional fresh cherries, if they’re in season, to really drive home that vibrant cherry flavor and add a beautiful visual appeal that makes them look professionally made.
And let’s talk variations! While our focus keyword, Cherry Cheesecake Chimichangas, is undeniably delicious, the beauty of this recipe lies in its incredible adaptability. You could easily swap out the cherry pie filling for apple pie filling, creating a wonderful autumnal dessert reminiscent of apple turnovers but with that unique chimichanga twist. Peach, blueberry, or even a mixed berry filling would work beautifully, each offering its own unique flavor profile while retaining the beloved cheesecake creaminess that makes this recipe so special. For those who love a bit of citrus, a lemon zest mixed into the cream cheese filling could add a bright, zesty counterpoint to any fruit, providing a lovely zing. You could even experiment with different spices in the filling; a pinch of cinnamon or nutmeg would be fantastic with apple, while a tiny hint of almond extract could elevate the cherry flavor even further, adding a depth that is truly captivating. The possibilities are truly vast, making this recipe a foundational favorite that you can customize to suit any craving, season, or occasion. Whether you prefer them hot and fresh, with that delightful warmth emanating from the center, or slightly cooled, perhaps even chilled for a different texture, the combination of crisp pastry and creamy fruit filling remains utterly irresistible and supremely satisfying.
So, what are you waiting for? I’ve shared all my tips and tricks, and now it’s your turn to bring these incredible Cherry Cheesecake Chimichangas to life in your own kitchen. I genuinely believe that cooking should be an adventure, a chance to create joy and share delicious moments with loved ones. This recipe offers exactly that – a straightforward path to an utterly delightful dessert that will earn you rave reviews and requests for more. Don’t be shy; embrace the process, have fun with it, and prepare to be amazed by how easily you can create something so impressive and utterly delicious. Once you’ve whipped up your batch, I would absolutely love to hear about your experience! Did you stick to the classic cherry, or did you venture into a different fruit filling? What was your favorite topping? Please, share your culinary triumphs and any creative twists you added in the comments below, or even better, snap a photo and share it on your favorite social media platform! Your feedback and shared experiences inspire me and others in our wonderful cooking community. Let’s make some delicious memories together and spread the joy of these fantastic desserts!
Cherry Cheesecake Chimichangas
A delightful dessert marrying creamy cherry cheesecake with a crispy, golden-fried tortilla shell. This sweet twist on a classic chimichanga offers a fun, handheld treat perfect for any occasion.
Ingredients
-
8 oz (227g) full-fat cream cheese, softened
-
1/4 cup (50g) granulated sugar (for filling)
-
1 teaspoon (5ml) pure vanilla extract
-
1/4 teaspoon almond extract (optional)
-
Pinch of salt
-
1/4 cup sour cream or heavy cream
-
1 cup (240g) cherry pie filling
-
5 large flour tortillas (8-10 inches)
-
1/4 cup unsalted butter, melted
-
2 tablespoons granulated sugar (for coating)
-
1 teaspoon ground cinnamon
-
Optional: 1 egg white, lightly beaten (for sealing)
-
4 cups (960ml) vegetable oil (for frying)
Instructions
-
Step 1
In a large bowl, beat softened cream cheese until smooth and airy (2-3 minutes). Gradually add 1/4 cup granulated sugar, vanilla extract, optional almond extract, and salt; mix until combined. Stir in sour cream or heavy cream until just incorporated. Chill for at least 30 minutes to firm up. -
Step 2
Warm tortillas slightly for flexibility (microwave 20-30 seconds). Lay one tortilla flat. Spoon 2-3 tablespoons of chilled cheesecake filling onto one edge. Top with about 1 tablespoon of cherry pie filling. -
Step 3
Fold the two shorter sides of the tortilla inward over the filling. Tightly roll the tortilla away from you, like a burrito. Brush the seam with melted butter (or egg white) to seal completely. Place seam-side down on a prepared plate. -
Step 4
In a heavy pot, heat 4 cups vegetable oil to 350-375°F (175-190°C). In a shallow dish, mix 2 tablespoons granulated sugar with 1 teaspoon ground cinnamon. -
Step 5
Carefully place 2-3 chimichangas (seam-side down) into the hot oil. Fry for 2-3 minutes per side, or until golden brown and crispy. Do not overcrowd; maintain oil temperature. -
Step 6
Remove fried chimichangas from oil, letting excess oil drip off. Immediately roll each warm chimichanga in the cinnamon-sugar mixture. Serve warm, optionally garnished with powdered sugar, fresh mint, whipped cream, or vanilla ice cream.
Important Information
Nutrition Facts (Per Serving)
It is important to consider this information as approximate and not to use it as definitive health advice.
Allergy Information
Please check ingredients for potential allergens and consult a health professional if in doubt.


Leave a Comment