
Biscoff Mini Cheesecakes are truly a delightful creation that promises to elevate any dessert table or satisfy your sweet cravings with an unforgettable taste. I am absolutely thrilled to share this recipe with you today, as it beautifully combines two universally adored treats into one perfectly portioned indulgence. The iconic Lotus Biscoff biscuit, with its distinctive caramelized flavor and crisp texture, originated in Belgium as a simple seasonal cookie. Over the years, its unique charm has captivated palates worldwide, transforming from a humble accompaniment to coffee into a beloved ingredient in countless desserts. Similarly, the classic cheesecake, with its rich, creamy filling and often crumbly base, has been a timeless favorite for centuries, evolving from ancient Greek origins to the beloved New York style we know today.
What makes these individual desserts so incredibly special? It is the harmonious marriage of the spiced, crunchy Biscoff base and topping with a velvety smooth, tangy cream cheese filling that truly captivates.
People adore these Biscoff Mini Cheesecakes not only for their exquisite flavor profile and contrasting textures but also for their sheer convenience.
Each one is a perfectly sized treat, eliminating the need for slicing and making them ideal for gatherings, parties, or a luxurious personal dessert. I find them to be an irresistible combination of comfort and sophistication, truly a stellar choice for anyone seeking a unique and utterly delicious sweet escape.

Ingredients:
-
For the Biscoff Crust:
- 1 ½ cups (approximately 200g or one standard package) Biscoff Lotus cookies, finely crushed
- ¼ cup (56g) unsalted butter, melted
-
For the Biscoff Cheesecake Filling:
- 24 oz (three 8-oz blocks) full-fat cream cheese, softened to room temperature
- ¾ cup (150g) granulated sugar
- 2 large eggs, at room temperature
- 1 teaspoon pure vanilla extract
- ¼ cup (60ml) sour cream or full-fat heavy cream, at room temperature
- ½ cup (120g) Biscoff Lotus cookie spread, melted and cooled slightly
-
For the Topping and Garnish (Optional, but highly recommended!):
- ½ cup (120g) Biscoff Lotus cookie spread, melted
- 6-8 Biscoff Lotus cookies, crushed or broken into pieces, for garnish
-
Equipment You’ll Need:
- 12-cup muffin tin or mini cheesecake pan
- Paper cupcake liners or foil liners
- Large roasting pan (for water bath)
- Food processor or a large sturdy Ziploc bag and rolling pin
- Electric hand mixer or stand mixer with paddle attachment
- Rubber spatula
- Measuring cups and spoons
- Small microwave-safe bowl (for melting butter and Biscoff spread)
Preparing the Biscoff Cookie Crust
- Preheat and Prepare: First things first, let’s get our oven ready. Preheat your oven to 325°F (160°C). While it’s heating up, line a standard 12-cup muffin tin with paper cupcake liners. I find that using liners makes it incredibly easy to remove the finished Biscoff Mini Cheesecakes, plus they look extra pretty! If you have a mini cheesecake pan with removable bottoms, simply place those into the pan and skip the liners – they’re designed for easy release.
- Crush the Biscoff Cookies: Now for the star of our crust – the Biscoff cookies! You’ll want to finely crush about 1 ½ cups of these delightful cookies. My go-to method is using a food processor. Just toss the entire package of Biscoff cookies into the bowl and pulse until they form very fine crumbs, resembling sand. It’s important to get them as fine as possible to ensure a solid, even crust. If you don’t have a food processor, no worries at all! Place the cookies in a sturdy, large Ziploc bag, seal it tightly, and use a rolling pin or the bottom of a heavy pan to smash them into fine crumbs. This can be quite therapeutic, actually! Make sure there are no big chunks left behind.
- Combine with Melted Butter: Once your Biscoff crumbs are perfectly fine, transfer them to a medium-sized bowl. Next, melt your ¼ cup of unsalted butter. You can do this in the microwave in 15-second intervals or gently on the stovetop. Pour the melted butter over the Biscoff crumbs. Using a fork or your hands, mix the butter into the crumbs until they are thoroughly combined and resemble wet sand. Every crumb should be moistened by the butter, which acts as the binding agent for our delicious crust.
- Press the Crust into Liners: This is where our Biscoff Mini Cheesecakes truly begin to take shape. Distribute the Biscoff cookie mixture evenly among the 12 lined muffin cups. I usually use a tablespoon or two per cup, depending on how thick I want my crust. Then, using the back of a spoon, your fingers, or even a small tart tamper if you have one, firmly press the crumbs into the bottom of each liner. Pressing firmly is key to prevent the crust from crumbling when you bite into your cheesecake later. Make sure the layer is even and compact.
- Pre-bake (Optional but Recommended): While some recipes skip this, I always recommend a quick pre-bake for the crust. It helps to set it, making it extra sturdy and preventing it from becoming soggy from the cheesecake filling. Pop the muffin tin into your preheated oven for about 5-7 minutes, just until the crusts are lightly golden and fragrant. Remove from the oven and set aside to cool slightly while we prepare the filling. Keep the oven on, as we’ll be using it again very soon!
Crafting the Silky Smooth Biscoff Cheesecake Filling
- Soften the Cream Cheese: The secret to an unbelievably smooth cheesecake filling is starting with perfectly softened cream cheese. Seriously, this is a non-negotiable step! Make sure your three 8-oz blocks of full-fat cream cheese have been sitting out at room temperature for at least 1-2 hours. If it’s too cold, it won’t blend smoothly with the sugar and you’ll end up with lumps, which we absolutely want to avoid for our Biscoff Mini Cheesecakes.
- Cream the Cream Cheese and Sugar: In the bowl of your electric stand mixer fitted with the paddle attachment (or a large bowl with an electric hand mixer), place the softened cream cheese. Beat the cream cheese on medium speed for about 2-3 minutes, scraping down the sides of the bowl occasionally, until it’s completely smooth and free of any lumps. Then, gradually add the ¾ cup of granulated sugar to the cream cheese. Continue beating on medium speed for another 2-3 minutes, until the mixture is light, fluffy, and the sugar is fully incorporated. Again, make sure to scrape down the sides and bottom of the bowl multiple times to ensure everything is evenly mixed.
- Incorporate Eggs, One at a Time: Now, add the eggs. This is another crucial step for cheesecake perfection! Add one large egg at a time to the cream cheese mixture. After each egg, mix on low speed just until it is just incorporated. Do not overmix at this stage! Overmixing eggs introduces too much air into the batter, which can cause your cheesecakes to puff up excessively in the oven and then sink or crack as they cool. We want dense, creamy Biscoff Mini Cheesecakes, not airy ones. Scrape down the bowl after each egg addition.
- Add Vanilla and Sour Cream/Heavy Cream: Once the eggs are gently mixed in, add the 1 teaspoon of pure vanilla extract and ¼ cup of room temperature sour cream or heavy cream. Mix on low speed just until combined. The sour cream or heavy cream adds a beautiful richness and helps to create that signature velvety texture that makes cheesecakes so irresistible.
- Fold in Melted Biscoff Spread: It’s time to infuse our filling with that distinctive Biscoff flavor! Measure out ½ cup of Biscoff Lotus cookie spread. Gently melt it in the microwave in 15-second intervals until it’s smooth and pourable, then let it cool slightly – we don’t want to add hot spread to our batter. Pour the slightly cooled Biscoff spread into your cheesecake batter. Using a rubber spatula, gently fold the Biscoff spread into the mixture until just combined and you see no streaks of plain cream cheese batter. Be careful not to overmix! The goal is to evenly distribute the Biscoff flavor without introducing too much air. This luscious, spiced cookie spread is what truly makes these “Biscoff Mini Cheesecakes” shine!
- Fill the Crusts: Divide the Biscoff cheesecake filling evenly among the 12 pre-baked (or unbaked, if you skipped that step) Biscoff cookie crusts in your muffin tin. I like to use an ice cream scoop for this, as it helps with even distribution. Each cup should be filled almost to the top, leaving just a small amount of room for expansion. Gently tap the muffin tin on your counter a few times to release any large air bubbles from the filling.
Baking Your Perfect Biscoff Mini Cheesecakes (with a Water Bath!)
- Prepare the Water Bath: This is a key step for achieving perfectly creamy, crack-free cheesecakes, even mini ones! Place your muffin tin (the one with the cheesecake batter) inside a larger roasting pan. Now, carefully pour hot water into the roasting pan, making sure it comes about halfway up the sides of your muffin tin. Be very careful not to get any water into the cheesecake batter itself! The water bath creates a humid environment in your oven, which helps the cheesecakes bake gently and evenly, preventing them from drying out or cracking. It’s truly a game-changer for cheesecake texture.
- Bake: Carefully transfer the roasting pan with the muffin tin inside to your preheated 325°F (160°C) oven. Bake for approximately 20-25 minutes. The baking time can vary depending on your oven, so keep an eye on them. You’ll know they’re done when the edges are set and appear slightly firm, but the centers still have a slight jiggle to them when you gently shake the pan. They will continue to set as they cool. Overbaking is the enemy of a creamy cheesecake, so err on the side of slightly underbaked if you’re unsure.
- Slow Cooling in the Oven: Once baked, turn off the oven but leave the roasting pan (with the muffin tin inside and the water bath) in the oven with the door propped open slightly (a wooden spoon works perfectly for this). Let the Biscoff Mini Cheesecakes cool in the gradually cooling oven for at least 30-60 minutes. This slow cooling process is incredibly important as it helps prevent cracking due to sudden temperature changes. It allows the cheesecakes to settle gently.
- Room Temperature Cooling: After the slow cool in the oven, carefully remove the muffin tin from the roasting pan and remove the muffin tin from the water bath. Place the muffin tin on a wire rack to cool completely to room temperature. This can take another 1-2 hours. Resist the urge to rush this step; patience is a virtue when it comes to cheesecake!
- Chill Thoroughly: Once your Biscoff Mini Cheesecakes are at room temperature, transfer the muffin tin to the refrigerator. Chill them for at least 4 hours, but preferably overnight. This chilling period is absolutely essential. It allows the cheesecakes to firm up completely, develop their full flavor, and become perfectly sliceable (or in this case, peel-able from their liners). A properly chilled cheesecake is a truly magnificent thing.
Decorating and Serving Your Irresistible Biscoff Mini Cheesecakes
- Prepare Biscoff Topping: When your Biscoff Mini Cheesecakes are fully chilled and you’re ready to serve, it’s time for the glorious topping! Measure out the remaining ½ cup of Biscoff Lotus cookie spread. Melt it gently in the microwave in 15-second bursts, stirring in between, until it’s smooth and pourable. Let it cool for a minute or two so it’s warm but not hot.
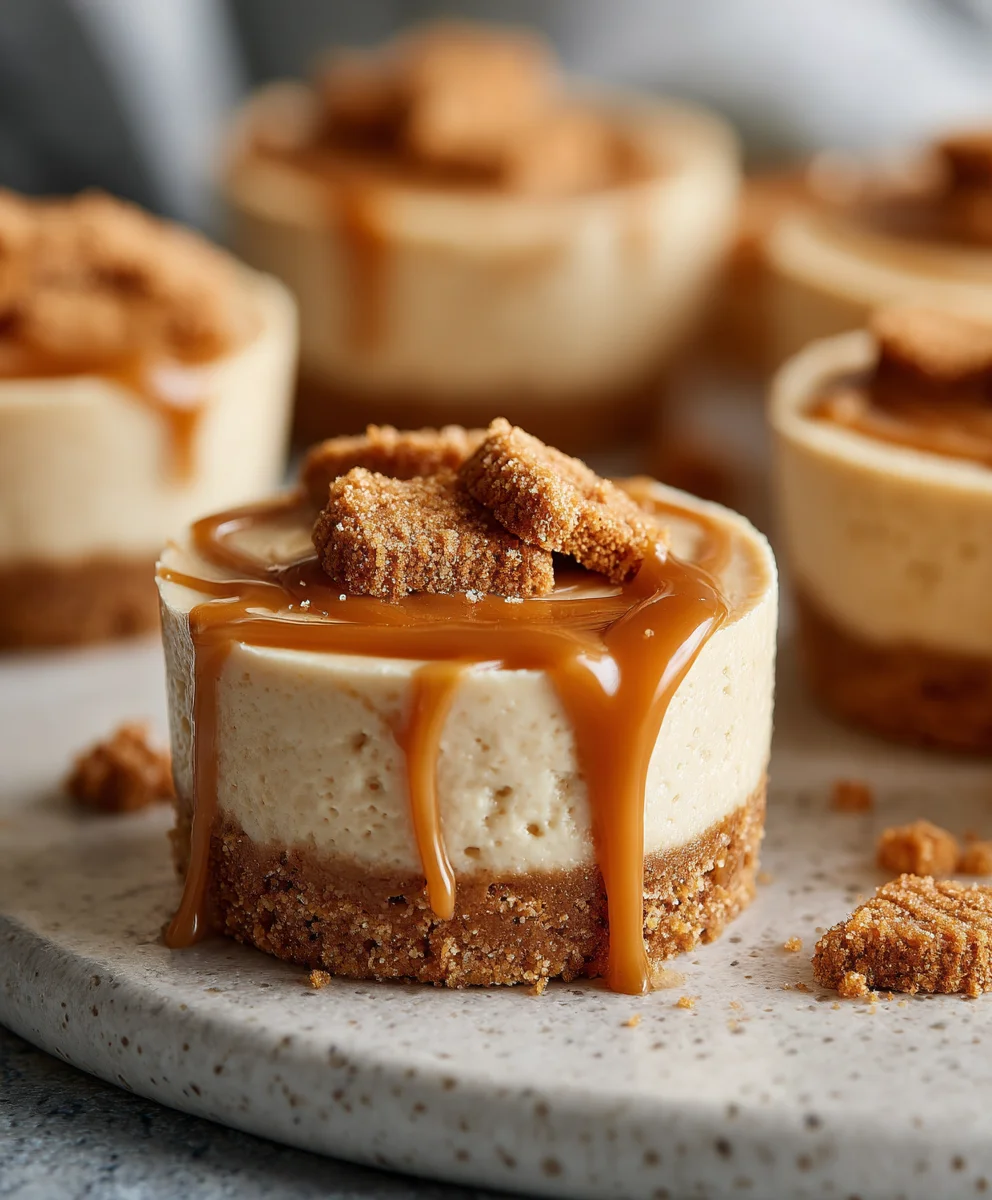
- Top the Cheesecakes: Carefully peel the paper liners away from your chilled Biscoff Mini Cheesecakes. If you used a mini cheesecake pan with removable bottoms, gently push them up from the bottom. Place the cheesecakes on a serving platter. Drizzle or spread a generous amount of the melted Biscoff topping over each individual cheesecake. You can use a spoon for a rustic drizzle or a small offset spatula for a smoother finish.
- Garnish (Optional but Highly Recommended!): For an extra touch of beauty and texture, crush a few more Biscoff Lotus cookies into coarse crumbs or break them into small pieces. Sprinkle these delightful crumbs over the melted Biscoff topping on each cheesecake. This not only looks fantastic but also adds another layer of that signature Biscoff crunch.
- Serve and Enjoy: Your magnificent Biscoff Mini Cheesecakes are now ready to be devoured! Serve them chilled. The creamy, spiced cheesecake, the crunchy Biscoff crust, and the smooth, sweet Biscoff topping create an explosion of flavor and texture that is utterly divine.
- Storage: Any leftover Biscoff Mini Cheesecakes should be stored in an airtight container in the refrigerator for up to 5 days. While they rarely last that long in my house, it’s good to know they keep well! You can also freeze them (without the topping) for up to 1 month. Just wrap them individually in plastic wrap and then place them in a freezer-safe bag. Thaw in the refrigerator before serving and add the topping. Enjoy every single bite of these truly special Biscoff Mini Cheesecakes!
Conclusion:
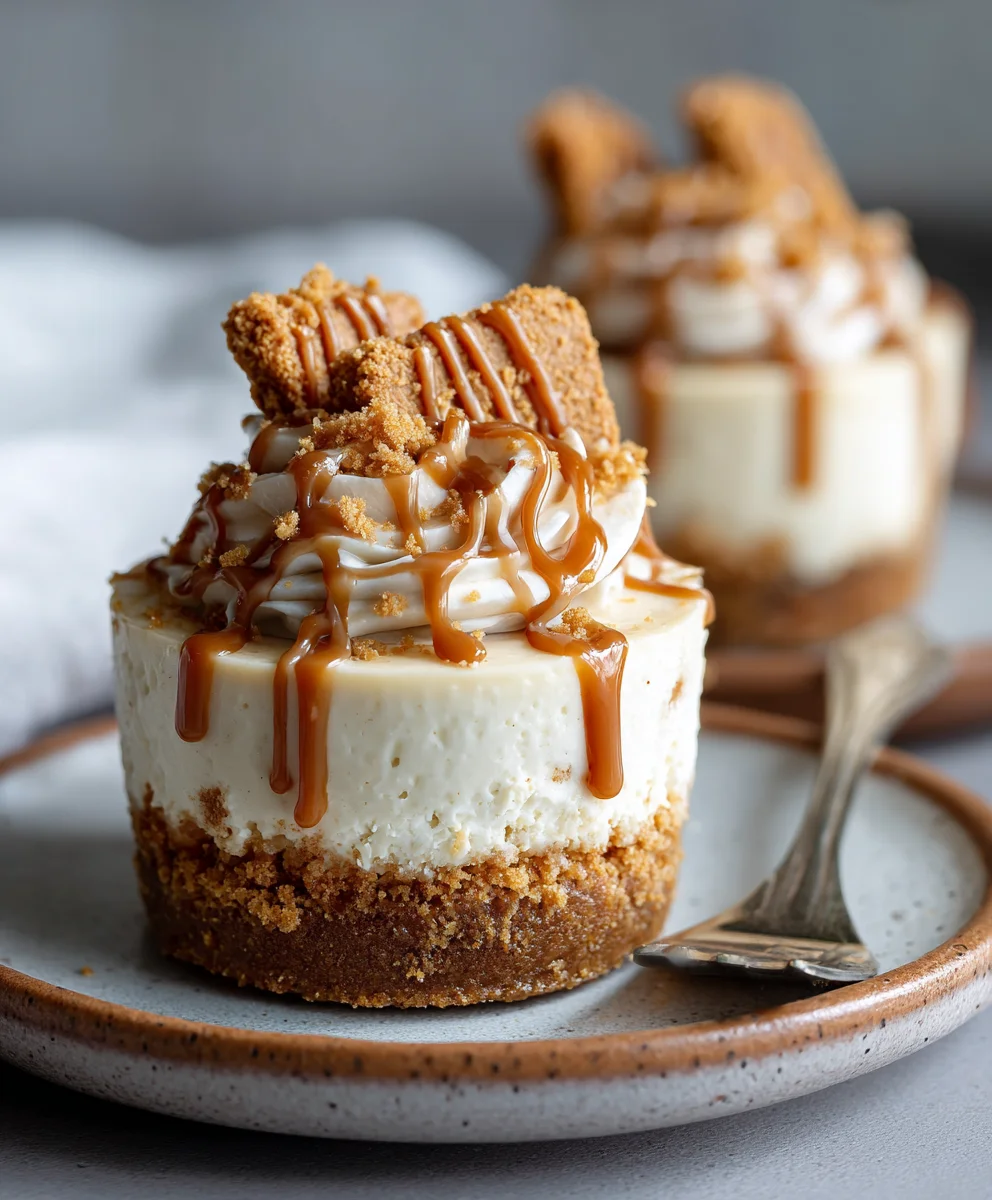
So, why should you drop everything and make these Biscoff Mini Cheesecakes right now? Well, where do I even begin? These aren’t just any cheesecakes; they’re a true culinary revelation, a symphony of creamy, tangy, and exquisitely spiced goodness, all wrapped up in a perfectly portioned, irresistible bite. I promise you, the moment you take that first forkful, you’ll understand. The foundation is a wonderfully crunchy, buttery Biscoff cookie crust, providing a delightful textural contrast to the velvety smooth cheesecake filling. This filling isn’t just plain; it’s generously infused with that iconic, deeply caramelized, and subtly spiced Lotus Biscoff cookie butter flavor that we all adore. Then, for a crowning touch, a luxurious swirl of warmed Biscoff cookie butter graces the top, sometimes even adorned with a delicate Biscoff cookie crumble, adding another layer of flavor and crunch. They strike that perfect balance of being intensely rich and indulgent without ever feeling overly heavy, leaving you perfectly satisfied and perhaps craving just one more. The individual portions mean no fuss, no slicing, and absolutely perfect for sharing (or not sharing, I won’t tell!). These are the ultimate crowd-pleaser, destined to be the star of any dessert table, from casual family gatherings to more elegant dinner parties. They’re surprisingly easy to prepare, making them an ideal dessert project for both seasoned bakers and complete novices. I genuinely believe that once you try these, they’ll become a cherished staple in your baking repertoire.
But the magic surrounding these delightful little treats doesn’t stop once they’re baked and chilled. While these Biscoff Mini Cheesecakes are absolutely divine and complete masterpieces entirely on their own, I simply adore getting creative with how I serve and adapt them, encouraging you to do the same! For an extra touch of pure decadence, consider adding a delicate dollop of freshly whipped cream – its lightness provides a beautiful counterpoint to the cheesecake’s richness. A tiny sprinkle of flaky sea salt on top can work wonders, too, enhancing the caramelized notes of the Biscoff and making that unique flavor truly pop. They pair wonderfully with a variety of beverages, making them incredibly versatile. Imagine savoring one with a steaming hot cup of artisanal coffee or a fragrant herbal tea for an elegant afternoon pick-me-up. For those who prefer something cooler, a tall, cold glass of milk, a creamy milkshake, or even an iced coffee would be an exquisite companion.
Thinking about delightful variations to keep things exciting? Oh, the possibilities are endless! You could easily swirl in a different type of cookie butter, like an almond butter or even a cashew butter for a unique twist, though the Biscoff truly holds a special place. For an added textural dimension, finely chopped pecans or walnuts can be incorporated into the Biscoff crust mixture before pressing it into the muffin liners. If you’re looking to introduce a fruity freshness, a few vibrant fresh berries like plump raspberries, juicy blueberries, or sliced strawberries offer a lovely contrast to the richness of the cheesecake, making them feel a little lighter and brighter.
Seasonal Twists to Elevate Your Biscoff Mini Cheesecakes
During the festive holiday season, a delicate dusting of ground cinnamon or nutmeg over the finished cheesecakes, perhaps accompanied by a small candied cranberry or a sprig of mint, would instantly transform them into charming, festive delights perfect for any celebratory spread. For autumn, a tiny dollop of apple butter or a sprinkle of pumpkin spice could evoke warm, comforting feelings. Don’t be afraid to experiment with your favorite seasonal garnishes – a little creativity goes a long way in making these already spectacular cheesecakes truly your own signature dessert.
I truly hope that by now, you’re feeling incredibly inspired and perhaps even a little bit eager to head into your kitchen to whip up a batch of these glorious Biscoff Mini Cheesecakes. This is more than just a recipe for me; it’s a creation that has brought so much joy, sweet satisfaction, and countless compliments to my kitchen, and I am absolutely confident they’ll do the very same for yours. Don’t hesitate, gather your ingredients, follow the simple steps, and let the magic happen! Once you’ve tasted these little wonders, once you’ve seen the smiles they bring to the faces of your loved ones, I would absolutely love to hear about your experience. Did you add a special, inventive touch? Were they a monumental hit with your friends and family? Please, share your stories, your stunning photos, and any brilliant ideas or serving suggestions you come up with. Your culinary adventures inspire me endlessly, and I genuinely cannot wait to see your delightful creations come to life. Happy baking, my dear friends!
Biscoff Mini Cheesecakes
Delightful Biscoff Mini Cheesecakes combining a spiced Biscoff biscuit crust and topping with a velvety smooth, tangy cream cheese filling. Perfectly portioned and ideal for any occasion.
Ingredients
-
1 ½ cups (200g) Biscoff Lotus cookies, finely crushed (for crust)
-
¼ cup (56g) unsalted butter, melted (for crust)
-
24 oz (3 blocks) full-fat cream cheese, softened (for filling)
-
¾ cup (150g) granulated sugar (for filling)
-
2 large eggs, at room temperature (for filling)
-
1 teaspoon pure vanilla extract (for filling)
-
¼ cup (60ml) sour cream or full-fat heavy cream, at room temperature (for filling)
-
½ cup (120g) Biscoff Lotus cookie spread, melted and cooled slightly (for filling)
-
½ cup (120g) Biscoff Lotus cookie spread, melted (for topping)
-
6-8 Biscoff Lotus cookies, crushed or broken into pieces (for garnish)
Instructions
-
Step 1
Preheat oven to 325°F (160°C). Line a standard 12-cup muffin tin with paper cupcake liners or use a mini cheesecake pan with removable bottoms. -
Step 2
Finely crush 1 ½ cups Biscoff Lotus cookies using a food processor or a Ziploc bag and rolling pin until fine crumbs resemble sand. Combine crumbs with ¼ cup melted unsalted butter until moistened like wet sand. -
Step 3
Press the Biscoff mixture firmly and evenly into the bottom of each lined muffin cup. Pre-bake for 5-7 minutes until lightly golden. Remove and let cool slightly, keeping the oven on. -
Step 4
In a stand mixer, beat 24 oz softened full-fat cream cheese on medium speed for 2-3 minutes until smooth. Gradually add ¾ cup granulated sugar and beat for another 2-3 minutes until light and fluffy, scraping down the bowl as needed. -
Step 5
Add eggs one at a time, mixing on low speed just until each is incorporated. Do not overmix. Stir in 1 teaspoon vanilla extract and ¼ cup room temperature sour cream or heavy cream until just combined. -
Step 6
Gently fold in ½ cup melted and slightly cooled Biscoff Lotus cookie spread with a rubber spatula until just combined, ensuring no streaks of plain batter remain. Avoid overmixing. -
Step 7
Divide the cheesecake filling evenly among the 12 pre-baked crusts, filling almost to the top. Gently tap the muffin tin on the counter to release air bubbles. Place the muffin tin inside a larger roasting pan. -
Step 8
Carefully pour hot water into the roasting pan, ensuring it comes halfway up the sides of the muffin tin without getting into the batter. Bake for 20-25 minutes at 325°F (160°C), until edges are set and centers have a slight jiggle. -
Step 9
Turn off the oven, prop the door open slightly, and let cheesecakes cool slowly in the oven within the water bath for 30-60 minutes. This prevents cracking. -
Step 10
Remove the muffin tin from the roasting pan and water bath. Cool completely to room temperature on a wire rack (1-2 hours). Transfer to the refrigerator and chill for at least 4 hours, preferably overnight, until firm. -
Step 11
Once chilled, carefully peel away liners or remove from pan. Melt the remaining ½ cup Biscoff Lotus cookie spread until smooth; let cool slightly. Drizzle or spread generously over each cheesecake. Garnish with additional crushed Biscoff cookies. -
Step 12
Serve chilled. Store leftover Biscoff Mini Cheesecakes in an airtight container in the refrigerator for up to 5 days. For longer storage, freeze without topping for up to 1 month, wrapped individually.
Important Information
Nutrition Facts (Per Serving)
It is important to consider this information as approximate and not to use it as definitive health advice.
Allergy Information
Please check ingredients for potential allergens and consult a health professional if in doubt.
Leave a Comment