
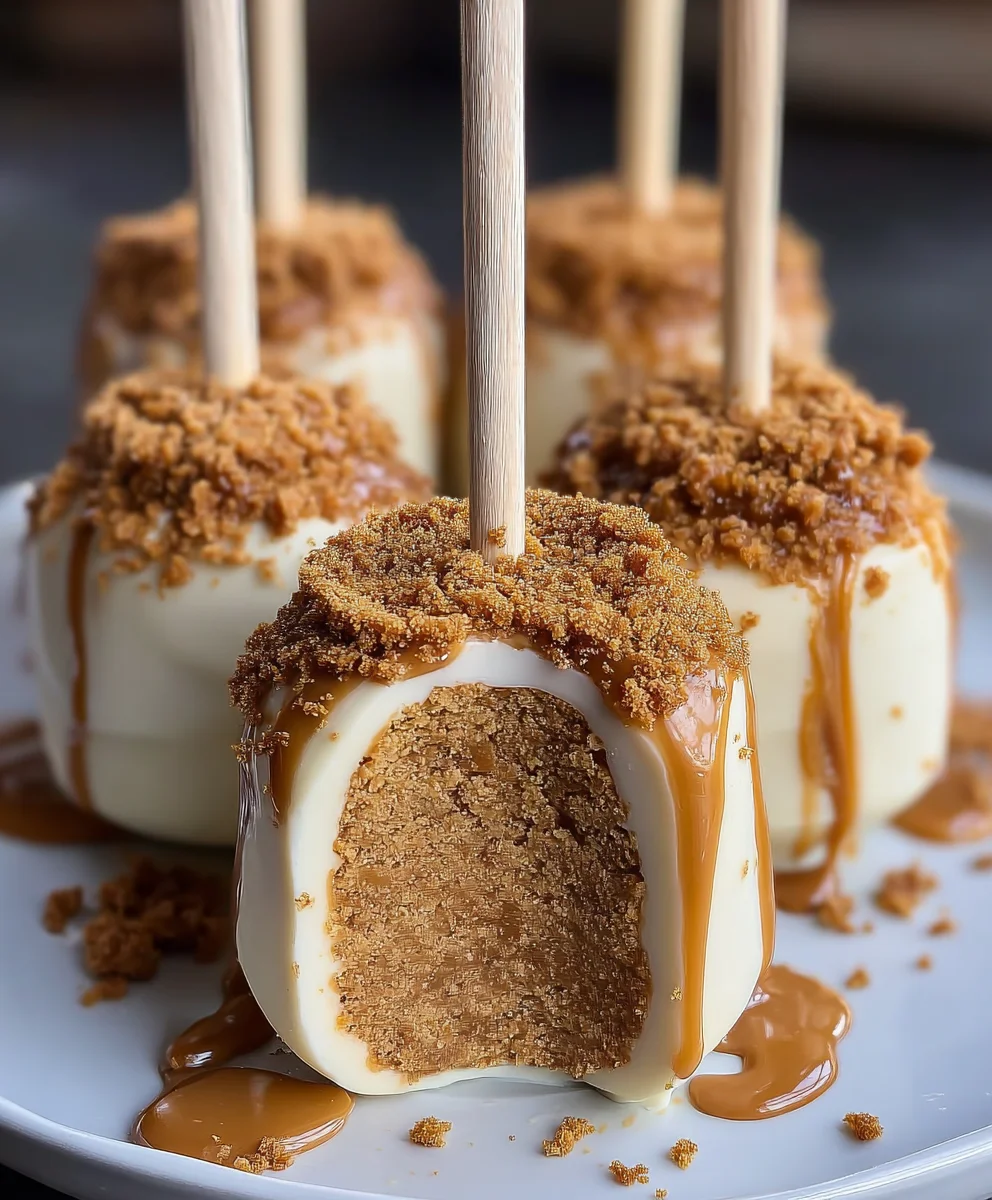
Biscoff Cookie Butter Cheesecake Pops are a delightful little package of pure joy, and trust me, once you try them, you’ll understand why they’ve become such a sensation. Imagin extracte the creamy, dreamy indulgence of cheesecake, elevated by the warm, spiced caramel notes of Biscoff cookies and that incredibly smooth, irresistible cookie butter. It’s a flavor combination that’s both comforting and exciting, making these pops perfect for any occasion, from a simple sweet treat to a show-stopping dessert for your next gathering. What makes these Biscoff Cookie Butter Cheesecake Pops so special is the ingenious way we’ve transformed a classic dessert into bite-sized perfection. They offer all the rich, decadent flavor of a traditional cheesecake but in a fun, portable, and utterly addictive format. Get ready to fall head over heels for these!

Ingredients:
- 8 oz cream cheese, softened
- ½ cup powdered sugar
- 1 teaspoon vanilla extract
- ½ cup whipped cream (or Cool Whip)
- ½ cup crushed Biscoff cookies
- ½ cup Biscoff cookie butter
- 2 tablespoons heavy cream (optional, for thinning)
- Whole Biscoff cookies
- Extra crushed Biscoff cookies for garnish
- Popsicle sticks
Biscoff Cookie Butter Cheesecake Pops Preparation
Creating the Cheesecake Base
- To begin extract crafting these delightful Biscoff Cookie Butter Cheesecake Pops, the first crucial step is to ensure your cream cheese is properly softened. This means taking it out of the refrigerator at least 30-60 minutes before you plan to start mixing. Softened cream cheese is essential for achieving a smooth, lump-free cheesecake filling. In a medium-sized mixing bowl, add the 8 ounces of softened cream cheese. Using an electric mixer (handheld or stand mixer with a paddle attachment), beat the cream cheese on medium speed until it becomes completely smooth and creamy. Scrape down the sides of the bowl periodically to make sure all the cream cheese is incorporated and there are no pockets of unmixed cheese.
- Once the cream cheese is smooth, it’s time to add the sweetness and flavor. Gradually add the ½ cup of powdered sugar to the cream cheese, continuing to beat on medium speed until the sugar is fully incorporated and the mixture is light and fluffy. Next, add the 1 teaspoon of vanilla extract. Vanilla extract is a classic pairing with cream cheese and helps to enhance the overall flavor profile of the cheesecake. Beat until just combined, being careful not to overmix at this stage, which can sometimes make the filling too thin.
- Now, we’ll introduce the airy lightness that makes these pops so wonderfully creamy. Gently fold in the ½ cup of whipped cream (or your convenient Cool Whip). If you’re using whipped cream, ensure it’s already whipped to stiff peaks. If using Cool Whip, it’s ready to go straight from the container. Use a spatula to fold the whipped cream into the cream cheese mixture until no streaks of cream cheese remain. This folding motion helps to preserve the airiness of the whipped cream, which contributes to the light texture of the final cheesecake filling. Avoid vigorous mixing; gentle folding is key.
- The star of the show, the Biscoff cookie butter, is next. Add the ½ cup of Biscoff cookie butter to the bowl. This rich, spiced cookie spread will impart a wonderful depth of flavor and a beautiful caramel-like hue to your cheesecake mixture. Beat on low speed, just until the cookie butter is fully incorporated into the cream cheese mixture. If you desire a slightly thinner consistency for easier piping or spooning into molds, you can now add the 2 tablespoons of heavy cream, a little at a time, and mix until the desired consistency is reached. Remember, the mixture should be thick enough to hold its shape but spreadable.
- To add that delightful cookie crunch and texture, gently fold in the ½ cup of crushed Biscoff cookies. Reserve a few whole Biscoff cookies for decoration later. Make sure the crushed cookies are evenly distributed throughout the cheesecake mixture. This step ensures that every bite of your cheesecake pops will have a satisfying texture contrast.
Assembly and Freezing
- Now it’s time to assemble your Biscoff Cookie Butter Cheesecake Pops. You have a couple of options for shaping. You can use small silicone molds designed for popsicles or mini cheesecakes, or you can prepare a small loaf pan lined with parchment paper, leaving some overhang to lift the cheesecake out later. If using a loaf pan, you’ll cut the solidified cheesecake into smaller portions before inserting the sticks. Spoon or pipe the cheesecake mixture evenly into your chosen molds or prepared pan. Ensure the mixture fills the molds completely, pressing gently to eliminate any air pockets.
- This is a critical step for achieving the pop shape. If you are using molds designed for pops, insert a popsicle stick into each mold, pushing it about halfway into the cheesecake mixture. If you are using a loaf pan and will be cutting later, you can wait until the cheesecake is partially frozen before inserting the sticks.
- Once your molds are filled and the sticks are inserted (or you’re ready to insert them), carefully transfer them to the freezer. Allow them to freeze for at least 4-6 hours, or preferably overnight, until they are completely firm. This extended freezing time is essential for the cheesecake to set properly, making it easy to remove from the molds and ensuring it holds its shape when dipped. Patience here will be richly rewarded with perfectly formed pops.
Decorating and Serving
- With your cheesecake pops fully frozen and firm, it’s time for the final, fun touches. You can choose to simply roll them in extra crushed Biscoff cookies for a textured coating, or you can opt for a dip. To prepare for dipping, if you desire, melt some additional Biscoff cookie butter or even some white chocolate or regular chocolate chips in a microwave-safe bowl in 30-second intervals, stirring between each, until smooth. You can thin this with a tiny bit of vegetable oil or coconut oil if it’s too thick.
- Carefully remove the frozen cheesecake pops from their molds or from the loaf pan (if you prepared one, cut it into your desired pop sizes now). Dip each pop into the melted Biscoff spread or chocolate, allowing any excess to drip off. Immediately after dipping, while the coating is still wet, roll the pop in the extra crushed Biscoff cookies you have set aside for garnish. You can also press a whole Biscoff cookie onto the top of a few pops for an extra decorative element.
- Place the decorated Biscoff Cookie Butter Cheesecake Pops back onto a parchment-lined tray and return them to the freezer for at least another 30 minutes to allow the coating to set firmly. This ensures your beautiful creations are ready to be enjoyed. Serve them chilled directly from the freezer. These are perfect for parties, as a special dessert, or simply as a delightful treat any time you crave something sweet and decadent with that irresistible Biscoff flavor.
Conclusion:
And there you have it – your guide to creating delightful Biscoff Cookie Butter Cheesecake Pops! We’ve walked through each step, from crafting the creamy cheesecake base to coating them in that irresistible Biscoff goodness. These pops are a truly unique and decadent treat that are sure to impress. They’re perfect for parties, bake snon-alcoholic ales, or simply as a special indulgence for yourself. Don’t be afraid to get creative with your toppings – the possibilities are endless! We encourage you to give this recipe a try and experience the magic of Biscoff Cookie Butter Cheesecake Pops for yourself. Get ready for rave reviews!
FAQs about Biscoff Cookie Butter Cheesecake Pops:
Can I make these ahead of time?
Absolutely! Biscoff Cookie Butter Cheesecake Pops can be made up to 2 days in advance. Store them in an airtight container in the refrigerator to maintain their freshness and prevent them from absorbing any unwanted odors. Ensure they are fully chilled before serving for the best texture.
What are some other delicious dipping options?
While the Biscoff coating is divine, feel free to explore other decadent options! Melted dark chocolate, white chocolate, or even a drizzle of caramel sauce are fantastic alternatives or additions. You could also crush additional Biscoff cookies or other cookies for extra texture and flavor. The key is to have fun and personalize your Biscoff Cookie Butter Cheesecake Pops!
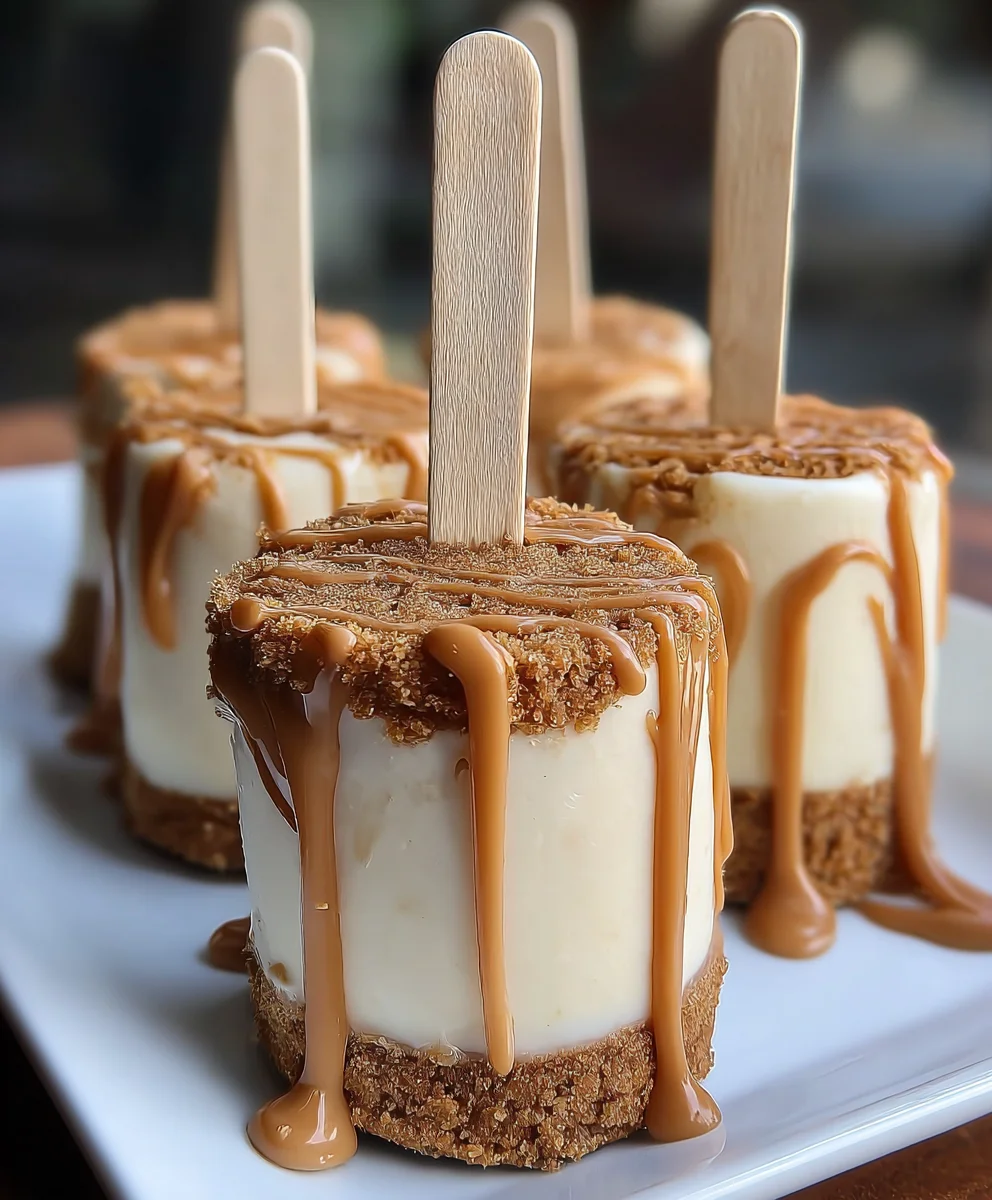
Biscoff Cookie Butter Cheesecake Pops
Delicious no-bake cheesecake pops with the irresistible flavor of Biscoff cookies and cookie butter.
Ingredients
-
8 oz cream cheese, softened
-
½ cup powdered sugar
-
1 teaspoon vanilla extract
-
½ cup whipped cream (or Cool Whip)
-
½ cup crushed Biscoff cookies
-
½ cup Biscoff cookie butter
-
2 tablespoons heavy cream (optional, for thinning)
-
Whole Biscoff cookies
-
Extra crushed Biscoff cookies for garnish
-
Popsicle sticks
Instructions
-
Step 1
Soften cream cheese at room temperature for 30-60 minutes. Beat softened cream cheese in a medium bowl with an electric mixer until completely smooth and creamy. -
Step 2
Gradually add powdered sugar and vanilla extract to the cream cheese mixture, beating until fully incorporated and the mixture is light and fluffy. Be careful not to overmix. -
Step 3
Gently fold in the whipped cream or Cool Whip using a spatula until no streaks of cream cheese remain, preserving the airiness. -
Step 4
Add Biscoff cookie butter and beat on low speed until fully incorporated. If desired, add heavy cream for a thinner consistency. -
Step 5
Gently fold in the crushed Biscoff cookies, reserving a few whole cookies for decoration. -
Step 6
Spoon or pipe the cheesecake mixture into silicone molds or a parchment-lined loaf pan. Insert popsicle sticks into each mold. -
Step 7
Freeze for at least 4-6 hours, or preferably overnight, until completely firm. -
Step 8
Remove frozen pops from molds. Dip in melted Biscoff spread or chocolate (optional), then roll in extra crushed Biscoff cookies and garnish with whole cookies. -
Step 9
Return decorated pops to the freezer for at least 30 minutes to set. Serve chilled.
Important Information
Nutrition Facts (Per Serving)
It is important to consider this information as approximate and not to use it as definitive health advice.
Allergy Information
Please check ingredients for potential allergens and consult a health professional if in doubt.


Leave a Comment