
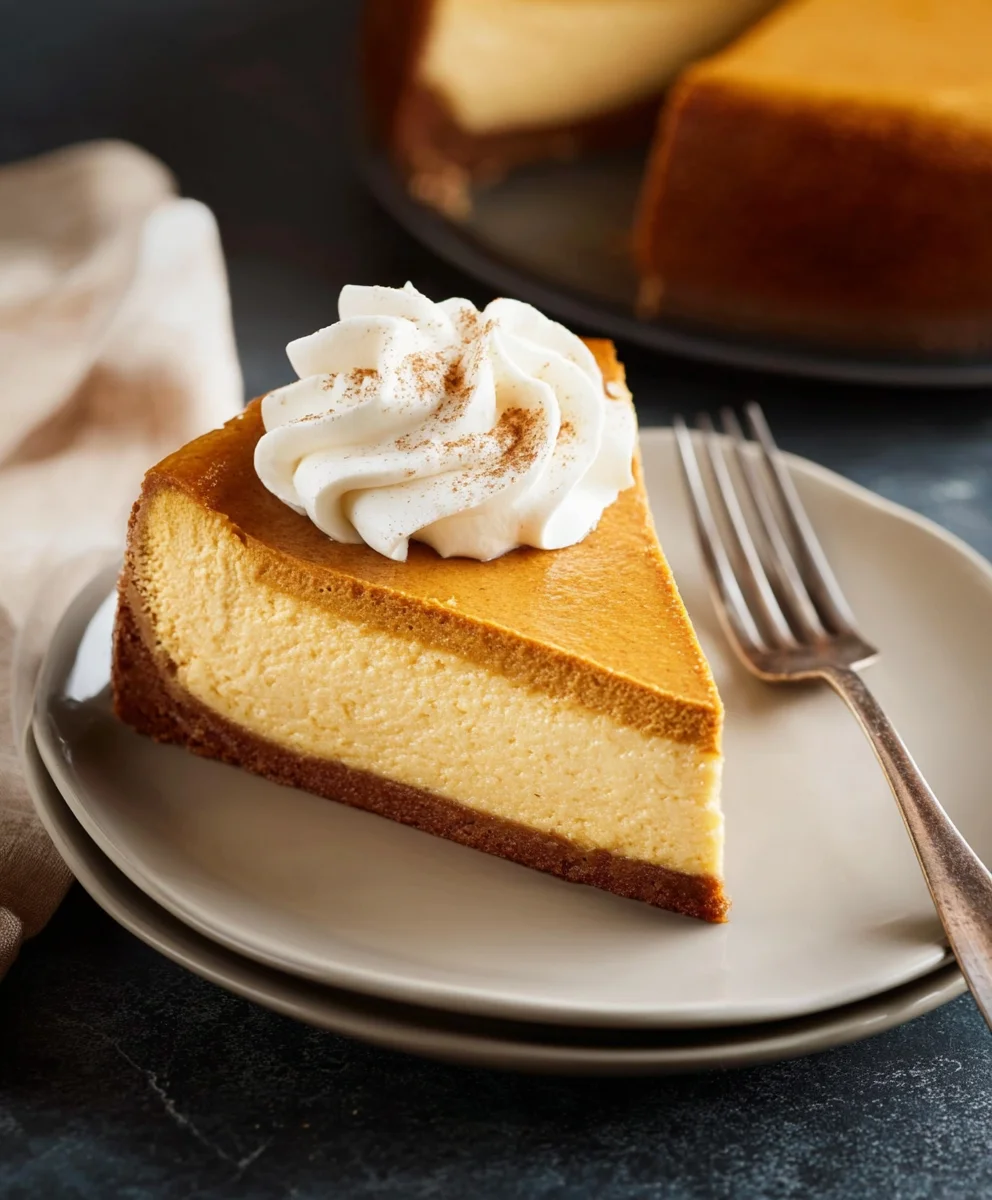
Pumpkin Pie Cheesecake – just hearing those words, my mind immediately conjures up images of cozy autumn evenings and the joyful warmth of holiday gatherings. For me, it’s a truly spectacular dessert that seamlessly blends two of my most cherished seasonal treats into one unforgettable creation. Imagine the rich, velvety texture of a classic cheesecake, perfectly infused with the comforting, spiced essence of a traditional pumpkin pie. I truly believe this isn’t merely a dessert; it’s a culinary triumph designed to satisfy every palate and become a new favorite.
While the concept of a “Pumpkin Pie Cheesecake” might be a modern innovation, its individual components boast a venerable history. Pumpkin pie, a beloved staple of North American autumn celebrations, particularly Thanksgiving, symbolizes harvest and gratitude, with its roots deep in colonial culinary traditions. Cheesecake, on the other hand, traces its origins back to ancient Greece, evolving over centuries into the universally adored, creamy indulgence we know today. Our Pumpkin Pie Cheesecake pays homage to both, offering a sophisticated fusion that I find perfectly caters to diverse tastes at any festive table.
Why this dessert is simply irresistible:
People absolutely adore this dish because it truly delivers the best of both worlds. The luscious, smooth cream cheese filling beautifully complements the sweet, earthy notes of pumpkin and a delicate blend of autumn spices like cinnamon, nutmeg, and ginger. The result is a harmonious balance of flavors and textures that is both decadent and comforting, making it a dream for me and many others. It’s the ideal solution for those who love both pumpkin pie and cheesecake but prefer not to choose. I guarantee this extraordinary dessert is not just a treat for the taste buds; it’s a visually stunning centerpiece that promises to elevate any meal into a memorable occasion. Get ready to impress!

Ingredients:
Creating this truly spectacular Pumpkin Pie Cheesecake is an absolute joy, and it all starts with gathering our high-quality ingredients. Each component plays a vital role in building those distinct, luscious layers that make this dessert so incredibly special.
-
For the Graham Cracker Crust:
- 1 ½ cups (approximately 180g) graham cracker crumbs (about 10-12 full sheets, finely crushed)
- ¼ cup (50g) granulated sugar
- 6 tablespoons (85g) unsalted butter, melted
-
For the Creamy Cheesecake Layer:
- 3 (8-ounce/226g each) packages full-fat cream cheese, softened to room temperature
- 1 cup (200g) granulated sugar
- ¼ cup (60ml) sour cream, full-fat, at room temperature (or full-fat plain Greek yogurt)
- 1 teaspoon vanilla extract
- 2 large eggs, at room temperature
-
For the Silky Pumpkin Pie Layer:
- 1 (15-ounce/425g) can pure pumpkin puree (not pumpkin pie filling)
- ½ cup (100g) granulated sugar
- ¼ cup (50g) packed light brown sugar
- 1 large egg, at room temperature
- ½ cup (120ml) heavy cream (or evaporated milk for a classic pie flavor)
- 1 ½ teaspoons ground cinnamon
- ½ teaspoon ground ginger
- ¼ teaspoon ground nutmeg
- ⅛ teaspoon ground cloves (or a pinch of allspice)
- ¼ teaspoon salt
-
Optional Garnish:
- Sweetened whipped cream
- A dusting of cinnamon or pumpkin pie spice
- Caramel sauce or candied pecans
Preparing the Crust: The Foundation of Flavor
Our journey to the perfect Pumpkin Pie Cheesecake begins with laying down a solid, flavorful foundation: the graham cracker crust. This step, while seemingly simple, is crucial for both taste and structural integrity.
- Preheat your oven and prepare your pan: First things first, let’s get our oven ready. Preheat it to 350°F (175°C). While that’s warming up, grab a 9-inch springform pan. It’s incredibly important to ensure this pan is properly sealed to prevent any butter leakage during baking, or water seeping in if you’re using a water bath. I often wrap the bottom and sides of my springform pan tightly with heavy-duty aluminum foil, usually two layers, just to be extra cautious. This little trick is a lifesaver for cheesecake baking!
- Combine the crust ingredients: In a medium-sized mixing bowl, combine your finely crushed graham cracker crumbs, the granulated sugar, and the melted unsalted butter. It’s truly important that your graham cracker crumbs are fine and uniform; you can achieve this by pulsing full sheets in a food processor or placing them in a Ziploc bag and crushing them with a rolling pin. The finer the crumbs, the more compact and even your crust will be. Mix everything together with a fork or spatula until all the crumbs are thoroughly moistened and resemble wet sand. You should be able to press a small amount between your fingers and have it hold its shape firmly.
- Press the crust into the pan: Now, pour this delightful mixture into the bottom of your prepared 9-inch springform pan. Using the bottom of a flat glass or a measuring cup, firmly and evenly press the mixture across the bottom of the pan. You want to create a compact, uniform layer. A well-pressed crust won’t crumble when sliced, so don’t be shy with the pressure! If you like, you can extend the crust slightly up the sides of the pan, about ½ to ¾ of an inch, for a more defined edge and an extra crunch.
- Par-bake the crust: Place the pan with the pressed crust into your preheated oven and bake for 8 to 10 minutes. This par-baking step is essential. It helps to set the crust, making it sturdy and less likely to become soggy once the cheesecake filling is added. It also brings out a lovely toasted aroma from the graham crackers. Once baked, remove the pan from the oven and set it aside to cool slightly while we prepare our magnificent cheesecake filling. Leave the oven on, as we’ll be needing it again very soon!
Crafting the Cheesecake Layer: Velvety Smooth Perfection
This is where the magic truly begins to unfold for our Pumpkin Pie Cheesecake. Creating a perfectly smooth, rich, and creamy cheesecake layer is an art, and paying attention to detail here will yield the most delightful results.
- Prepare your cream cheese: In the large bowl of a stand mixer fitted with the paddle attachment, or using a large bowl with an electric hand mixer, place your softened cream cheese. It is absolutely paramount that your cream cheese is at room temperature. If it’s too cold, it will be lumpy, and no amount of mixing will make it perfectly smooth, leading to a textured cheesecake. Beat the cream cheese on medium speed for about 2-3 minutes until it is incredibly smooth, light, and completely free of lumps. Scrape down the sides of the bowl frequently to ensure even mixing. This initial creaming sets the stage for a velvety-smooth finish.
- Add sugar and sour cream: Gradually add the granulated sugar to the cream cheese, beating on medium-low speed until just combined. Overmixing at this stage can incorporate too much air, which can lead to cracks in your cheesecake, so be mindful. Once the sugar is mostly incorporated, add the room-temperature sour cream and vanilla extract. Beat on low speed until just combined and smooth. The sour cream adds a wonderful tang and a luxurious, extra-creamy texture to the cheesecake layer, balancing the sweetness beautifully.
- Incorporate the eggs carefully: This step requires a gentle touch. Add the eggs one at a time, beating on the lowest speed possible just until each egg is incorporated before adding the next. Again, do not overmix! The goal here is to gently combine the ingredients, not to whip air into the batter. Overmixing eggs can introduce too much air, which expands during baking and then collapses during cooling, causing those dreaded cracks. Scrape down the sides of the bowl after each addition to ensure everything is perfectly blended.
- Pour the cheesecake batter: Carefully pour the gloriously smooth cheesecake batter over your cooled, par-baked graham cracker crust in the springform pan. Gently tap the pan on your counter a few times to release any large air bubbles that might be trapped within the batter. This helps ensure an even bake and a smooth surface.
- Prepare the water bath (Bain-Marie): For a truly crack-free, evenly baked, and silky-smooth cheesecake, a water bath is your best friend. Place your foil-wrapped springform pan into a larger roasting pan. Carefully pour hot water into the roasting pan, ensuring the water level comes about halfway up the sides of the springform pan. The steam from the water bath creates a moist, consistent cooking environment, preventing the cheesecake from drying out, rising too quickly, or cracking.
- Initial bake of the cheesecake layer: Carefully transfer the roasting pan with the cheesecake into your preheated 350°F (175°C) oven. Bake for approximately 25-30 minutes. At this point, the edges of the cheesecake should be just set, and the center will still be noticeably jiggly. This is exactly what we want! We are not fully baking it, just setting it enough to create a stable base for our pumpkin layer. Once this initial bake is complete, carefully remove the entire roasting pan from the oven, and very gently lift the springform pan out of the water bath. Set it aside to cool slightly while we prepare the pumpkin layer. Keep the oven temperature consistent.
Whipping Up the Pumpkin Pie Layer: The Aromatic Heart
Now for the layer that gives our dessert its iconic name: the pumpkin pie layer. This layer brings warmth, spice, and that undeniable autumnal flavor that makes this Pumpkin Pie Cheesecake truly special.
- Combine pumpkin layer ingredients: While your cheesecake layer is cooling slightly, in a separate large mixing bowl, combine the pure pumpkin puree (make absolutely sure it’s pumpkin puree, not pumpkin pie filling!), both the granulated sugar and the light brown sugar, the single large egg, heavy cream, all your aromatic spices (cinnamon, ginger, nutmeg, cloves), and the salt. The brown sugar adds a lovely depth of molasses flavor that pairs exquisitely with the pumpkin.
- Mix until smooth: Using a whisk or an electric hand mixer on low speed, mix all these ingredients together until the mixture is completely smooth and well combined. Ensure there are no streaks of unmixed spices or sugar. The consistency should be pourable and uniform. Taste a tiny bit if you dare, it’s just so fragrant and delicious!
- Pour pumpkin layer over cheesecake: Gently and evenly pour this beautiful, spiced pumpkin mixture over the partially baked cheesecake layer in your springform pan. Take care not to disturb the cheesecake layer beneath. Smooth the top with a spatula if necessary to ensure an even coating.
- Return to the water bath: Carefully place your springform pan, now with both layers, back into the larger roasting pan. Refill the roasting pan with hot water if the level has dropped, ensuring it still comes halfway up the sides of the springform pan.
Baking, Cooling, and Chilling the Pumpkin Pie Cheesecake: The Patience Pays Off
The final stages of baking, followed by crucial cooling and chilling, are vital for achieving the perfect texture and preventing cracks in your magnificent Pumpkin Pie Cheesecake.
- Bake the combined layers: Carefully transfer the roasting pan back into your 350°F (175°C) oven. Bake for an additional 50-70 minutes. The baking time can vary, so it’s important to watch for visual cues. The cheesecake is done when the edges are set, and the center (about 2-3 inches in diameter) still has a slight jiggle when you gently nudge the pan. It will look puffed up around the edges, and the pumpkin layer should also be set. A knife inserted into the pumpkin layer, an inch from the edge, should come out mostly clean.
- Begin the cooling process: Once baked, turn off the oven but leave the cheesecake inside with the oven door propped open slightly (a wooden spoon works perfectly for this) for 1 hour. This slow, gradual cooling within the warm environment of the oven is a critical step. It helps prevent rapid temperature changes that can cause cracks on the surface of your beautiful cheesecake.
- Cool outside the oven: After an hour in the oven, carefully remove the springform pan from the roasting pan and the water bath. Remove the foil from around the base of the springform pan. Place the cheesecake on a wire rack and allow it to cool completely to room temperature. This can take another 2-3 hours. Do not rush this step! The internal temperature needs to stabilize slowly.
- The crucial chill: Once the cheesecake has reached room temperature, cover it loosely with plastic wrap. This is essential to prevent it from absorbing refrigerator odors. Transfer the covered cheesecake to the refrigerator and chill for a minimum of 6-8 hours, or ideally overnight. Chilling is perhaps the most important step for cheesecake. It allows the layers to fully set, firm up, and develop their rich flavor and creamy texture. A properly chilled cheesecake is easier to slice and tastes infinitely better.
Serving Suggestions and Garnish: The Grand Finale!
After all your hard work and patience, it’s time to admire and indulge in your glorious Pumpkin Pie Cheesecake!
- Unmolding and slicing: When you’re ready to serve, carefully run a thin knife around the outer edge of the cheesecake before unlatching and removing the springform pan’s ring. This helps ensure a clean release and prevents the edges from sticking. For perfect slices, use a sharp, thin knife dipped in hot water and wiped clean between each cut. This creates beautifully crisp lines and prevents dragging.
- Garnish and enjoy: Serve slices of your stunning Pumpkin Pie Cheesecake chilled. I absolutely love topping mine with a generous dollop of freshly sweetened whipped cream, a delicate dusting of ground cinnamon or pumpkin pie spice, and perhaps a drizzle of homemade caramel sauce or a sprinkle of candied pecans for an extra layer of texture and decadence. Each bite is a harmonious blend of creamy cheesecake and warmly spiced pumpkin pie – a true autumn delight! Enjoy every single moment of this incredible dessert.
Conclusion:
And there you have it, my friends! We’ve journeyed through the steps of creating what I truly believe is one of the most magnificent desserts you’ll ever bake. This isn’t just another dessert; it’s an experience, a masterpiece that beautifully marries the comforting, autumnal embrace of a classic pumpkin pie with the rich, velvety indulgence of a creamy cheesecake. I can honestly say, with every fibre of my being, that this recipe for Pumpkin Pie Cheesecake is an absolute must-try, a culinary adventure that promises to delight your senses and impress anyone fortunate enough to share a slice.
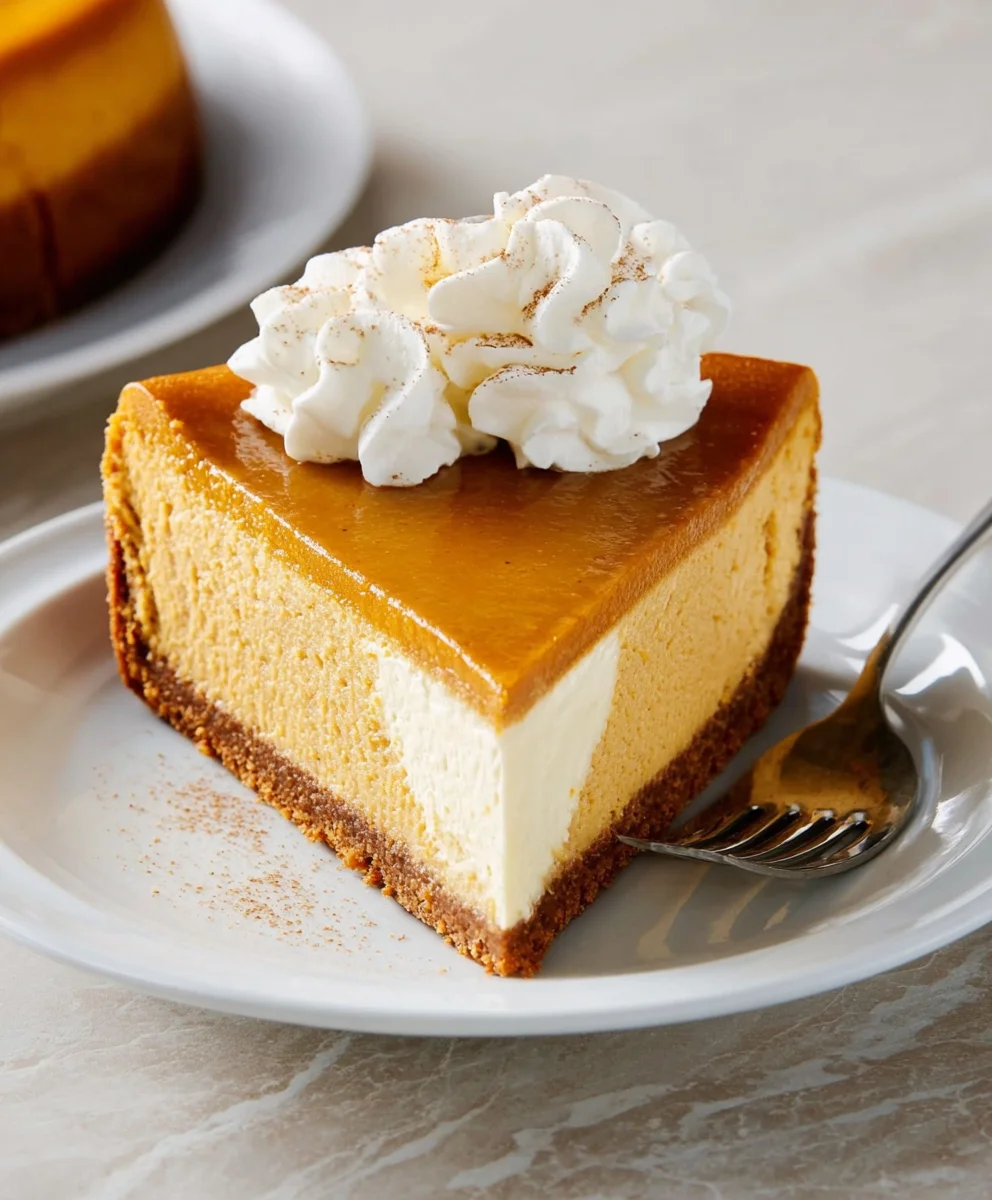
Why is it a must-try? Well, where do I even begin? For starters, it effortlessly solves the eternal holiday dilemma: pie or cheesecake? With this recipe, you don’t have to choose! You get the best of both worlds, a harmonious blend of the spiced warmth of pumpkin and the tangy, luxurious smoothness of cheesecake, all nestled atop a perfectly crumbly crust. The texture alone is enough to swoon over – that delightful contrast between the delicate, spiced pumpkin layer and the denser, silken cream cheese layer creates a symphony in every bite. It’s rich without being overly heavy, sweet without being cloying, and spiced just right to evoke those cozy, nostalgic feelings of fall and festive gatherings. I often find myself taking just one more small spoonful, simply to savour the complexity of flavours.
But beyond its undeniable deliciousness, this Pumpkin Pie Cheesecake is also a showstopper. It looks incredibly impressive on any dessert table, making it the perfect centrepiece for Thanksgiving, Christmas, or any special occasion where you want to serve something truly memorable. The vibrant orange hue of the pumpkin layer peeking through the creamy cheesecake is visually stunning, and the aroma that fills your kitchen while it bakes is, quite frankly, intoxicating. It’s the kind of dessert that elicits gasps of admiration before anyone has even taken a bite, and I guarantee you’ll feel an immense sense of pride when you present it.
Elevate Your Experience with Serving Suggestions and Creative Variations:
While this Pumpkin Pie Cheesecake is utterly divine on its own, there are countless ways to elevate your serving experience or even put your own unique spin on the recipe. For a classic touch, I always recommend a generous dollop of freshly whipped cream. The light, airy cream provides a wonderful textural contrast and a cooling counterpoint to the rich cheesecake. You could even infuse your whipped cream with a hint of vanilla bean, a touch of maple syrup, or a whisper of cinnamon for an extra layer of flavour. Another fantastic addition is a drizzle of warm caramel sauce, either homemade or a good quality store-bought one. The buttery, sweet notes of caramel beautifully complement both the pumpkin and the cream cheese layers.
For those who love a bit of crunch, consider sprinkling some toasted pecans, candied walnuts, or even a dusting of grated dark chocolate over each slice. A light dusting of nutmeg or a decorative stencil using cinnamon powder can also add a professional, elegant finish. And if you’re feeling particularly indulgent, a small scoop of high-quality vanilla bean ice cream alongside a warm slice of this cheesecake is simply heavenly, creating a warm-cold dynamic that is irresistible.
Thinking about variations? The possibilities are endless! Instead of a traditional graham cracker crust, you could experiment with a gingersnap crust for an extra spicy kick, or a shortbread cookie crust for a buttery, crumbly base. You could also play with the spices in the pumpkin layer, perhaps adding a pinch of cardamom or allspice alongside the traditional cinnamon and nutmeg. For a truly decadent twist, a thin layer of chocolate ganache spread over the cooled cheesecake before serving would be extraordinary. Or, if you’re hosting a larger gathering, consider making individual Pumpkin Pie Cheesecakes in muffin tins or small ramekins – they’re adorable, portion-controlled, and just as delicious.
Your Culinary Adventure Awaits!
So, what are you waiting for? This is more than just a recipe; it’s an invitation to create something truly special, to fill your home with incredible aromas, and to share moments of pure delight with those you love. I wholeheartedly encourage you to roll up your sleeves, gather your ingredients, and give this Pumpkin Pie Cheesecake a try. Don’t be intimidated by the steps; I promise you, the reward is well worth the effort. There’s an immense satisfaction in baking something from scratch, especially when the result is this spectacularly delicious.
Once you’ve baked it, tasted it, and inevitably fallen in love with it, I would absolutely adore hearing about your experience! Did you stick to the recipe, or did you add your own creative twist? What was your favourite part of making it, and how did your guests react? Please, share your stories, your triumphs, and even your “lessons learned” in the comments section below. I love seeing how my recipes come to life in your kitchens. Happy baking, and enjoy every single glorious bite!
Pumpkin Pie Cheesecake
A spectacular fall dessert, blending the rich, velvety texture of classic cheesecake with the comforting, spiced essence of traditional pumpkin pie. A culinary triumph for any festive table.
Ingredients
-
2 (8 oz) packages cream cheese, room temperature
-
½ cup granulated sugar
-
1 teaspoon vanilla extract
-
2 large eggs
-
½ cup pumpkin puree
-
2 teaspoons pumpkin spice
-
1 (9-inch) graham cracker crust (store-bought or homemade)
-
Whipped cream (optional topping)
Instructions
-
Step 1
Preheat oven to 350°F (175°C). Prepare a 9-inch springform pan by wrapping the bottom and sides tightly with foil. If using a homemade graham cracker crust, par-bake for 8-10 minutes and cool. If using a store-bought crust, simply place it in the prepared pan. -
Step 2
In a large bowl, beat room temperature cream cheese until smooth. Gradually add granulated sugar and vanilla extract, beating until just combined. Scrape down the bowl. Add eggs one at a time, beating on the lowest speed until just incorporated; do not overmix. -
Step 3
Gently fold in the pure pumpkin puree and pumpkin spice into the cheesecake batter until just combined and smooth. Avoid overmixing. -
Step 4
Pour the pumpkin cheesecake batter into your prepared graham cracker crust. Gently tap the pan to release air bubbles. Place the springform pan into a larger roasting pan. Pour hot water into the roasting pan, halfway up the sides of the springform pan. Bake at 350°F (175°C) for 60-75 minutes, or until edges are set and the center slightly jiggles. -
Step 5
Turn off the oven, prop the door open, and cool cheesecake in the oven for 1 hour. Remove from oven and water bath, remove foil, and cool completely on a wire rack to room temperature (2-3 hours). Cover and chill in the refrigerator for a minimum of 6-8 hours, or ideally overnight, to fully set. -
Step 6
To serve, run a thin knife around the outer edge before unlatching the springform pan ring. For clean slices, use a sharp knife dipped in hot water and wiped clean between each cut. Serve chilled, optionally topped with sweetened whipped cream and a dusting of cinnamon or pumpkin pie spice.
Important Information
Nutrition Facts (Per Serving)
It is important to consider this information as approximate and not to use it as definitive health advice.
Allergy Information
Please check ingredients for potential allergens and consult a health professional if in doubt.

Leave a Comment