
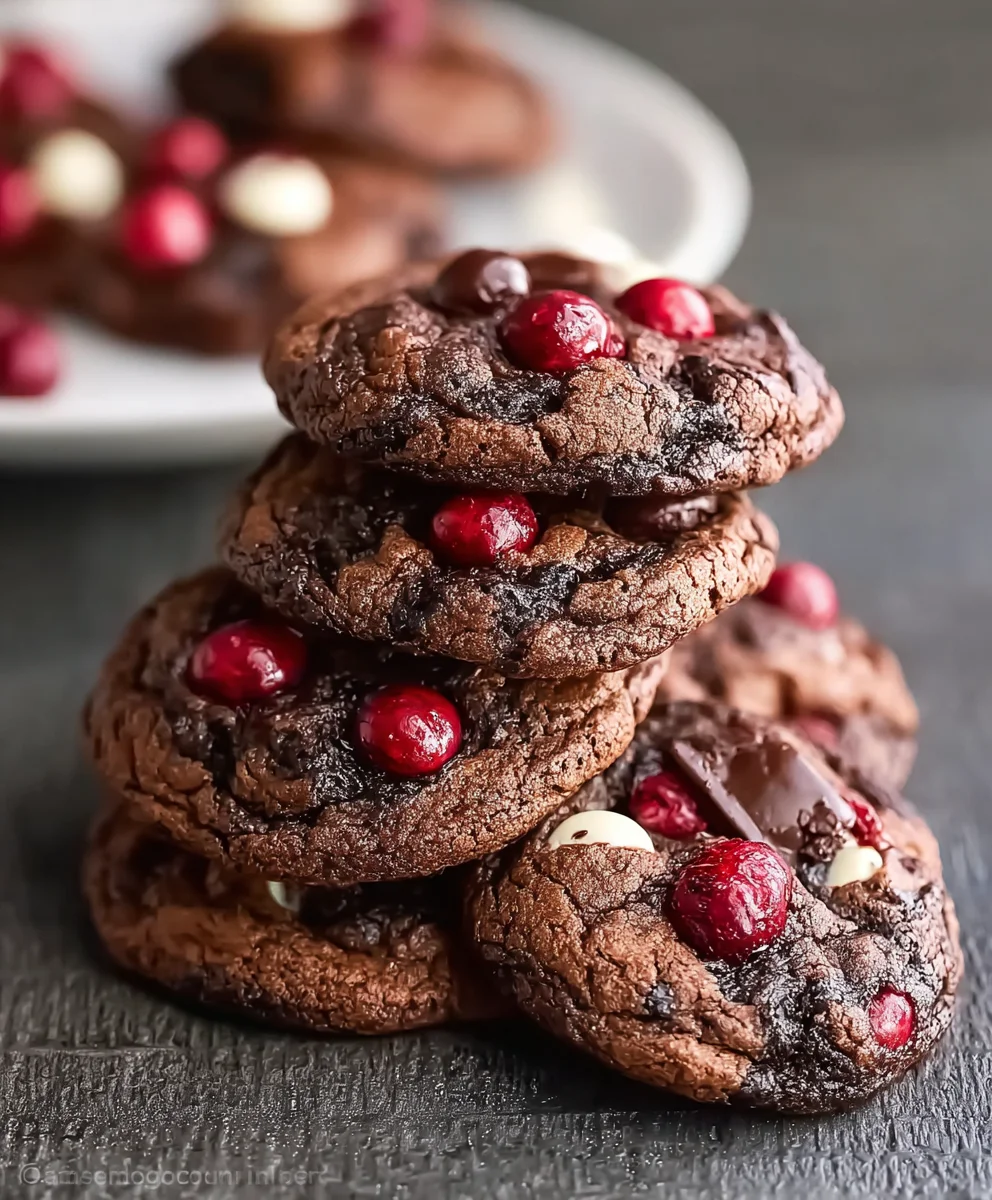
Black Forest Cookies are a truly enchanting treat that brings the iconic flavors of the beloved German Black Forest cake into a delightful, bite-sized form. Imagine the rich, dark chocolate, the vibrant burst of tart cherries, and a whisper of creamy vanilla – all perfectly harmonized in a single, irresistible cookie. I’ve always been captivated by the deep history and rich flavors associated with the original Schwarzwälder Kirschtorte, and these cookies pay a wonderful homage.
This recipe is more than just a dessert; it’s a culinary journey inspired by the lush forests and traditional bakeries of the Black Forest region itself. People adore these Black Forest Cookies not only for their sophisticated taste profile but also for the pure convenience of enjoying such complex flavors without the effort of baking an entire cake. They offer that perfect balance of sweetness and tang, a tender crumb, and a truly unforgettable experience, making them an instant favorite for any occasion.

Ingredients:
- For the Chocolate Cookies:
- 1 ½ cups (3 sticks or 340g) unsalted butter, softened to room temperature
- 2 cups (400g) granulated sugar
- ¾ cup (150g) packed light brown sugar
- 2 large eggs, at room temperature
- 2 teaspoons pure vanilla extract
- 2 ½ cups (300g) all-purpose flour, sifted
- 1 cup (90g) unsweetened cocoa powder (Dutch-processed for a darker color and milder flavor, or natural for a more intense chocolatey tang), sifted
- 1 teaspoon baking soda
- ½ teaspoon salt
- 1 cup (170g) bittersweet chocolate chips or finely chopped bittersweet chocolate (I personally love using a high-quality chocolate bar and chopping it myself for varied textures!)
- For the Cherry Filling:
- 2 cups (about 300g) fresh or frozen pitted cherries (if using frozen, do not thaw completely; they can be added directly)
- ½ cup (100g) granulated sugar (adjust to your preferred sweetness, depending on cherry tartness)
- ¼ cup (60ml) water or kirsch (cherry liqueur – highly recommended for authentic Black Forest flavor!)
- 2 tablespoons cornstarch
- ½ teaspoon almond extract (optional, but complements cherries beautifully)
- For the White Chocolate Drizzle and Garnish:
- 4 ounces (115g) white chocolate, good quality, chopped or in chip form
- 1 tablespoon vegetable shortening or coconut oil (helps with a smooth, drizzle-able consistency)
- Optional: Chocolate shavings for garnish
- Optional: A few extra whole cherries or candied cherries for decoration
Preparing the Black Forest Cookie Dough:
- Bring Ingredients to Temperature: Before you even think about mixing, take your butter and eggs out of the refrigerator. This is a crucial step for perfectly emulsified cookie dough. Room temperature butter creams beautifully with sugar, incorporating air that will give your Black Forest Cookies a lovely, tender crumb. Your eggs will also blend more smoothly into the mixture. I like to leave them out for at least an hour, sometimes two, depending on how cool my kitchen is.
- Sift and Combine Dry Ingredients: In a medium bowl, sift together the all-purpose flour, cocoa powder, baking soda, and salt. Sifting is not just for eliminating lumps; it also helps to aerate the dry ingredients, ensuring they combine more evenly into the wet mixture. Give them a quick whisk to ensure everything is thoroughly mixed. Set this bowl aside for now.
- Cream Butter and Sugars: In the bowl of a stand mixer fitted with the paddle attachment, or using a large bowl and a hand mixer, combine the softened unsalted butter, granulated sugar, and light brown sugar. Beat on medium-high speed for about 3-5 minutes. You’re looking for a transformation here: the mixture should become visibly light and fluffy, almost pale in color. This creaming process is vital because it incorporates air into the butter, which contributes to the cookies’ texture and rise. Don’t rush this step!
- Add Eggs and Vanilla: Reduce the mixer speed to low. Add the eggs one at a time, beating well after each addition until fully incorporated. Scrape down the sides of the bowl with a rubber spatula as needed to ensure everything is mixing evenly. After the eggs, mix in the pure vanilla extract. Continue to beat on low speed until the mixture is smooth and cohesive.
- Gradually Add Dry Ingredients: With the mixer still on low speed, gradually add the sifted dry ingredients to the wet mixture. Do this in 2-3 additions, mixing only until just combined after each addition. The key here is not to overmix. Overmixing the dough can develop the gluten in the flour too much, leading to tough, dense Black Forest Cookies instead of soft, chewy ones. Stop mixing as soon as you no longer see streaks of dry flour. A few small lumps are perfectly fine.
- Fold in Chocolate Chips: Gently fold in the bittersweet chocolate chips or chopped chocolate using your spatula. I always recommend using good quality chocolate here, as it really elevates the flavor of these Black Forest Cookies. Distribute them evenly throughout the dough.
- Chill the Dough: Cover the bowl with plastic wrap and refrigerate the cookie dough for at least 1 hour. Personally, I find chilling for 2-4 hours, or even overnight, yields the best results. Chilling is not optional for these Black Forest Cookies! It allows the flavors to meld and deepen, prevents the cookies from spreading too much in the oven, and makes the dough much easier to handle. A well-chilled dough is key to achieving that perfect Black Forest Cookie texture.
Crafting the Cherry Filling:
- Prepare Cherries: If using fresh cherries, make sure they are pitted. If using frozen, there’s no need to completely thaw them; just break them apart if they’re clumped together.
- Combine Ingredients: In a small saucepan, combine the pitted cherries, granulated sugar, water (or kirsch if you’re going for that authentic Black Forest experience!), and cornstarch. Whisk everything together gently to dissolve the cornstarch and sugar.
- Cook the Filling: Place the saucepan over medium heat. Bring the mixture to a gentle boil, stirring frequently to prevent sticking and burning. As it heats, the cherries will release their juices, and the cornstarch will begin to thicken the sauce. Continue to cook and stir for about 5-7 minutes after it starts boiling, or until the mixture is thick enough to coat the back of a spoon. It should have a glossy appearance and a consistency similar to pie filling. My personal preference is for a slightly thicker filling, as it holds better in the cookies.
- Add Flavoring: Remove the saucepan from the heat. Stir in the almond extract, if using. The almond extract truly enhances the cherry flavor and gives it that classic Black Forest cake-like aroma.
- Cool the Filling: Transfer the cherry filling to a heatproof bowl and let it cool completely to room temperature. You can even pop it in the refrigerator for about 30-60 minutes to speed up the cooling process. It’s crucial that the filling is completely cool before you attempt to fill your baked Black Forest Cookies; a warm filling will melt your beautiful chocolate.
Baking the Black Forest Cookies:
- Preheat Oven and Prepare Baking Sheets: Preheat your oven to 350°F (175°C). Line two large baking sheets with parchment paper or silicone baking mats. This prevents sticking and makes cleanup a breeze.
- Scoop and Form Cookies: Remove the chilled cookie dough from the refrigerator. Using a 1.5-inch cookie scoop (about 1.5-2 tablespoons of dough per cookie), scoop rounded balls of dough and place them about 2 inches apart on the prepared baking sheets. Remember, these cookies will spread slightly, so adequate spacing is important. I usually get about 12 cookies per standard baking sheet.
- Create a Well for Filling: This is a fun step! Immediately after placing the dough balls on the baking sheet, use the back of a small spoon or your thumb to gently create an indentation in the center of each cookie dough ball. Don’t press all the way through, just enough to form a “well” that will hold our delicious cherry filling later. This little hollow is what makes these Black Forest Cookies so unique and perfect for their cherry surprise.
- Bake the Cookies: Bake one sheet at a time in the preheated oven for 10-12 minutes. The exact baking time can vary depending on your oven, so keep an eye on them. The cookies will look slightly puffed and set around the edges, but the centers might still look a little soft. They will continue to set as they cool. You want them to be just baked through, keeping them nice and chewy.
- Cool on Baking Sheets: Once baked, remove the baking sheets from the oven. Let the cookies cool on the baking sheets for about 5 minutes. This allows them to firm up slightly before you attempt to move them.
- Transfer to Wire Rack: After 5 minutes, carefully transfer the warm Black Forest Cookies to a wire cooling rack to cool completely. It is absolutely essential that the cookies are fully cooled before you fill them and add the chocolate drizzle. Attempting to fill or drizzle warm cookies will result in a messy, melted disaster!
Assembling and Decorating Your Black Forest Cookies:
- Fill the Cooled Cookies: Once the cookies are completely cool, and your cherry filling is also thoroughly cooled, it’s time for the magic! Spoon about 1-2 teaspoons of the prepared cherry filling into the indentation of each Black Forest Cookie. Don’t overfill, or it will spill out, but be generous enough to get a good burst of cherry flavor with every bite. The deep, rich color of the cherry filling against the dark chocolate cookie is just gorgeous.
- Prepare the White Chocolate Drizzle: In a microwave-safe bowl, combine the chopped white chocolate and vegetable shortening (or coconut oil). Microwave in 30-second intervals, stirring well after each, until the white chocolate is completely melted and smooth. Be careful not to overheat white chocolate, as it can seize easily. Alternatively, you can melt it over a double boiler. If using a double boiler, place the bowl over a saucepan of simmering water, ensuring the bottom of the bowl does not touch the water. Stir until smooth. The shortening helps achieve a beautifully flowing, glossy drizzle.
- Drizzle the Black Forest Cookies: Transfer the melted white chocolate to a small piping bag, a zip-top bag with the corner snipped off, or simply use a spoon. Drizzle the white chocolate decoratively over each filled Black Forest Cookie. I love the contrast of the bright white chocolate against the dark cookie and the red cherry filling; it truly evokes the classic Black Forest cake aesthetic.
- Garnish (Optional): While the white chocolate is still wet, you can sprinkle a few chocolate shavings over the cookies for extra visual appeal and texture. A tiny whole cherry (fresh or candied) placed delicately on top of the cherry filling in the center of a few cookies can also be a delightful touch. These small garnishes truly elevate the homemade look of your Black Forest Cookies.
- Allow Drizzle to Set: Let the cookies sit at room temperature for about 30 minutes, or place them in the refrigerator for 10-15 minutes, to allow the white chocolate drizzle to fully set. Once the chocolate is firm, your delightful Black Forest Cookies are ready to be served and enjoyed! The combination of the rich chocolate cookie, the tart-sweet cherry filling, and the creamy white chocolate is an absolute dream.
Tips for Perfect Black Forest Cookies:
- Quality Ingredients Matter: For the best Black Forest Cookies, especially with a simple flavor profile like this, using high-quality cocoa powder, good vanilla extract, and excellent chocolate for both the chips and the drizzle makes a noticeable difference in the final taste. Don’t skimp here!
- Don’t Overmix the Dough: I cannot stress this enough. Overmixing develops gluten, leading to tough cookies. Mix only until the dry ingredients are just incorporated.
- Cherry Filling Variations: While fresh or frozen pitted cherries are ideal, if you’re in a pinch, you could use canned pitted tart cherries (drained and rinsed), or even a good quality cherry pie filling (though you might want to adjust the sugar in the recipe if it’s already sweetened). Adding a splash of kirsch to the filling truly brings that authentic Black Forest flavor.
- Cookie Size: While I recommend a 1.5-inch scoop, you can adjust the size of your Black Forest Cookies. Just remember to adjust baking time accordingly. Larger cookies will need a minute or two more, smaller ones a minute or two less.
- Storage: Store these Black Forest Cookies in an airtight container at room temperature for up to 3-4 days. If your kitchen is very warm, or if you prefer a firmer cookie, you can store them in the refrigerator. The cherry filling keeps them wonderfully moist.
- Freezing Dough: You can scoop and chill the dough balls (without the indentation) and freeze them on a baking sheet until firm. Then transfer them to a freezer-safe bag. When ready to bake, just add a couple of minutes to the baking time, and create the well immediately after placing on the sheet. This makes for super fresh Black Forest Cookies whenever a craving strikes!
- Achieving a Deep Black Forest Color: Using Dutch-processed cocoa powder will give your Black Forest Cookies a much darker, almost black, color which is very characteristic of the “Black Forest” theme. Natural cocoa powder will result in a lighter, reddish-brown hue. Both are delicious, but Dutch-processed is my go-to for that classic look.
- Room Temperature Eggs: I mentioned it once, but it bears repeating! Cold eggs do not emulsify properly into creamed butter and sugar, leading to a dough that might look curdled. Room temperature eggs blend seamlessly, creating a smooth and cohesive batter for your Black Forest Cookies.
- Parchment Paper is Your Friend: It not only makes cleanup easier but also ensures even baking and prevents the cookies from sticking, especially since we’re creating indentations that might make them a bit more delicate.
Conclusion:
So, after diving deep into the delightful world of these treats, I truly hope you’re as excited as I am about them. What makes this recipe for Black Forest Cookies an absolute culinary masterpiece, a true must-try in your baking repertoire? Well, it’s the magical synergy of flavors, isn’t it? We’re talking about a foundation of rich, dark chocolate, a deep, comforting cocoa base that serves as the perfect canvas. Then, there’s that delightful, irresistible burst of cherry – not just a hint, but a confident, fruity note that cuts through the chocolate’s intensity beautifully, adding a layer of vibrant sweetness and a touch of tang. And let’s not forget the subtle creaminess that rounds everything out, whether it’s from a delicate frosting or a marbled cream cheese swirl, echoing the luxurious layers of a classic Black Forest cake. These aren’t just any cookies; they’re a symphony for your taste buds, evoking all the nostalgic charm of a beloved dessert, but in a perfectly portable, bite-sized form.
Imagine the first bite: the slight crispness giving way to a wonderfully soft, chewy interior, followed by that luscious combination of intense chocolate and bright cherry. It’s an experience, not just a snack. I poured my heart into designing this recipe to be approachable, ensuring that even if you’re a novice baker, you can achieve impressive, professional-level results that will delight everyone who tries them. They truly stand out from other cookies because they offer a complex, sophisticated flavor profile without demanding hours of intricate work or specialized equipment. This recipe genuinely captures the essence of indulgence and celebration, promising a moment of pure, unadulterated bliss with every single cookie. It’s the perfect treat for any occasion, from a casual afternoon snack to an elegant dessert platter.
Serving Suggestions & Creative Variations
But the joy of these Black Forest Cookies doesn’t end with baking them. Oh no, my friends, that’s just the beginning! These beauties are incredibly versatile and lend themselves beautifully to various serving styles and creative modifications. Imagine serving them warm, straight from the oven, with a generous scoop of premium vanilla bean ice cream melting gently on top – a truly decadent dessert experience that will earn you rave reviews. They pair wonderfully with a robust cup of freshly brewed coffee in the morning, a delicate herbal tea in the afternoon, or even a tall, frosty glass of cold milk for a comforting evening treat. For a touch of sophisticated flair, consider offering them alongside a small shot of kirsch or a cherry liqueur for the adults; it truly amplifies that classic Black Forest flavor profile to an exquisite degree. They also make magnificent, heartfelt gifts! Arrange them thoughtfully in a beautiful box lined with parchment paper, tie it with a festive ribbon, and you’ve got a homemade present that speaks volumes of your thoughtfulness and culinary prowess, perfect for holidays, birthdays, or just to say “thank you.”
Now, let’s talk variations! While this recipe is undeniably perfect as is, I always encourage culinary exploration and a dash of personal creativity. Feel free to experiment with different types of chocolate in the dough. Perhaps a sweeter milk chocolate base for a more kid-friendly cookie, or a very dark, high-cacao chocolate for an intensely bittersweet and grown-up experience. You could even swap out the dried cherries for fresh, pitted ones during peak cherry season, adjusting the moisture content slightly if needed. A tiny pinch of almond extract alongside the vanilla can add another layer of delightful complexity, enhancing the fruity notes. If you’re feeling particularly adventurous, try adding a small amount of finely chopped toasted almonds or walnuts into the dough for an extra textural crunch and nutty depth. For those looking for a gluten-free option, many gluten-free all-purpose flour blends work wonderfully in this type of cookie; just ensure your chosen blend contains xanthan gum or add a quarter teaspoon per cup of flour. And for a truly adult twist, a splash of kirsch (cherry brandy) either in the cookie dough or brushed lightly over the warm, baked cookies before frosting would elevate them to an entirely new level of gourmet indulgence. The possibilities are truly endless, allowing you to personalize these delicious treats to your heart’s content and make them uniquely your own.
Your Turn to Bake and Share!
I genuinely believe that once you try this recipe, it will quickly become a cherished favorite in your kitchen. There’s something so incredibly rewarding and joyful about creating something so utterly delicious with your own hands. I pour my heart into developing recipes that not only taste absolutely incredible but are also a sheer joy to make, and these Black Forest Cookies are no exception. They are designed to bring a genuine smile to your face, both when you’re actively baking them and, especially, when you’re savoring every single, heavenly bite. Don’t let another day pass without experiencing the sheer magic of this chocolate-cherry combination; your taste buds will thank you profusely, and your kitchen will smell divine.
So, please, take the plunge! Gather your ingredients, tie on your apron, and let the enticing, comforting aroma of baking fill your home. I promise you, you won’t regret it for a second. And once you’ve whipped up your very own glorious batch of these delightful treats, I would absolutely LOVE to hear all about your experience. Did you stick faithfully to the recipe, or did you bravely try one of my suggested variations? Perhaps you came up with a brilliant twist of your own that you simply must share? Please, don’t be shy! Share your photos, your triumphs, any unexpected discoveries, and any tips you picked up along the way. You can easily share your thoughts and experiences in the comments section below this article. Your feedback, your personal stories, and your unique creations are what truly make this culinary community vibrant, inspiring, and wonderfully interactive. It’s an incredible, heartwarming feeling to know that I’ve played a small part in helping you create something truly wonderful and memorable in your own kitchen. Let’s bake some unforgettable memories together – I can’t wait to see what you create!
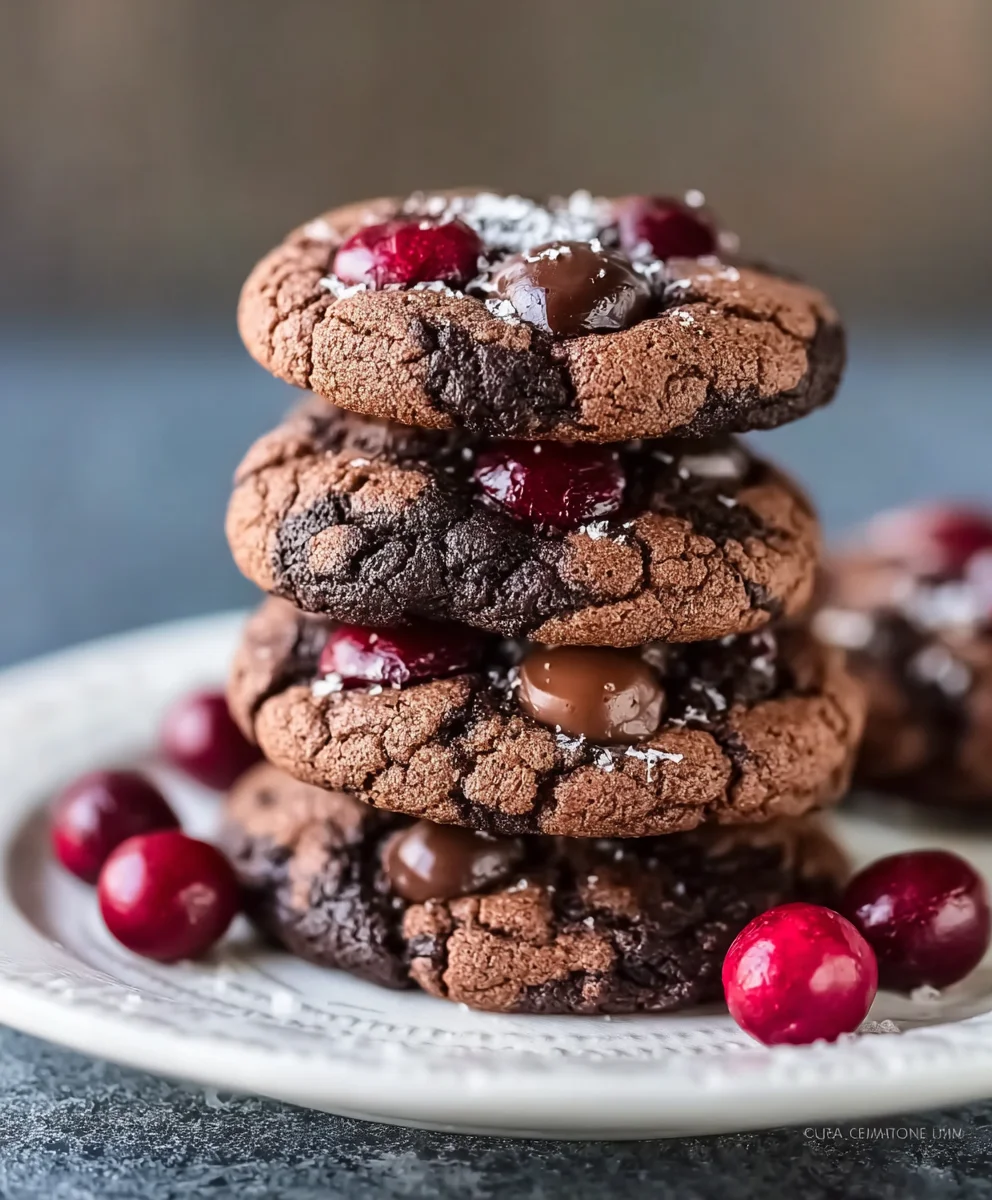
Black Forest Cookies
Black Forest Cookies are a decadent treat that combines the rich flavors of chocolate and cherries in one irresistible cookie. These cookies are made with a buttery, chocolate-infused dough that’s mixed with semi-sweet chocolate chips and chopped maraschino cherries, creating a delightful contrast between the sweet cherries and the rich chocolate. After baking, the cookies are dusted with powdered sugar, adding a touch of sweetness that enhances the overall flavor. Perfect for satisfying your sweet tooth, these Black Forest Cookies are ideal for holiday baking, dessert trays, or anytime you need a delicious chocolate-cherry fix. Serve them with a glass of milk or a cup of coffee for the ultimate indulgence.
Ingredients
-
1 cup softened butter
-
1 cup granulated sugar
-
1 cup packed brown sugar
-
2 large eggs
-
1 tsp vanilla extract
-
2 1/4 cups flour
-
1/2 cup cocoa powder
-
1/2 tsp baking soda
-
1/4 tsp salt
-
1 cup chocolate chips
-
1 cup chopped maraschino cherries
-
1/2 cup powdered sugar
Instructions
-
Step 1
Preheat oven to 350°F (175°C). Line baking sheets with parchment paper. -
Step 2
In a large bowl, beat together 1 cup softened butter, 1 cup granulated sugar, and 1 cup packed brown sugar until creamy. -
Step 3
Beat in 2 large eggs one at a time, then stir in 1 tsp vanilla extract. -
Step 4
In a separate bowl, whisk together 2 1/4 cups flour, 1/2 cup cocoa powder, 1/2 tsp baking soda, and 1/4 tsp salt. -
Step 5
Gradually add the dry ingredients to the wet mixture, mixing until combined. -
Step 6
Fold in 1 cup chocolate chips and 1 cup chopped maraschino cherries. -
Step 7
Drop spoonfuls of dough onto prepared baking sheets. Bake for 10-12 minutes until edges are set. -
Step 8
Cool cookies on baking sheets for a few minutes, then transfer to a wire rack to cool completely. Once cooled, dust with 1/2 cup powdered sugar.
Important Information
Nutrition Facts (Per Serving)
It is important to consider this information as approximate and not to use it as definitive health advice.
Allergy Information
Please check ingredients for potential allergens and consult a health professional if in doubt.


Leave a Comment