
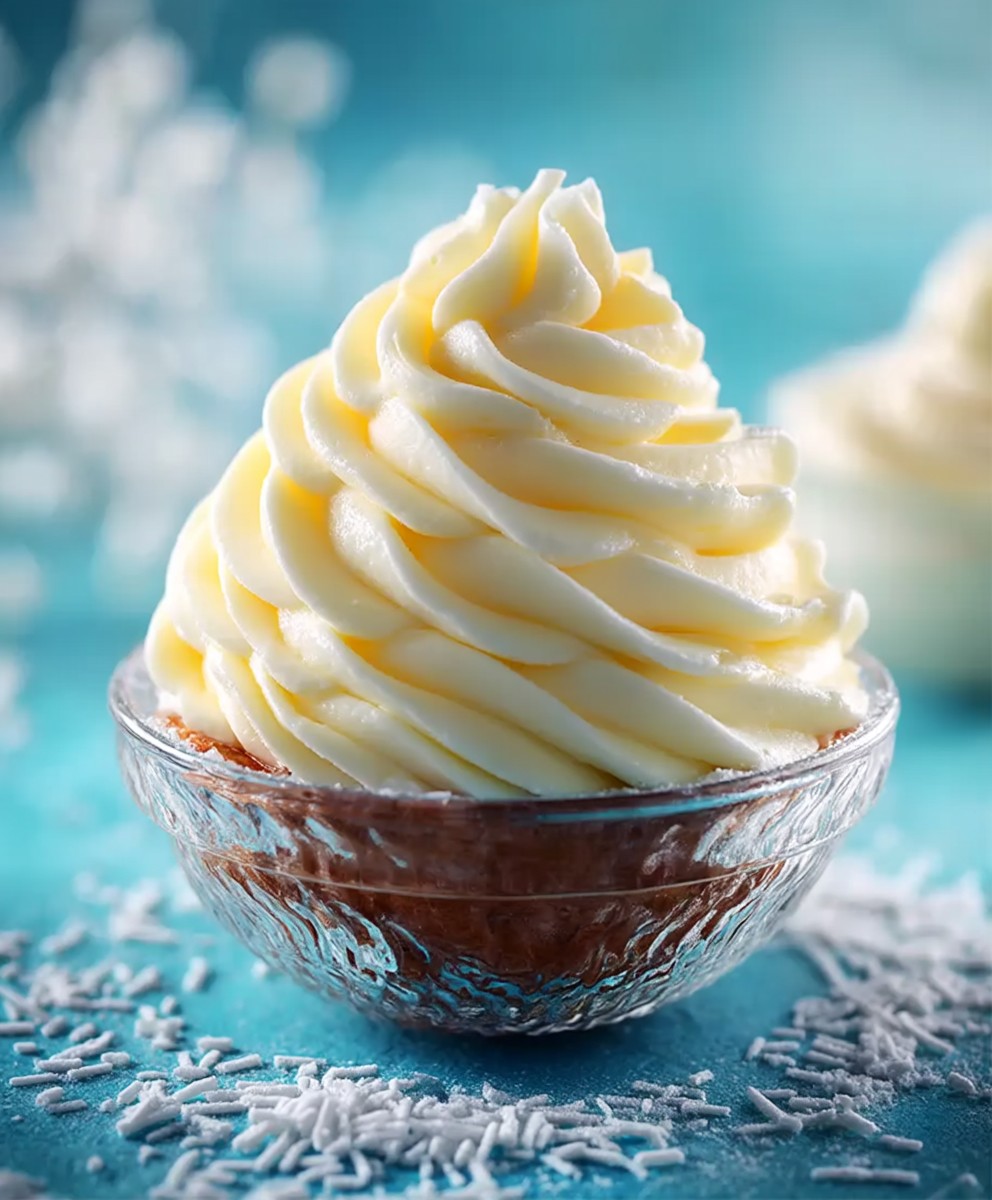
Vanilla frosting: the quintessential topping that transforms ordinary cakes and cupcakes into extraordinary delights! Have you ever wondered why a simple swirl of creamy, sweet frosting can evoke such joy? It’s more than just sugar; it’s a connection to childhood memories, celebratory moments, and the pure pleasure of indulging in something delicious.
While the exact origins of frosting are debated, sweetened toppings have graced baked goods for centuries. Early versions often involved honey and fruit purees, but the modern vanilla frosting we know and love truly blossomed with the increased availability of refined sugar and butter. Vanilla, with its warm and inviting aroma, quickly became a favored flavoring, elevating frosting to new heights of deliciousness.
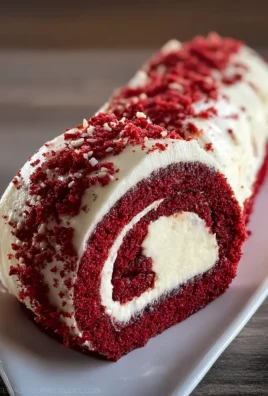
What makes vanilla frosting so universally appealing? Its versatility is a major factor. It pairs perfectly with chocolate, vanilla, red velvet, and countless other cake flavors. The smooth, melt-in-your-mouth texture is simply irresistible, and the sweet vanilla flavor is comforting and familiar. Plus, it’s relatively easy to make at home, allowing you to customize the sweetness and consistency to your exact liking. Whether you’re a seasoned baker or a novice in the kitchen, a batch of homemade vanilla frosting is always within reach, ready to add a touch of magic to your next baking creation.

Ingredients:
- 1 cup (2 sticks) unsalted butter, softened
- 3-4 cups powdered sugar, sifted
- 1/4 cup milk or heavy cream
- 2 teaspoons pure vanilla extract
- Pinch of salt
Preparing the Butter and Sugar:
Alright, let’s get started! The key to a truly amazing vanilla frosting is starting with the right ingredients and preparing them properly. First things first, make sure your butter is nice and soft. I’m talking about leaving it out at room temperature for at least an hour, maybe even two, depending on how warm your kitchen is. You want it to be pliable, but not melted. If it’s melted, your frosting will be greasy. If it’s too cold, you’ll end up with lumps. Trust me, I’ve been there!
Now, about that powdered sugar. Sifting it is crucial! It removes any lumps and makes the frosting incredibly smooth. I know it seems like an extra step, but it’s totally worth it. You can use a sifter or even a fine-mesh sieve. Just run the powdered sugar through it a little at a time. This will prevent a powdered sugar explosion in your kitchen (we’ve all been there, too!).
The Mixing Process:
- Cream the Butter: In a large bowl (or the bowl of your stand mixer), beat the softened butter with an electric mixer on medium speed until it’s light and fluffy. This usually takes about 3-5 minutes. You want it to look almost whipped. Scraping down the sides of the bowl occasionally ensures that all the butter is evenly creamed. Don’t rush this step; it’s the foundation of your frosting.
- Gradually Add the Powdered Sugar: Reduce the mixer speed to low and gradually add the sifted powdered sugar, one cup at a time. Be patient! Adding it too quickly will create a cloud of powdered sugar that will coat everything in your kitchen (including you!). After each cup, mix until just combined. Again, scrape down the sides of the bowl as needed.
- Incorporate the Liquid: Add the milk or heavy cream and the vanilla extract. Start with 1/4 cup of milk. If you want a thinner frosting, you can add a little more later. The heavy cream will give you a richer, more decadent flavor, but milk works just fine. Mix on low speed until everything is combined.
- Whip it Good!: Increase the mixer speed to medium-high and beat the frosting for another 2-3 minutes, or until it’s light, fluffy, and smooth. This is where the magic happens! The frosting will become noticeably lighter in color and increase in volume. Don’t overbeat it, though, or it can become too airy.
- Adjust Consistency: Check the consistency of the frosting. If it’s too thick, add a tablespoon of milk or cream at a time until you reach your desired consistency. If it’s too thin, add a tablespoon of powdered sugar at a time. Remember, you can always add more, but you can’t take it away!
- Add a Pinch of Salt: This might seem counterintuitive, but a pinch of salt really enhances the sweetness of the frosting and balances the flavors. Trust me on this one!
Flavor Variations and Tips:
Now that you have a basic vanilla frosting, you can get creative and customize it to your liking! Here are a few ideas:
- Lemon Vanilla Frosting: Add 1-2 tablespoons of lemon juice and the zest of one lemon. This will give your frosting a bright, citrusy flavor.
- Chocolate Vanilla Frosting: Add 1/4 cup of unsweetened cocoa powder along with the powdered sugar. You might need to add a little more milk to adjust the consistency.
- Almond Vanilla Frosting: Substitute almond extract for the vanilla extract. Start with 1 teaspoon and add more to taste.
- Brown Butter Vanilla Frosting: Brown the butter before creaming it. This will give your frosting a nutty, caramel-like flavor. Let the browned butter cool completely before using it.
Tips for Success:
- Use high-quality vanilla extract: The quality of your vanilla extract will greatly impact the flavor of your frosting. I recommend using pure vanilla extract, not imitation vanilla.
- Don’t overmix: Overmixing can cause the frosting to become tough. Mix until just combined.
- Store properly: Store leftover frosting in an airtight container in the refrigerator for up to a week. Let it come to room temperature before using it.
- Pipe like a pro: If you’re planning on piping your frosting, make sure it’s the right consistency. It should be thick enough to hold its shape, but not so thick that it’s difficult to pipe.
- Troubleshooting: If your frosting is too stiff, add a little more milk or cream. If it’s too thin, add a little more powdered sugar. If it’s lumpy, make sure your butter is soft enough and that you sifted your powdered sugar.
Achieving the Perfect Consistency:
The consistency of your frosting is key, and it really depends on what you’re using it for. For spreading on cakes or cupcakes, you want a smooth, creamy consistency that’s easy to work with. For piping, you’ll need a thicker consistency that will hold its shape. Here’s how to adjust the consistency:
- Too Thick: If your frosting is too thick, it will be difficult to spread or pipe. Add milk or heavy cream, one tablespoon at a time, until you reach the desired consistency. Mix well after each addition.
- Too Thin: If your frosting is too thin, it will run off your cake or cupcakes. Add powdered sugar, one tablespoon at a time, until you reach the desired consistency. Mix well after each addition.
- Just Right: The perfect consistency for spreading is smooth and creamy, like softened butter. For piping, it should be thick enough to hold its shape but still easy to pipe.
Level Up Your Frosting Game:
Want to take your vanilla frosting to the next level? Here are a few more advanced techniques:
- Swiss Meringue Buttercream: This is a more stable and less sweet frosting that’s perfect for decorating cakes. It involves cooking egg whites and sugar over a double boiler, then whipping them into a meringue before adding butter.
- Italian Meringue Buttercream: Similar to Swiss meringue buttercream, but it uses a hot sugar syrup to cook the egg whites. This results in an even more stable and silky smooth frosting.
- French Buttercream: This is the richest and most decadent of the buttercreams. It uses egg yolks instead of egg whites, which gives it a rich, custard-like flavor.
Serving and Storage:
Once your frosting is ready, you can use it immediately to frost your cakes, cupcakes, cookies, or anything else your heart desires! If you’re not using it right away, store it in an airtight container in the refrigerator for up to a week. Let it come to room temperature before using it, and re-whip it with an electric mixer to restore its fluffy texture.
You can also freeze vanilla frosting for up to 3 months. Thaw it in the refrigerator overnight and re-whip it before using it.
I hope you enjoy this recipe for vanilla frosting! It’s a classic for a reason, and with a few simple tips and tricks, you can make it even better. Happy baking!
Conclusion:
This isn’t just any frosting recipe; it’s your new go-to for achieving that perfect, melt-in-your-mouth sweetness. I truly believe this vanilla frosting recipe is a must-try because it delivers that classic, comforting flavor we all crave, but with a texture that’s unbelievably smooth and creamy. Forget those grainy, overly sweet frostings of the past! This recipe uses simple techniques and high-quality ingredients to create a frosting that’s both elegant and utterly delicious.
But the best part? It’s incredibly versatile! While it’s absolutely divine on classic vanilla cupcakes or a rich chocolate cake, don’t be afraid to experiment. Imagine swirling it onto freshly baked sugar cookies for a festive treat, or using it as a decadent filling for macarons. For a fun twist, try adding a pinch of sea salt to enhance the sweetness, or a few drops of lemon extract for a bright, citrusy flavor. You could even fold in some finely chopped toasted nuts for added texture and a nutty aroma.
Serving Suggestions and Variations:
* Classic Cupcakes: The obvious choice! This frosting elevates any cupcake to bakery-worthy status.
* Layer Cakes: Create stunning layer cakes with this frosting as the perfect complement.
* Sugar Cookies: Transform simple sugar cookies into elegant treats with a generous swirl of this frosting.
* Macarons: Use it as a filling for delicate macarons for a truly decadent experience.
* Lemon Twist: Add a few drops of lemon extract for a bright and refreshing flavor.
* Salted Vanilla: A pinch of sea salt enhances the sweetness and adds a sophisticated touch.
* Nutty Delight: Fold in finely chopped toasted nuts for added texture and flavor.
* Coffee Infusion: Add a teaspoon of instant espresso powder for a mocha-inspired frosting.
* Cinnamon Spice: A dash of cinnamon creates a warm and cozy flavor, perfect for fall baking.
* Chocolate Swirl: Gently swirl in melted chocolate for a marbled effect and a hint of chocolatey goodness.
I’ve poured my heart into perfecting this recipe, and I’m confident that you’ll love it as much as I do. It’s the kind of frosting that makes people say, “Wow, this is amazing!” And that’s exactly what I want for you to create desserts that leave a lasting impression.
So, what are you waiting for? Gather your ingredients, preheat your oven (if you’re making cupcakes or a cake!), and get ready to whip up the best vanilla frosting you’ve ever tasted. I’m so excited for you to try it!
Once you’ve had a chance to bake with this recipe, I’d absolutely love to hear about your experience. Did you try any of the variations? What did you bake it on? Share your photos and stories in the comments below! Your feedback is invaluable, and it helps me continue to improve and create even more delicious recipes for you. Happy baking! I can’t wait to see what you create!
Vanilla Frosting: The Ultimate Guide to Perfecting Your Recipe
A classic, smooth, and fluffy vanilla frosting perfect for cakes, cupcakes, and cookies. Easily customizable with flavor variations.
Ingredients
- 1 cup (2 sticks) unsalted butter, softened
- 3-4 cups powdered sugar, sifted
- 1/4 cup milk or heavy cream
- 2 teaspoons pure vanilla extract
- Pinch of salt
Instructions
- Cream the Butter: In a large bowl (or the bowl of your stand mixer), beat the softened butter with an electric mixer on medium speed until it’s light and fluffy (3-5 minutes). Scrape down the sides of the bowl occasionally.
- Gradually Add the Powdered Sugar: Reduce the mixer speed to low and gradually add the sifted powdered sugar, one cup at a time. Mix until just combined after each cup. Scrape down the sides of the bowl as needed.
- Incorporate the Liquid: Add the milk or heavy cream and the vanilla extract. Start with 1/4 cup of milk. Mix on low speed until everything is combined.
- Whip it Good!: Increase the mixer speed to medium-high and beat the frosting for another 2-3 minutes, or until it’s light, fluffy, and smooth.
- Adjust Consistency: If it’s too thick, add a tablespoon of milk or cream at a time until you reach your desired consistency. If it’s too thin, add a tablespoon of powdered sugar at a time.
- Add a Pinch of Salt: Add a pinch of salt to enhance the sweetness.
Notes
- Butter: Ensure butter is softened but not melted.
- Powdered Sugar: Sifting is crucial for a smooth frosting.
- Vanilla Extract: Use high-quality, pure vanilla extract.
- Don’t Overmix: Overmixing can make the frosting tough.
- Consistency: Adjust milk/cream or powdered sugar to achieve desired consistency (smooth and creamy for spreading, thicker for piping).
- Flavor Variations: Consider adding lemon juice/zest, cocoa powder, or almond extract.
- Storage: Store leftover frosting in an airtight container in the refrigerator for up to a week. Let it come to room temperature before using it. Can be frozen for up to 3 months.
Leave a Comment