
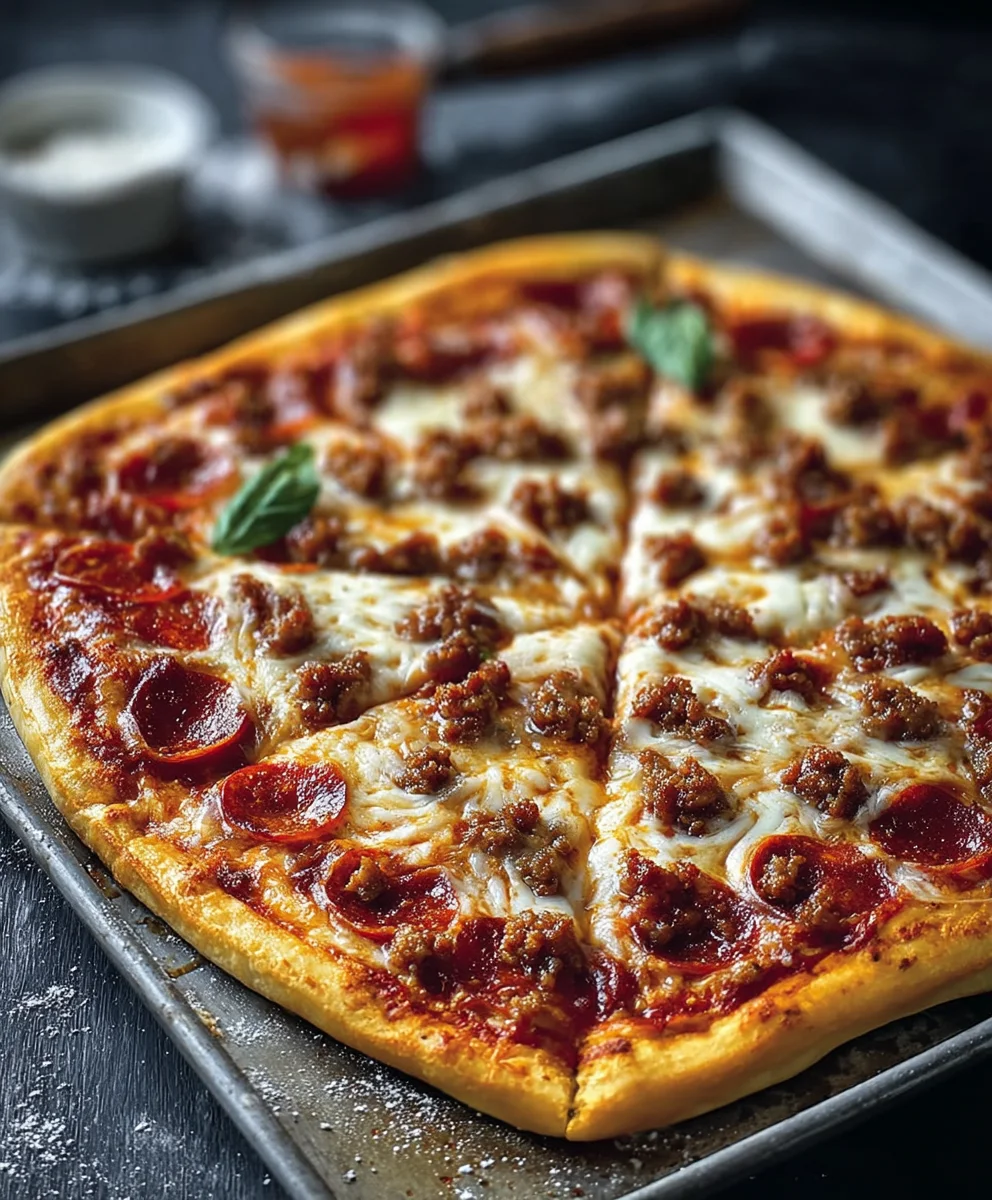
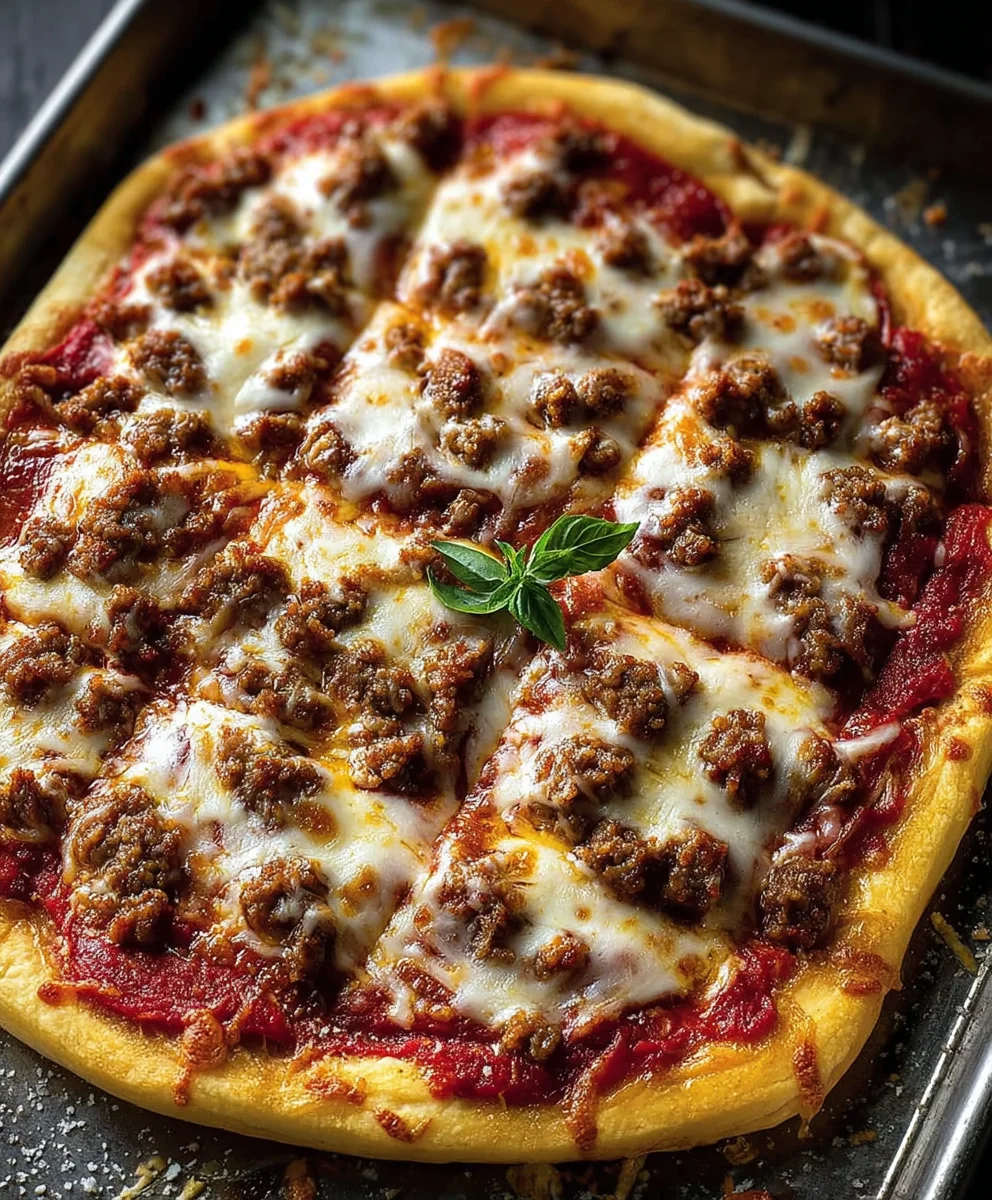
The Ultimate School Pizza. Ah, those three words instantly transport many of us back to bustling school cafeterias, the familiar clatter of trays, and the sheer delight of pizza day. I remember the palpable anticipation, the distinctive rectangular shape, the perfectly chewy crust, and that uniquely savory, slightly sweet sauce. It wasn’t just lunch; it was an experience, a highlight of the week that brought a collective smile to countless students. For years, I, like many, have chased that elusive, nostalgic flavor, striving to recreate that childhood magic in my own kitchen. Good news: We’ve finally cracked the code!
This isn’t just any pizza recipe; it’s a dedicated tribute to a foundational culinary memory for generations. People adore this dish not only for its comforting familiarity but also for its surprisingly balanced flavors: the perfect ratio of melted, gooey cheese, the tangy, slightly sweet tomato sauce, and a crust that hits just the right note between soft and crispy. It’s a taste that signifies simpler times, a delicious journey back to childhood with every single bite. I’m absolutely thrilled to guide you through crafting what I genuinely believe is The Ultimate School Pizza experience right in your home kitchen, ensuring every slice delivers that cherished taste of yesteryear.

Ingredients:
- For the Dough:
- 1 ½ cups (360ml) warm water (about 105-115°F / 40-46°C)
- 2 ¼ teaspoons (7g or 1 standard packet) active dry yeast
- 1 teaspoon granulated sugar
- 3 ½ cups (420g) all-purpose flour, plus more for dusting
- 2 tablespoons olive oil, plus more for greasing the bowl
- 1 ½ teaspoons fine sea salt
- For the Sauce:
- 1 (28-ounce / 794g) can crushed tomatoes
- 2 cloves garlic, minced
- 1 tablespoon olive oil
- 1 teaspoon dried oregano
- ½ teaspoon dried basil
- ¼ teaspoon red pepper flakes (optional, for a little kick)
- ½ teaspoon granulated sugar (to balance acidity)
- Salt and freshly ground black pepper to taste
- For the Toppings & Assembly:
- 2 cups (about 8 ounces / 226g) low-moisture, whole-milk mozzarella cheese, freshly shredded (I find block cheese shreds best!)
- ½ cup (about 2 ounces / 56g) provolone cheese, freshly shredded (optional, but adds that classic school pizza tang!)
- Your favorite pizza toppings:
- Pepperoni slices (mini ones work great for that uniform look!)
- Cooked crumbled sausage
- Sliced mushrooms
- Diced bell peppers
- Sliced black olives
- A light drizzle of olive oil for the crust edge (optional, for extra crispness)
- Cornmeal or semolina flour, for dusting the pan (prevents sticking and adds texture)
Preparing the Dough for The Ultimate School Pizza Base
Creating the perfect crust is absolutely foundational to achieving The Ultimate School Pizza experience. It needs to be sturdy enough to hold its toppings, yet tender and flavorful. Trust me, dedicating a little time here makes all the difference.
- First things first, let’s activate our yeast. In a large mixing bowl (or the bowl of your stand mixer if you’re using one), combine the warm water and granulated sugar. The sugar acts as food for the yeast, helping it to wake up. Sprinkle the active dry yeast over the top of the water. Give it a gentle stir, just enough to moisten all the yeast granules. Now, let it sit undisturbed for about 5-10 minutes. You’re looking for it to become frothy and bubbly on the surface. This is your sign that the yeast is alive and ready to work its magic. If it doesn’t foam up, your water might have been too hot or too cold, or your yeast might be old, and you’ll need to start again.
- Once your yeast is active, add the olive oil, salt, and about half of the all-purpose flour to the bowl. Mix with a wooden spoon or the dough hook attachment of your stand mixer on low speed until just combined.
- Gradually add the remaining flour, about half a cup at a time, mixing well after each addition. Continue adding flour until the dough comes together and starts to pull away from the sides of the bowl. The dough should be soft but not overly sticky. You might not need all of the flour, or you might need a tiny bit more – it really depends on the humidity in your kitchen.
- If kneading by hand: Turn the dough out onto a lightly floured surface. Knead vigorously for about 8-10 minutes. Use the heel of your hand to push the dough away from you, fold it back over, turn it a quarter turn, and repeat. You’re developing the gluten here, which is essential for that chewy, elastic texture. The dough should become smooth, elastic, and spring back when gently poked.
- If kneading with a stand mixer: Attach the dough hook and knead on medium-low speed for about 7-9 minutes. The dough should gather around the hook and pull away from the sides of the bowl. It should look smooth and feel elastic.
- To test if your dough is ready, perform the “windowpane test.” Pinch off a small piece of dough and gently stretch it. If you can stretch it thin enough to see light through it without it tearing, your gluten is sufficiently developed. If it tears easily, knead for another minute or two and test again.
- Lightly oil a large clean bowl with olive oil. Place the kneaded dough into the bowl, turning it once to coat the entire surface with oil. This prevents it from drying out. Cover the bowl tightly with plastic wrap or a clean kitchen towel.
- Now comes the first rise, often called the bulk fermentation. Place the covered bowl in a warm, draft-free spot. I often use my oven with just the light on (not preheated!) as a warm proofing box. Let the dough rise for about 1 to 1 ½ hours, or until it has doubled in size. This step is crucial for flavor development and achieving a light, airy crust.
- Once doubled, gently punch down the dough to release the air. This helps create a more even texture. You’re now ready for shaping, but let’s get our sauce and toppings ready first!
Crafting the Signature Pizza Sauce
While the dough is busy rising, we’ll whip up a quick yet incredibly flavorful sauce. This sauce is simple, letting the quality of the tomatoes shine, but with just enough seasoning to evoke that nostalgic Ultimate School Pizza taste.
- In a medium saucepan, heat 1 tablespoon of olive oil over medium heat. Add the minced garlic and sauté for about 30 seconds to 1 minute, until fragrant. Be careful not to burn the garlic – burnt garlic can turn bitter.
- Pour in the crushed tomatoes. Stir in the dried oregano, dried basil, red pepper flakes (if using), and granulated sugar. The sugar is key here, as it helps to cut through the acidity of the tomatoes, creating a perfectly balanced flavor profile.
- Bring the sauce to a gentle simmer. Reduce the heat to low, cover the saucepan, and let it simmer for at least 15-20 minutes. The longer it simmers, the more the flavors will meld and deepen. Stir occasionally to prevent sticking.
- Taste the sauce and season with salt and freshly ground black pepper as needed. I usually add about ½ to 1 teaspoon of salt to start, then adjust to my preference. You want it to be vibrant and well-seasoned.
- Remove the sauce from the heat and set it aside to cool slightly while you prepare the rest of your ingredients. It’s best to use a sauce that isn’t piping hot on your pizza dough, as it can affect the dough’s texture.
Prepping Your Toppings
This phase is all about organization and ensuring everything is ready to go when your dough is perfectly proofed. Good prep makes assembly a breeze, and helps us get closer to that iconic Ultimate School Pizza look and taste.
- Shred your cheeses: If you’re using block mozzarella and provolone (which I highly recommend for better melting and flavor!), use a box grater to shred them. Freshly shredded cheese melts so much better than pre-shredded varieties, which often contain anti-caking agents. Combine the shredded mozzarella and provolone in a bowl.
- Prepare any other toppings:
- If using pepperoni, have your slices ready. For that true school pizza aesthetic, I sometimes opt for mini pepperoni, but regular slices work wonderfully too.
- Cook any meats like sausage or ground beef ahead of time, then drain off any excess fat.
- Slice mushrooms, bell peppers, or olives thinly and evenly. Evenly cut toppings cook more uniformly and distribute better on the pizza.
- Preheat your oven: Arrange an oven rack in the middle position. Preheat your oven to 450°F (230°C). If you have a pizza stone or steel, place it in the oven during preheating to get it nice and hot. This will help create a super crispy crust.
Assembling The Ultimate School Pizza
This is where your vision for The Ultimate School Pizza starts to come to life! Getting the dough shaped correctly and the toppings evenly distributed is key for that classic rectangular slice.
- Lightly grease a large rectangular baking sheet (a half-sheet pan, approximately 13×18 inches, works perfectly for that “school pizza” shape) with olive oil. Sprinkle a generous amount of cornmeal or semolina flour evenly over the bottom of the pan. This not only prevents sticking but also adds a lovely, slightly crisp texture to the bottom of the crust, just like those cafeteria trays.
- Take your risen dough and gently transfer it to the prepared baking sheet. It might feel a bit resistant at first.
- Using your fingertips, gently press the dough outwards, starting from the center and working towards the edges of the pan. Don’t force it too much; if it resists, let it rest for 5-10 minutes, covered, to allow the gluten to relax. This makes it much easier to stretch. Continue pressing until the dough fills the entire pan, reaching into all four corners. Aim for an even thickness across the whole surface. You might want to create a slightly raised edge around the perimeter to form a crust.
- Once the dough is stretched, cover the pan loosely with plastic wrap or a clean kitchen towel. Let the dough rest and rise for another 15-20 minutes. This second, shorter rise (often called the “bench rest” or “final proof”) allows the dough to relax, become slightly puffy, and results in a lighter crust.
- Remove the plastic wrap. If you like a slightly crispier edge, you can lightly brush the very edge of the dough (the crust-to-be) with a little olive oil.
- Now, it’s time for the sauce! Spoon your cooled pizza sauce evenly over the stretched dough, leaving about a ½-inch to 1-inch border for the crust. Don’t overload it; a thin, even layer is usually best to prevent a soggy pizza. I find about ¾ of a cup to a full cup of sauce is usually perfect for this size pizza.
- Next, sprinkle about half of your shredded cheese mixture evenly over the sauce. This initial layer of cheese acts as a barrier, protecting the crust from getting too wet from the sauce and helps the other toppings adhere better.
- Distribute your chosen toppings evenly over the first layer of cheese. Remember that school pizza typically has a more uniform, perhaps sparse, distribution of toppings, so don’t go overboard if you’re aiming for that authentic look.
- Finally, sprinkle the remaining shredded cheese over the toppings. This top layer of cheese will melt into a glorious, bubbly blanket, holding everything in place and creating that irresistible golden-brown crust.
Baking The Ultimate School Pizza to Perfection
The moment of truth! Baking is where all your hard work comes together, transforming simple ingredients into a piping hot, delicious Ultimate School Pizza. Achieving that perfect golden crust and bubbly cheese requires attention to detail.
- Carefully transfer the baking sheet with your assembled pizza to the preheated 450°F (230°C) oven. If you’re using a pizza stone or steel, slide the baking sheet directly onto it.
- Bake for 15-20 minutes. Baking times can vary slightly depending on your oven, the thickness of your crust, and the amount of toppings.
- Keep a close eye on your pizza. You’re looking for the crust to be golden brown and crisp, and the cheese to be melted, bubbly, and beautifully golden in spots. If one side of your pizza is browning faster than the other, rotate the baking sheet halfway through the baking time to ensure even cooking.
- For an extra crispy bottom, especially if you didn’t use a pizza stone, you can sometimes carefully slide the pizza directly onto the oven rack for the last 2-3 minutes of baking, after the pan has been in for most of the time. However, be cautious when doing this to avoid spills!
- Once the pizza is done, the cheese should be bubbling vigorously and the crust edges should be firm and deeply golden. The bottom of the crust should also be nicely browned and crisp. You can lift a corner with a spatula to check this.
- Carefully remove the baking sheet from the oven. The smell filling your kitchen right now should be absolutely divine and incredibly nostalgic!
Serving Suggestions and Enjoying Your Homemade School Pizza
The hardest part of making The Ultimate School Pizza? Waiting to eat it! But trust me, a few minutes of patience here will reward you with a much better experience.
- Once out of the oven, do not cut into your pizza immediately. This is a common mistake! Allow the pizza to rest on the baking sheet for at least 5-7 minutes. This resting period is crucial. It allows the cheese to set slightly, preventing it from sliding off when you cut it, and it also helps the crust firm up, making for cleaner slices and preventing a soggy middle.
- After resting, carefully transfer the pizza from the baking sheet to a large cutting board. A wide metal spatula or two spatulas can help with this.
- Using a sharp pizza cutter or a large chef’s knife, slice the pizza into classic rectangular portions. For that true school pizza vibe, I aim for about 8-12 uniform rectangles, depending on how large I want each slice to be.
- Serve your homemade Ultimate School Pizza warm! It’s fantastic on its own, but you can also serve it with a side salad for a more complete meal, or with a sprinkle of extra dried oregano or Parmesan cheese if you like.
- This pizza is wonderful for parties, weeknight dinners, or even meal prepping. Leftovers can be stored in an airtight container in the refrigerator for up to 3-4 days and reheat beautifully in a toaster oven or a hot skillet for a crispy crust.
Conclusion:
And there you have it! After walking through every step, every ingredient, and all the little secrets that make this recipe truly special, I truly hope you’re feeling inspired to roll up your sleeves and bring this fantastic dish to life in your own kitchen. I promise you, once you taste that first warm, gooey, perfectly seasoned slice, you’ll quickly understand why I’ve poured so much passion into calling this creation The Ultimate School Pizza. It’s more than just a meal; it’s a journey back to cherished memories, a testament to simple, wholesome ingredients, and an absolute game-changer for your weeknight dinner rotation or any casual gathering. The sheer joy of pulling a freshly baked pizza from your oven, filling your home with that irresistible aroma, is an experience I want every single one of you to enjoy.
What makes this pizza a non-negotiable must-try, you ask? It’s the perfect harmony of a crispy-yet-chewy crust that holds up to every topping, a rich and tangy sauce that provides the ideal backdrop, and a melty, flavorful cheese blend that stretches with every bite. It’s a canvas for creativity, but even in its simplest form, it’s profoundly satisfying. Forget the soggy, bland versions you might remember; this is the elevated, homemade equivalent that respects your time and your taste buds. It’s comforting, it’s nostalgic, and most importantly, it’s undeniably delicious. I truly believe this recipe will become a cornerstone in your culinary repertoire, something you’ll turn to again and again, not just because it’s easy, but because it’s consistently exceptional.
Now, let’s talk about enhancing your pizza experience. While it’s utterly phenomenal on its own, a fresh, crisp side salad with a light vinaigrette makes for a perfectly balanced meal. Think a simple garden salad with cherry tomatoes, cucumbers, and a sprinkle of croutons. Or, for a truly indulgent spread, pair it with some homemade garlic knots or a plate of warm, buttery breadsticks for dipping in any leftover sauce. A chilled glass of your favorite soda, sparkling water with lemon, or even a classic milkshake can complete the nostalgic vibe. If you’re making it for a party, consider cutting it into smaller, more manageable squares for easy grabbing. And don’t forget the classic pizza accompaniments: a sprinkle of red pepper flakes for those who love a kick, and extra Parmesan cheese for an added layer of salty umami.
The beauty of this recipe lies in its incredible versatility. Don’t be afraid to experiment with your toppings! While pepperoni and plain cheese are classics, imagine a veggie supreme with bell peppers, onions, mushrooms, and black olives. For a meat-lover’s delight, add crumbled sausage, crispy bacon, or diced ham. Feeling a little gourmet? Try a sprinkle of fresh arugula and prosciutto added right after baking, or a drizzle of balsamic glaze. You could even swap out the classic marinara for a pesto base with sun-dried tomatoes and goat cheese, or a creamy white garlic sauce with chicken and spinach. For those with dietary considerations, this recipe is incredibly adaptable: a gluten-free crust works wonderfully, and plant-based cheeses and meat alternatives can easily transform it into a delicious vegan option without sacrificing flavor. Think about adding a different cheese blend too – perhaps some sharp provolone mixed with the mozzarella, or a touch of smoked gouda for an unexpected depth of flavor. The possibilities truly are endless, and I encourage you to make this pizza your own, reflecting your personal preferences and what’s in season.
So, what are you waiting for? This isn’t just a recipe to read; it’s a recipe to make, to savor, and to share. I genuinely hope you take the plunge and dedicate an afternoon or evening to creating this masterpiece. Trust me, the smiles it brings to faces around your table will be more than worth the effort. There’s a special kind of satisfaction that comes from feeding your loved ones something you’ve made with your own hands, and this pizza is designed to deliver exactly that. Once you’ve had a chance to try your hand at The Ultimate School Pizza, I would absolutely love to hear about your experience! Did you stick to the classic toppings, or did you venture into new culinary territory? What was your family’s favorite part? Did you make any unique adjustments that turned out to be brilliant? Please, don’t hesitate to share your stories, your photos, and any creative variations you came up with in the comments below or on social media. Your insights and adventures inspire me and our entire community of home cooks. Happy baking, and enjoy every single slice!
The Ultimate School Pizza
This homemade version of classic school cafeteria pizza features a unique soft-yet-crispy crust, savory homemade sauce, seasoned meat, and perfectly melted mozzarella cheese.
Ingredients
-
1 ½ cups (360ml) warm water
-
2 ¼ teaspoons (7g) active dry yeast
-
1 teaspoon granulated sugar (for dough)
-
3 ½ cups (420g) all-purpose flour
-
2 tablespoons olive oil (for dough)
-
1 ½ teaspoons fine sea salt
-
1 (28-ounce / 794g) can crushed tomatoes
-
2 cloves garlic, minced
-
1 tablespoon olive oil (for sauce)
-
1 teaspoon dried oregano
-
½ teaspoon dried basil
-
¼ teaspoon red pepper flakes (optional)
-
½ teaspoon granulated sugar (for sauce)
-
Salt and freshly ground black pepper to taste
-
2 cups (8 ounces / 226g) low-moisture, whole-milk mozzarella cheese, shredded
-
½ cup (2 ounces / 56g) provolone cheese, shredded (optional)
-
Beef Pepperoni slices (mini ones work great)
-
Cooked crumbled beef sausage
-
Sliced mushrooms
-
Diced bell peppers
-
Sliced black olives
-
Cornmeal or semolina flour, for dusting
-
Parmesan cheese (optional, for serving)
Instructions
-
Step 1
In a large bowl, combine warm water and 1 tsp granulated sugar. Sprinkle yeast over water, stir gently, and let sit 5-10 minutes until frothy. -
Step 2
Add 2 tbsp olive oil, salt, and half the flour to the yeast mixture. Mix, then gradually add remaining flour until dough comes together and pulls from the bowl sides. -
Step 3
Knead by hand on a lightly floured surface for 8-10 minutes, or with a stand mixer (dough hook) on medium-low for 7-9 minutes, until smooth and elastic. -
Step 4
Lightly oil a large bowl. Place dough in it, turning to coat. Cover tightly and let rise in a warm, draft-free spot for 1 to 1 ½ hours, or until doubled in size. Gently punch down to release air. -
Step 5
Heat 1 tbsp olive oil in a medium saucepan over medium heat. Sauté minced garlic for 30-60 seconds until fragrant. Pour in crushed tomatoes. Stir in oregano, basil, red pepper flakes (if using), and ½ tsp granulated sugar. Bring to a gentle simmer, then reduce heat to low, cover, and simmer for 15-20 minutes, stirring occasionally. Season with salt and pepper to taste. Remove from heat and let cool slightly. -
Step 6
Shred mozzarella and provolone cheeses. Prepare any chosen toppings: have beef pepperoni ready, cook and drain any beef sausage, slice mushrooms, bell peppers, or olives thinly. Preheat oven to 450°F (230°C) with an oven rack in the middle position (place a pizza stone/steel in if using). -
Step 7
Lightly grease a 13×18 inch rectangular baking sheet with olive oil. Sprinkle a generous amount of cornmeal or semolina flour evenly over the bottom. Transfer risen dough to the prepared pan. Using fingertips, gently press and stretch the dough outwards to fill the entire pan, creating a slightly raised edge for the crust. If dough resists, let it rest, covered, for 5-10 minutes before continuing. -
Step 8
Once dough is stretched, cover the pan loosely with plastic wrap or a clean kitchen towel. Let the dough rest and rise for another 15-20 minutes until slightly puffy. -
Step 9
Remove plastic wrap. Lightly brush the crust edge with olive oil (optional). Spoon cooled pizza sauce evenly over the dough, leaving a ½-inch to 1-inch border. Sprinkle about half of the shredded cheese mixture evenly over the sauce. Distribute your chosen toppings evenly over this cheese layer. Finally, sprinkle the remaining shredded cheese over the toppings. -
Step 10
Carefully transfer the assembled pizza to the preheated oven. Bake for 15-20 minutes, or until the crust is golden brown and crisp, and the cheese is melted, bubbly, and beautifully golden in spots. Rotate the baking sheet halfway through if needed for even cooking. -
Step 11
Carefully remove the pizza from the oven. Allow it to rest on the baking sheet for at least 5-7 minutes; this helps the cheese set and the crust firm up. Transfer the pizza to a large cutting board and slice into classic rectangular portions (8-12 slices). Serve warm, optionally with a sprinkle of extra dried oregano or Parmesan cheese.
Important Information
Nutrition Facts (Per Serving)
It is important to consider this information as approximate and not to use it as definitive health advice.
Allergy Information
Please check ingredients for potential allergens and consult a health professional if in doubt.


Leave a Comment