
Thai Fried Chicken Sandwich: Prepare to embark on a culinary adventure that will tantalize your taste buds and leave you craving more! Imagine sinking your teeth into a crispy, golden-brown chicken fillet, infused with the vibrant flavors of Thailand, nestled between soft, toasted buns. This isn’t just a sandwich; it’s an experience.
While the exact origins of the Thai Fried Chicken Sandwich are relatively modern, it draws inspiration from the rich culinary heritage of Thailand. Thai cuisine is renowned for its harmonious blend of sweet, sour, salty, spicy, and umami flavors. This sandwich cleverly captures that essence, offering a delightful fusion of textures and tastes that will transport you to the bustling streets of Bangkok.
What makes this sandwich so irresistible? It’s the perfect marriage of crispy and tender, savory and sweet. The chicken is marinated in a fragrant blend of Thai spices, ensuring every bite is bursting with flavor. The addition of a tangy slaw or a spicy mayo adds another layer of complexity, creating a symphony of sensations that will keep you coming back for more. Whether you’re looking for a quick and satisfying lunch or a crowd-pleasing dinner, the Thai Fried Chicken Sandwich is guaranteed to be a hit. Get ready to elevate your sandwich game!

Ingredients:
- For the Chicken Marinade:
- 2 lbs boneless, skinless chicken thighs, cut into 2-inch pieces
- 1/4 cup soy sauce
- 2 tablespoons fish sauce
- 2 tablespoons lime juice
- 1 tablespoon grated ginger
- 2 cloves garlic, minced
- 1 teaspoon ground coriander
- 1/2 teaspoon white pepper
- 1/4 teaspoon turmeric powder
- For the Fried Chicken Coating:
- 2 cups all-purpose flour
- 1/2 cup cornstarch
- 2 tablespoons rice flour (optional, for extra crispiness)
- 2 teaspoons baking powder
- 1 teaspoon salt
- 1 teaspoon garlic powder
- 1 teaspoon onion powder
- 1/2 teaspoon paprika
- 1/4 teaspoon cayenne pepper (optional, for heat)
- 1 cup ice water
- For the Spicy Mayo:
- 1/2 cup mayonnaise
- 2 tablespoons sriracha (or more, to taste)
- 1 tablespoon lime juice
- 1 teaspoon honey or agave nectar
- 1/2 teaspoon sesame oil
- For the Pickled Slaw:
- 1 cup shredded green cabbage
- 1/2 cup shredded red cabbage
- 1/2 cup shredded carrots
- 1/4 cup rice vinegar
- 2 tablespoons sugar
- 1/2 teaspoon salt
- For the Sandwich Assembly:
- 4 brioche buns, split
- Vegetable oil, for frying
- Fresh cilantro leaves, for garnish
- Optional: Sliced cucumbers, for extra crunch
Marinating the Chicken:
Okay, let’s get started! First things first, we need to marinate our chicken. This is where all the amazing Thai flavors really get infused into the meat, making it super juicy and delicious. Don’t skip this step!
- In a large bowl, combine the soy sauce, fish sauce, lime juice, grated ginger, minced garlic, ground coriander, white pepper, and turmeric powder. Give it a good whisk to make sure everything is nicely mixed together.
- Add the chicken pieces to the bowl. Make sure each piece is well coated with the marinade. I like to use my hands to really massage the marinade into the chicken, but you can use a spoon if you prefer.
- Cover the bowl with plastic wrap and refrigerate for at least 2 hours, or preferably overnight. The longer it marinates, the more flavorful it will be! I usually aim for at least 4 hours if I have the time.
Preparing the Pickled Slaw:
While the chicken is marinating, let’s whip up the pickled slaw. This adds a fantastic tangy crunch that perfectly complements the richness of the fried chicken and the spiciness of the mayo. It’s a total game-changer!
- In a medium bowl, combine the shredded green cabbage, red cabbage, and carrots.
- In a separate small bowl, whisk together the rice vinegar, sugar, and salt until the sugar and salt are dissolved. This is your pickling liquid.
- Pour the pickling liquid over the cabbage mixture and toss well to combine.
- Cover the bowl and refrigerate for at least 30 minutes, or up to a few hours. The longer it sits, the more the flavors will meld together. Give it a toss occasionally to ensure even pickling.
Making the Spicy Mayo:
Next up, let’s make the spicy mayo. This is the glue that holds everything together and adds a creamy, spicy kick that you’ll absolutely love. Adjust the sriracha to your liking I like mine pretty spicy!
- In a small bowl, combine the mayonnaise, sriracha, lime juice, honey (or agave), and sesame oil.
- Whisk everything together until it’s smooth and creamy.
- Taste and adjust the seasoning as needed. Add more sriracha for extra heat, or a little more lime juice for extra tang.
- Cover the bowl and refrigerate until ready to use. This will allow the flavors to meld together even more.
Coating and Frying the Chicken:
Now for the fun part frying the chicken! This is where the magic happens and we transform the marinated chicken into crispy, golden-brown perfection. Make sure you have everything ready before you start frying, as it can get a little hectic.
- In a large bowl, whisk together the all-purpose flour, cornstarch, rice flour (if using), baking powder, salt, garlic powder, onion powder, paprika, and cayenne pepper (if using). This is your dry coating.
- Slowly whisk in the ice water until just combined. Don’t overmix! You want a slightly lumpy batter. The cold water helps to create a super crispy coating.
- Heat about 2-3 inches of vegetable oil in a large, heavy-bottomed pot or Dutch oven to 350°F (175°C). Use a thermometer to ensure the oil is at the correct temperature. This is crucial for even cooking and crispy chicken.
- Remove the chicken pieces from the marinade, letting any excess drip off.
- Dip each chicken piece into the batter, making sure it’s completely coated. Let any excess batter drip off before carefully placing it into the hot oil.
- Fry the chicken in batches, being careful not to overcrowd the pot. Overcrowding will lower the oil temperature and result in soggy chicken. Fry for about 6-8 minutes per batch, or until the chicken is golden brown and cooked through. The internal temperature should reach 165°F (74°C).
- Remove the fried chicken from the oil with a slotted spoon and place it on a wire rack lined with paper towels to drain any excess oil. This will help keep the chicken crispy.
Assembling the Thai Fried Chicken Sandwiches:
Alright, we’re in the home stretch! Now it’s time to assemble our delicious Thai Fried Chicken Sandwiches. Get ready for a flavor explosion!
- Lightly toast the brioche buns. This will prevent them from getting soggy from the sauces and fillings.
- Spread a generous amount of spicy mayo on both the top and bottom buns.
- Place 2-3 pieces of fried chicken on the bottom bun.
- Top the chicken with a generous amount of the pickled slaw.
- Add a few fresh cilantro leaves for garnish.
- If you’re feeling fancy, add a few slices of cucumber for extra crunch.
- Place the top bun on the sandwich and gently press down.
- Serve immediately and enjoy! These sandwiches are best enjoyed fresh, while the chicken is still crispy.
Tips for the Best Thai Fried Chicken Sandwich:
- Don’t skip the marinade! It’s essential for flavor and tenderness.
- Use a thermometer to monitor the oil temperature. This ensures even cooking and crispy chicken.
- Don’t overcrowd the pot when frying. Fry in batches to maintain the oil temperature.
- Use a wire rack to drain the fried chicken. This helps keep it crispy.
- Adjust the sriracha in the spicy mayo to your liking.
- Make the pickled slaw ahead of time. This allows the flavors to meld together.
- Serve immediately for the best flavor and texture.
Variations:
- Add a fried egg: For an extra layer of richness, top the chicken with a fried egg.
- Use different buns: Try using sesame seed buns or Hawaiian rolls.
- Add different toppings: Experiment with other toppings like avocado, bean sprouts, or shredded lettuce.
- Make it vegetarian: Substitute the chicken with fried tofu or tempeh.
- Make it gluten-free: Use gluten-free flour and tamari instead of soy sauce.
I hope you enjoy making and eating these Thai Fried Chicken Sandwiches as much as I do! They’re a perfect combination of crispy, spicy, tangy, and savory flavors that will leave you wanting more. Happy cooking!
Conclusion:
This isn’t just another chicken sandwich; it’s a flavor explosion waiting to happen! Seriously, if you’re looking for a way to elevate your lunch game or impress your friends at your next gathering, this Thai Fried Chicken Sandwich is an absolute must-try. The crispy, juicy chicken, infused with those vibrant Thai spices, combined with the creamy, tangy slaw and the soft bun… it’s a symphony of textures and tastes that will leave you craving more. I know I am!
But what makes this sandwich truly special is its versatility. While I’ve outlined my favorite way to assemble it, feel free to get creative and make it your own!
Serving Suggestions and Variations:
* Spice it up! If you’re a heat seeker, add a pinch of cayenne pepper to the chicken marinade or a drizzle of sriracha mayo to the bun. A little goes a long way!
* Go bunless! For a lighter option, serve the Thai fried chicken over a bed of fresh greens with a generous helping of the slaw. It’s a delicious and healthy alternative.
* Slaw swap! Not a fan of coleslaw? Try a quick cucumber and carrot salad with a light rice vinegar dressing. It’ll still provide that refreshing crunch.
* Bun alternatives! While I love a soft brioche bun, you could also use a toasted baguette, a ciabatta roll, or even lettuce wraps for a gluten-free option.
* Make it a meal! Serve your Thai Fried Chicken Sandwich with a side of sweet potato fries, crispy onion rings, or a refreshing mango salad for a complete and satisfying meal.
* Spice Level Adjustment: The recipe is designed to be moderately spicy. If you prefer a milder flavor, reduce the amount of chili flakes in the marinade. For those who like it hot, feel free to add more chili flakes or even a chopped Thai chili pepper.
* Marinade Time: While the recipe suggests a minimum marinating time of 30 minutes, allowing the chicken to marinate for a longer period (up to 4 hours) will result in even more flavorful and tender chicken.
* Air Fryer Option: For a healthier alternative, you can air fry the chicken instead of deep-frying it. Simply preheat your air fryer to 375°F (190°C) and cook the chicken for 15-20 minutes, flipping halfway through, until golden brown and cooked through.
I truly believe that this Thai Fried Chicken Sandwich recipe is a winner. It’s relatively easy to make, packed with flavor, and endlessly customizable. It’s the perfect way to bring a taste of Thailand to your kitchen and impress your family and friends.
So, what are you waiting for? Gather your ingredients, put on some music, and get ready to create a culinary masterpiece! I’m confident that you’ll love this recipe as much as I do.
And most importantly, I’d love to hear about your experience! Did you try the recipe? Did you make any modifications? What did you think? Share your photos and comments below I can’t wait to see your creations and hear your feedback. Happy cooking! Let me know how your Thai Fried Chicken Sandwich turns out!
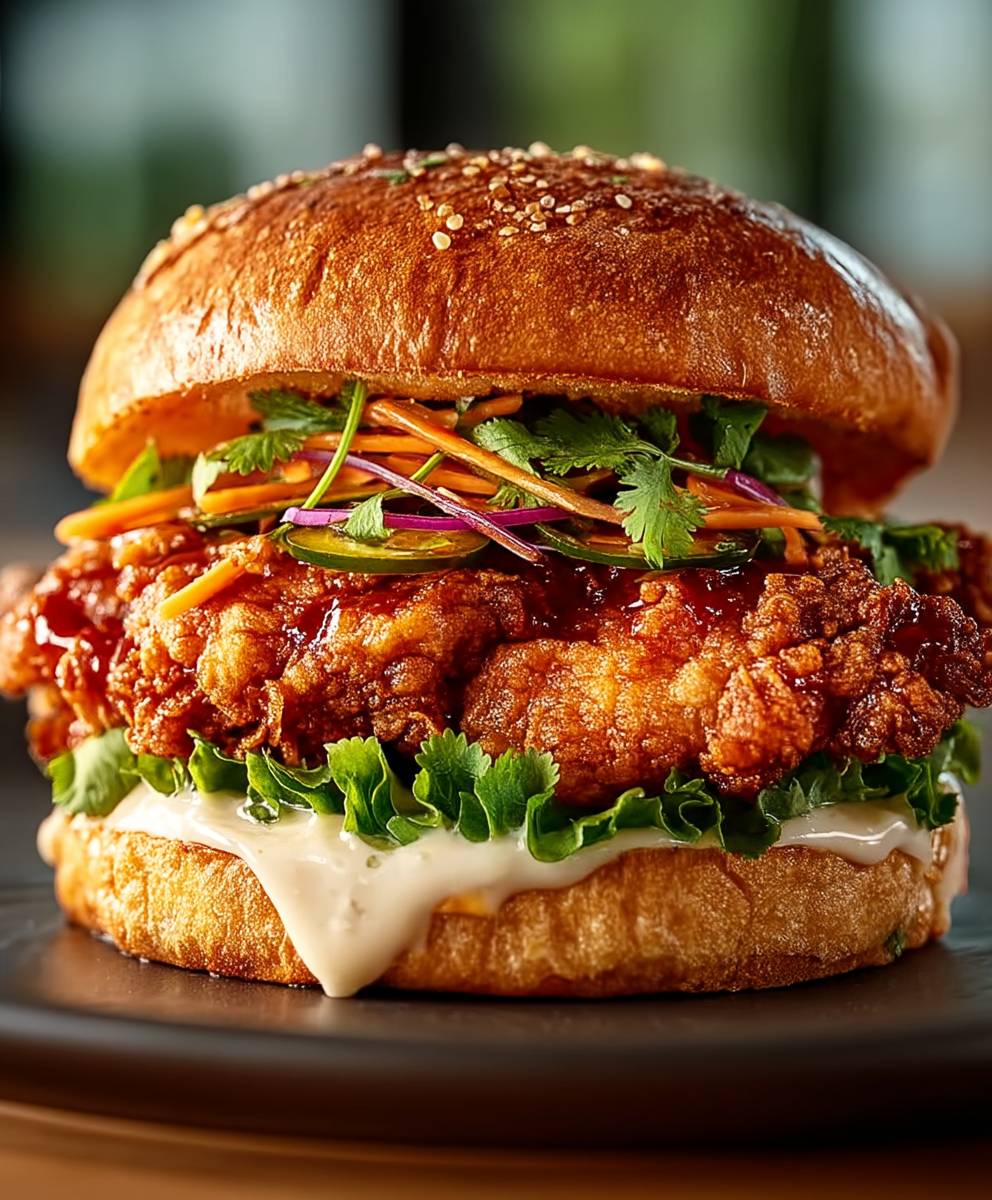
Thai Fried Chicken Sandwich: A Deliciously Crispy Recipe
Crispy, juicy Thai fried chicken sandwiches with spicy mayo and tangy pickled slaw, all nestled in a toasted brioche bun. A flavor explosion in every bite!
Ingredients
- 2 lbs boneless, skinless chicken thighs, cut into 2-inch pieces
- 1/4 cup soy sauce
- 2 tablespoons fish sauce
- 2 tablespoons lime juice
- 1 tablespoon grated ginger
- 2 cloves garlic, minced
- 1 teaspoon ground coriander
- 1/2 teaspoon white pepper
- 1/4 teaspoon turmeric powder
- 2 cups all-purpose flour
- 1/2 cup cornstarch
- 2 tablespoons rice flour (optional, for extra crispiness)
- 2 teaspoons baking powder
- 1 teaspoon salt
- 1 teaspoon garlic powder
- 1 teaspoon onion powder
- 1/2 teaspoon paprika
- 1/4 teaspoon cayenne pepper (optional, for heat)
- 1 cup ice water
- 1/2 cup mayonnaise
- 2 tablespoons sriracha (or more, to taste)
- 1 tablespoon lime juice
- 1 teaspoon honey or agave nectar
- 1/2 teaspoon sesame oil
- 1 cup shredded green cabbage
- 1/2 cup shredded red cabbage
- 1/2 cup shredded carrots
- 1/4 cup rice vinegar
- 2 tablespoons sugar
- 1/2 teaspoon salt
- 4 brioche buns, split
- Vegetable oil, for frying
- Fresh cilantro leaves, for garnish
- Optional: Sliced cucumbers, for extra crunch
Instructions
- Marinate the Chicken: In a large bowl, combine soy sauce, fish sauce, lime juice, ginger, garlic, coriander, white pepper, and turmeric. Whisk well. Add chicken, coat thoroughly, and refrigerate for at least 2 hours (preferably overnight).
- Prepare the Pickled Slaw: Combine green cabbage, red cabbage, and carrots in a bowl. In a separate bowl, whisk rice vinegar, sugar, and salt until dissolved. Pour over cabbage mixture, toss, and refrigerate for at least 30 minutes, tossing occasionally.
- Make the Spicy Mayo: In a small bowl, combine mayonnaise, sriracha, lime juice, honey (or agave), and sesame oil. Whisk until smooth. Taste and adjust seasoning. Refrigerate until ready to use.
- Coat and Fry the Chicken: In a large bowl, whisk together flour, cornstarch, rice flour (if using), baking powder, salt, garlic powder, onion powder, paprika, and cayenne pepper (if using). Slowly whisk in ice water until just combined (slightly lumpy).
- Heat 2-3 inches of vegetable oil in a large pot to 350°F (175°C).
- Remove chicken from marinade, letting excess drip off. Dip each piece in batter, ensuring complete coating. Let excess batter drip off.
- Fry chicken in batches (don’t overcrowd) for 6-8 minutes per batch, or until golden brown and internal temperature reaches 165°F (74°C).
- Remove fried chicken with a slotted spoon and place on a wire rack lined with paper towels to drain.
- Assemble the Sandwiches: Lightly toast brioche buns. Spread spicy mayo on both top and bottom buns. Place 2-3 pieces of fried chicken on the bottom bun. Top with pickled slaw, cilantro leaves, and optional cucumber slices. Place the top bun on the sandwich and gently press down.
- Serve immediately and enjoy!
Notes
- Marinade Time: Longer marinating time (4+ hours or overnight) yields more flavorful chicken.
- Oil Temperature: Maintaining the correct oil temperature is crucial for crispy chicken. Use a thermometer.
- Frying Batches: Avoid overcrowding the pot when frying to prevent soggy chicken.
- Draining: Use a wire rack to drain excess oil and keep the chicken crispy.
- Spice Level: Adjust the amount of sriracha in the spicy mayo to your preferred heat level.
- Make Ahead: The pickled slaw can be made ahead of time to allow flavors to meld.
- Serving: Serve immediately for the best flavor and texture.


Leave a Comment