
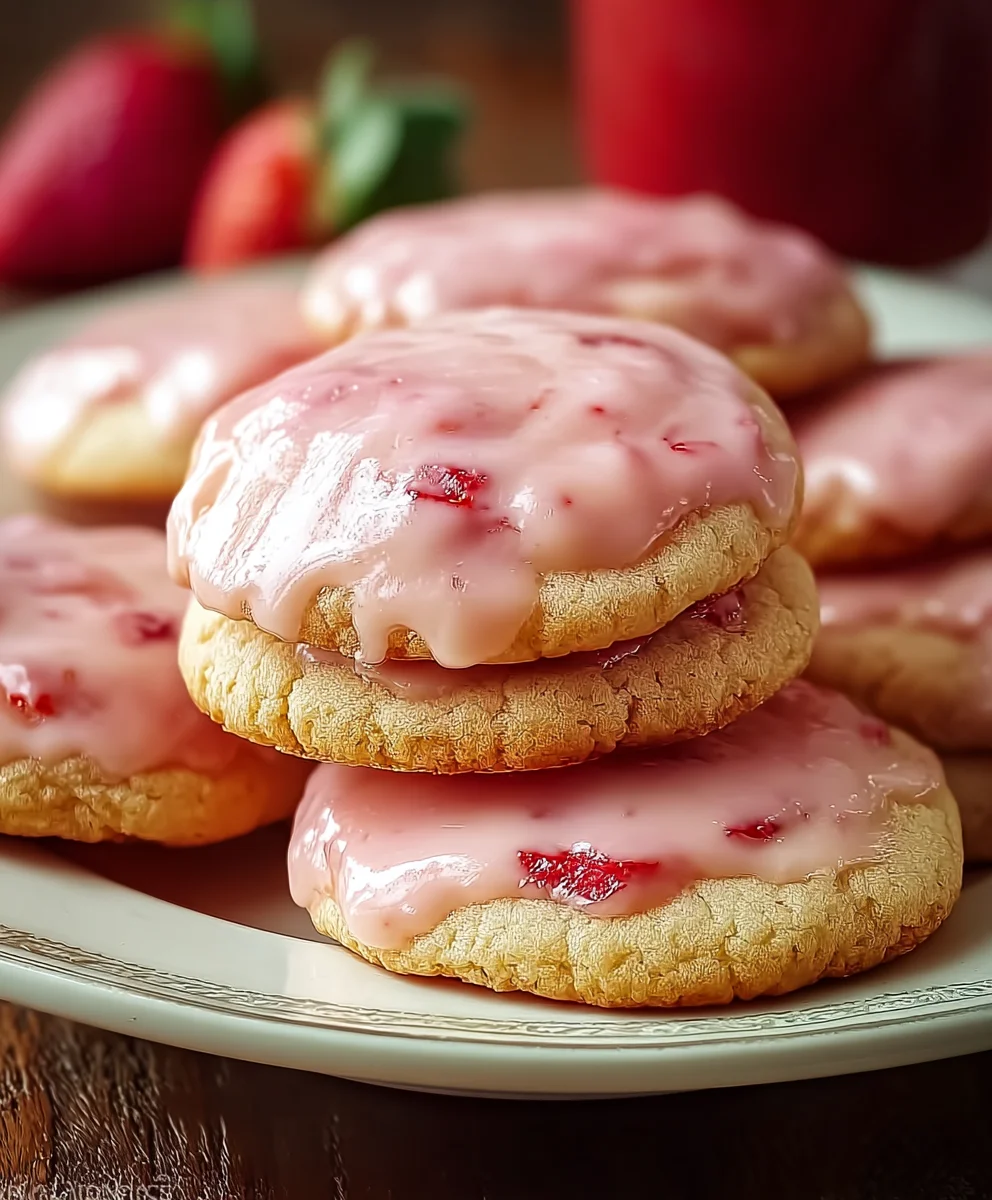
Strawberry Glaze Cookies are more than just a sweet treat; they are a delightful invitation to experience pure culinary bliss. Imagine biting into a soft, tender cookie, its buttery richness perfectly harmonizing with the vibrant, sweet-tart essence of fresh strawberries, all encapsulated under a shimmering, irresistible glaze. This isn’t just a fantasy; it’s the promise of what awaits you with every bite of these truly exceptional cookies.
A Sweet History and Irresistible Charm
While the concept of adding fruit glazes to cookies has graced kitchens for generations, celebrating seasonal produce and adding a touch of elegance to simple bakes, our modern take on the Strawberry Glaze Cookies truly elevates this tradition. It taps into that universal love for strawberries – a fruit synonymous with summer, joy, and refreshing sweetness, bringing a burst of sunshine to any day.
What makes these cookies so universally adored? It’s their perfect balance: the cookie base is wonderfully soft and chewy, providing a comforting foundation, while the star of the show – that brilliant strawberry glaze – delivers an exhilarating burst of fresh, tangy sweetness that awakens the palate. Their stunning appearance, with that captivating pink hue, makes them an absolute showstopper on any dessert table, creating smiles and memories. They’re relatively simple to make but yield such impressive results, making them an ideal choice for both seasoned bakers and eager beginners. I’m absolutely thrilled to guide you through crafting these delightful morsels, and I promise, these Strawberry Glaze Cookies will become a cherished recipe in your collection.

Ingredients:
Crafting these delightful strawberry glaze cookies starts with a foundation of quality ingredients. We’re going for that perfect balance of tender, buttery cookie and a vibrant, sweet-tart strawberry glaze that truly shines. Here’s everything you’ll need to bring these treats to life in your kitchen:
-
For the Cookies:
- 2 ½ cups (300g) all-purpose flour: I always make sure to use unbleached all-purpose flour for consistent results. You might want a little extra for dusting your work surface.
- 1 teaspoon baking powder: This gives our cookies just the right amount of lift without making them cakey.
- ½ teaspoon salt: A crucial ingredient that enhances all the other flavors, balancing the sweetness beautifully.
- 1 cup (226g) unsalted butter, softened: Room temperature butter is key for proper creaming. If it’s too cold, it won’t cream properly; if it’s too warm, your dough might be greasy.
- 1 cup (200g) granulated sugar: The primary sweetener for our cookie base, contributing to its crisp edges and tender interior.
- 1 large egg, room temperature: Like the butter, a room temperature egg incorporates better into the batter, leading to a smoother, more cohesive dough.
- 1 teaspoon pure vanilla extract: Don’t skimp on good quality vanilla; it adds so much depth to the cookie flavor.
-
For the Strawberry Glaze:
- 1 ½ cups (180g) powdered sugar (confectioners’ sugar), sifted: Sifting is important here to ensure a silky-smooth glaze without any lumps.
- ½ cup (about 6-8 medium) fresh or frozen strawberries, hulled and quartered: Fresh strawberries will give you the brightest flavor, but frozen work perfectly well, especially if you’re making these out of season.
- 1 tablespoon fresh lemon juice: This brightens the strawberry flavor and adds a lovely tang that cuts through the sweetness of the glaze.
- 1-2 tablespoons milk or heavy cream (optional, for consistency): I use this sparingly, just enough to achieve my desired glaze thickness. You might not need it at all, depending on how juicy your strawberries are.
- A pinch of salt: Just a tiny bit really helps the strawberry and sugar flavors pop.
-
Optional Garnish:
- Fresh strawberry slices: A beautiful touch for presentation.
- Sprinkles: If you’re feeling festive!
Equipment You’ll Need:
Having the right tools can make all the difference in your baking experience. Here’s what I usually have on hand when I make these strawberry glaze cookies:
- Large mixing bowls (at least two)
- Electric mixer (stand mixer with paddle attachment or a hand mixer)
- Spatulas
- Whisk
- Measuring cups and spoons
- Parchment paper or silicone baking mats
- Baking sheets
- Rolling pin
- Cookie cutters (round or any shape you prefer, about 2-3 inches)
- Small saucepan or microwave-safe bowl (for strawberry puree)
- Fine-mesh sieve (for straining strawberry puree and sifting powdered sugar)
- Wire cooling rack
Baking the Strawberry Glaze Cookies:
Let’s get down to the fun part – making the cookies themselves! This process is quite straightforward, but paying attention to a few details will ensure your cookies are perfectly tender and delicious.
Preparing the Cookie Dough
- Whisk Dry Ingredients: In a medium bowl, I combine my all-purpose flour, baking powder, and salt. I give them a good whisk for about 30 seconds to ensure they’re thoroughly mixed. This step is crucial because it distributes the leavening agent evenly, preventing pockets of un-leavened dough and ensuring a consistent texture in your final cookies. Set this bowl aside for a moment.
- Cream Butter and Sugar: Now, in a large mixing bowl, either using my stand mixer fitted with the paddle attachment or a hand mixer, I beat the softened unsalted butter and granulated sugar together. I start on low speed to incorporate them without a sugar cloud, then increase to medium-high. I beat them for about 3-5 minutes, or until the mixture is visibly light in color and incredibly fluffy. This process, known as creaming, incorporates air into the butter and sugar, which contributes significantly to the cookies’ light and tender texture. It’s really the foundation of a great cookie.
- Add Egg and Vanilla: Once the butter and sugar are perfectly creamed, I crack in the large, room temperature egg. I beat it in on medium speed until it’s just incorporated, scraping down the sides of the bowl as needed to ensure everything is mixed evenly. Then, I stir in the pure vanilla extract. I beat for another 30 seconds until the mixture is smooth and cohesive. Overmixing at this stage can sometimes lead to a tougher cookie, so I try to be gentle but thorough.
- Combine Wet and Dry Ingredients: With the wet ingredients beautifully combined, I gradually add the dry ingredient mixture to the wet mixture. I usually add it in two or three batches, mixing on the lowest speed of my mixer, or by hand with a spatula, until just combined. The key here is not to overmix! Overmixing develops the gluten in the flour, which can result in tough, dense cookies. As soon as I see no more streaks of dry flour, I stop. The dough might seem a little soft, but that’s what we want.
- Chill the Dough: This step is non-negotiable for perfectly shaped cut-out cookies! I gather the dough into a ball, flatten it slightly into a disc, wrap it tightly in plastic wrap, and then pop it into the refrigerator. I let it chill for at least 1 hour, but sometimes up to 2 hours, or even overnight. Chilling the dough solidifies the butter, which prevents the cookies from spreading too much in the oven, and also makes the dough much easier to handle when rolling and cutting.
Shaping and Baking
- Preheat Oven and Prep Baking Sheets: About 15-20 minutes before I’m ready to bake, I preheat my oven to 350°F (175°C). While it’s heating, I line my baking sheets with parchment paper or silicone baking mats. This prevents sticking and makes for easy cleanup.
- Roll Out the Dough: I retrieve the chilled dough from the refrigerator. If it’s been chilling for a long time, I might let it sit at room temperature for 5-10 minutes to soften slightly, making it easier to roll. On a lightly floured surface (I use just enough flour to prevent sticking, but not so much that it dries out the dough), I roll out the dough to about ¼-inch thickness. I try to keep an even thickness across the whole sheet of dough to ensure consistent baking.
- Cut Out Cookies: Now for the fun part! I use my favorite 2-3 inch cookie cutters to cut out shapes. For these strawberry glaze cookies, I often go for simple rounds, but hearts or even flower shapes would be lovely. I carefully transfer the cut-out cookies to my prepared baking sheets, leaving about 1 inch of space between each one. If I have any dough scraps, I gently re-roll them once or twice to cut out more cookies, being careful not to overwork the dough, which can make it tough.
- Bake the Cookies: I place the baking sheets into the preheated oven and bake for 8-12 minutes. Baking time can vary depending on your oven and the size of your cookies, so I always keep a close eye on them. I know they’re ready when the edges are just barely set and very lightly golden, and the centers still look soft. I’m careful not to overbake, as that will make the cookies dry and less tender.
- Cool Completely: As soon as the cookies come out of the oven, they’re still a bit fragile. I let them cool on the baking sheets for about 5 minutes. This allows them to firm up before I transfer them carefully to a wire cooling rack to cool completely. It’s absolutely essential that the cookies are fully cooled before glazing; otherwise, the glaze will melt and run right off!
Crafting the Luscious Strawberry Glaze:
While the cookies are cooling, it’s the perfect time to prepare our star player: the vibrant strawberry glaze. This glaze is what truly elevates these cookies, giving them that irresistible fruity finish.
- Prepare Strawberry Puree: First, I grab my fresh or frozen hulled and quartered strawberries. If using fresh, I simply put them into a small saucepan or a microwave-safe bowl. If using frozen, I let them thaw slightly first, or use a slightly longer heating time. I gently heat the strawberries over low heat on the stovetop, or in the microwave in 30-second increments, until they soften and release their juices. This usually takes about 5-7 minutes on the stovetop or 1-2 minutes in the microwave. The goal isn’t to cook them down into a jam, but just to make them soft enough to puree easily.
- Puree and Strain: Once softened, I transfer the strawberries to a blender or use an immersion blender to puree them until they are completely smooth. For the silkiest glaze possible, I then press this strawberry puree through a fine-mesh sieve set over a small bowl. This step removes any seeds and large fruit fibers, leaving me with a beautifully smooth, concentrated strawberry liquid. I often use the back of a spoon or a spatula to really press all the liquid through, ensuring I don’t waste any of that delicious strawberry essence. I aim for about 3-4 tablespoons of concentrated strawberry puree.
- Mix the Glaze: In a clean, medium-sized bowl, I measure out my sifted powdered sugar. Sifting is vital here, as it breaks up any lumps, ensuring a truly smooth glaze. Then, I gradually whisk in the fresh lemon juice and my prepared strawberry puree. I start with about 2-3 tablespoons of puree and whisk vigorously. I also add a tiny pinch of salt at this stage; it really helps to brighten the overall flavor of the glaze.
- Adjust Consistency: This is where the “optional” milk or heavy cream comes in handy. I continue to whisk, and if the glaze seems too thick (it should be thick enough to coat the back of a spoon but still pourable), I add the milk or cream, a teaspoon at a time, until I reach my desired consistency. I’m looking for a glaze that’s smooth, opaque, and flows slowly off the whisk without being too watery. If, by chance, my glaze becomes too thin, I simply whisk in another tablespoon or two of sifted powdered sugar until it thickens up again.
Glazing and Finishing Touches:
Once your cookies are completely cool and your glaze is perfectly prepared, it’s time for the grand finale!
- Glaze the Cookies: I set my wire cooling rack with the cooled cookies over a piece of parchment paper or wax paper. This catches any drips and makes for easy cleanup. I have a few favorite ways to glaze:
- Dipping Method: I carefully dip the top surface of each cookie into the strawberry glaze, letting any excess drip back into the bowl. Then, I gently place the glazed cookie back onto the wire rack.
- Spreading Method: Alternatively, I use a small offset spatula or the back of a spoon to spread a thin, even layer of glaze over the top of each cookie. This method gives me a little more control over the glaze thickness.
- Piping Method: For a more decorative touch, I sometimes transfer the glaze to a piping bag with a small round tip and pipe a border, then fill it in.
I try to work relatively quickly as the glaze starts to set.
- Optional Garnish: If I’m using fresh strawberry slices or sprinkles, I add them immediately after glazing, while the glaze is still wet. This ensures they adhere nicely.
- Allow Glaze to Set: This is arguably the hardest part – patience! I let the glazed cookies sit undisturbed on the wire rack at room temperature for at least 30 minutes, or until the glaze has fully set and hardened. Depending on the humidity in your kitchen, this could take up to 1-2 hours. Once the glaze is firm to the touch, they are ready to be devoured!
Storage and Serving Suggestions:
Once you’ve gone to all the effort of baking these beautiful strawberry glaze cookies, you’ll want to make sure they stay fresh and delicious for as long as possible. Here are my tips for storing and enjoying them:
Storage:
- At Room Temperature: Once the glaze is completely set, I store these cookies in an airtight container at room temperature. They will remain fresh and delicious for 3-5 days. To prevent the cookies from sticking together, especially if they are heavily glazed, you can layer them with small pieces of parchment paper in between.
- In the Refrigerator: If your kitchen is particularly warm or humid, or if you prefer a slightly firmer cookie, you can store them in an airtight container in the refrigerator for up to a week. Just be aware that refrigeration can sometimes slightly alter the texture of the cookie, making it a little chewier.
- Freezing Dough: If you want to get ahead, you can prepare the cookie dough (before rolling and cutting) and wrap it tightly in plastic wrap, then place it in a freezer-safe bag. It will keep in the freezer for up to 3 months. When you’re ready to bake, thaw the dough in the refrigerator overnight before rolling and cutting.
- Freezing Baked, Unglazed Cookies: You can also freeze the baked, unglazed cookies. Once fully cooled, place them in a single layer on a baking sheet and freeze until solid. Then, transfer them to a freezer-safe airtight container or bag. They’ll last for up to 1 month. Thaw at room temperature before glazing. I don’t recommend freezing already glazed cookies as the glaze can become sticky or break down during thawing.
Serving Suggestions:
- Classic Treat: These cookies are perfect on their own with a cup of tea or coffee, or a glass of milk.
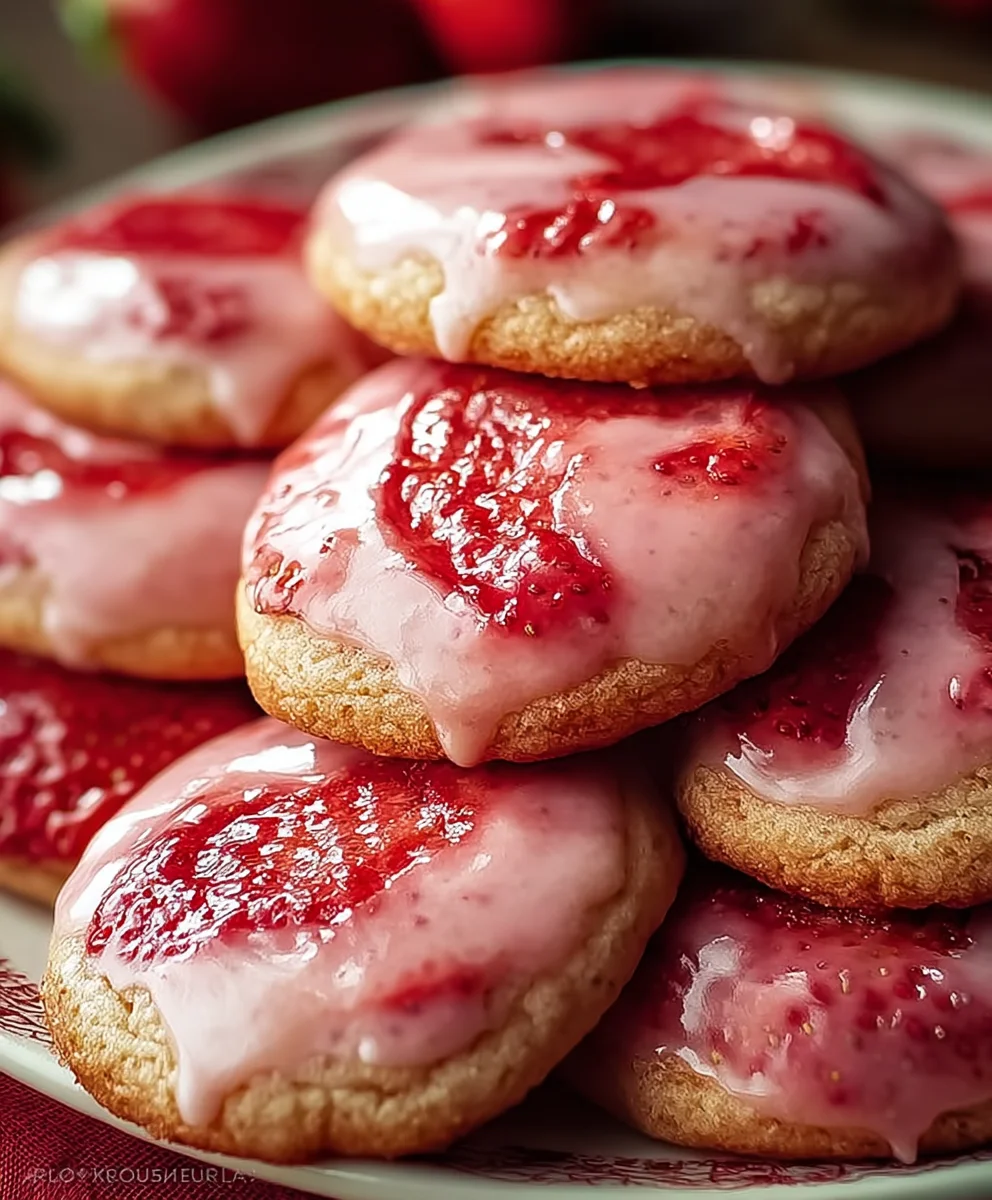
- Dessert Platter: Arrange them on a platter with other small desserts for a lovely spread at a party or gathering. Their vibrant pink glaze makes them a real showstopper.
- Afternoon Pick-Me-Up: A wonderful little indulgence to brighten your afternoon.
- Gift Giving: These cookies make fantastic edible gifts! Package them in a pretty box or cellophane bag for friends, family, or teachers.
I hope you enjoy baking and sharing these delightful strawberry glaze cookies as much as I do. The combination of a soft, buttery cookie with that bright, tangy strawberry glaze is truly something special!
Conclusion:
And there you have it, my friends! We’ve journeyed together through the delightful process of creating what I genuinely believe are some of the most charming and utterly delicious treats you’ll ever bake. This recipe isn’t just about combining ingredients; it’s about crafting moments of pure, unadulterated joy, one perfect bite at a time. If you’ve been searching for that quintessential cookie that perfectly balances a tender, buttery crumb with a vibrant, fruity punch, then your quest ends here. These aren’t just any cookies; they’re a celebration of simple pleasures, an ode to the comforting embrace of homemade goodness, and a testament to how truly magical a few basic ingredients can become with a little love and attention.
What makes these Strawberry Glaze Cookies an absolute must-try? Beyond their undeniable visual appeal – that gorgeous pink glaze is practically begging for a photoshoot – it’s the symphony of flavors and textures. The cookie itself is designed to be soft and chewy, with just the right amount of sweetness to complement the star of the show: that tangy, sweet, and utterly irresistible strawberry glaze. It’s a combination that truly sings on the palate, bright and refreshing yet deeply comforting. I love how accessible this recipe is, too; whether you’re a seasoned baker with a penchant for perfection or a curious newcomer eager to impress, the steps are straightforward and forgiving, guaranteeing a triumphant batch every single time. Imagine the aroma filling your kitchen – that sweet, buttery scent mingling with the subtle fruitiness of strawberry – it’s an experience in itself, a promise of the deliciousness to come.
Now, let’s talk about how you can best enjoy these beauties or even put your own creative spin on them. While they are undeniably perfect enjoyed just as they are, fresh from the cooling rack with a cup of coffee or a tall glass of milk, their versatility is truly one of their unsung heroes. Consider serving them as an elegant addition to an afternoon tea spread, their delicate appearance making them ideal for a garden party or a baby shower. They also make an absolutely stunning homemade gift; package them up in a pretty box with a ribbon, and you’ve got a thoughtful present that speaks volumes. For a simple dessert, warm one slightly in the microwave for a few seconds until the glaze just glistens, and serve it alongside a scoop of vanilla bean ice cream. The contrast of the warm cookie and cold ice cream, plus that fruity glaze, is simply divine!
Don’t be afraid to experiment with variations, either! If you’re feeling adventurous, you could try swapping out the strawberry for other berries in the glaze – a raspberry glaze would be equally stunning, or even a lemon glaze for a citrusy twist. For a textural contrast, sprinkle a pinch of finely chopped pistachios or toasted almonds over the wet glaze before it sets. If you’re making them for a specific holiday, a dash of food coloring in the glaze can transform them – think green for St. Patrick’s Day or vibrant red for Valentine’s. You could even incorporate white chocolate chips into the cookie dough for an extra layer of sweetness and creaminess. For those with dietary considerations, simple swaps like a gluten-free all-purpose flour blend or a plant-based butter can often yield fantastic results, allowing everyone to enjoy these delightful treats. The possibilities are genuinely endless, and I encourage you to make them truly your own!
So, what are you waiting for? I wholeheartedly encourage you to roll up your sleeves, gather your ingredients, and dive into the wonderful world of baking these incredible cookies. Trust me, the smiles they bring to faces – including your own – will be worth every moment. Once you’ve whipped up a batch, please don’t keep your experience to yourself! I would absolutely love to hear from you. Share your baking triumphs, your creative variations, or even just a photo of your beautiful cookies on social media. Tag me or use a relevant hashtag so I can see your masterpieces. There’s nothing more rewarding than seeing our culinary community grow and share in these delicious adventures. Happy baking, my dear readers, and may your kitchens always be filled with the sweet aroma of freshly baked joy!
FAQs (People Also Ask):
- To maintain their optimal freshness and that delightful texture, store your cookies in an airtight container at room temperature for up to 3-4 days. If your kitchen tends to be very warm, or if you prefer a firmer glaze, you can store them in the refrigerator, but let them come to room temperature for about 15-20 minutes before serving for the best flavor and texture.
-
Can I make the cookie dough ahead of time?
- Absolutely! This is a fantastic time-saver. You can prepare the cookie dough, wrap it tightly in plastic wrap, and refrigerate it for up to 2-3 days. When you’re ready to bake, let the dough sit at room temperature for about 15-20 minutes to soften slightly before scooping and baking as usual. You can also freeze the dough for up to 3 months; just thaw it in the refrigerator overnight before baking.
-
Can I use fresh strawberries instead of frozen for the glaze?
- Yes, you can definitely use fresh strawberries! Just ensure they are ripe and sweet for the best flavor. Wash and hull them, then chop them before adding them to your saucepan. The amount used should be the same as for frozen strawberries. Using fresh strawberries will give your glaze an even more vibrant, summery taste.
-
What if my glaze is too thick or too thin?
- Don’t worry, this is an easy fix! If your glaze is too thick, simply whisk in a tiny amount (about ½ teaspoon at a time) of milk or water until it reaches your desired consistency. If it’s too thin, gradually add a little more powdered sugar, about 1 tablespoon at a time, until it thickens up. Remember to mix well after each addition to avoid lumps.
- Yes, you can! Once the cookies are completely cooled and the glaze is fully set, arrange them in a single layer on a baking sheet and freeze until solid (about 1-2 hours). Then, transfer them to an airtight freezer-safe container or a heavy-duty freezer bag, separating layers with parchment paper to prevent sticking. They can be frozen for up to 1 month. Thaw at room temperature for a few hours before serving.
- Several factors can affect cookie spread. If they are spreading too much, your butter might have been too soft (verging on melted), your oven temperature might be too low, or you might have too much leavening. Chilling the dough before baking can often help. If they are not spreading enough, your butter might have been too cold, your flour measurement might be off (too much flour), or your oven could be too hot. Ensure your butter is at proper room temperature (softened but still cool to the touch) and that your oven thermometer is accurate for consistent results.
Strawberry Glaze Cookies: Sweet & Easy Homemade Treats!
These delightful Strawberry Glaze Cookies feature tender, buttery cookies topped with a vibrant, sweet-tart homemade strawberry glaze. Perfect for a classic treat or festive gift.
Ingredients
-
2 ½ cups (300g) all-purpose flour
-
1 teaspoon baking powder
-
½ teaspoon salt
-
1 cup (226g) unsalted butter, softened
-
1 cup (200g) granulated sugar
-
1 large egg, room temperature
-
1 teaspoon pure vanilla extract
-
1 ½ cups (180g) powdered sugar (confectioners’ sugar), sifted
-
½ cup (about 6-8 medium) fresh or frozen strawberries, hulled and quartered
-
1 tablespoon fresh lemon juice
-
1-2 tablespoons milk or heavy cream (optional)
-
A pinch of salt (for glaze)
-
Fresh strawberry slices (optional garnish)
-
Sprinkles (optional garnish)
Instructions
-
Step 1
In a medium bowl, whisk together the all-purpose flour, baking powder, and ½ teaspoon salt. Set aside. -
Step 2
In a large bowl, using an electric mixer, beat the softened unsalted butter and granulated sugar until light and fluffy, about 3-5 minutes. -
Step 3
Beat in the room temperature egg until just incorporated, then stir in the vanilla extract until smooth. -
Step 4
Gradually add the dry ingredient mixture to the wet mixture, mixing on the lowest speed or by hand until just combined. Do not overmix. -
Step 5
Gather dough into a disc, wrap tightly in plastic, and chill in the refrigerator for at least 1-2 hours, or overnight. This step is crucial for preventing spread. -
Step 6
Preheat oven to 350°F (175°C). Line baking sheets with parchment paper or silicone baking mats. -
Step 7
On a lightly floured surface, roll out the chilled dough to about ¼-inch thickness. Use 2-3 inch cookie cutters to cut out shapes. Transfer cookies to prepared baking sheets, leaving 1 inch between them. Re-roll scraps gently to cut more cookies. -
Step 8
Bake for 8-12 minutes, or until edges are lightly golden and centers are set. Do not overbake. -
Step 9
Let cookies cool on baking sheets for 5 minutes, then transfer to a wire rack to cool completely. Cookies must be fully cooled before glazing. -
Step 10
Gently heat hulled and quartered fresh or frozen strawberries in a small saucepan or microwave-safe bowl until softened and juicy. Puree until smooth, then press through a fine-mesh sieve to remove seeds and fibers. Aim for 3-4 tablespoons of concentrated puree. -
Step 11
In a clean bowl, whisk together the sifted powdered sugar, fresh lemon juice, 2-3 tablespoons of prepared strawberry puree, and a pinch of salt. -
Step 12
If the glaze is too thick, add milk or heavy cream a teaspoon at a time until it’s smooth, opaque, and pourable. If too thin, whisk in more sifted powdered sugar. -
Step 13
Dip the top of each cooled cookie into the glaze, or spread glaze with a small offset spatula. Place on a wire rack over parchment paper to catch drips. Add optional fresh strawberry slices or sprinkles immediately while glaze is wet. -
Step 14
Let glazed cookies sit undisturbed at room temperature for at least 30 minutes, or until the glaze has fully set and hardened (up to 1-2 hours).
Important Information
Nutrition Facts (Per Serving)
It is important to consider this information as approximate and not to use it as definitive health advice.
Allergy Information
Please check ingredients for potential allergens and consult a health professional if in doubt.


Leave a Comment