
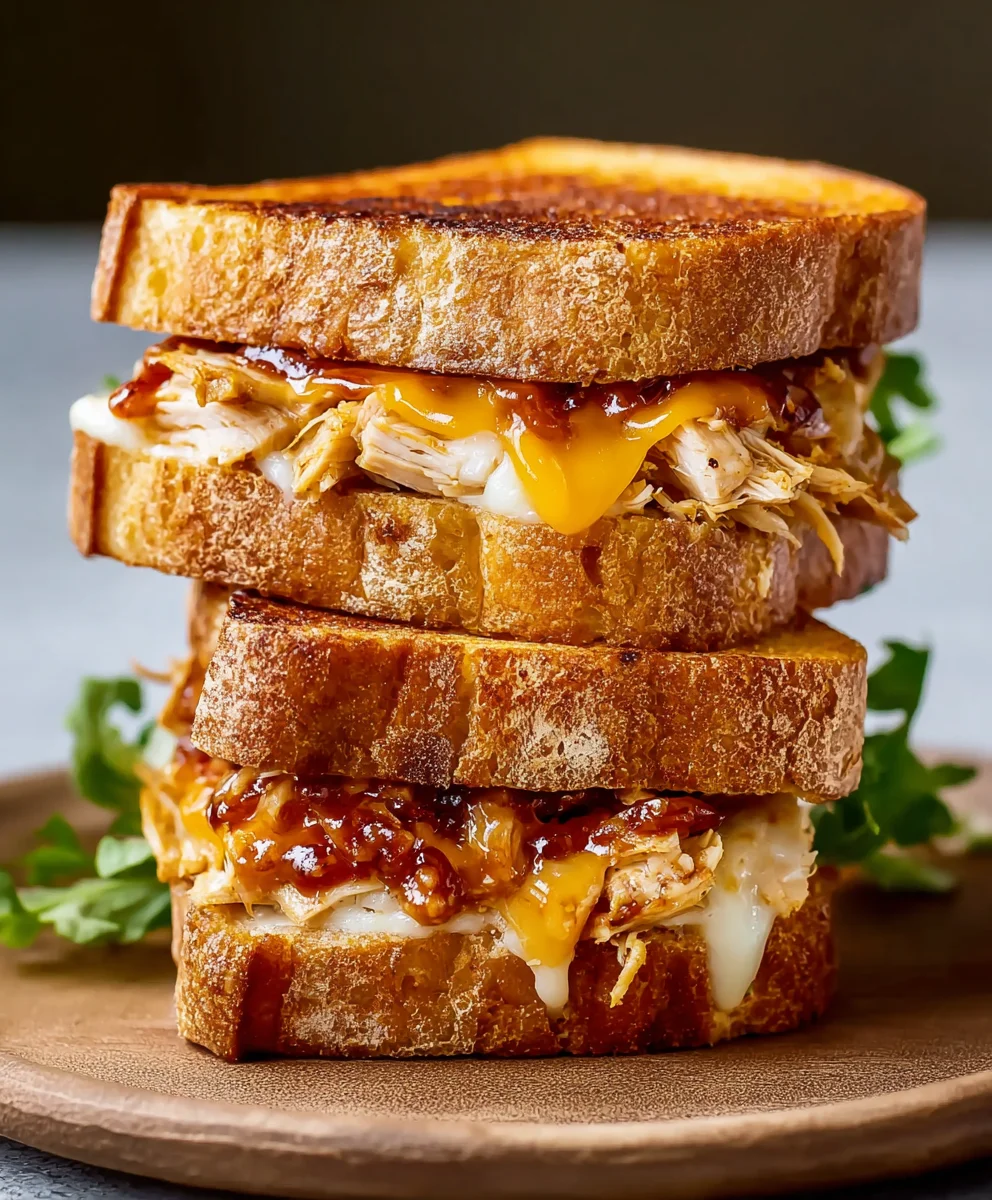
BBQ Chicken Grilled Cheese is more than just a sandwich; it’s a nostalgic trip back to summer barbecues and comforting weeknight meals, all nestled between two perfectly toasted slices of bread. We all crave that irresistible combination of savory, smoky, and cheesy goodness, and this elevated take on a classic grilled cheese delivers exactly that. What makes the BBQ Chicken Grilled Cheese so beloved? It’s the ingenious marriage of tender, shredded chicken coated in a tangy, sweet barbecue sauce, melted cheese that stretches with every bite, and the satisfying crunch of buttery, golden-brown bread. It’s the kind of dish that makes everyone at the table smile, perfect for a quick lunch, a fun dinner, or even an indulgent late-night snack. Get ready to discover your new favorite comfort food with this incredibly easy yet delightfully flavorful recipe.

Ingredients:
- 2 cups cooked chicken, shredded (using a rotisserie chicken is a fantastic shortcut for this recipe)
- 1/2 cup BBQ sauce, plus a little extra for drizzling over the finished sandwiches if you fancy a bit more tang
- 8 slices of your favorite bread; sourdough is particularly delightful here for its slightly tangy flavor which complements the BBQ chicken beautifully
- 8 slices of cheddar cheese; a sharp cheddar will give a great punch, or feel free to mix it with mozzarella for an extra gooey pull
- 1/2 red onion, sliced very thinly so it softens nicely during grilling
- 2 tablespoons unsalted butter, softened to room temperature so it spreads like a dream
- Optional additions to elevate your sandwich: a scattering of pickled jalapeños for a spicy kick, or some fresh cilantro for a bright, herbaceous note
Preparing the BBQ Chicken Filling
Step 1: Combine the Chicken and BBQ Sauce
First things first, let’s get our star filling ready. In a medium-sized bowl, place the shredded cooked chicken. Pour in the 1/2 cup of BBQ sauce. Now, using a fork or your hands (if you don’t mind getting a little messy!), thoroughly mix the BBQ sauce into the chicken. You want every strand of chicken to be coated in that delicious, smoky sauce. This step is all about ensuring that rich BBQ flavor permeates the chicken. If the mixture seems a little dry, don’t be afraid to add another tablespoon or two of BBQ sauce until it reaches a consistency that holds together well but isn’t swimming in sauce. Set this bowl aside for now; we’ll be coming back to this flavor-packed mixture.
Step 2: Prepare the Bread and Cheese
Next, we’ll get our sandwich bases ready. Lay out all 8 slices of your chosen bread on a clean work surface. On four of these slices, you’re going to layer your cheese. Place two slices of cheddar cheese on each of these four bread slices. Don’t worry about perfectly aligning them; a little overlap is perfectly fine. Now, take the remaining four slices of bread. These will be the top halves of our grilled cheese sandwiches. Set all the bread slices aside.
Assembling the BBQ Chicken Grilled Cheese
Step 3: Layering the Filling
Now it’s time to bring our delicious components together. Take the four bread slices that already have cheese on them. Evenly distribute the BBQ chicken mixture over the cheese on each of these slices. Make sure to get a good amount of chicken on each one, but try not to overstuff them, as this can make them difficult to flip and grill. Then, artfully arrange the thinly sliced red onion over the chicken mixture. If you’re using optional toppings like pickled jalapeños or cilantro, now is the time to sprinkle them over the onion. Think of this as building your perfect flavor profile!
Step 4: Buttering the Bread
This is a crucial step for achieving that perfectly golden, crispy exterior on your grilled cheese. Take your softened butter and spread a generous, even layer on one side of each of the remaining four bread slices (the ones without any filling yet). You want a good coating of butter that will melt and crisp up beautifully in the pan. Flip these four buttered slices over so the buttered side is now facing upwards.
Step 5: Building the Sandwiches and Grilling Preparation
Carefully place the remaining four bread slices, butter-side up, on top of the filling-covered bread slices, completing the sandwiches. You should now have four fully assembled sandwiches. Before you head to the stovetop, it’s a good idea to have your skillet or griddle ready. Heat a large, non-stick skillet or griddle over medium heat. You want the pan to be warm enough to start the grilling process immediately, but not so hot that it burns the bread before the cheese has a chance to melt. If you’re not using a non-stick pan, you might want to add a tiny bit of butter or oil to the pan itself, but generally, the butter on the bread should be sufficient.
Grilling to Golden Perfection
Step 6: Grilling the First Side
Once your skillet is heated, carefully place two of the assembled sandwiches into the hot pan. The buttered side of the bread should be facing down, making contact with the hot skillet. Let these grill for about 3 to 5 minutes. You’re looking for a deep golden-brown color and a nice crisp texture to develop on the bottom slice of bread. Resist the urge to press down too hard on the sandwiches with your spatula at this stage, as it can squeeze out the delicious filling. Peek underneath with your spatula to check for that perfect golden hue.
Step 7: Flipping and Grilling the Second Side
When the first side is beautifully golden and toasted, it’s time to flip. Gently slide a spatula underneath each sandwich and flip them over to cook the other side. Continue to grill for another 3 to 5 minutes, or until the second side is also a beautiful golden brown and the cheese inside is gloriously melted and gooey. If you find one side is browning faster than the other, you can adjust the heat slightly or carefully move the sandwich around the pan. For the second batch of sandwiches, repeat the grilling process in the same skillet.
Step 8: Resting and Serving
Once both sides of your BBQ Chicken Grilled Cheese sandwiches are perfectly grilled, remove them from the skillet. For the best melting experience, allow the sandwiches to rest for just a minute or two before slicing. This brief resting period allows the melted cheese to settle slightly, making it easier to cut without everything oozing out. You can slice them in half diagonally, revealing the melty, cheesy, BBQ chicken goodness within. If you reserved extra BBQ sauce, now is the perfect time to drizzle a little over the top of each sandwich for an extra burst of flavor. Serve immediately and enjoy this incredibly satisfying and flavorful meal!
Conclusion:
There you have it – your guide to crafting the ultimate BBQ Chicken Grilled Cheese! This recipe takes a classic comfort food and elevates it with the smoky, tangy goodness of barbecue chicken. The combination of gooey cheese, tender chicken, and toasted bread is simply irresistible. Don’t be afraid to get creative with your toppings; this sandwich is incredibly versatile.
For serving, consider pairing your BBQ Chicken Grilled Cheese with a crisp side salad, some crunchy coleslaw, or even a bowl of hearty tomato soup for a truly satisfying meal. If you’re feeling adventurous, try incorporating different types of cheese like Monterey Jack or a sharp cheddar for an added flavor dimension. You can also experiment with adding caramelized onions or a sprinkle of pickled jalapeños for a sweet and spicy kick.
The most important ingredient, however, is enthusiasm! Dive in, have fun in the kitchen, and enjoy every delicious bite of your homemade BBQ Chicken Grilled Cheese. We’re confident you’ll love it.
Frequently Asked Questions:
Q1: What kind of BBQ sauce works best for the BBQ Chicken Grilled Cheese?
A: You can use your favorite store-bought or homemade BBQ sauce! A classic Kansas City-style sauce provides a good balance of sweet and tangy. If you prefer a spicier kick, opt for a Texas-style or Carolina-style sauce.
Q2: Can I make the BBQ chicken ahead of time?
A: Absolutely! Preparing the BBQ chicken in advance makes assembling the sandwiches even quicker. You can grill, bake, or even use leftover rotisserie chicken shredded and tossed in BBQ sauce.
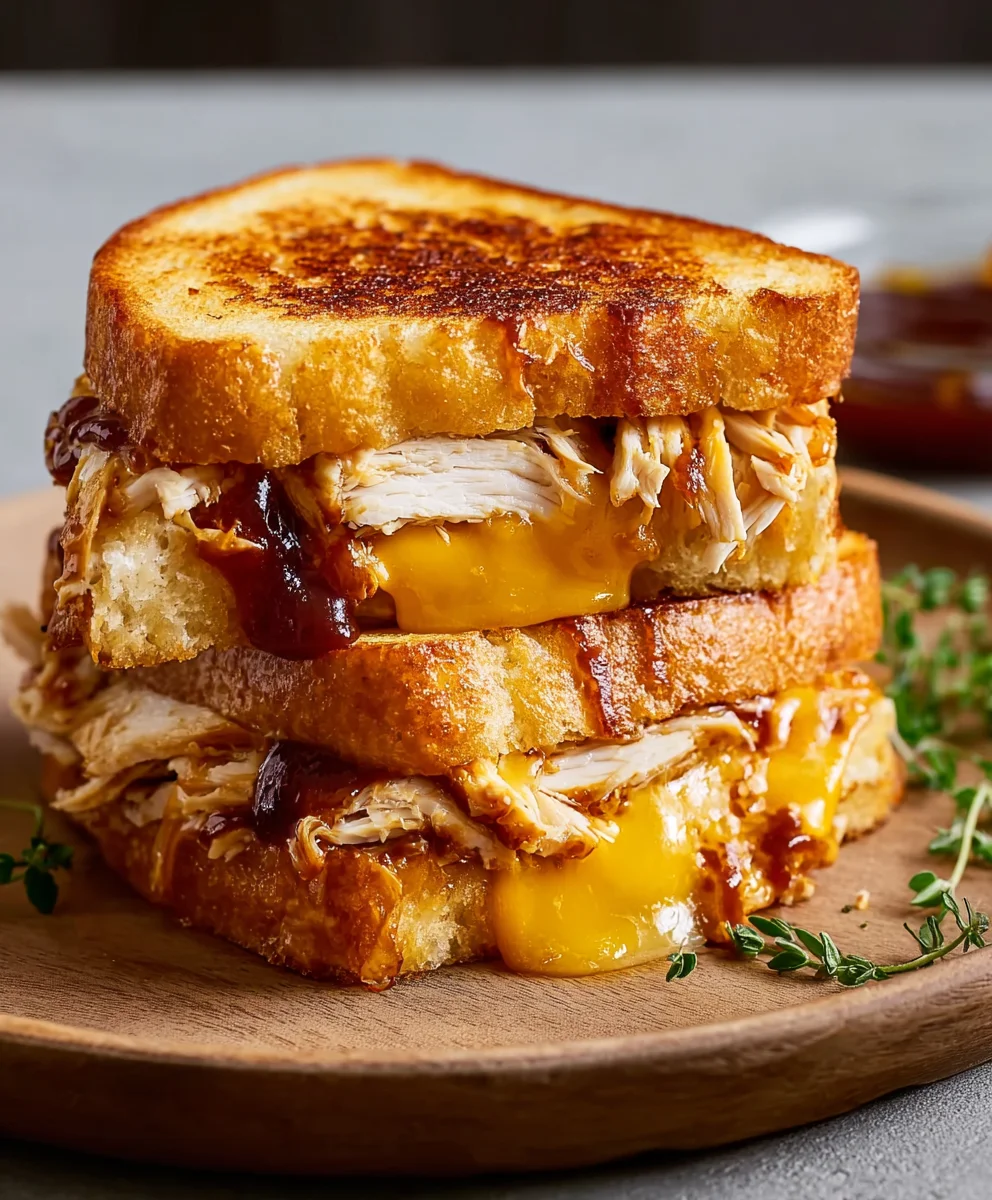
Smoky BBQ Chicken Grilled Cheese Sandwich
A delicious and easy grilled cheese sandwich featuring tender shredded chicken coated in smoky BBQ sauce, layered with melted cheddar cheese and thinly sliced red onion between perfectly toasted bread.
Ingredients
-
2 cups cooked chicken, shredded
-
1/2 cup BBQ sauce, plus extra for drizzling if desired
-
8 slices of bread
-
8 slices of cheddar cheese
-
1/2 red onion, thinly sliced
-
2 tablespoons butter, at room temperature
-
Optional: pickled jalapeños
-
Optional: cilantro
Instructions
-
Step 1
In a medium bowl, combine shredded chicken and BBQ sauce. Mix until chicken is well coated. Add more BBQ sauce if needed for desired consistency. -
Step 2
Lay out bread slices. On four slices, layer 2 slices of cheddar cheese each. Set remaining four slices aside. -
Step 3
Evenly distribute the BBQ chicken mixture over the cheese on the four bread slices. Top with thinly sliced red onion and any optional toppings like pickled jalapeños or cilantro. -
Step 4
Spread a generous, even layer of softened butter on one side of the remaining four bread slices. Place these butter-side up on top of the filling-covered slices to complete the sandwiches. -
Step 5
Heat a large non-stick skillet or griddle over medium heat. Carefully place two assembled sandwiches into the hot skillet, buttered side down. Grill for 3-5 minutes until golden brown. -
Step 6
Flip the sandwiches and grill the second side for another 3-5 minutes, or until golden brown and the cheese is melted and gooey. Repeat with the remaining two sandwiches. -
Step 7
Remove sandwiches from the skillet, let rest for a minute, then slice diagonally. Drizzle with extra BBQ sauce if desired and serve immediately.
Important Information
Nutrition Facts (Per Serving)
It is important to consider this information as approximate and not to use it as definitive health advice.
Allergy Information
Please check ingredients for potential allergens and consult a health professional if in doubt.

Leave a Comment